

⚠️ Hiking and scrambling are inherently dangerous activities. Please read my Disclaimer. ⚠️
EDIT: I made a second – and successful – return trip to Chinook Peak on 13 August 2022.
I should preface this post by acknowledging that I debated whether or not to include ‘(Attempt)’ in the title. While it’s true that Marc and I were thwarted a mere 22 vertical metres (~187 linear hiking metres) from the reaching the summit, this one ‘feels’ different. That’s not to say I’m happy to have been denied after technically coming so close, but rather, that there’s a lingering semblance of satisfaction which intimates that this was somehow, a successful ascent. Hence, I’m caving in and allowing the subjectivity of the experience to dictate my decision to exclude ‘(Attempt)’ from the title; instead subsituting it with an asterisk to soften the technical shortcomings of the story – at least that’s what I keep telling myself. Purists be damned! 😉
So where to begin? At the risk of sounding cliche, the main reason why this feels like a successful ascent undoubtedly comes from a day spent adventuring with a good friend – one who I don’t get to see very often. For me this was the highlight of the entire experience. Beyond this, was the reality that we were dealing with scant information about the mountain itself. We had changed our destination plans the night before and after a quick online search, all I was able to walk away with was So Nakagawa’s (a.k.a soistheman) snowy attempt from October 2011 and a post on Bivouac – but my subscription had expired. Somewhere in the back of my mind, I also recalled someone telling me that it was just a scree scramble from the trail to the summit (Clay Geddert?). Since I don’t own the latest editions of the scrambling books, I’m not sure if information about the route has been included (my apologies if it has). From maps and from the many pictures that I have, an ascent didn’t appear too complicated (famous last words) with the only unknown being the terrain near the summit. It looked like it was possible to ascend from the west and then use either the SE ridge or the NW ridge to approach the summit, but this is something we’d ultimately have to figure out for ourselves.
Now I have to say that I loved every minute of our ~ 6.3 km bike n’ hike in along the Ptolemy Creek / Trail of the Seven {missing} Bridges trail. Loved it! Our ascent from the base to the bowl beneath the summit was uneventful, as Chinook started out fairly tame. Once in the bowl however, the steepness of the grade increased quickly, and our pace was hindered by treadmill scree. Here we had two options: 1) head for a notch on our left which looked like it led onto the NW ridge; or 2) head to our right and gain the gentle looking SE ridge. Even though our instincts told us to head for the notch, the thought of slogging up the steep scree slope beneath it was wholly unappealing. Instead, we chose what we thought would be an easier path, up the exposed bedrock on the slope leading to the SE ridge. This was a fateful decision (at least I think it was) because once we finally made it to the crest of the ridge (in itself an adventure), we found ourselves staring up at the summit block, stymied by our unwillingness to even attempt to scramble up the final 22 vertical metres over some of the worst rock I’ve ever encountered. The entire mountain literally crumbles when you touch it and seemingly at will, you can pull rocks out like they were Lego blocks.
Yet, and here is partially why I ‘feel’ like this was a successful ascent, I’m not entirely sure we would have made the summit had we used the notch leading to NW ridge. My instincts say yes (this was also So’s original route), but I have nothing to base this on until I return and try again or until someone contacts me and says, “Yes, you are an idiot and that’s the route you should’ve used,” or perhaps, that I was altogether wrong and that there is a totally different way. At any rate, while we technically did not reach the summit it was nonetheless an amazingly satisfying day of exploration. Moreover, our poor choice in routes opened us up to the wonderful opportunity of exploring the SE ridge, ultimately leading us into the amazing alpine meadow nestled beneath the west face of Andy Good Peak. I’d been here before, but I’d forgotten just how amazing this tiny piece of the world is (So’s report has pictures of it in the winter). It was such a gift to see it again! Anyone who likes hiking and biking should visit this place.
So, as I apologize for turning this into an essay, I look forward to returning to Chinook Peak one day soon (hopefully with Marc) to claim the missing 22 metres of elevation and remove my self-imposed asterisk once and for all.
Edit 11 September 2016: Okay, so the jury is in and yes indeed, I am an idiot. Lol! Andrew Nugara contacted me and confirmed that going through the notch is the way to reach the summit via the NW ridge. In fact, he will be including a route description for Chinook Peak in the next edition of More Scrambles in the Canadian Rockies (go buy it when it comes out sometime around June 2017!). Without stealing any of his thunder, I will simply mention that Andrew describes the terrain along the NW ridge to the summit as, “loose, downsloping, and exposed.” As a result, he is going to classify Chinook Peak as ‘Difficult’.
To get to Chinook Peak, we followed Highway 3 past Coleman towards the B.C. border. After driving 1.3km beyond the rest area at the far west end of Crowsnest Lake, we turned left onto Coal Road. From here we drove ~3.2 km to our parking spot at the Ptolemy Creek / Valley of the Seven Bridges trailhead. We then biked ~5km until we reached a very large clearing/camping area. Despite the fact that we gained ~200m in elevation over this distance, the ride seemed to go by quickly as the trail was in excellent condition and there were only a few sections where we actually had to get off and push our bikes. We were also able to successfully pedal across all but one of the 8 creek crossings (including Crowsnest Creek at the trailhead). On our way back, we covered this distance in 40 minutes.
At the large clearing/camping area, the trail bifurcates, presenting the option to continue going straight – which will take you to the Promised Land – or to turn left, which will take you to Chinook Peak and Andy Good Peak. We biked down the left trail for ~190m until we came to a viewpoint. Here is where we stashed our bikes because the trail drops into a dry creek bed before climbing steeply for ~1km towards the avalanche slope which served as our starting point. In hindsight, the next time that I come back here, I might suck it up and push my bike up the final ~1km.
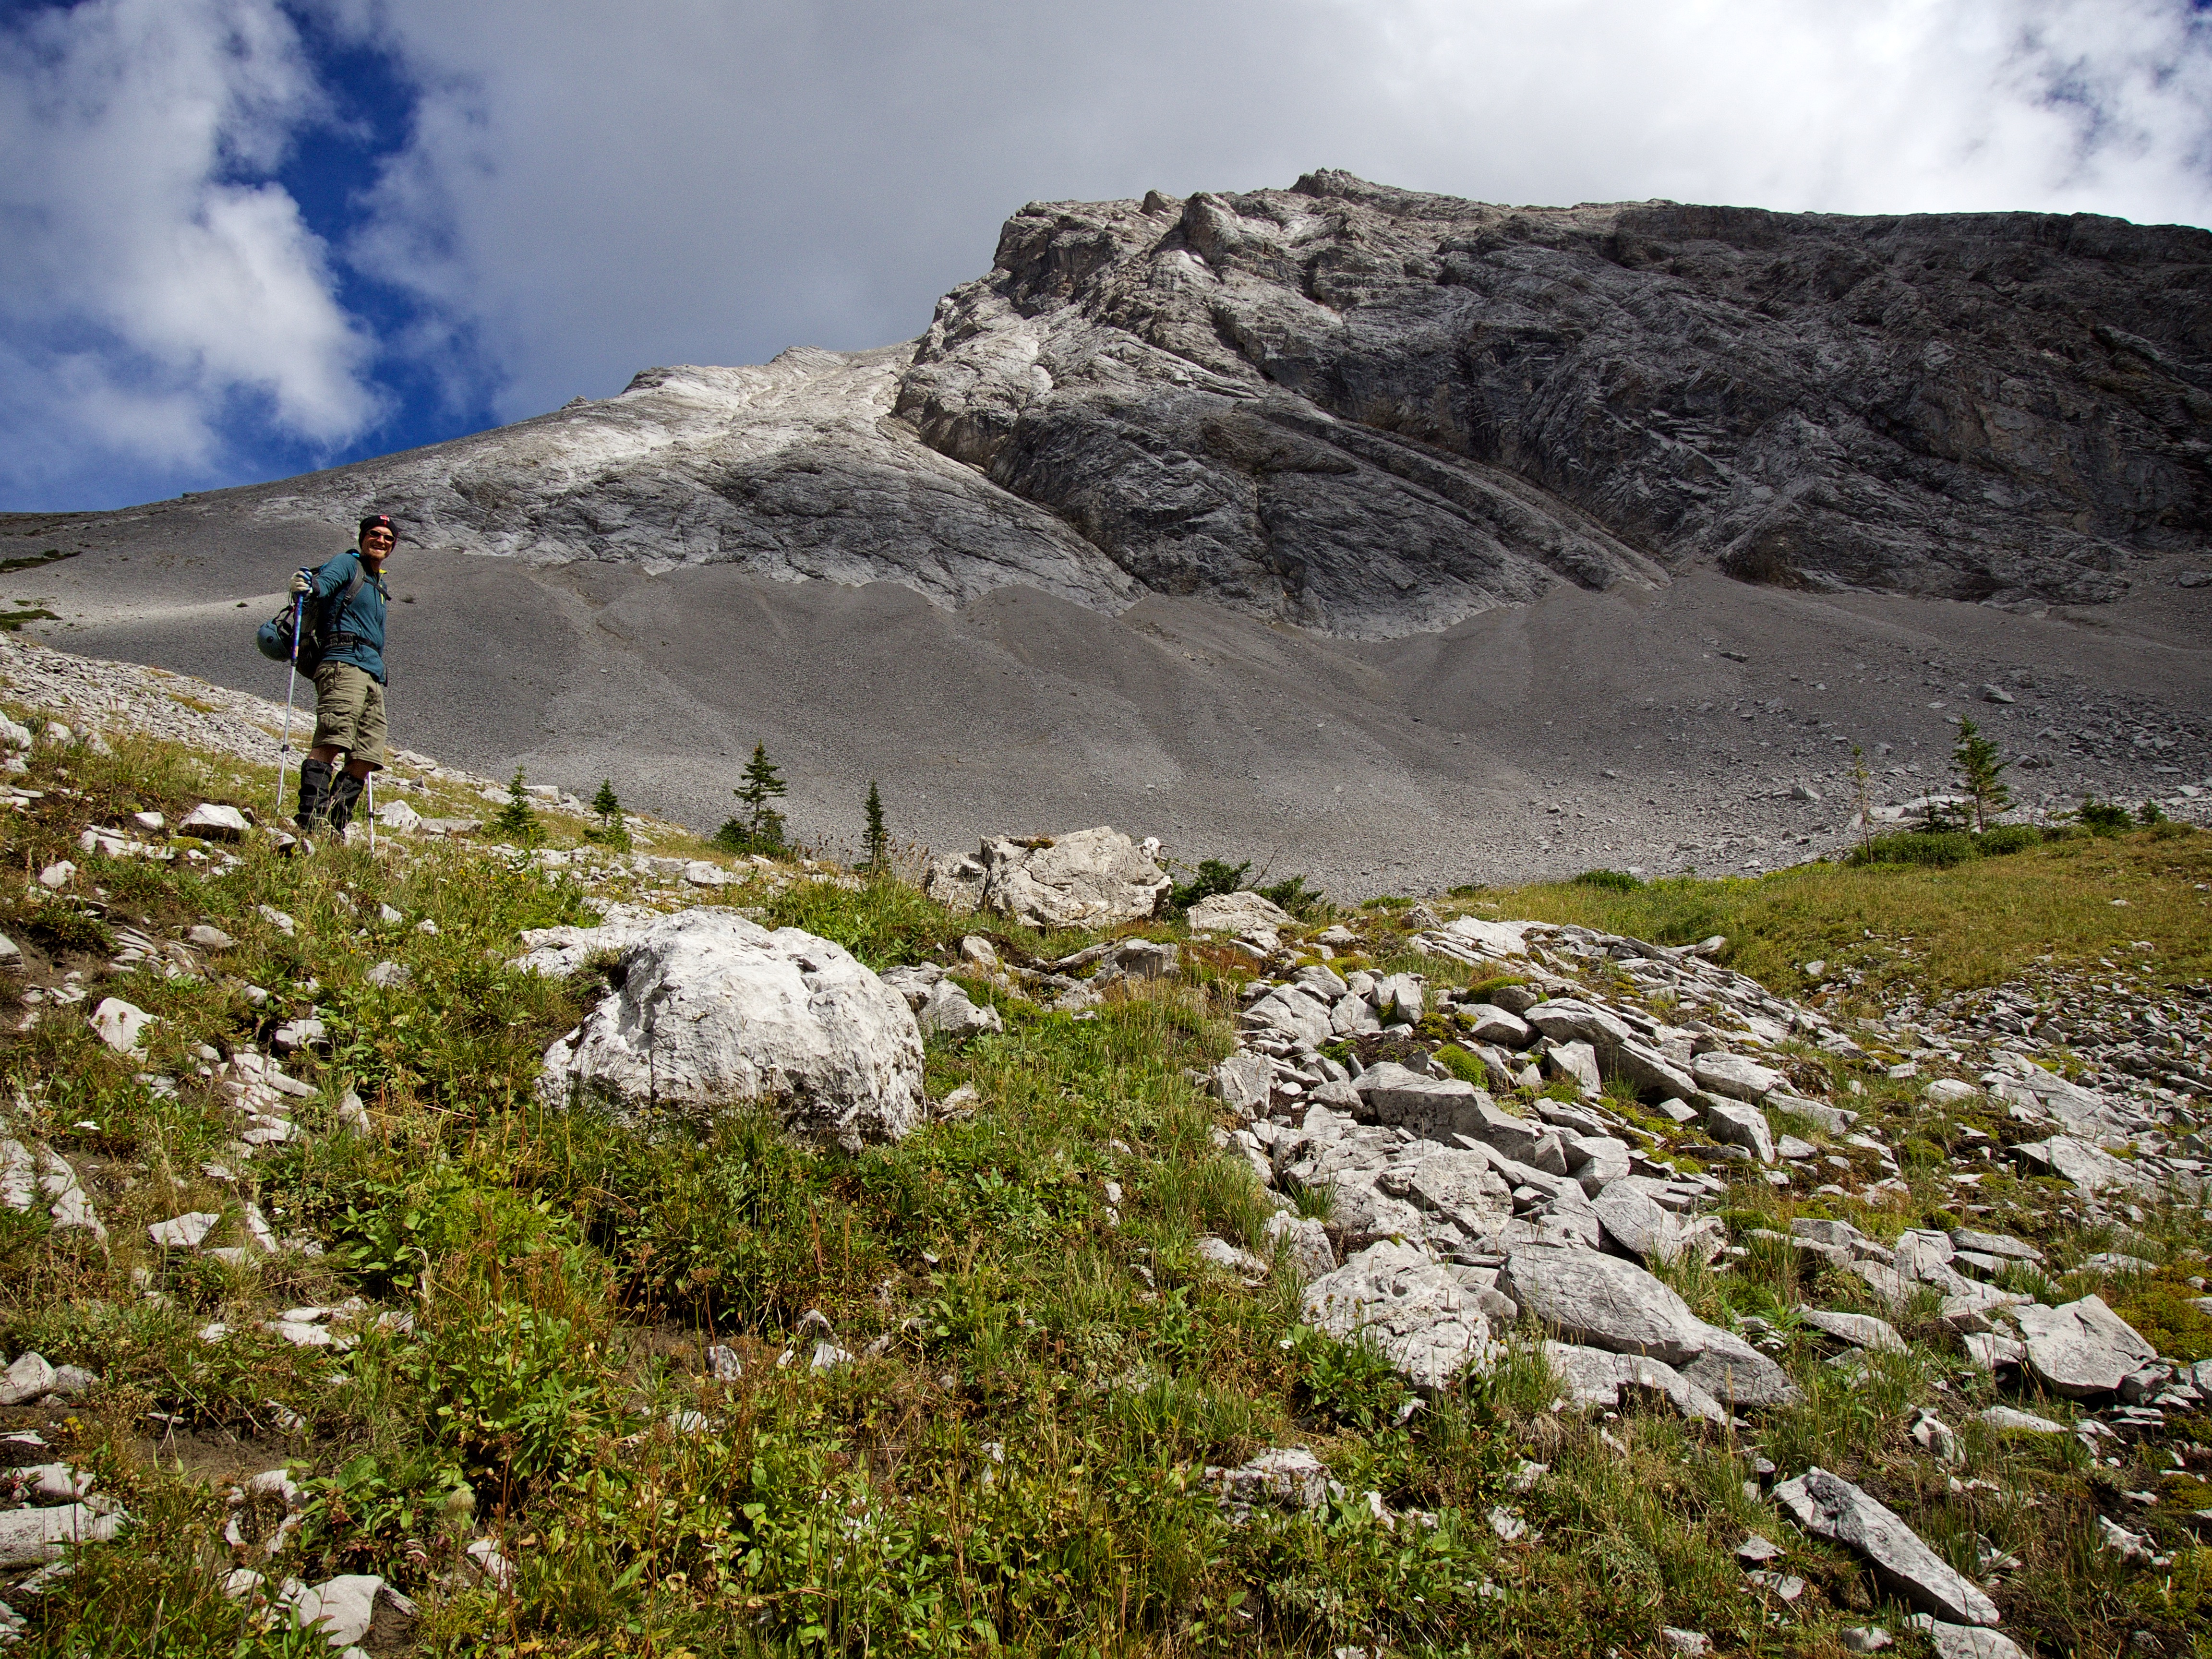
Upon leaving the trail we climbed increasingly steep slopes until we reach a bowl beneath the summit. This whole area is deceptively steep and the higher you go, the more treadmill scree you will encounter. Our route up to the SE slope was rather heinous at times, with continuous sections of slabs covered in scree. We eventually found a way up, but picking a safe path proved time consuming. Once on the ridge we fought intense wind as we carefully walked to the base of the summit block. Any ideas of trying to scramble up were quickly dashed by horrendously bad rock coupled with exposure.
Instead, we enjoyed the amazing views and then proceeded along the ridge to an outlier located between Mount Parrish and Chinook Peak. The wind was so horrible, that we had to be careful not to get too close to the edge. We descended down fairly easy scree slopes back to the trail where we enjoyed an easy hike to the meadow beneath Andy Good Peak. The distance back to the clearing/campground from Andy Good Peak was ~3.5km.

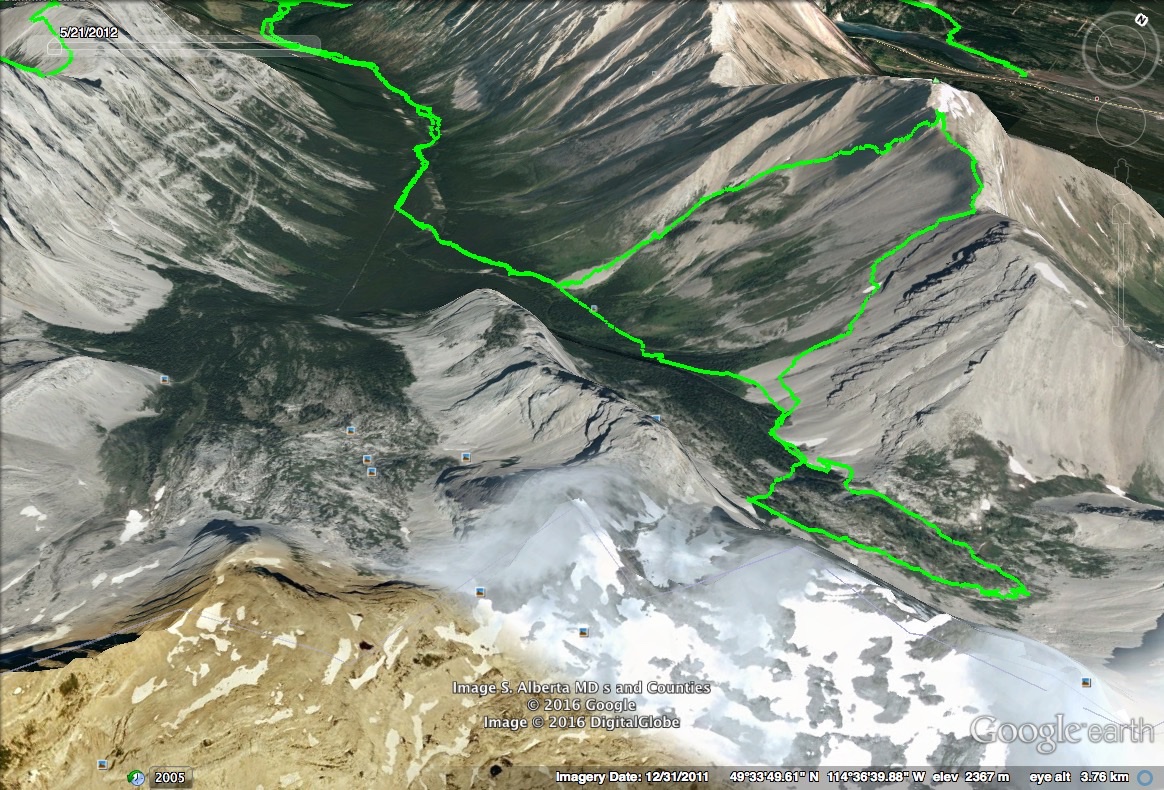
The topo map doesn’t help much in determining the best way to reach the summit – except that the east face is out of the question! I will use So’s route and aim for the notch that leads to the NW ridge when I return. Another interesting tidbit is that Chinook’s elevation is recorded differently depending on the source. For example, Google Earth lists it as 2637m; Bivouac at 2606m; Worldwide Elevation Finder at 2573m; Peakery at 2512m; and the Government of Canada NRC topo map (above) shows the last elevation line at 2560m. I’m going to go with 2606m just because it seems to fit best with the topo map and what my GPS recorded – which indicated that the highest point we reached was 2584m – and the summit did not look more than 22m beyond that. As a side note, I probably should have paid for a Bivouac subscription because it looks like Rick Collier also tried from the SE ridge, but that’s all the information it will give me… Doh!

Our total roundtrip distance was 22.9km and our total time was 8 hours and 36 minutes. Total elevation gains came in at 1606m.

Marc gears up at the Ptolemy Creek / Valley of the Seven Bridges trailhead. Don’t be misled by the whole ‘Seven Bridges’ schtick, there are none!

What a morning for a ride! A forest fire in Idaho left a slight haze, but this dissipated as the day wore on.
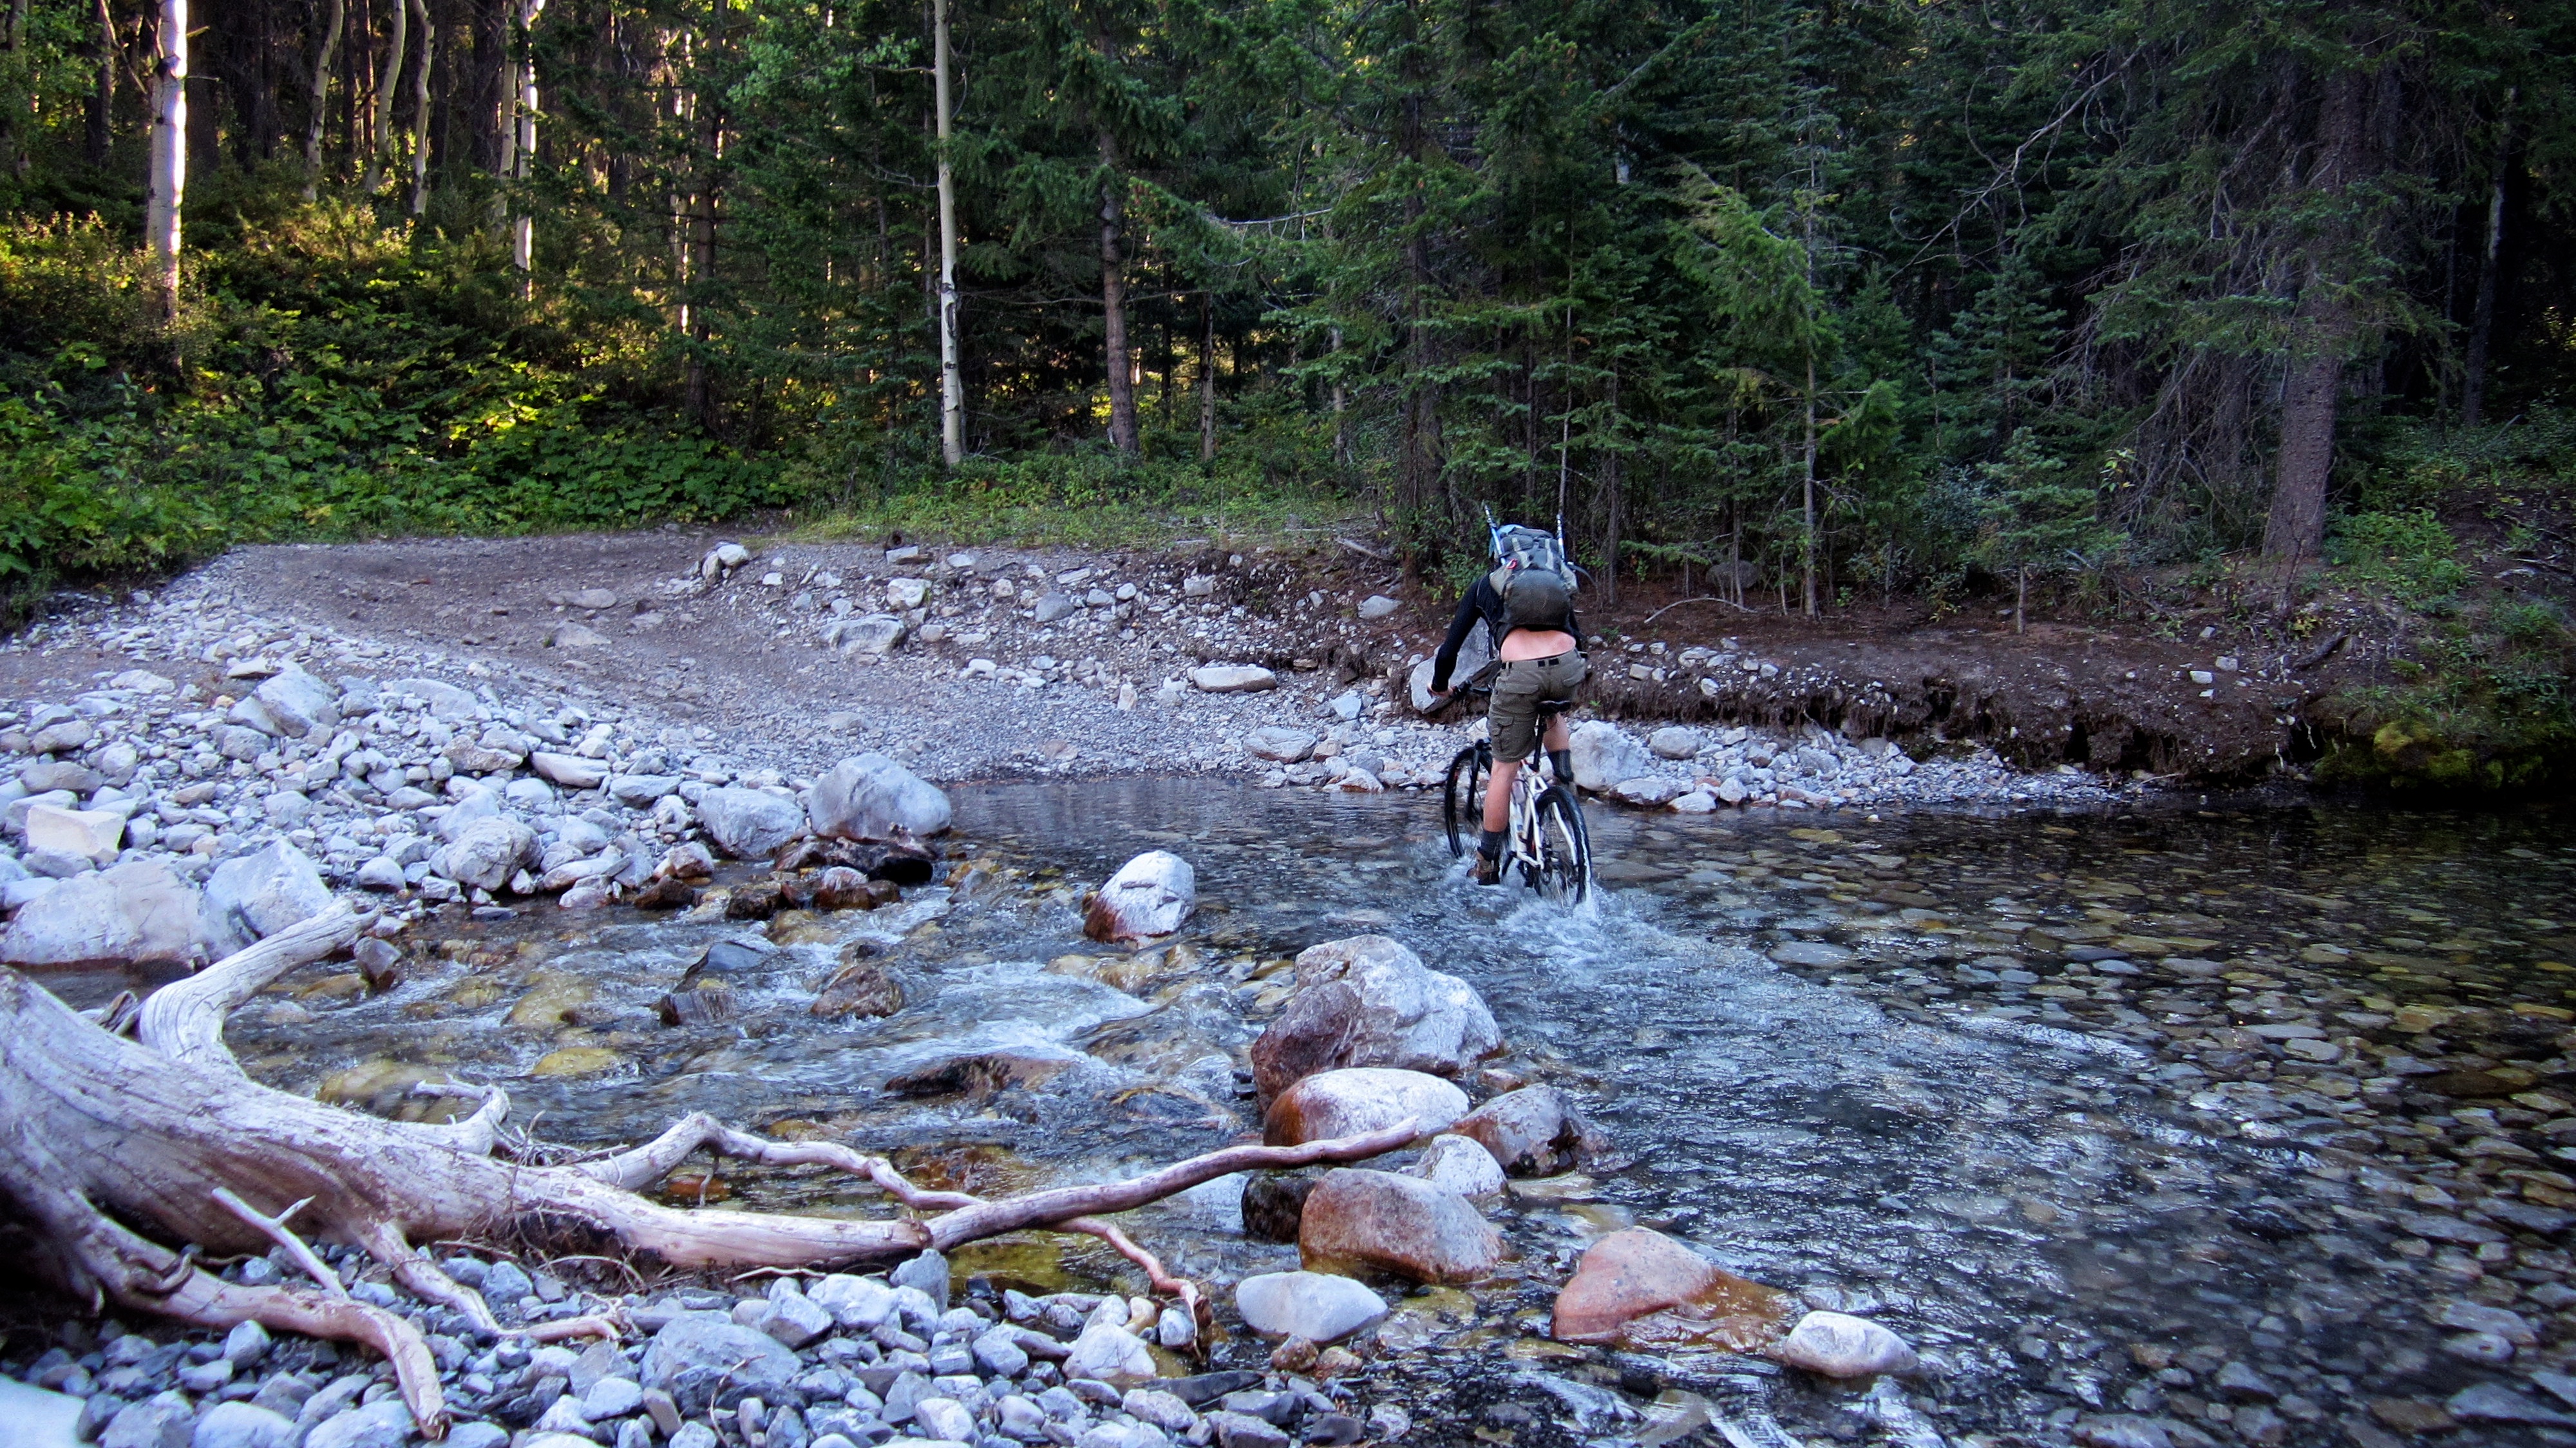
We were able to successfully pedal across all but one of the 8 creek crossings.

Though we gained ~200m in elevation on the ride in, the grade and condition of the trail made it an enjoyable experience. We only had to get off and push our bikes a handful of times.

After riding for a couple of kilometres, the views of the valley began to open up. In front of me are the 3 unnamed peaks found on The Northwest Ridge of Ptolemy (NROP). Since Mount Ptolemy was once named Mummy Mountain, Brad and I stuck with the theme when giving them nicknames after we had climbed them earlier this year. In the foreground on the right is ‘Mummy Mountain’, followed by ‘Anubis Peak’, and then ‘Pharaoh’s Peak’ – which at 2622m (my GPS) is higher than Chinook Peak. NROP was such a fun traverse!

Gazing down the valley towards the Promised Land and Mount Ptolemy.

Chinook Peak is on the left.

After biking for ~5km, we arrived at the clearing / camping area. Here the trail bifurcates presenting the option to continue going straight – which will take you to the Promised Land – or to turn left, which will take you to Chinook Peak and Andy Good Peak.

Standing in a campsite and looking down the trail that leads to Chinook and Andy Good.
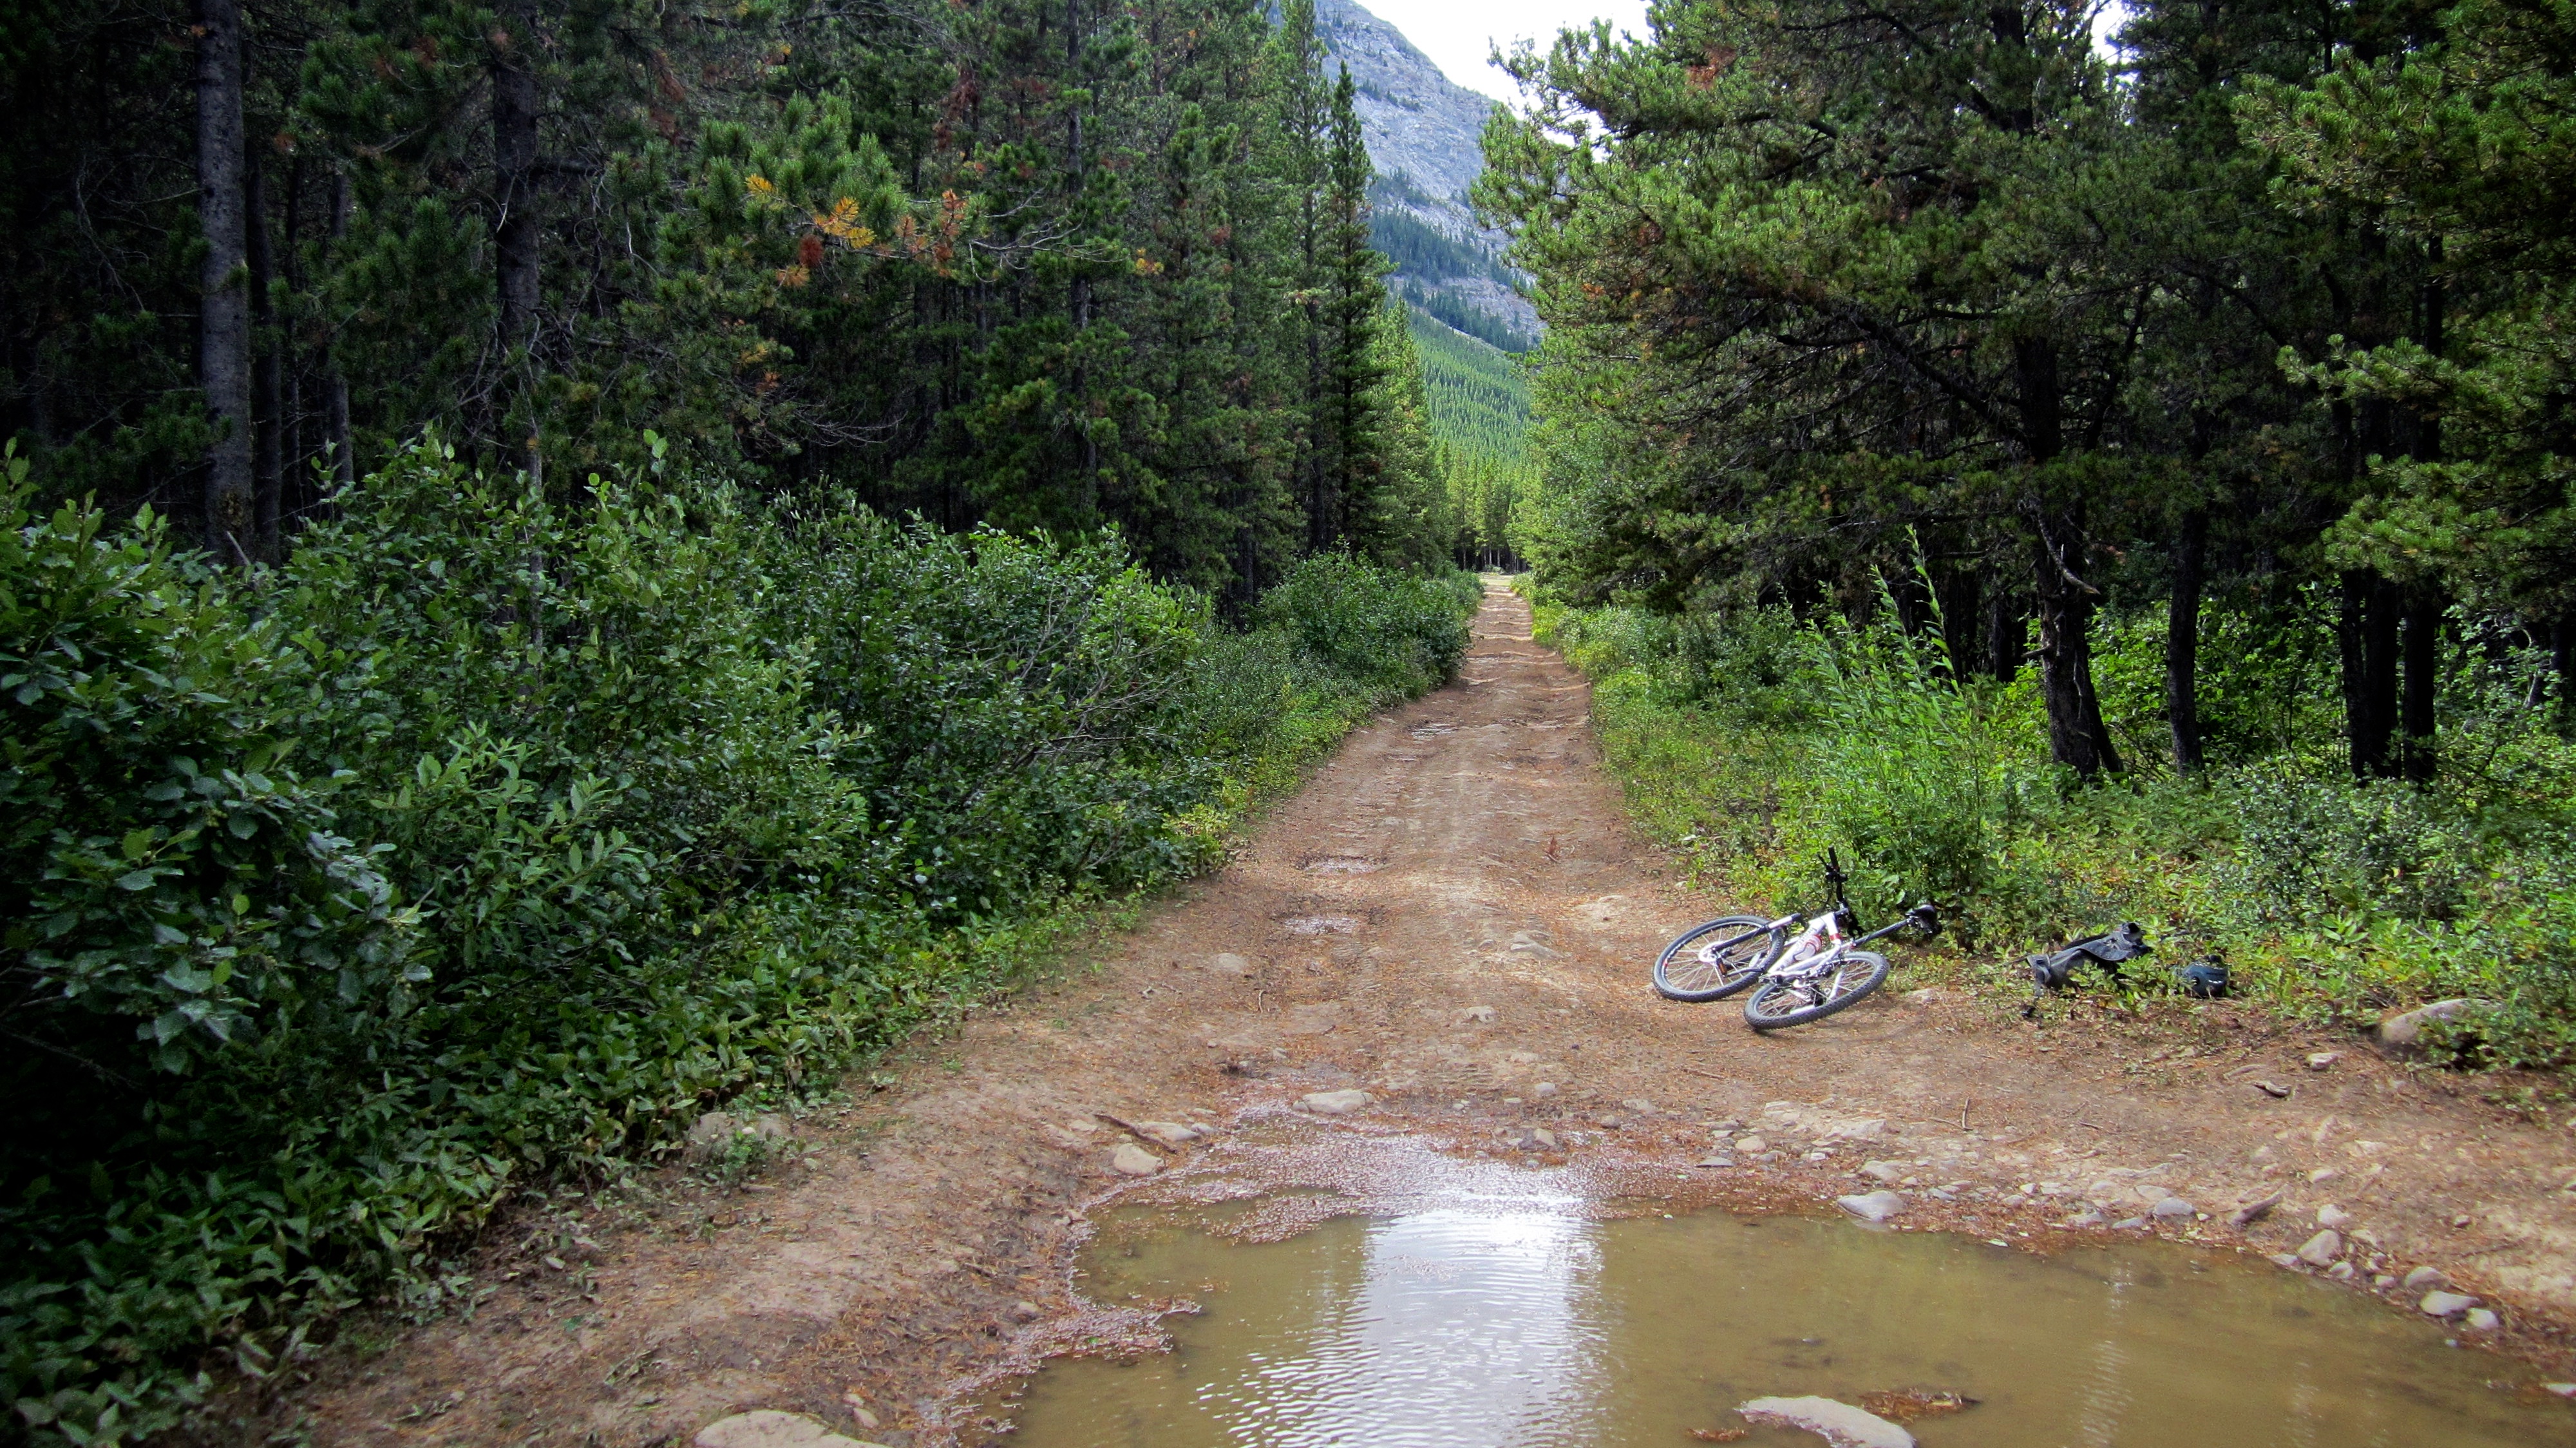
We biked along the trail for ~190m until we came to this viewpoint. Here the trail drops into a dry creek bed before climbing steeply for ~1km to the base of Chinook Peak (centre). The trail can be seen in the distance on the right.

Marc switches his gear from biking to hiking. We stashed our bikes well off of the trail because you just can’t trust wildlife these days… maybe we should build a wall? 😉

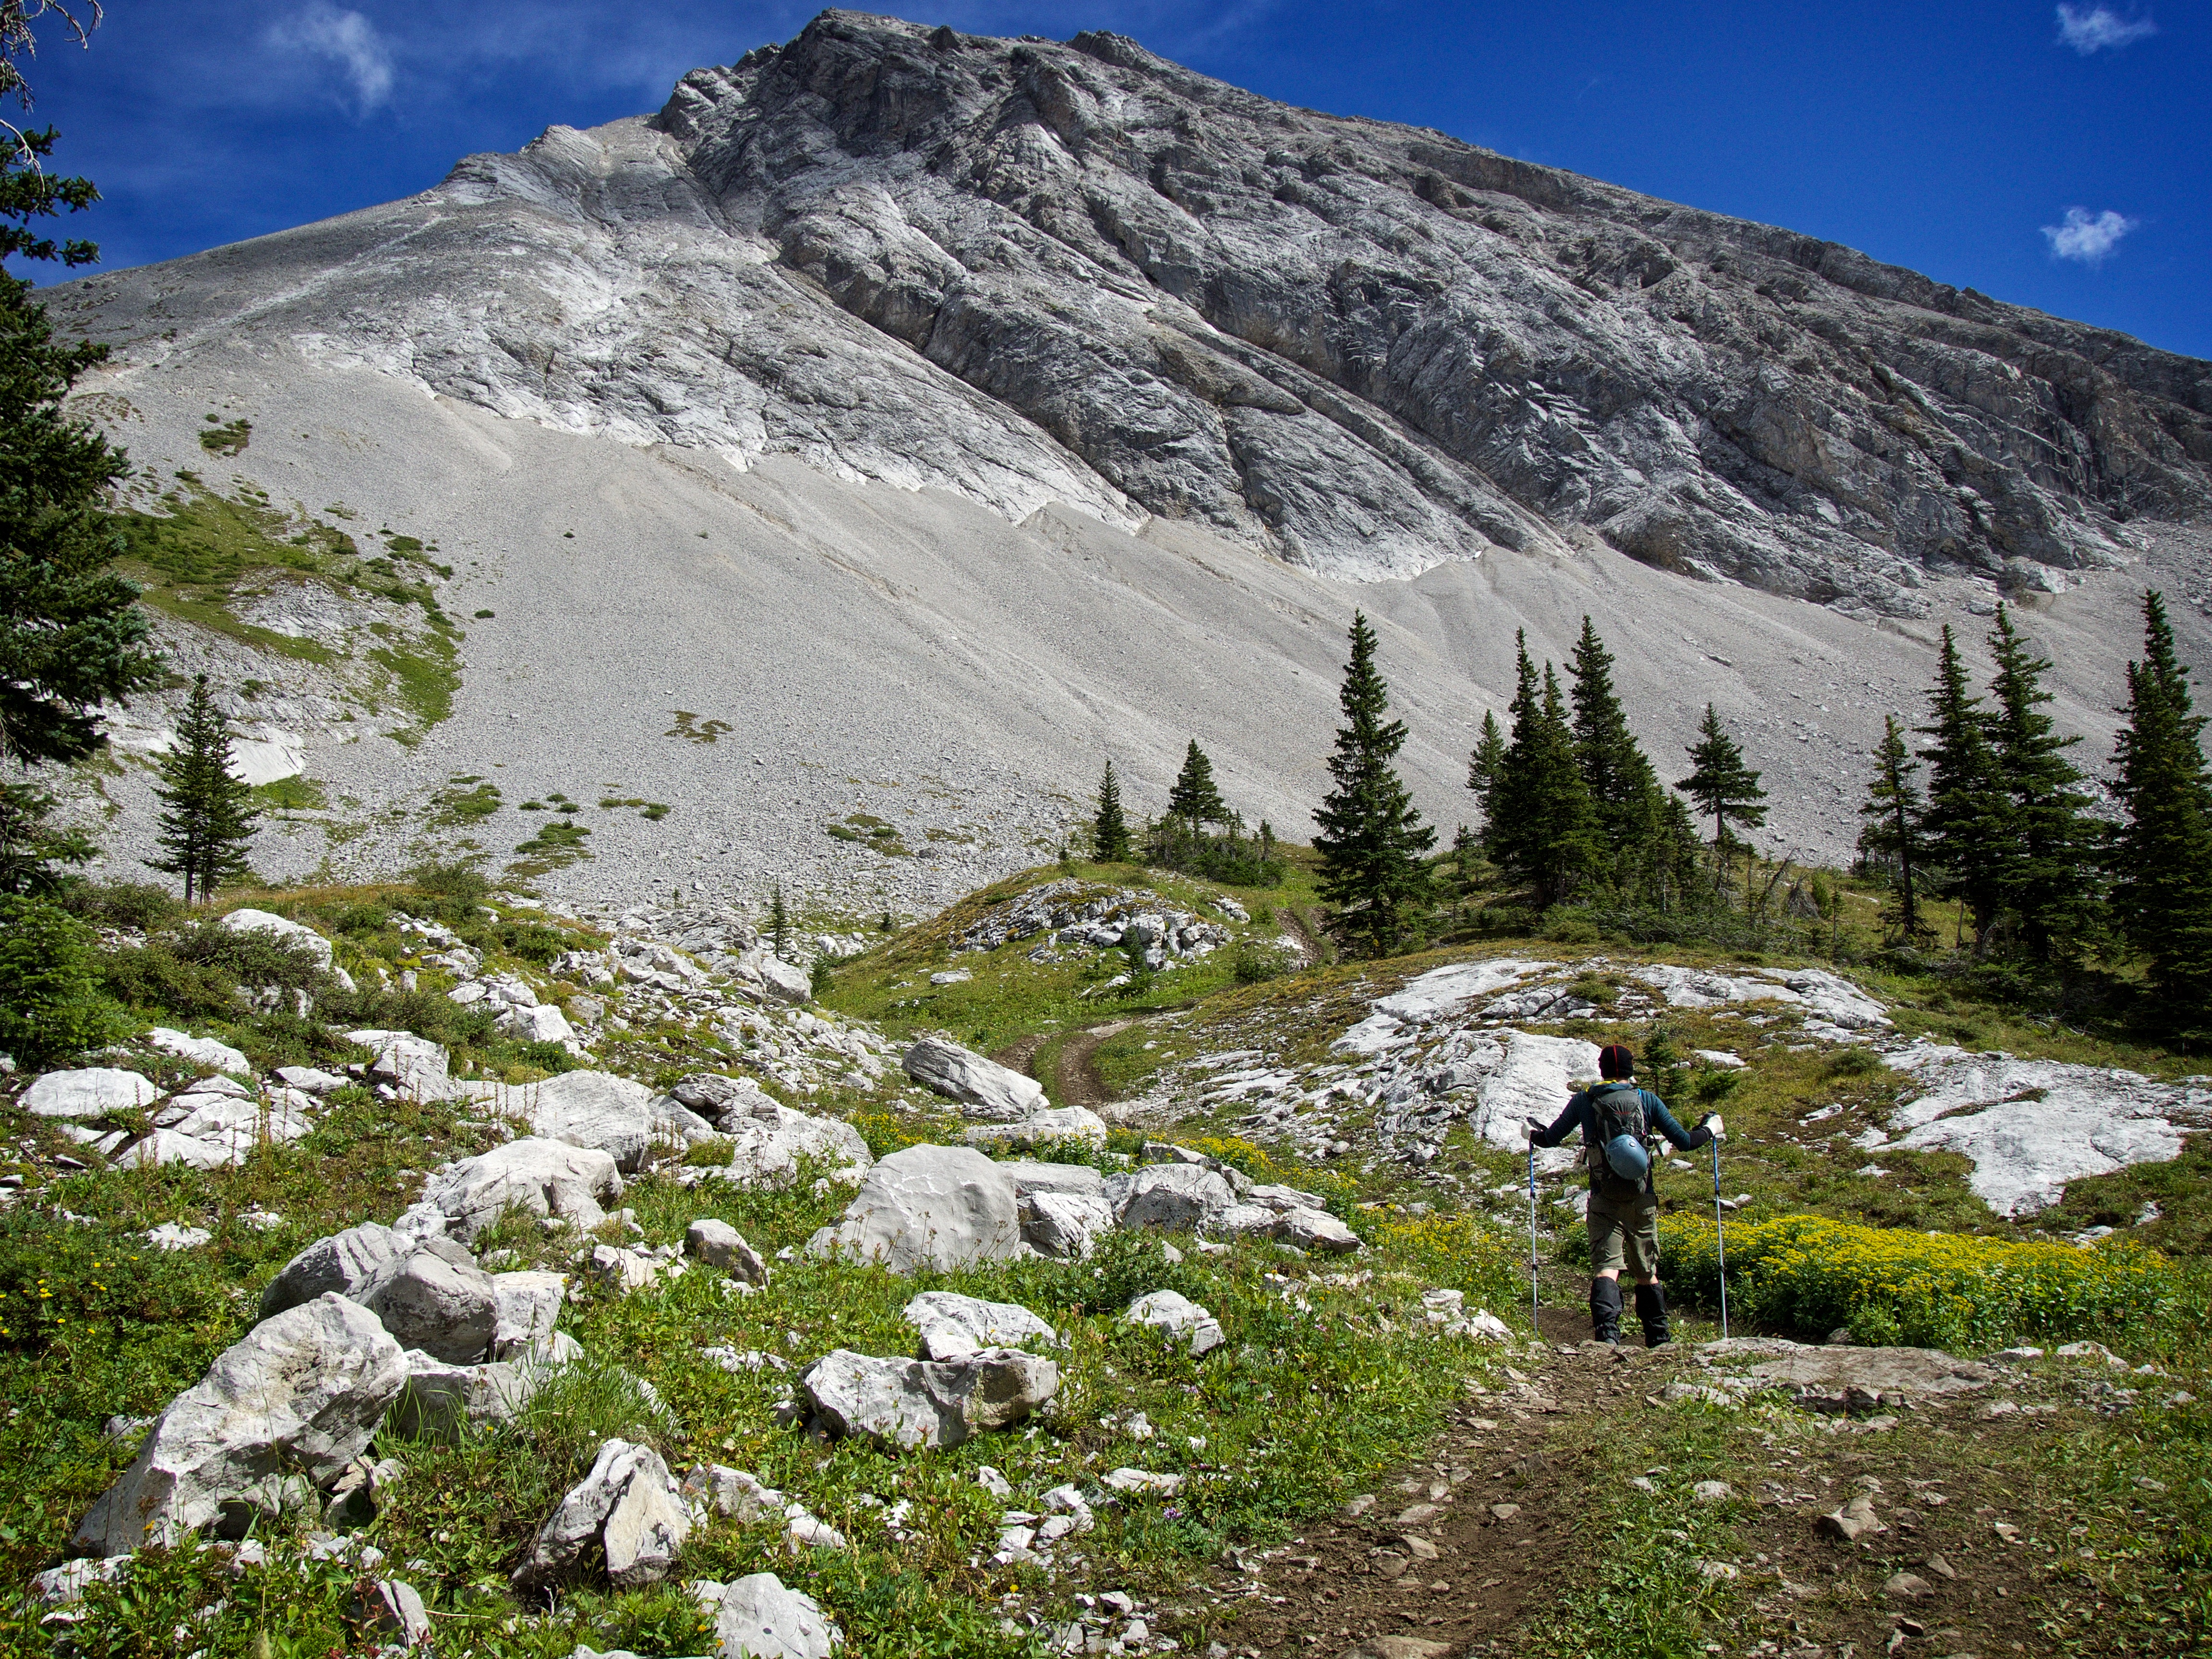
The section of trail leading to the base of Chinook is steep but in good shape.
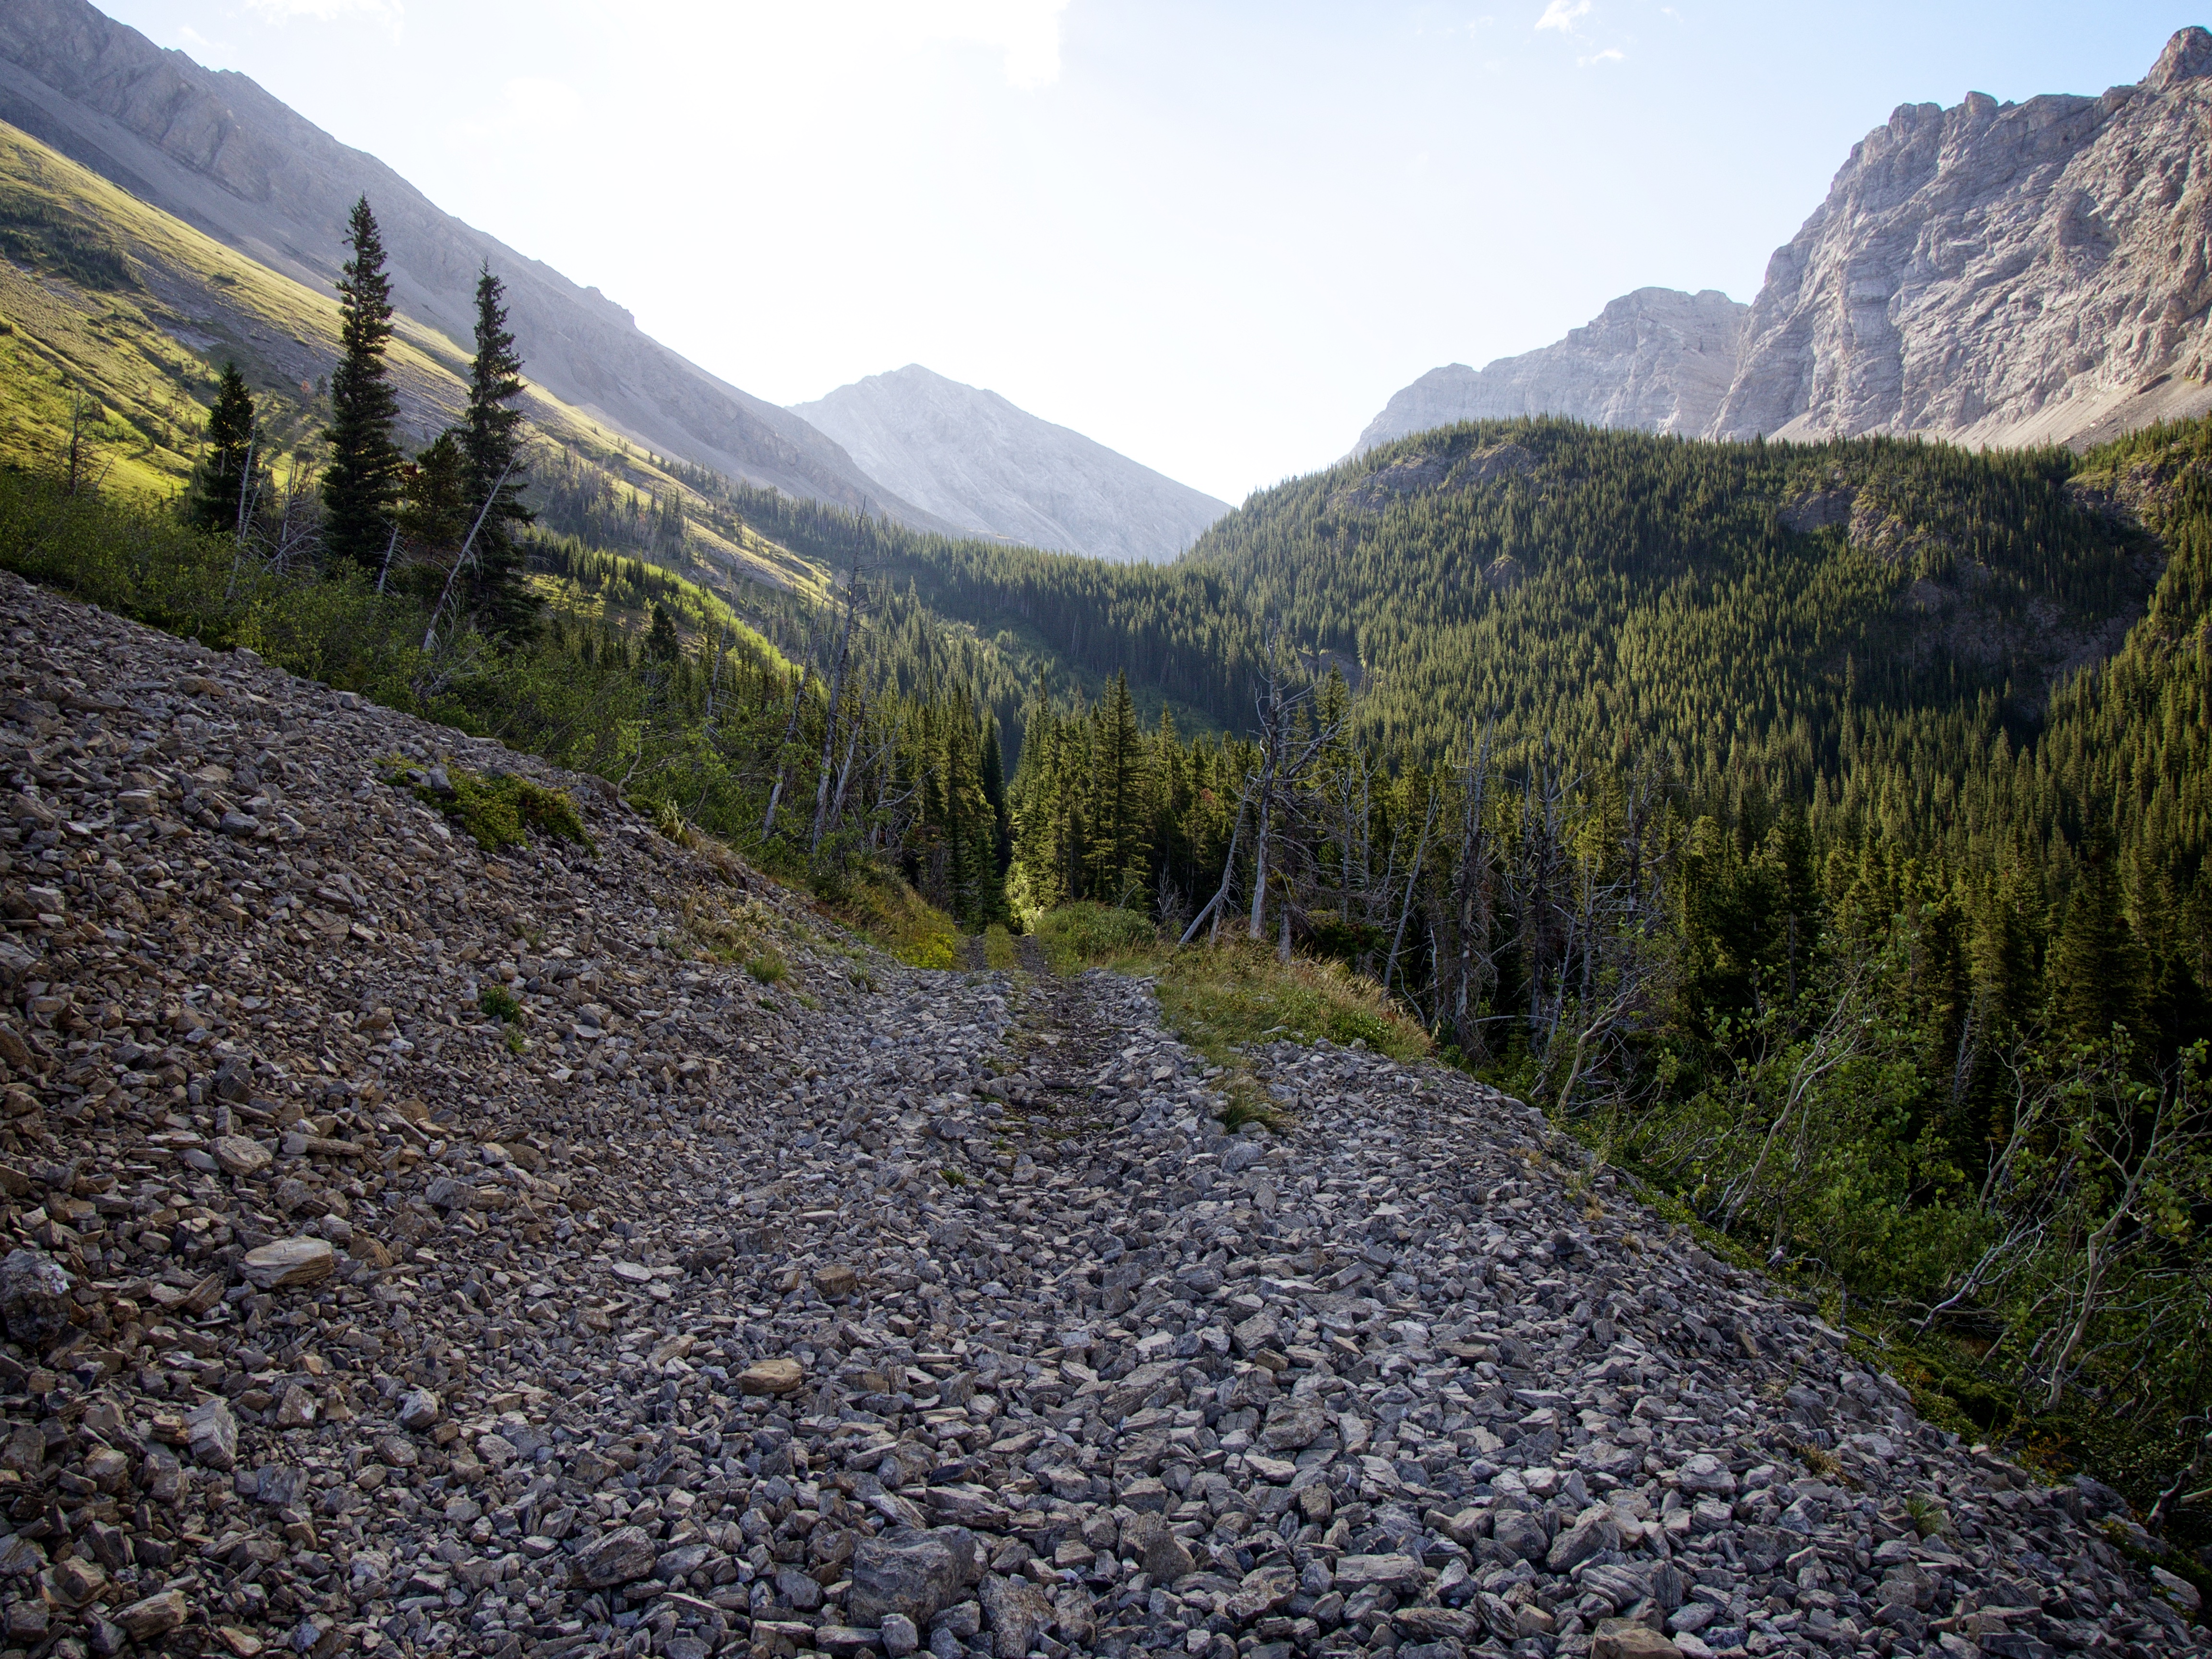
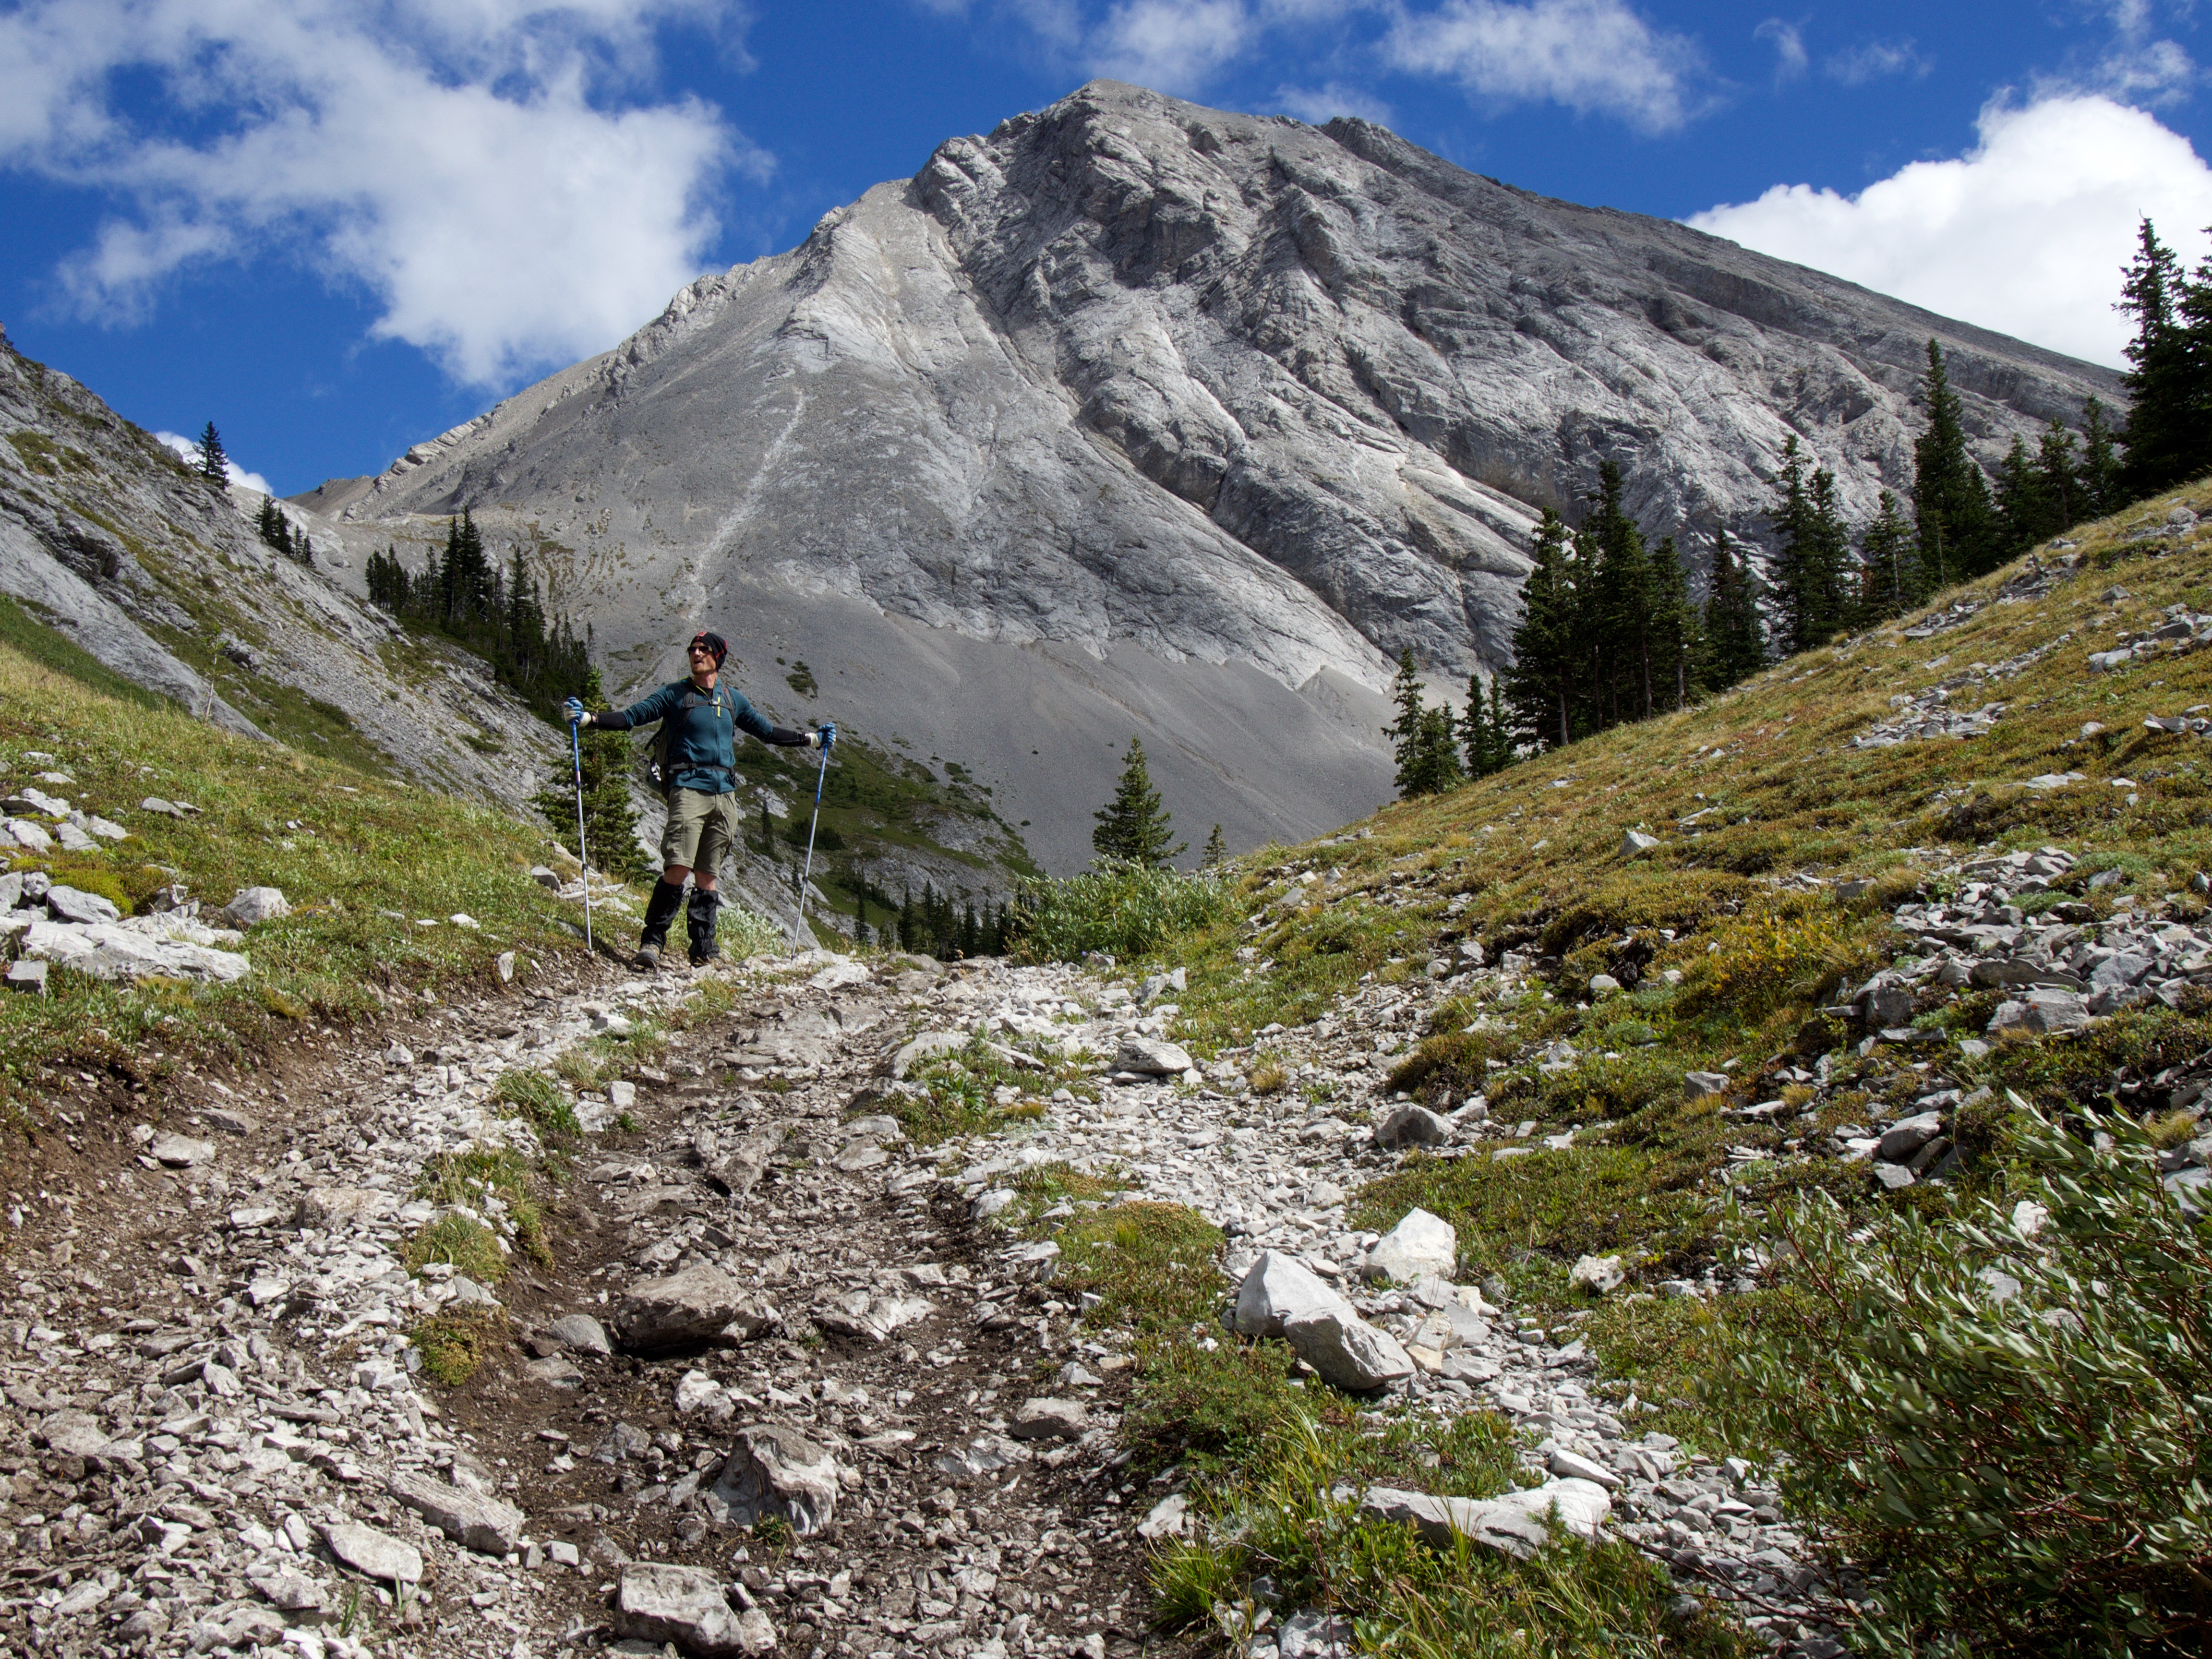
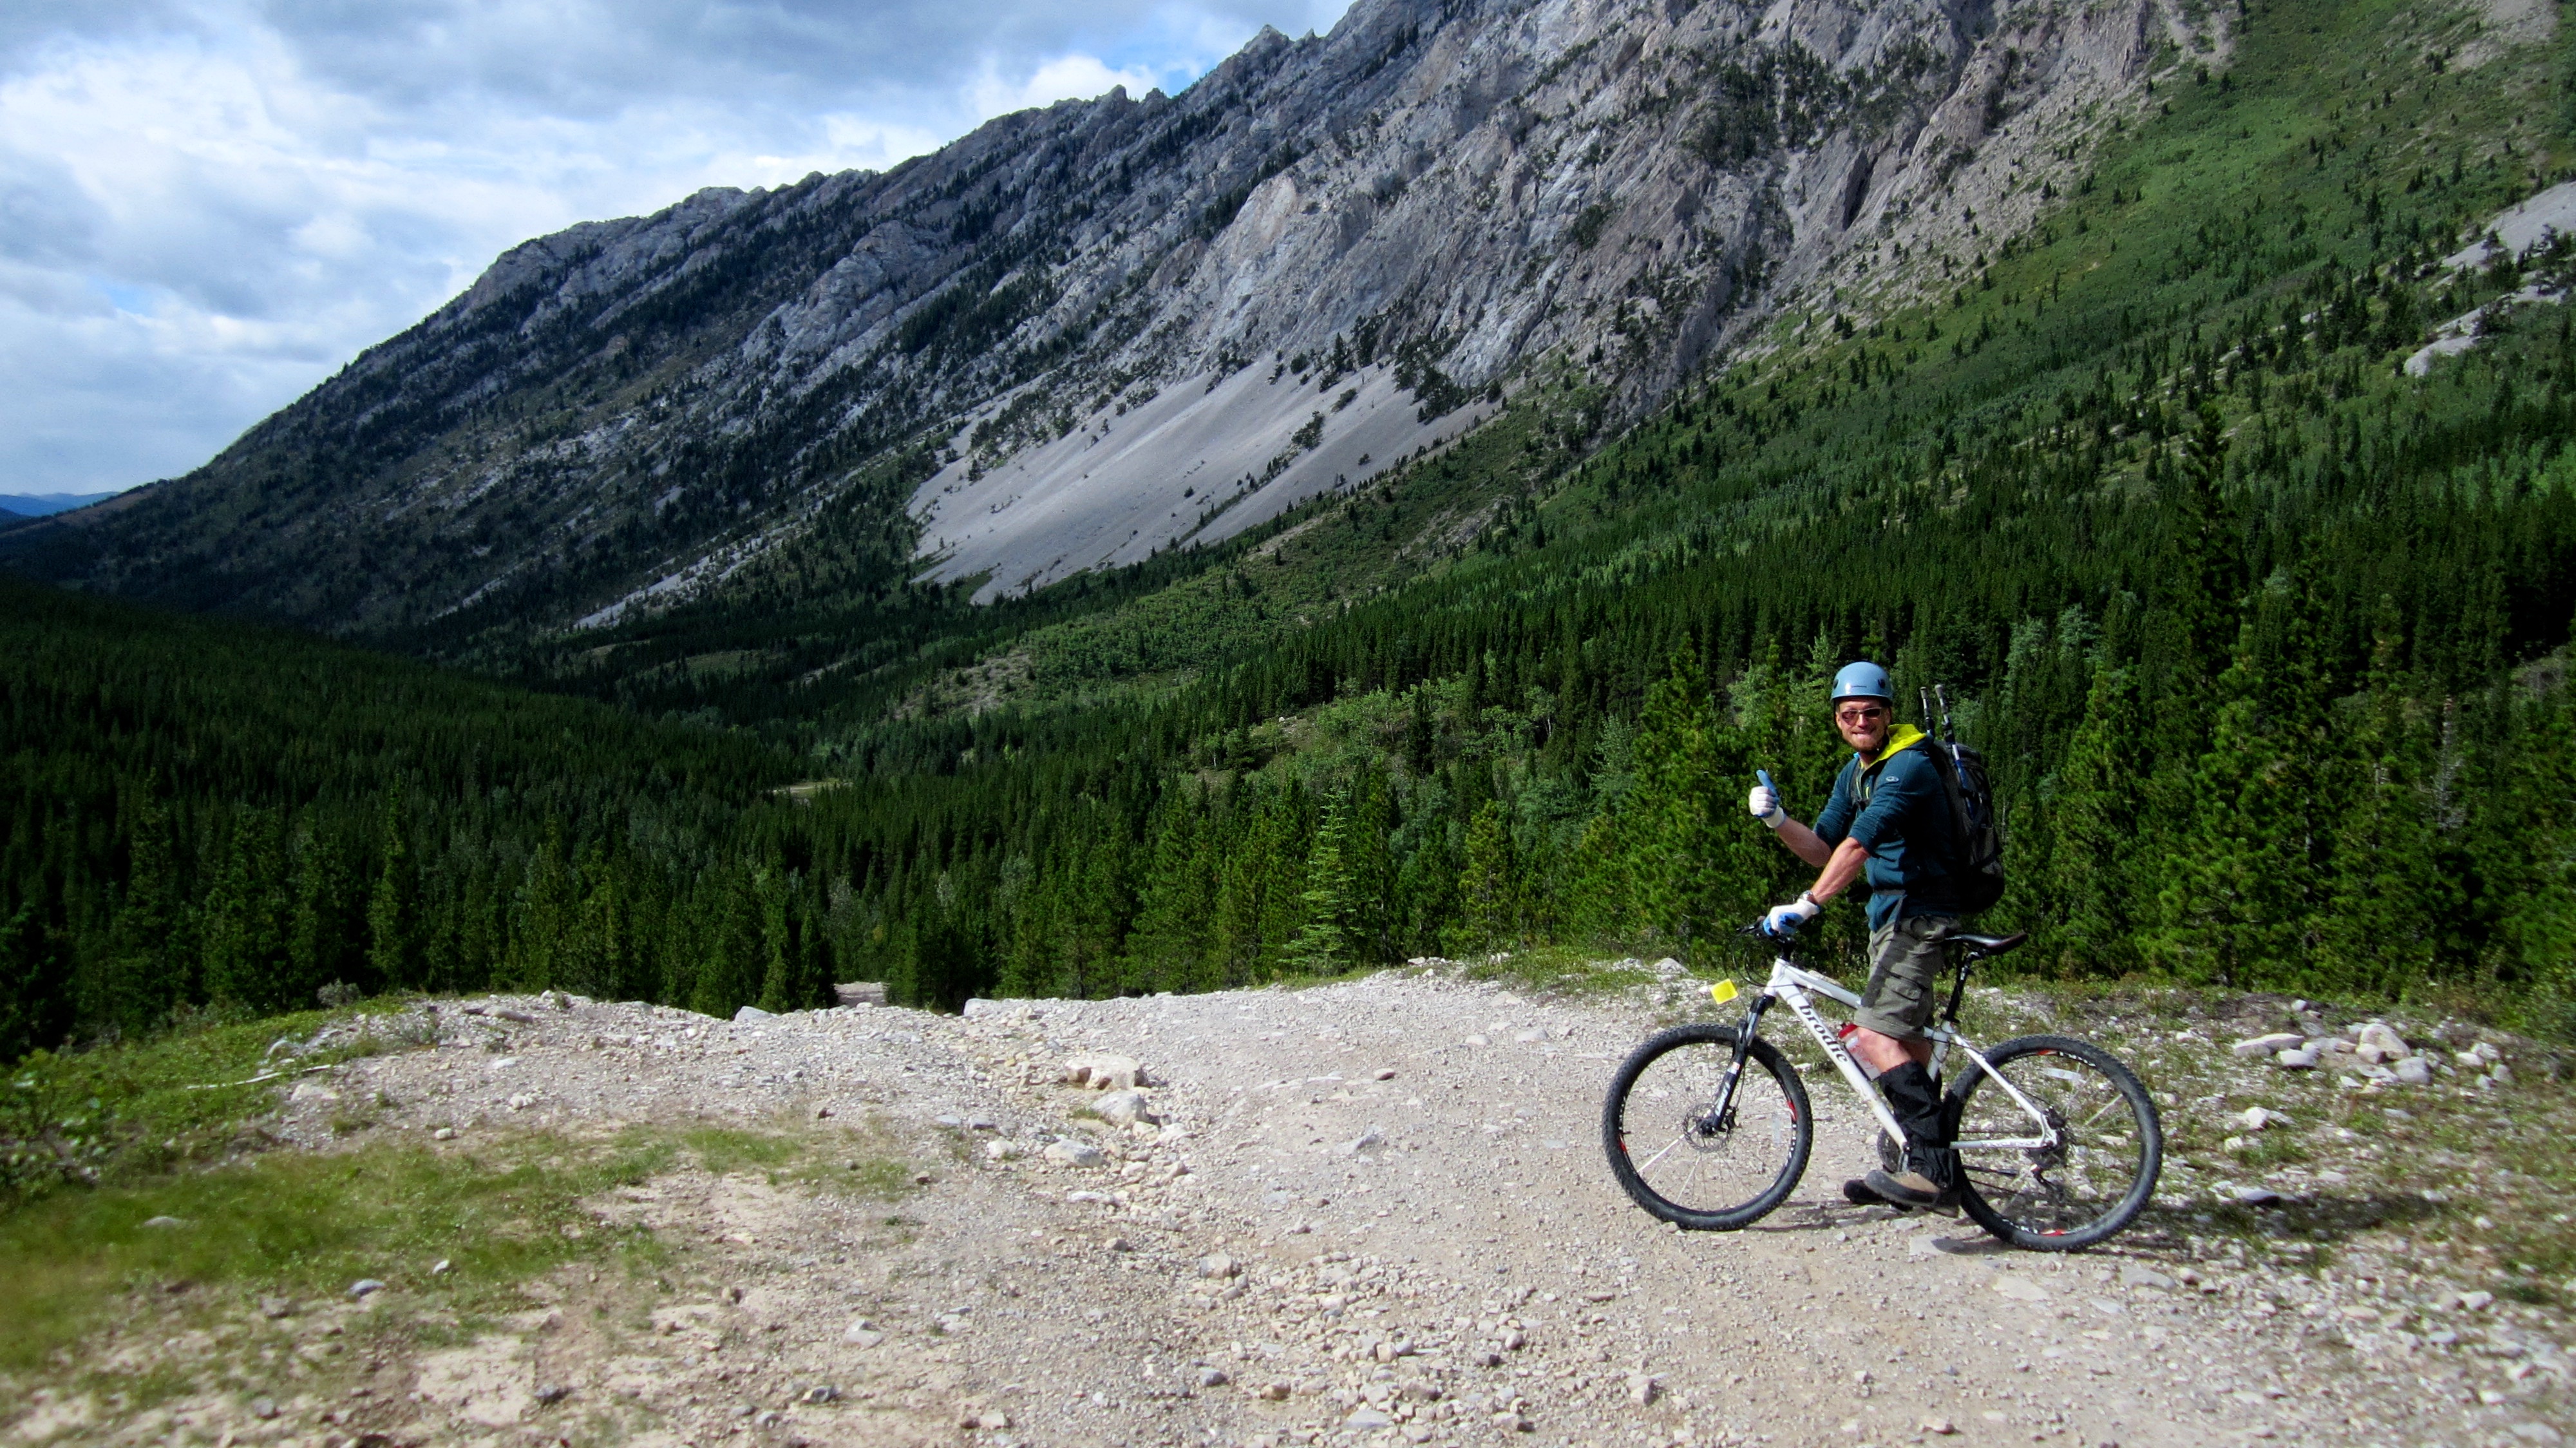
The trail levels off at the avalanche slope that we used to ascend. In the distance is Andy Good Peak.
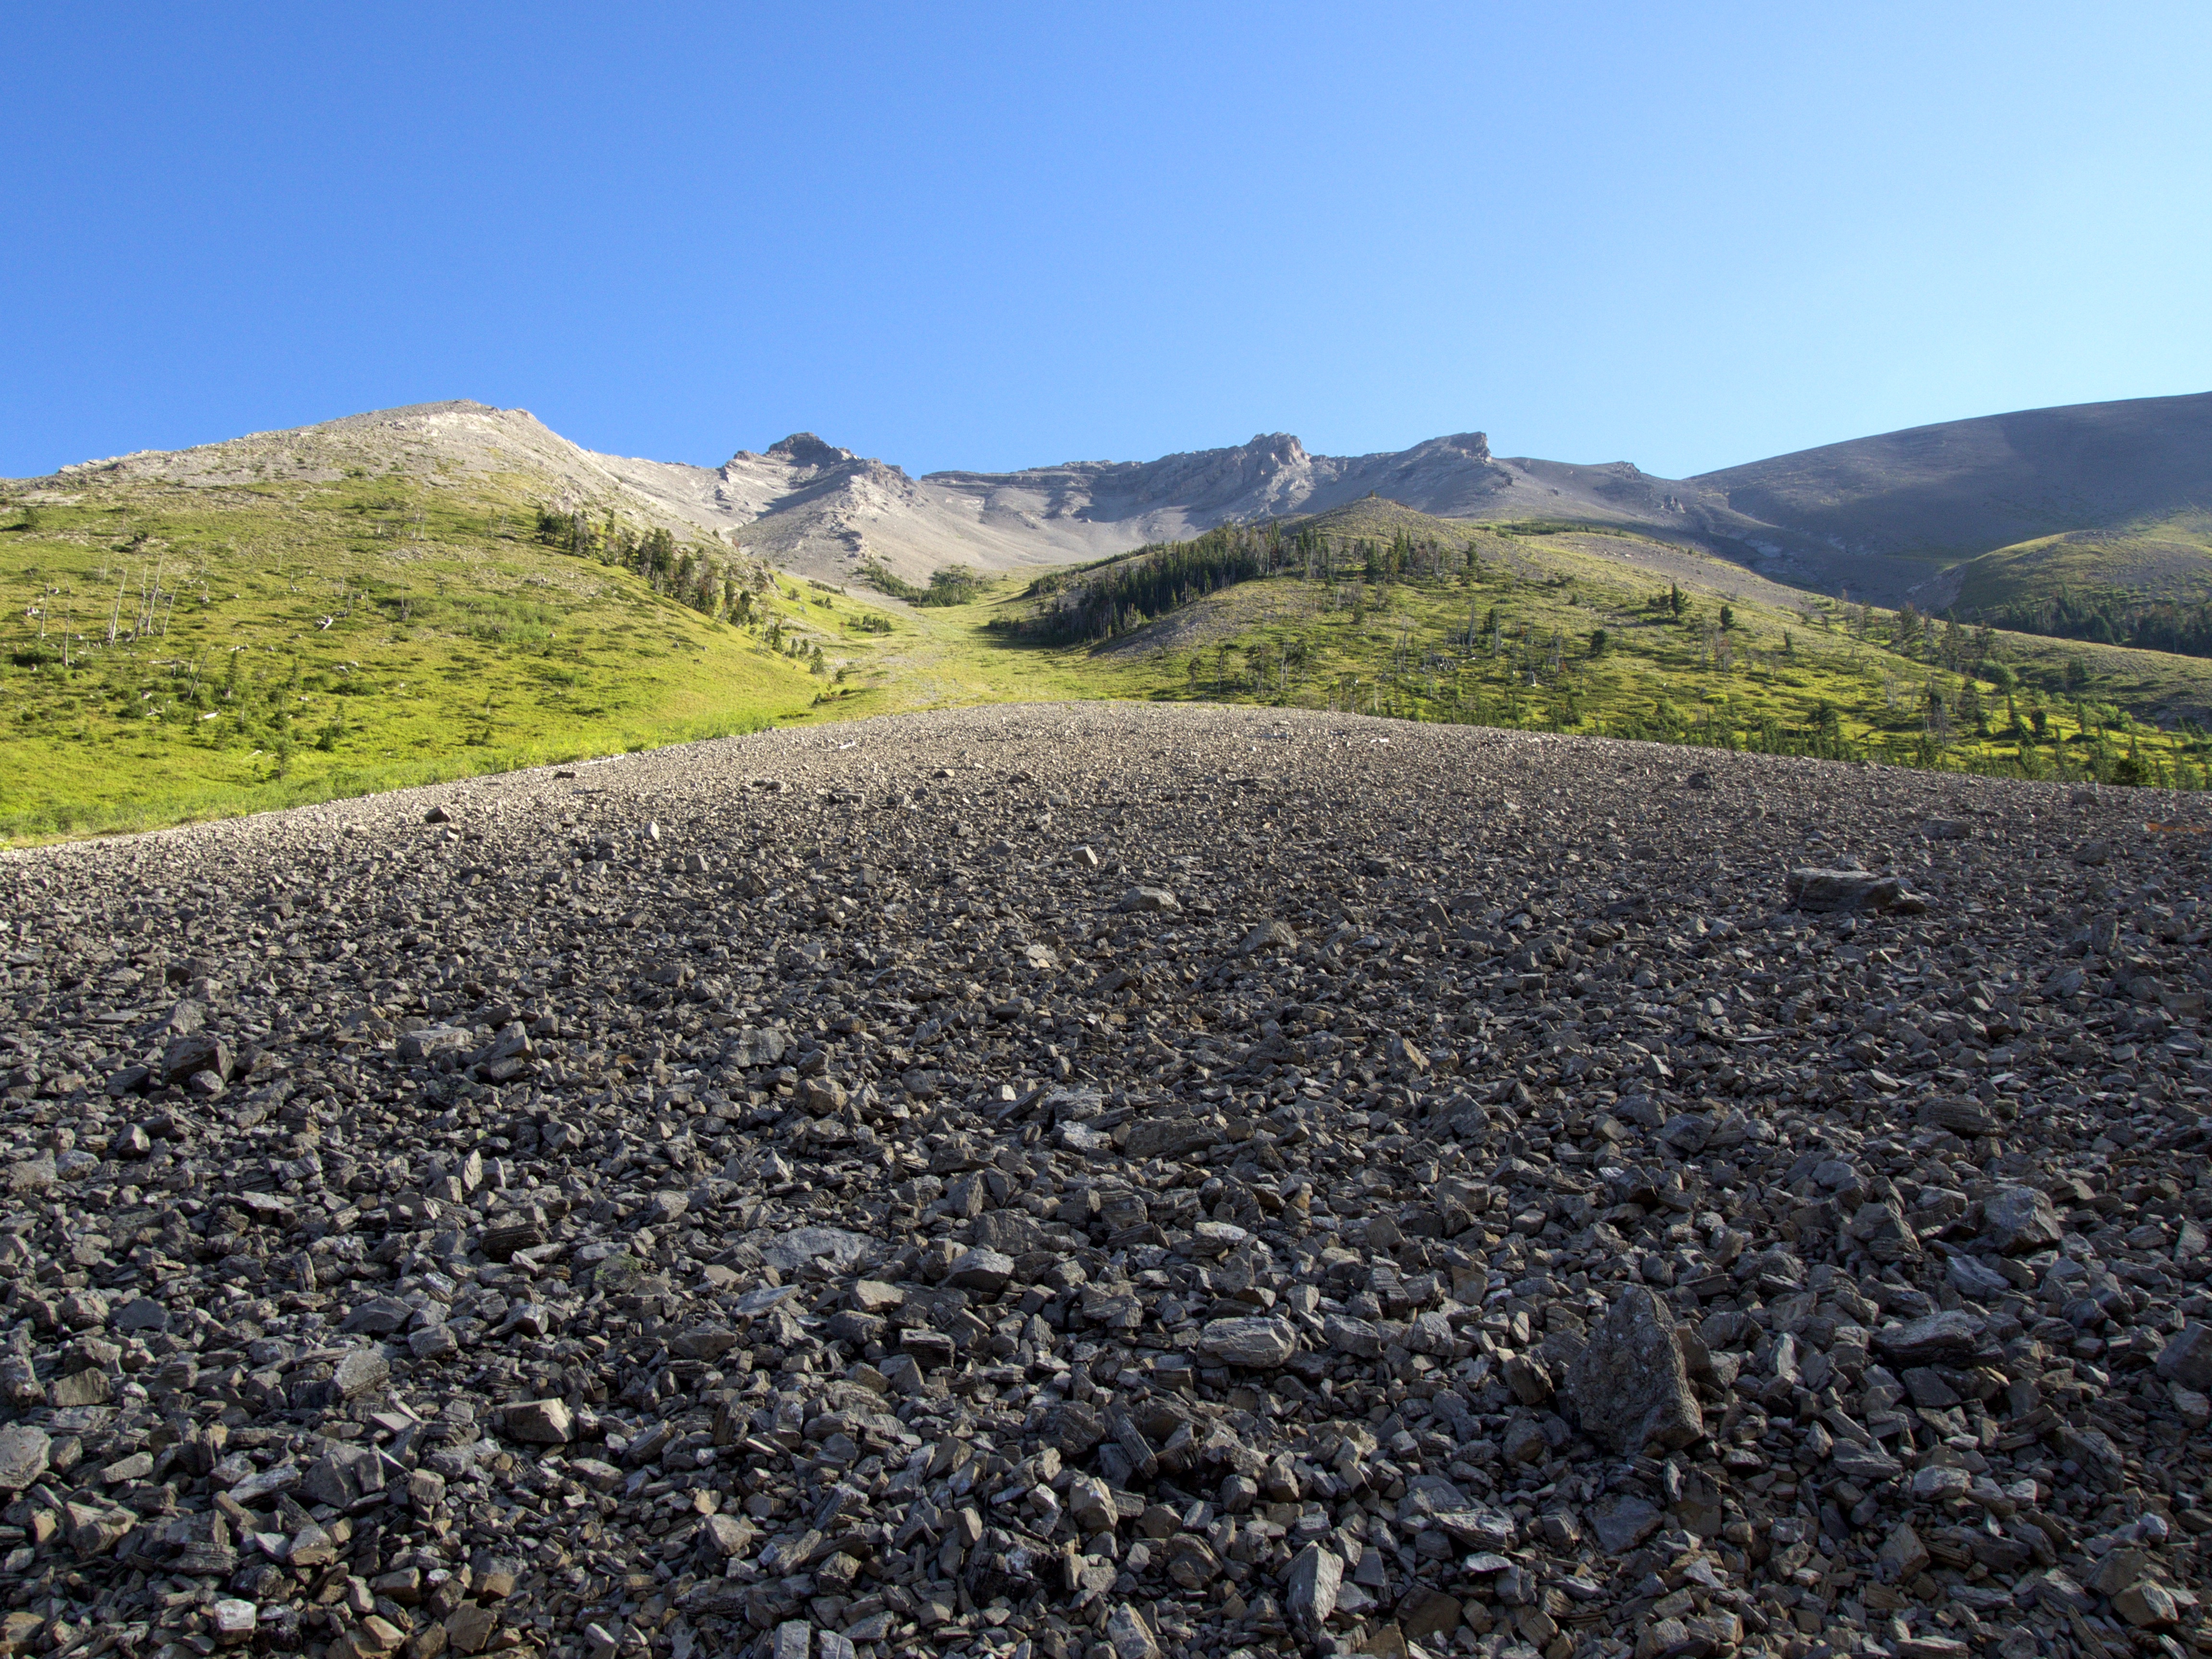
Looking up our ascent slope on the west face of Chinook Peak. The small notch that we should’ve used is just to the left of centre. Instead, we went between the two outcroppings on the right.

The SE ridge of Chinook Peak is in the centre and the outlier located between Chinook and Mount Parrish is on the right. Our descent route next to the outlier is highlighted by sunshine.

The morning sunlight reflects off of ‘Mummy Mountain’ on NROP.
A small window can be seen on the upper left of portion of NROP between Mount Ptolemy and ‘Pharaoh’s Peak’.

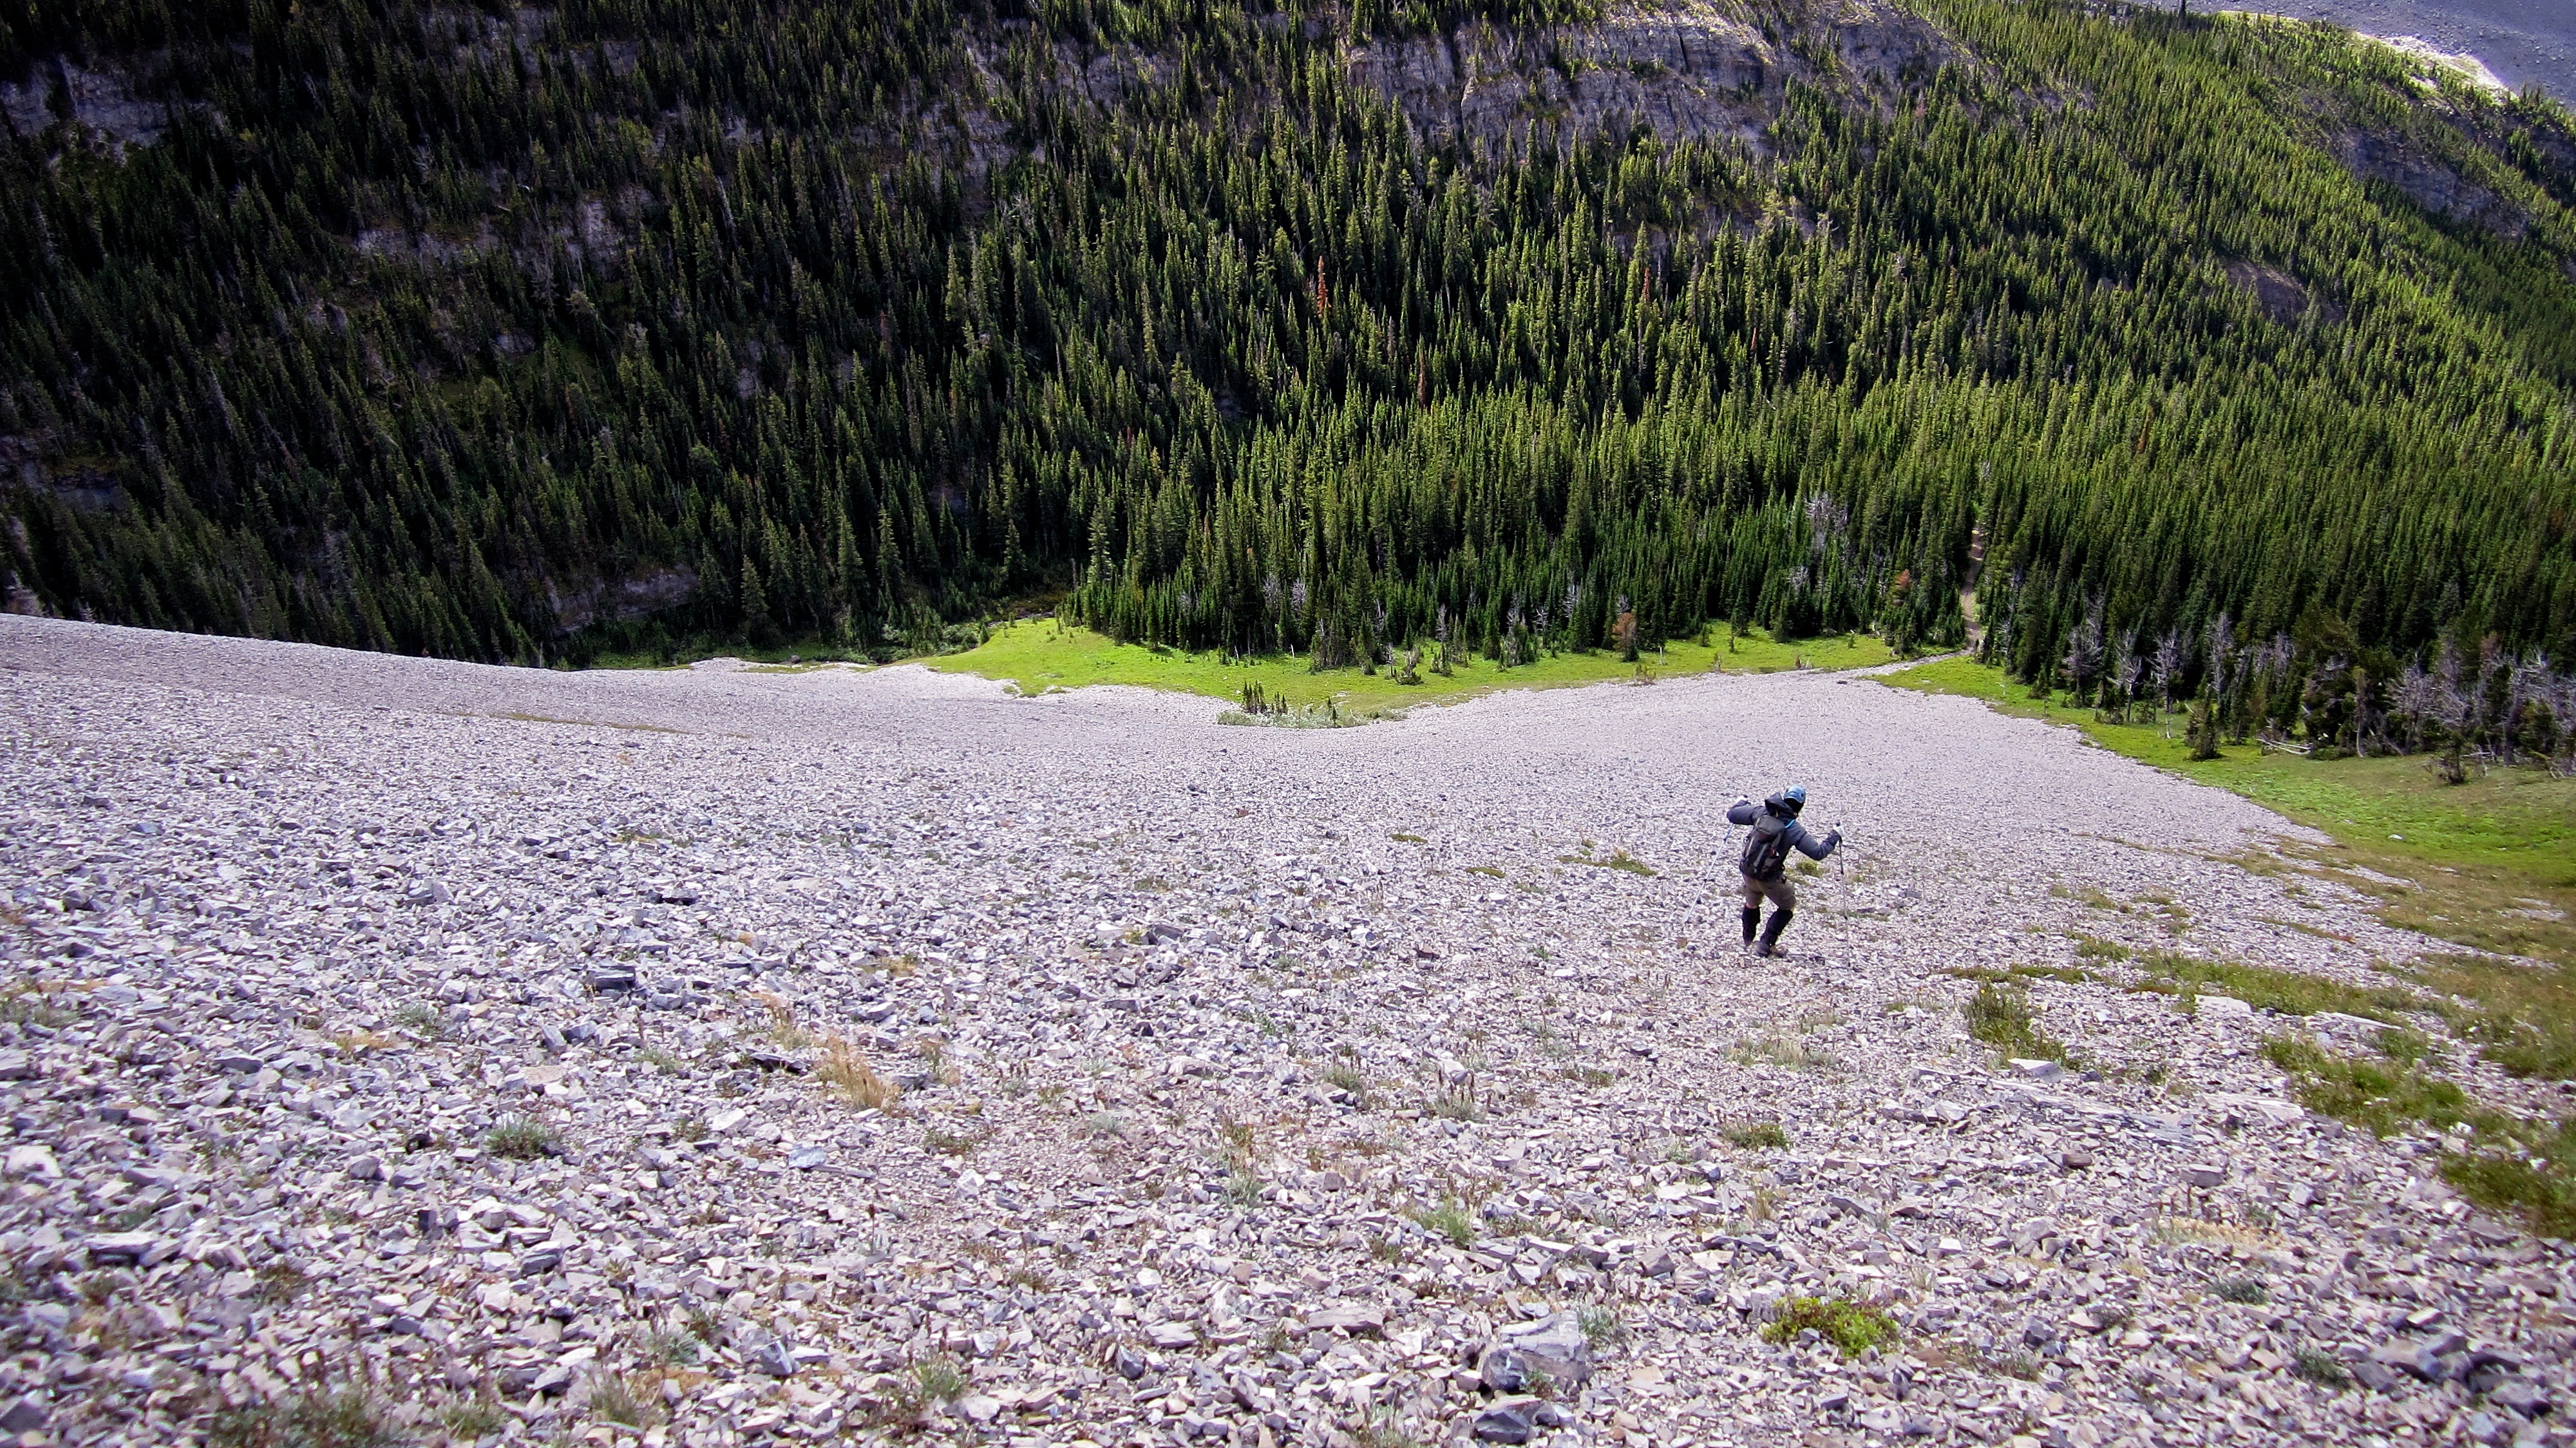
Marc zig zags as he works his way up the slope. It is steeper than it looks!
The view west towards Mount Ptolemy (left) and the 3 peaks of NROP from halfway up the slope. Our starting point was the patch of rubble in the centre.

The upper bowl where we made the fateful decision to head towards the rock just to the right of centre. The notch leading to the NW ridge is visible on the left.

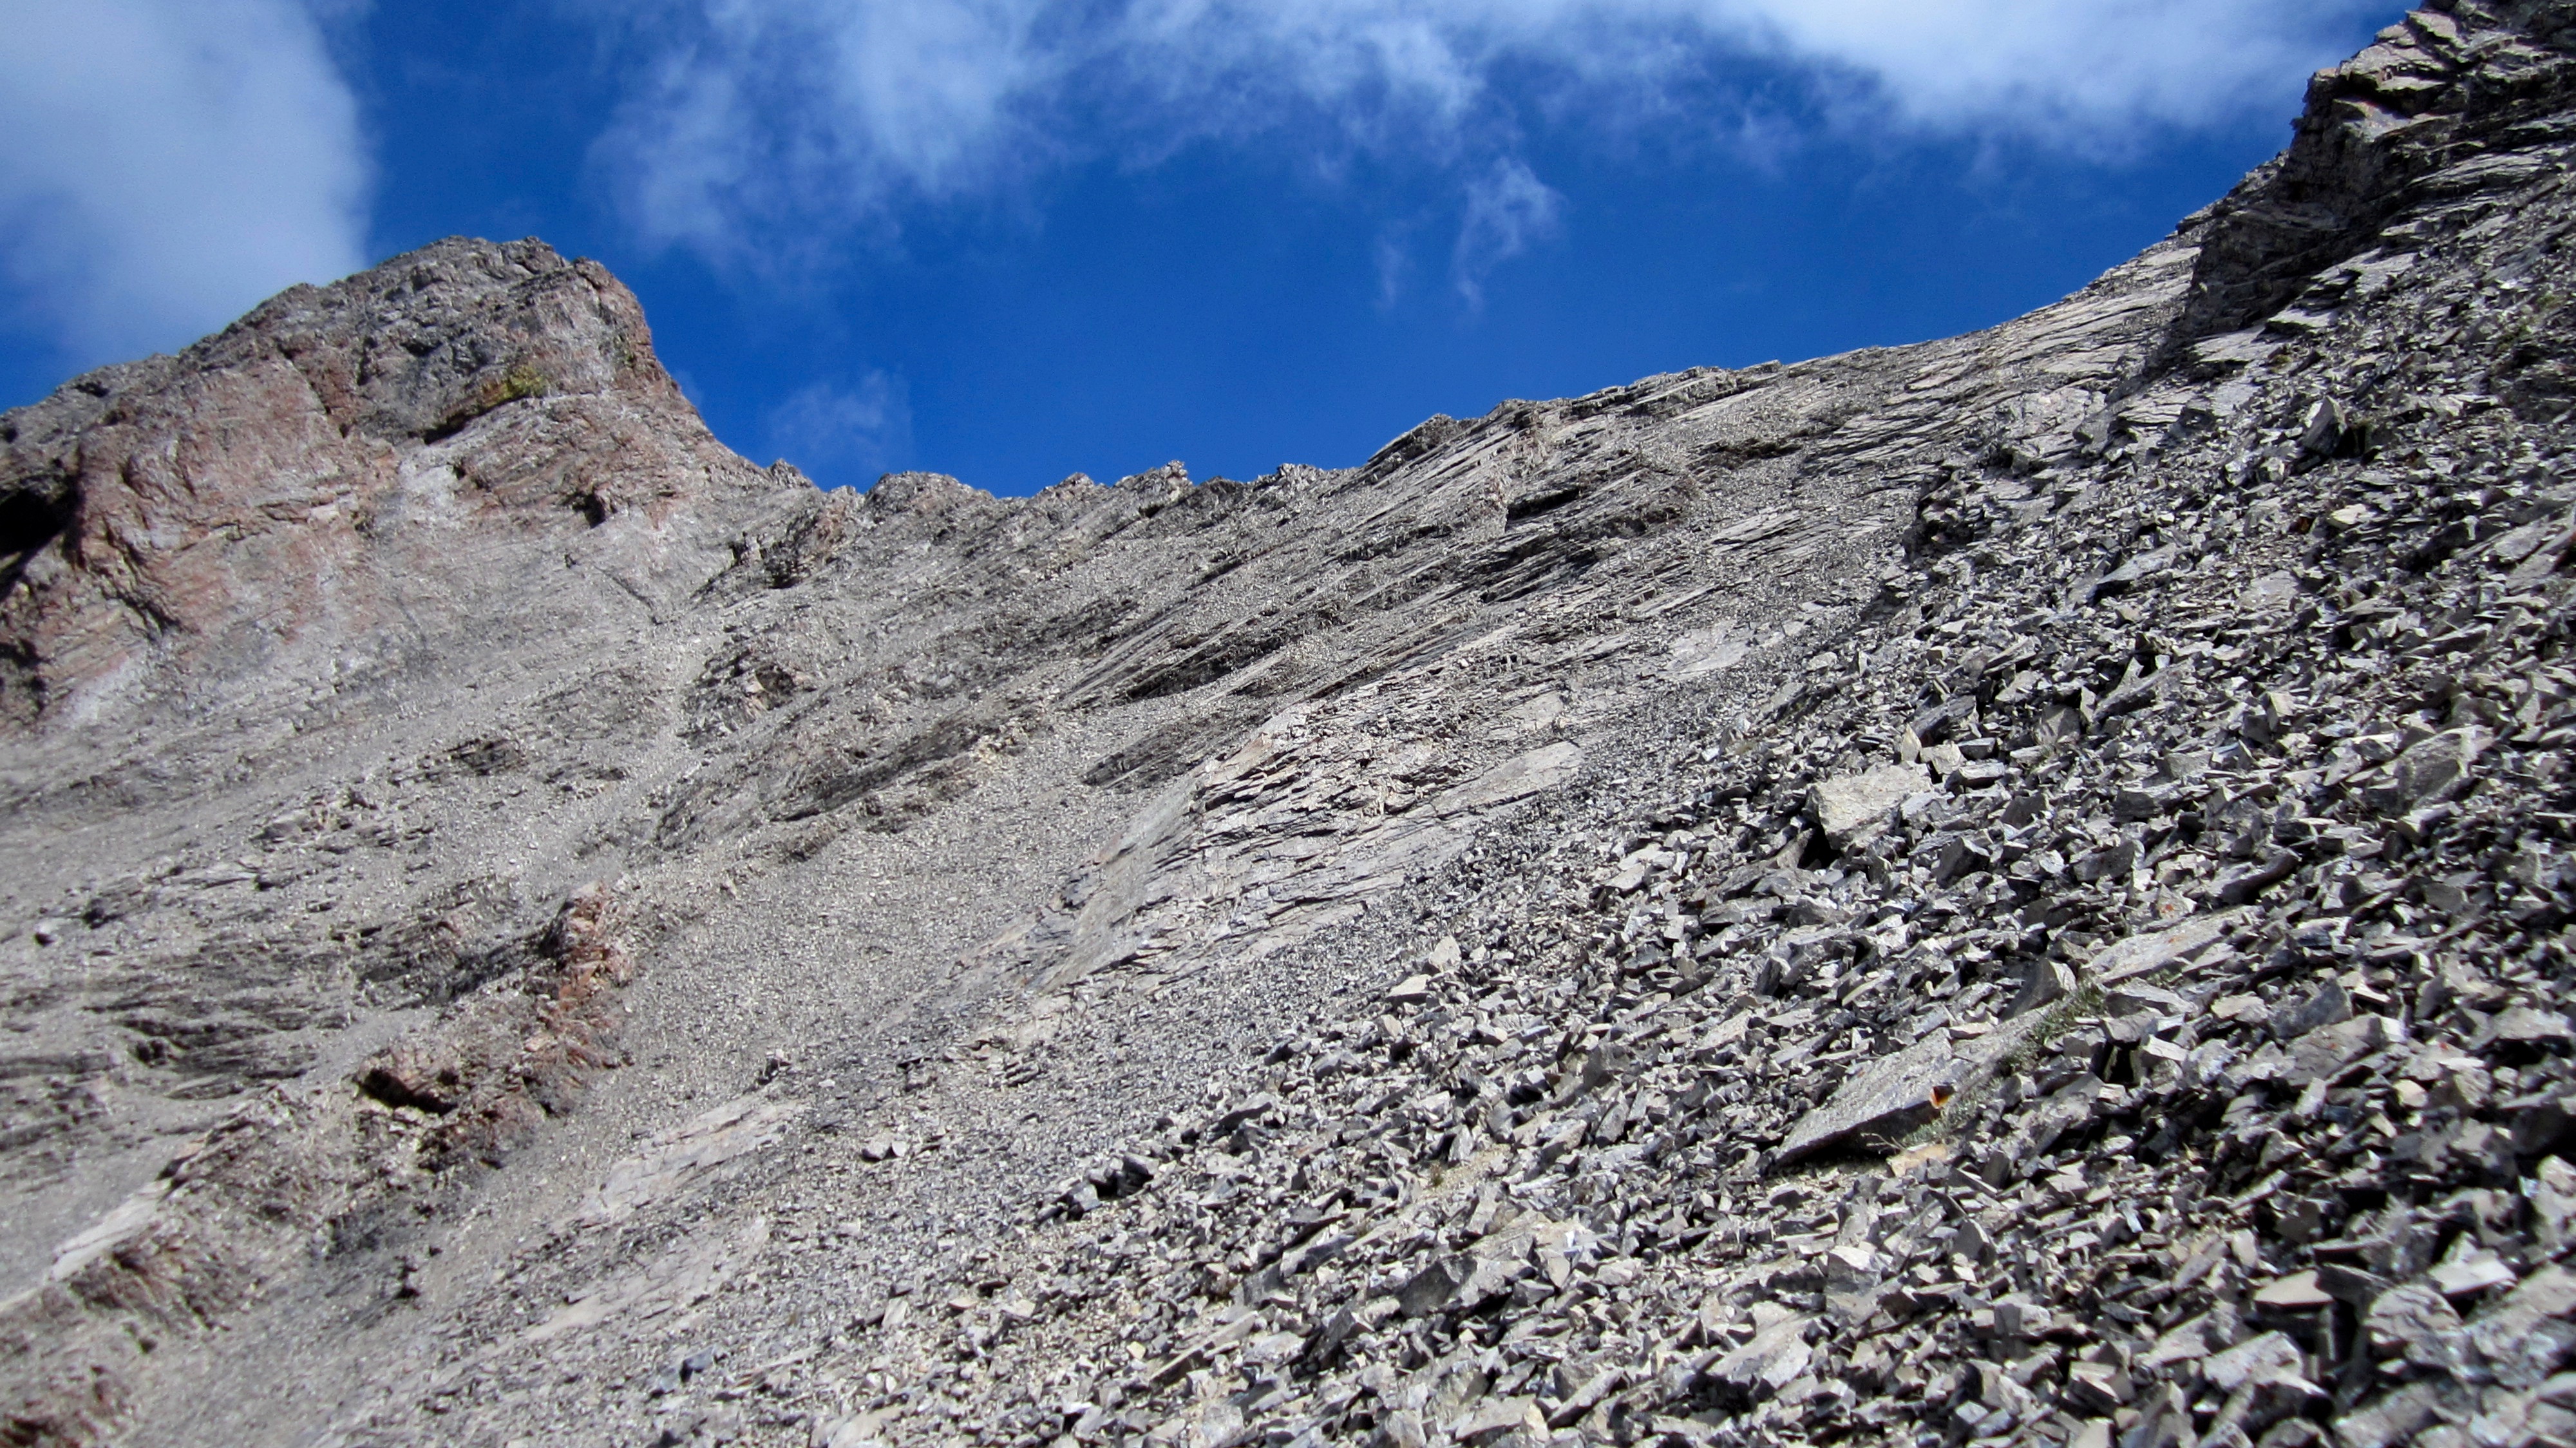
A closer look at the notch that I think leads to the summit (Edit: as I noted earlier, this was confirmed by Andrew Nugara as the correct route to use to gain the NW ridge and ultimately, the summit). At this point, the grade of the slope intensified and we found ourselves slogging our way up treadmill scree – hence our decision to head towards what we thought was solid rock. I believe there are several stories out there (e.g. Jesus) which warn about what happens when you choose to go the easy way rather than the more difficult, but correct way…

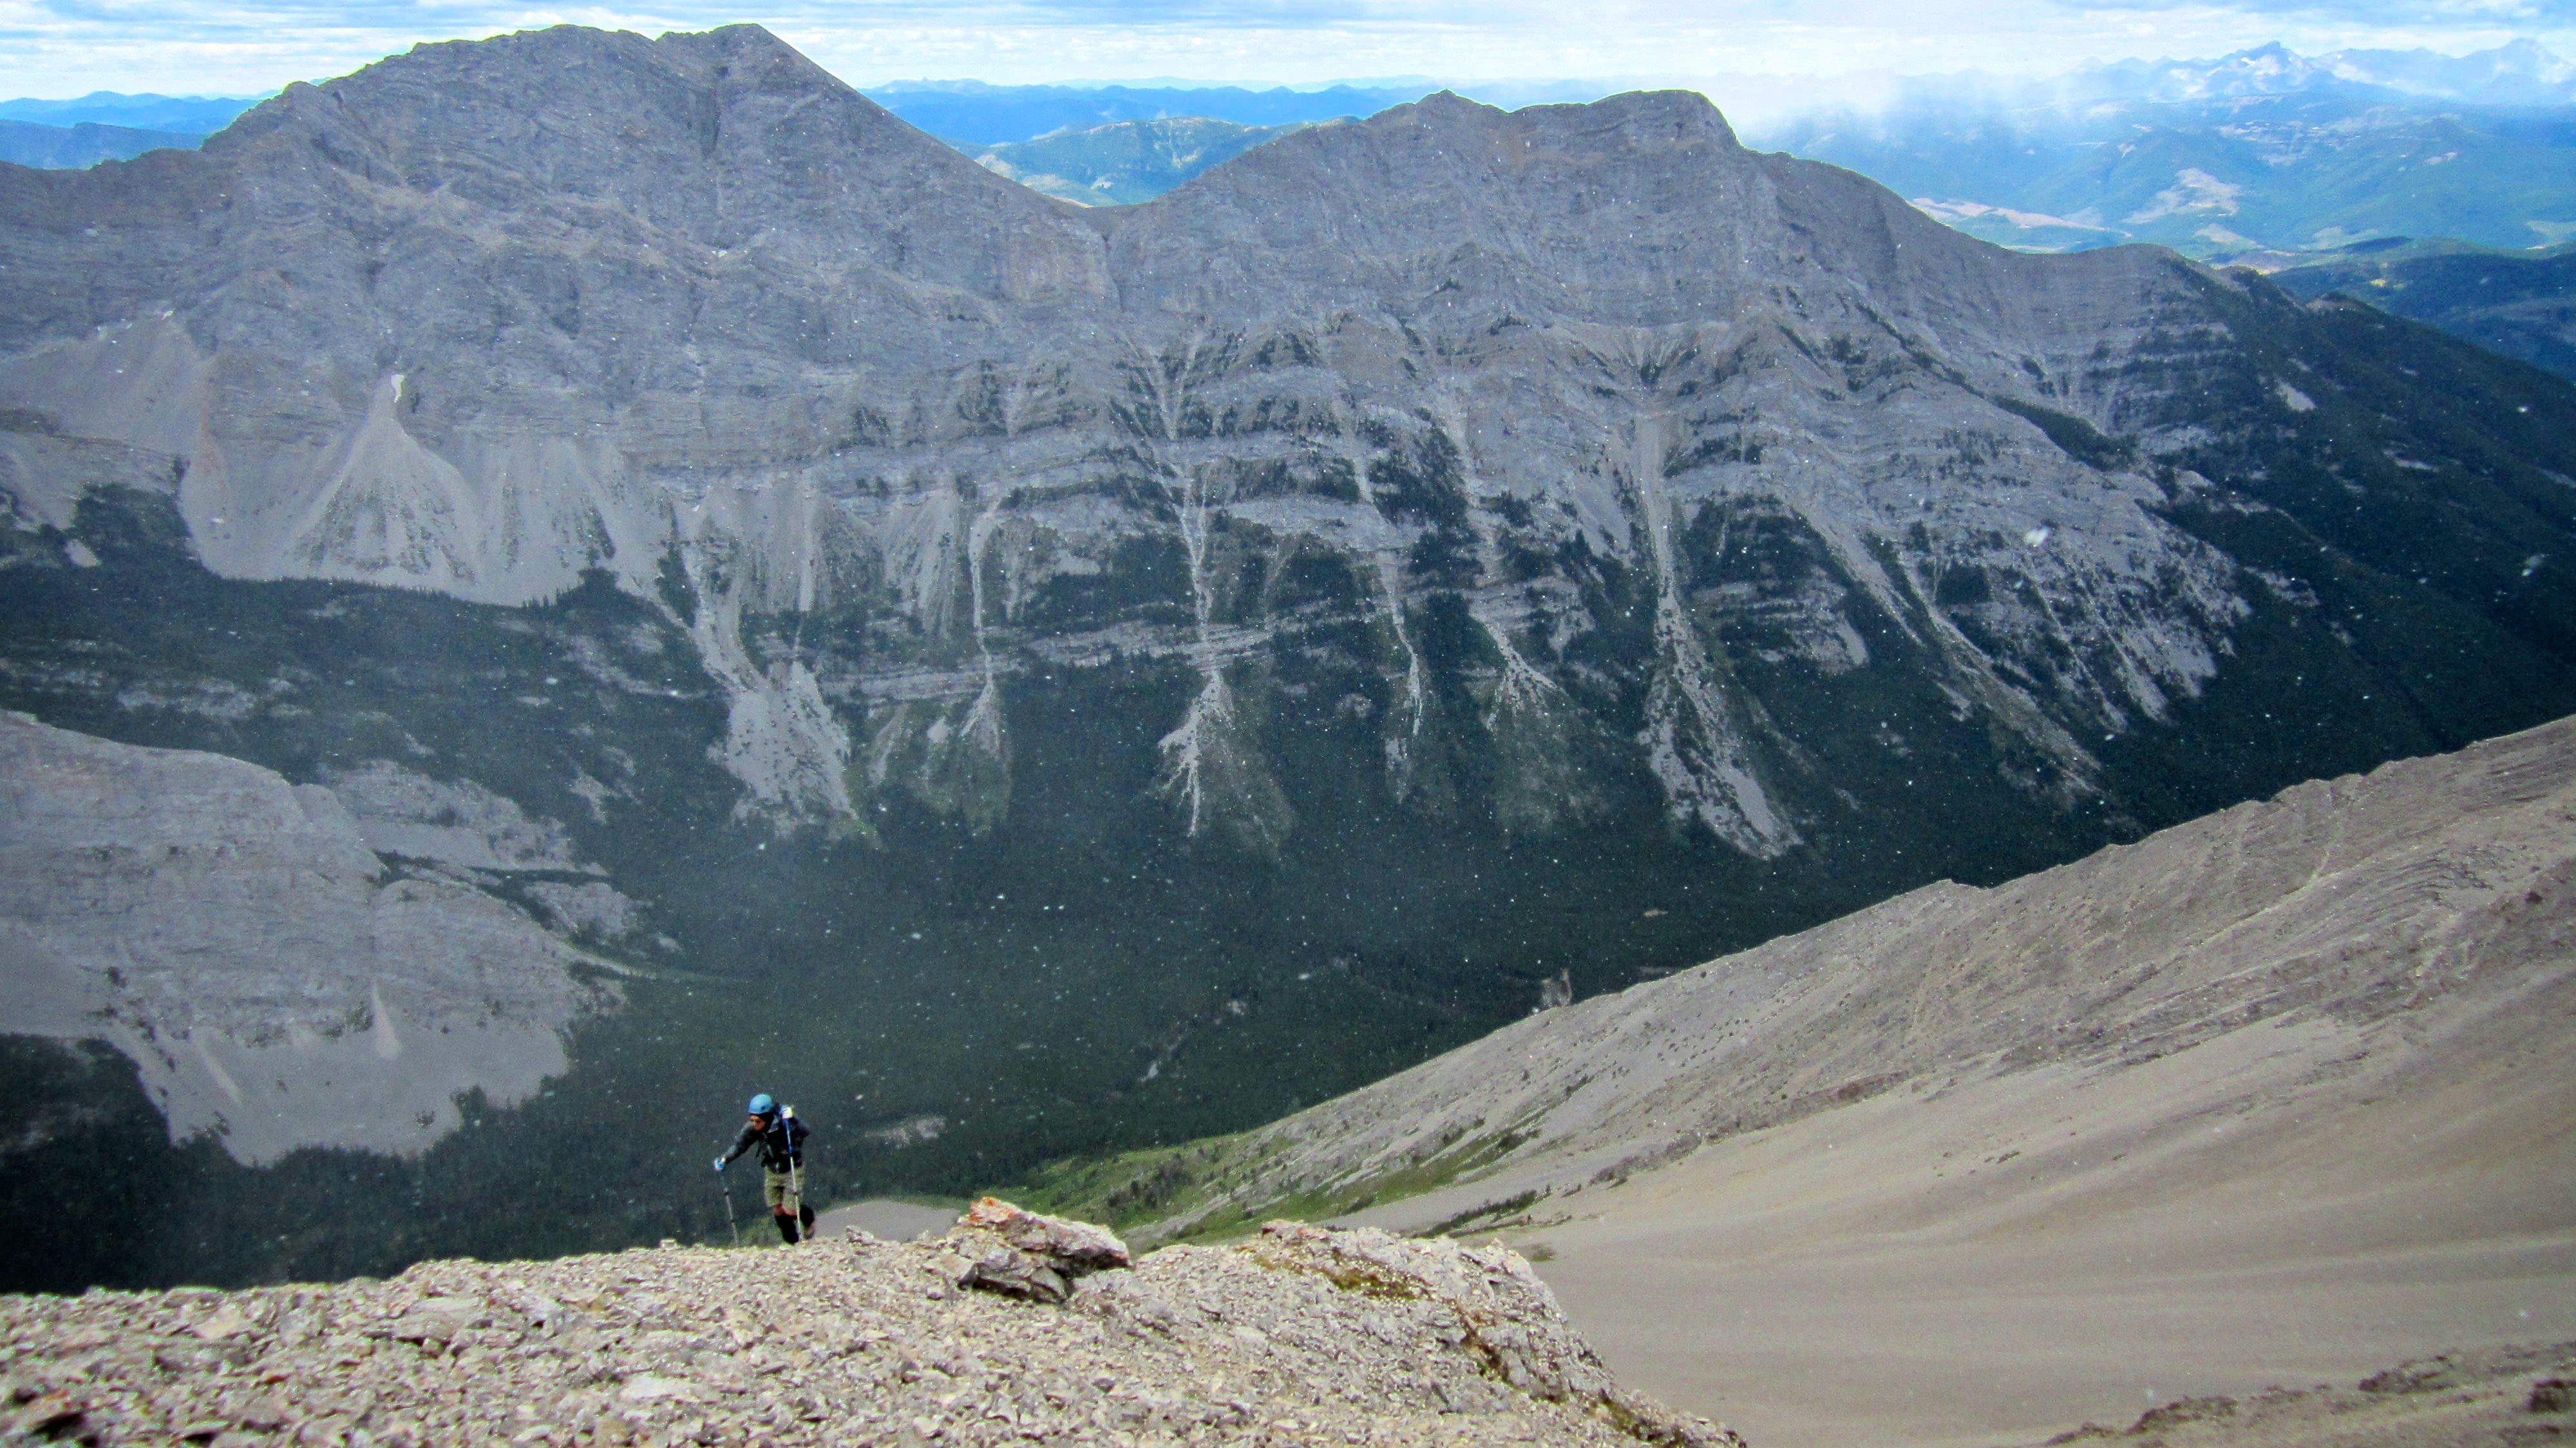
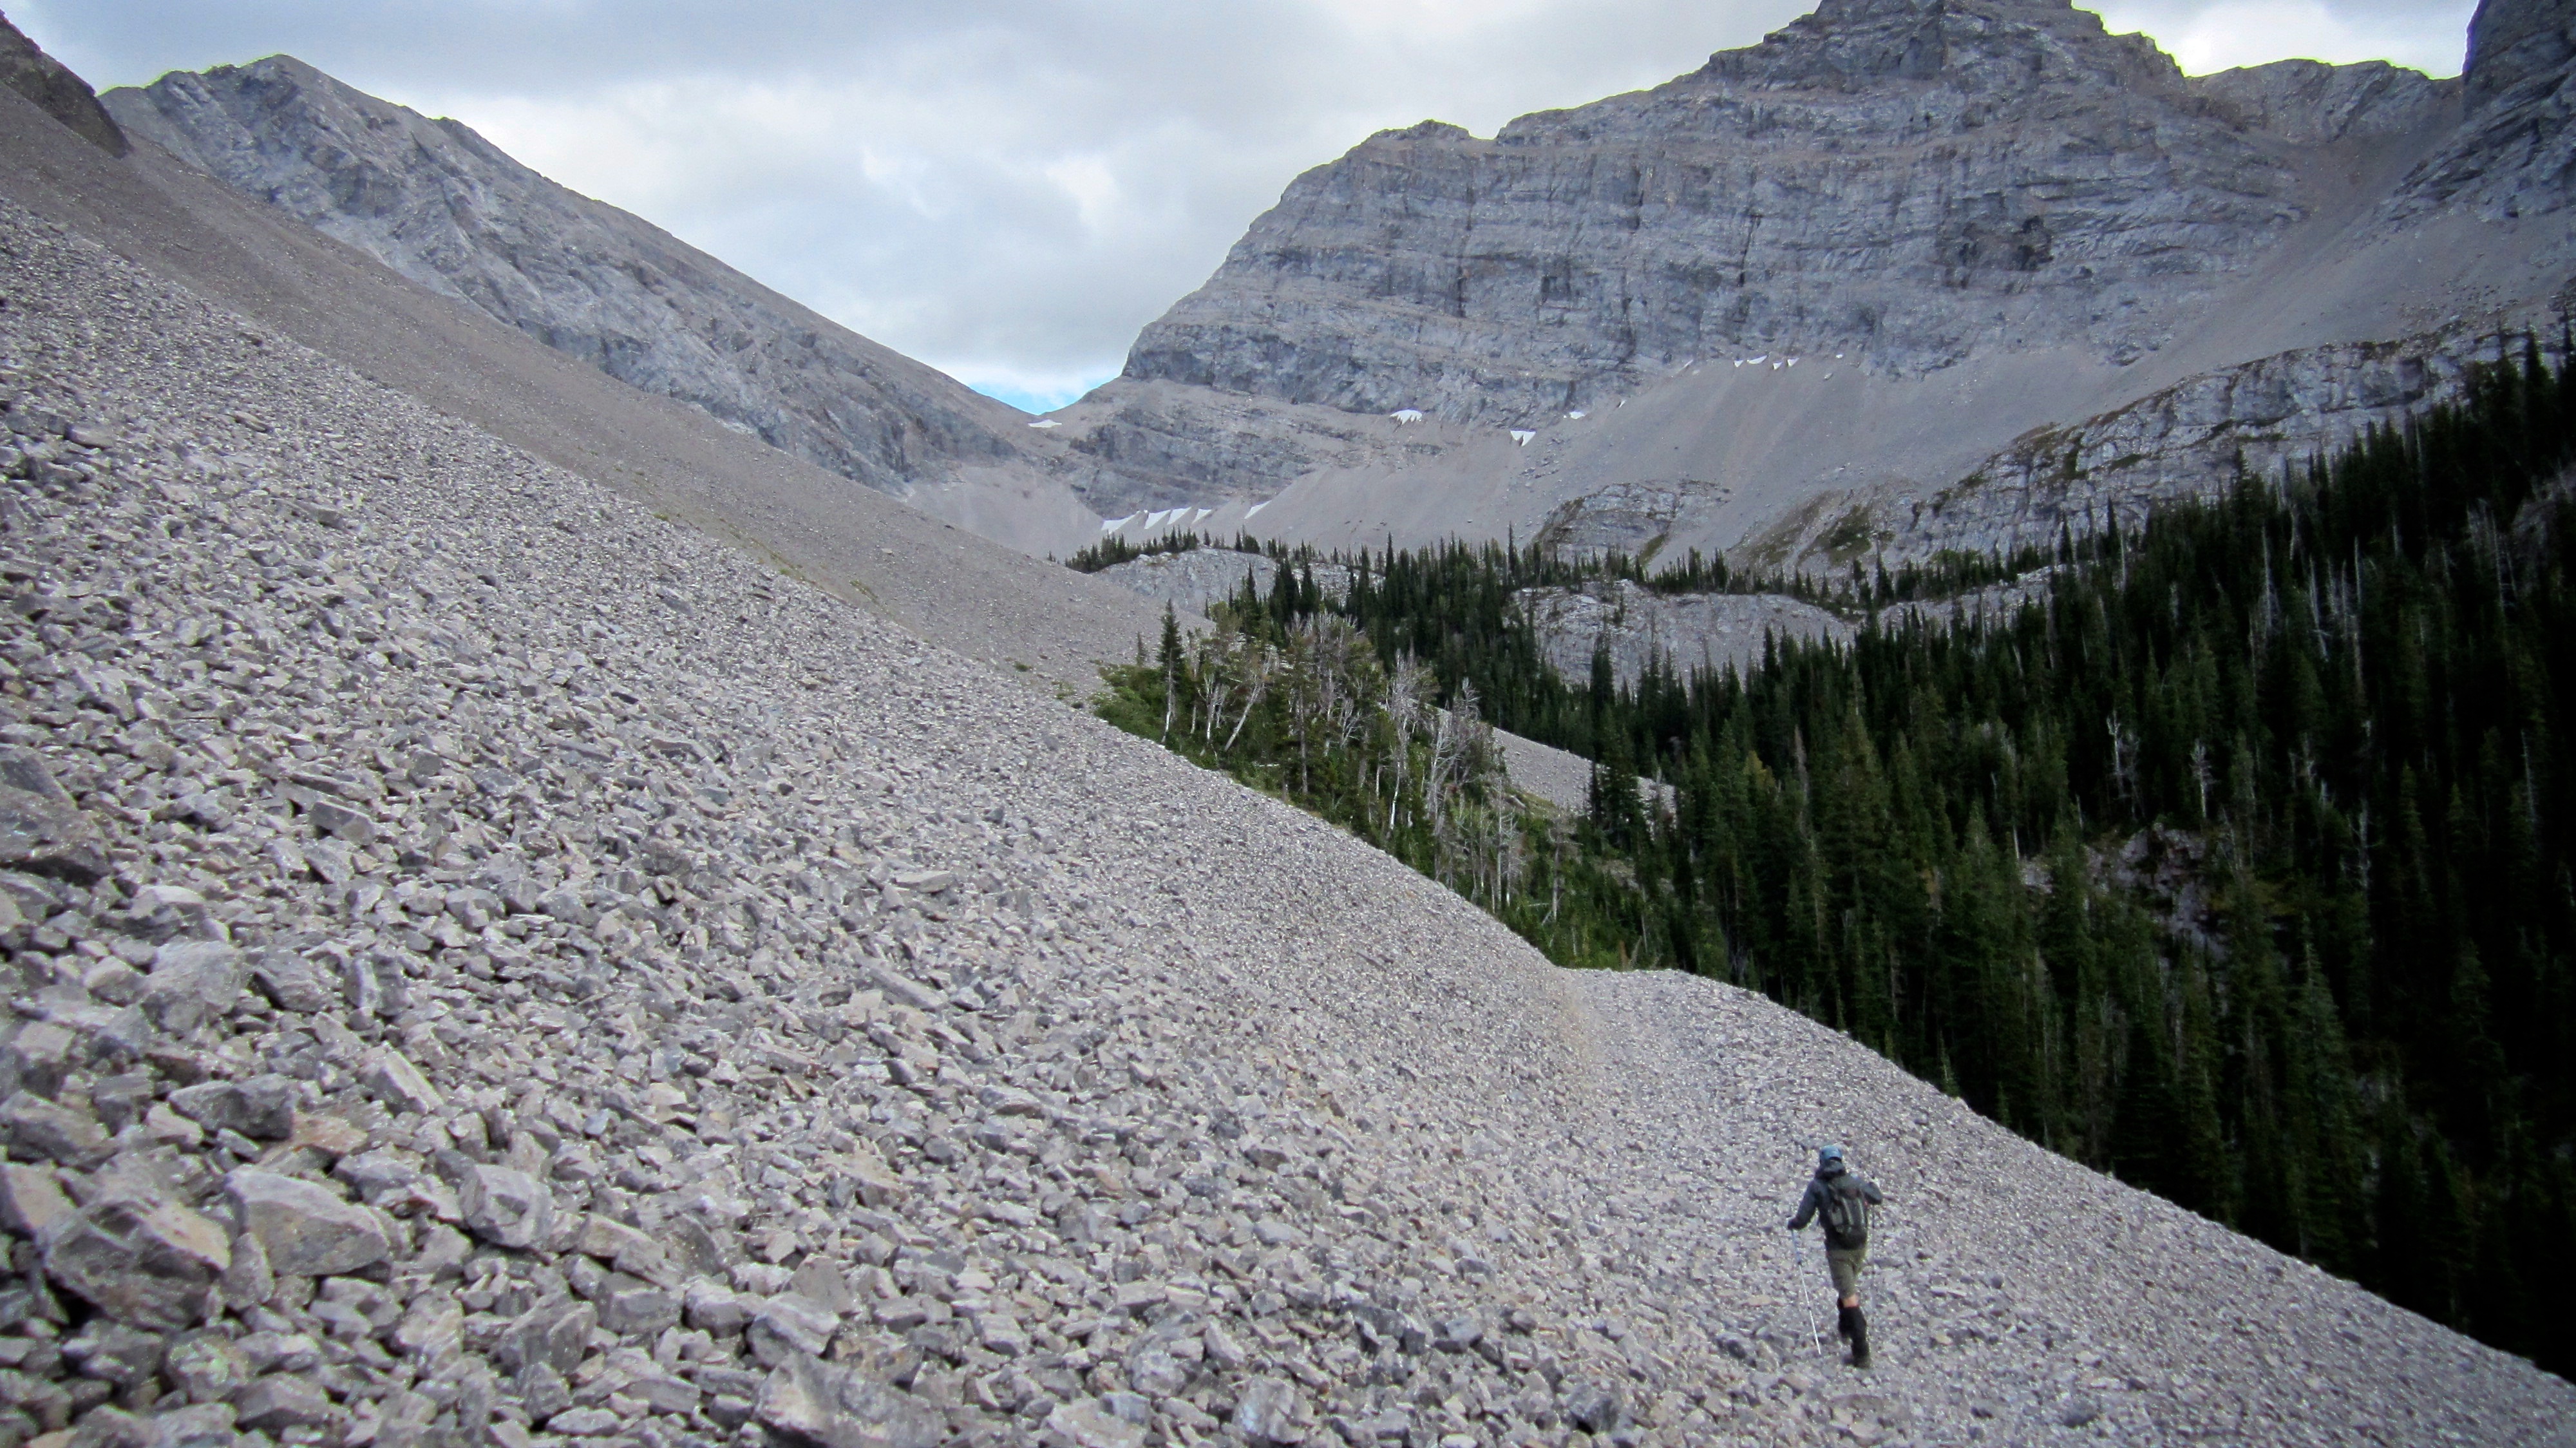
Marc hikes up the increasingly steep slope.

From a distance this looked like it would be better than the treadmill scree. Once we got close it became clear that we were wrong.

The rock we encountered on the way to the SE ridge was terrible, however, once we had committed we were in it for the duration. We spent a long time route finding and backtracking, but we eventually found a safe way to the top. (Photo by Marc Greidanus)

The only solid rock that we came across was on the right side of this shallow gully. We used this for a while to make our way up.

Marc eyes up the situation. 😉 (Photo by Marc Greidanus)
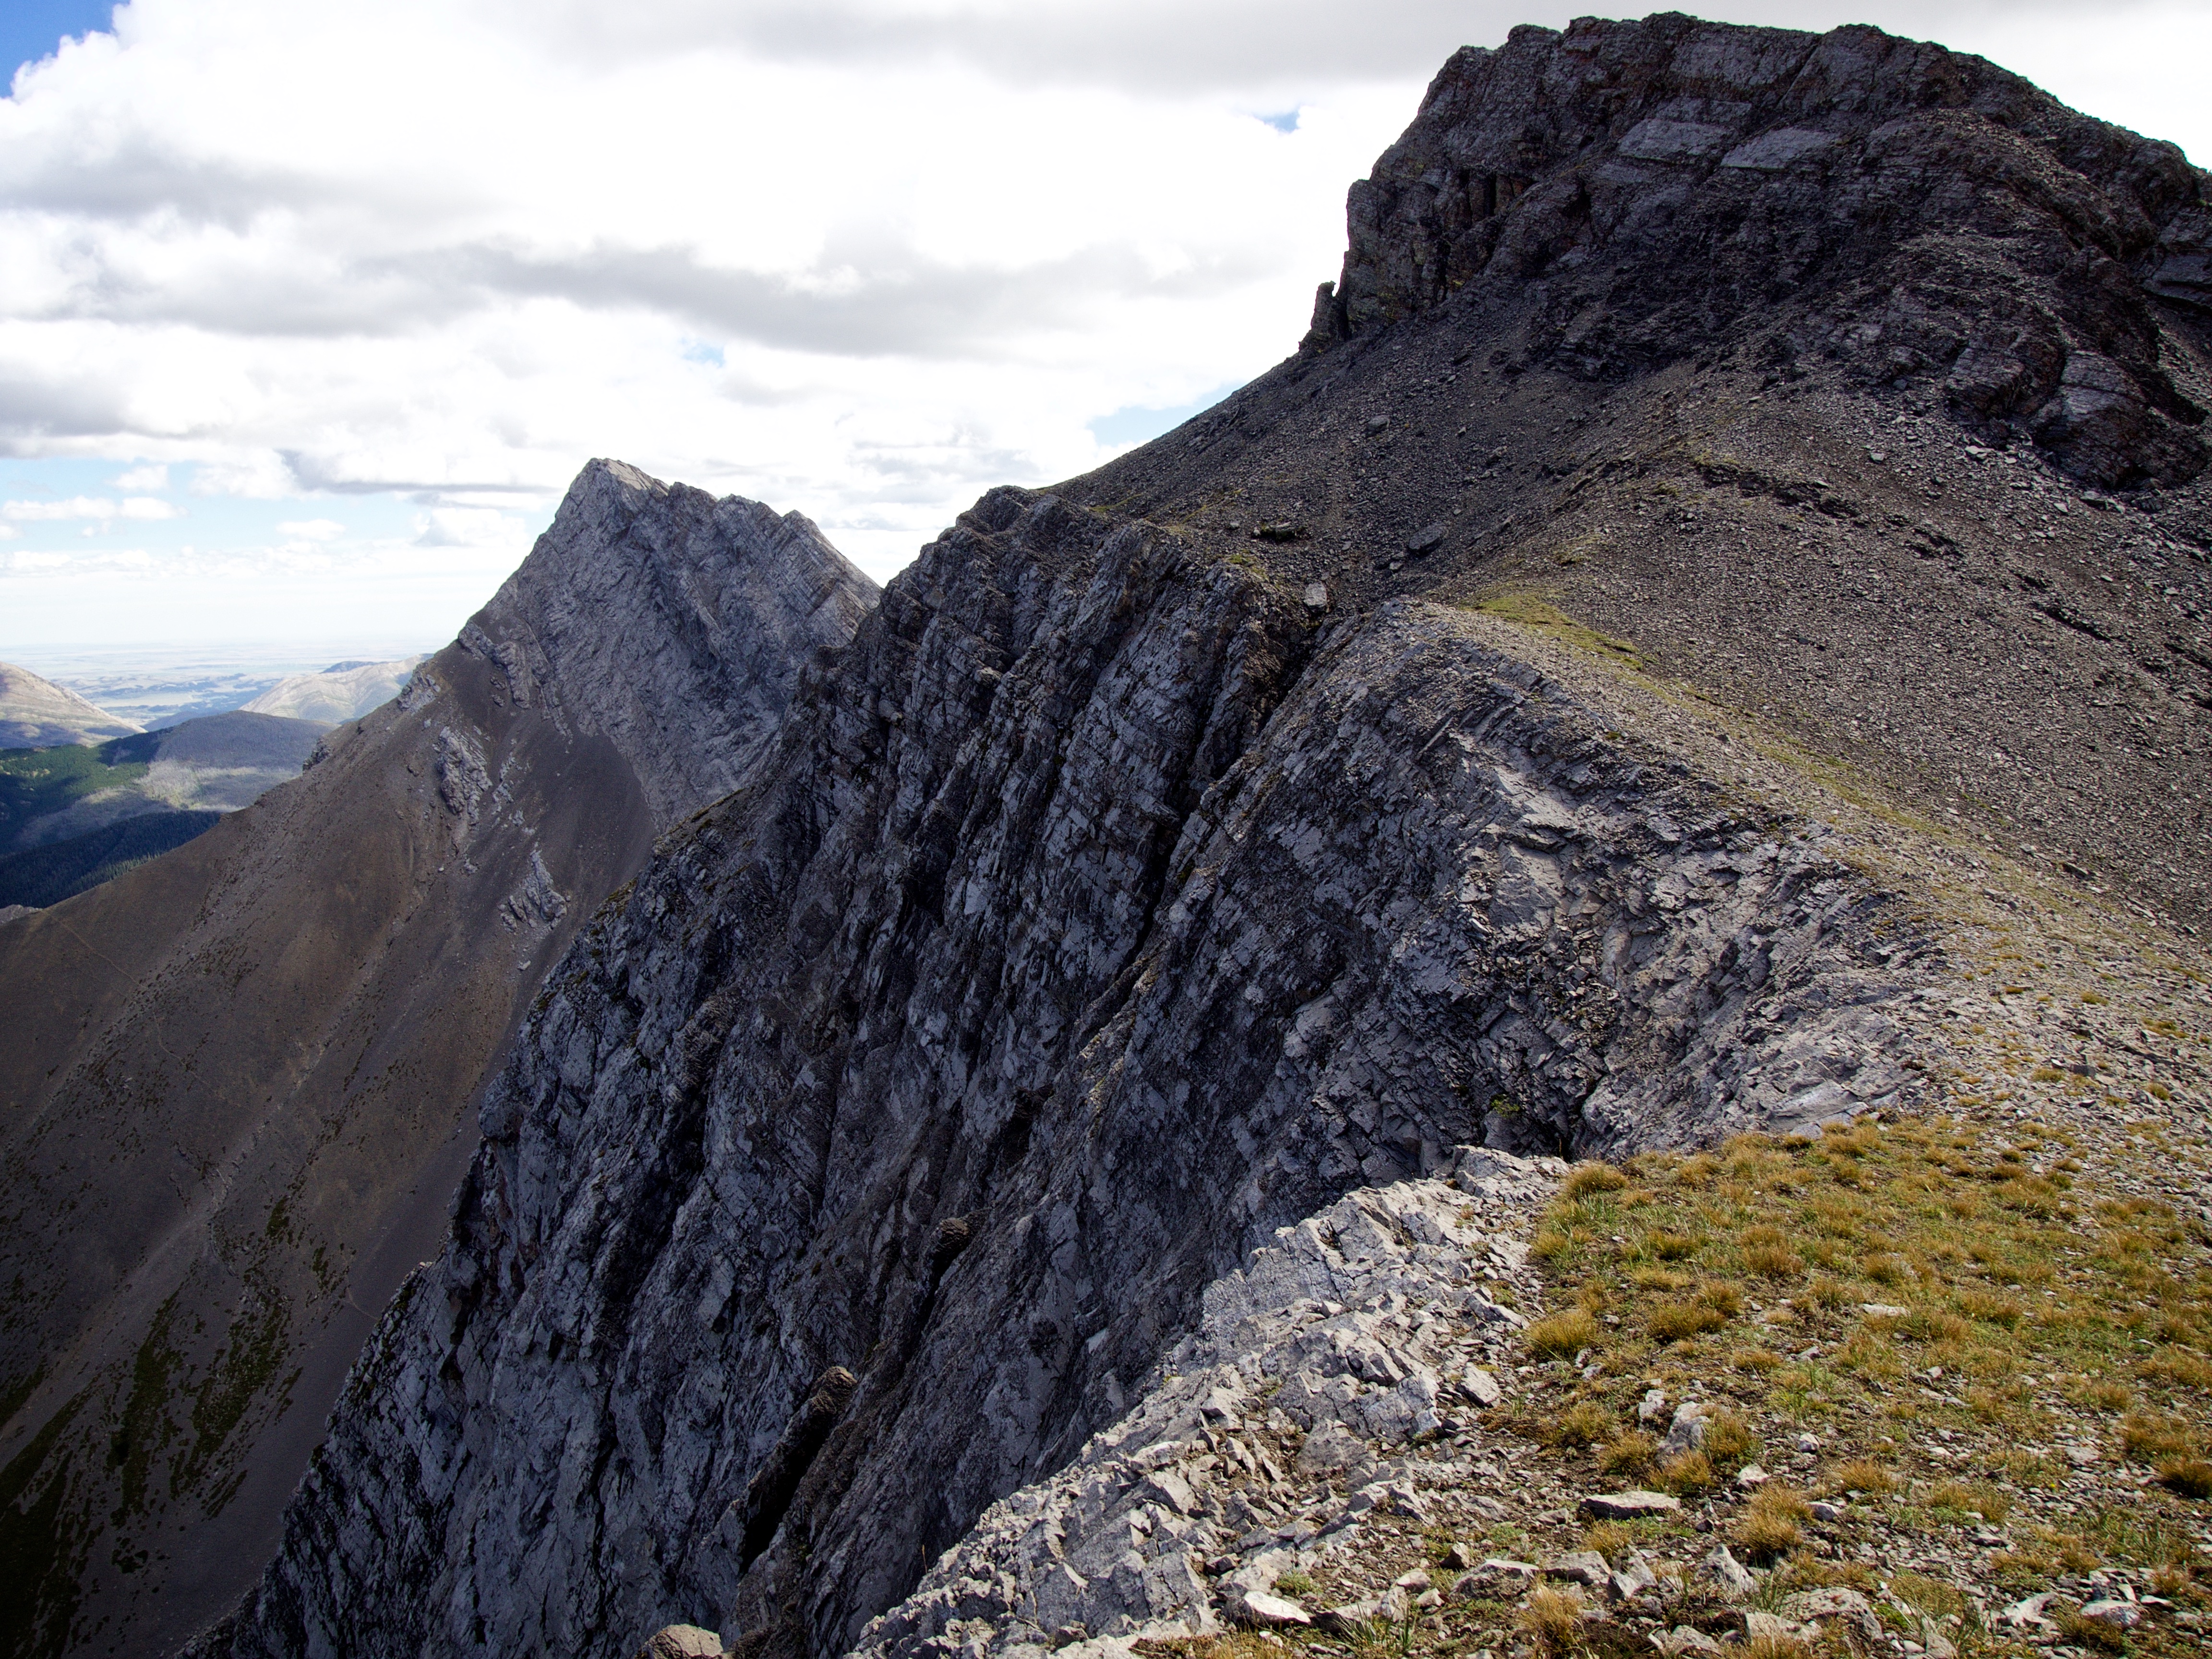
Almost at the top of the SE ridge. The summit block is on the left.
Marc endures intense wind and snow as he approaches the crest of the SE ridge.
Finally on the ridge! (Photo by Marc Greidanus)

Mount Ptolemy looms in the distance.
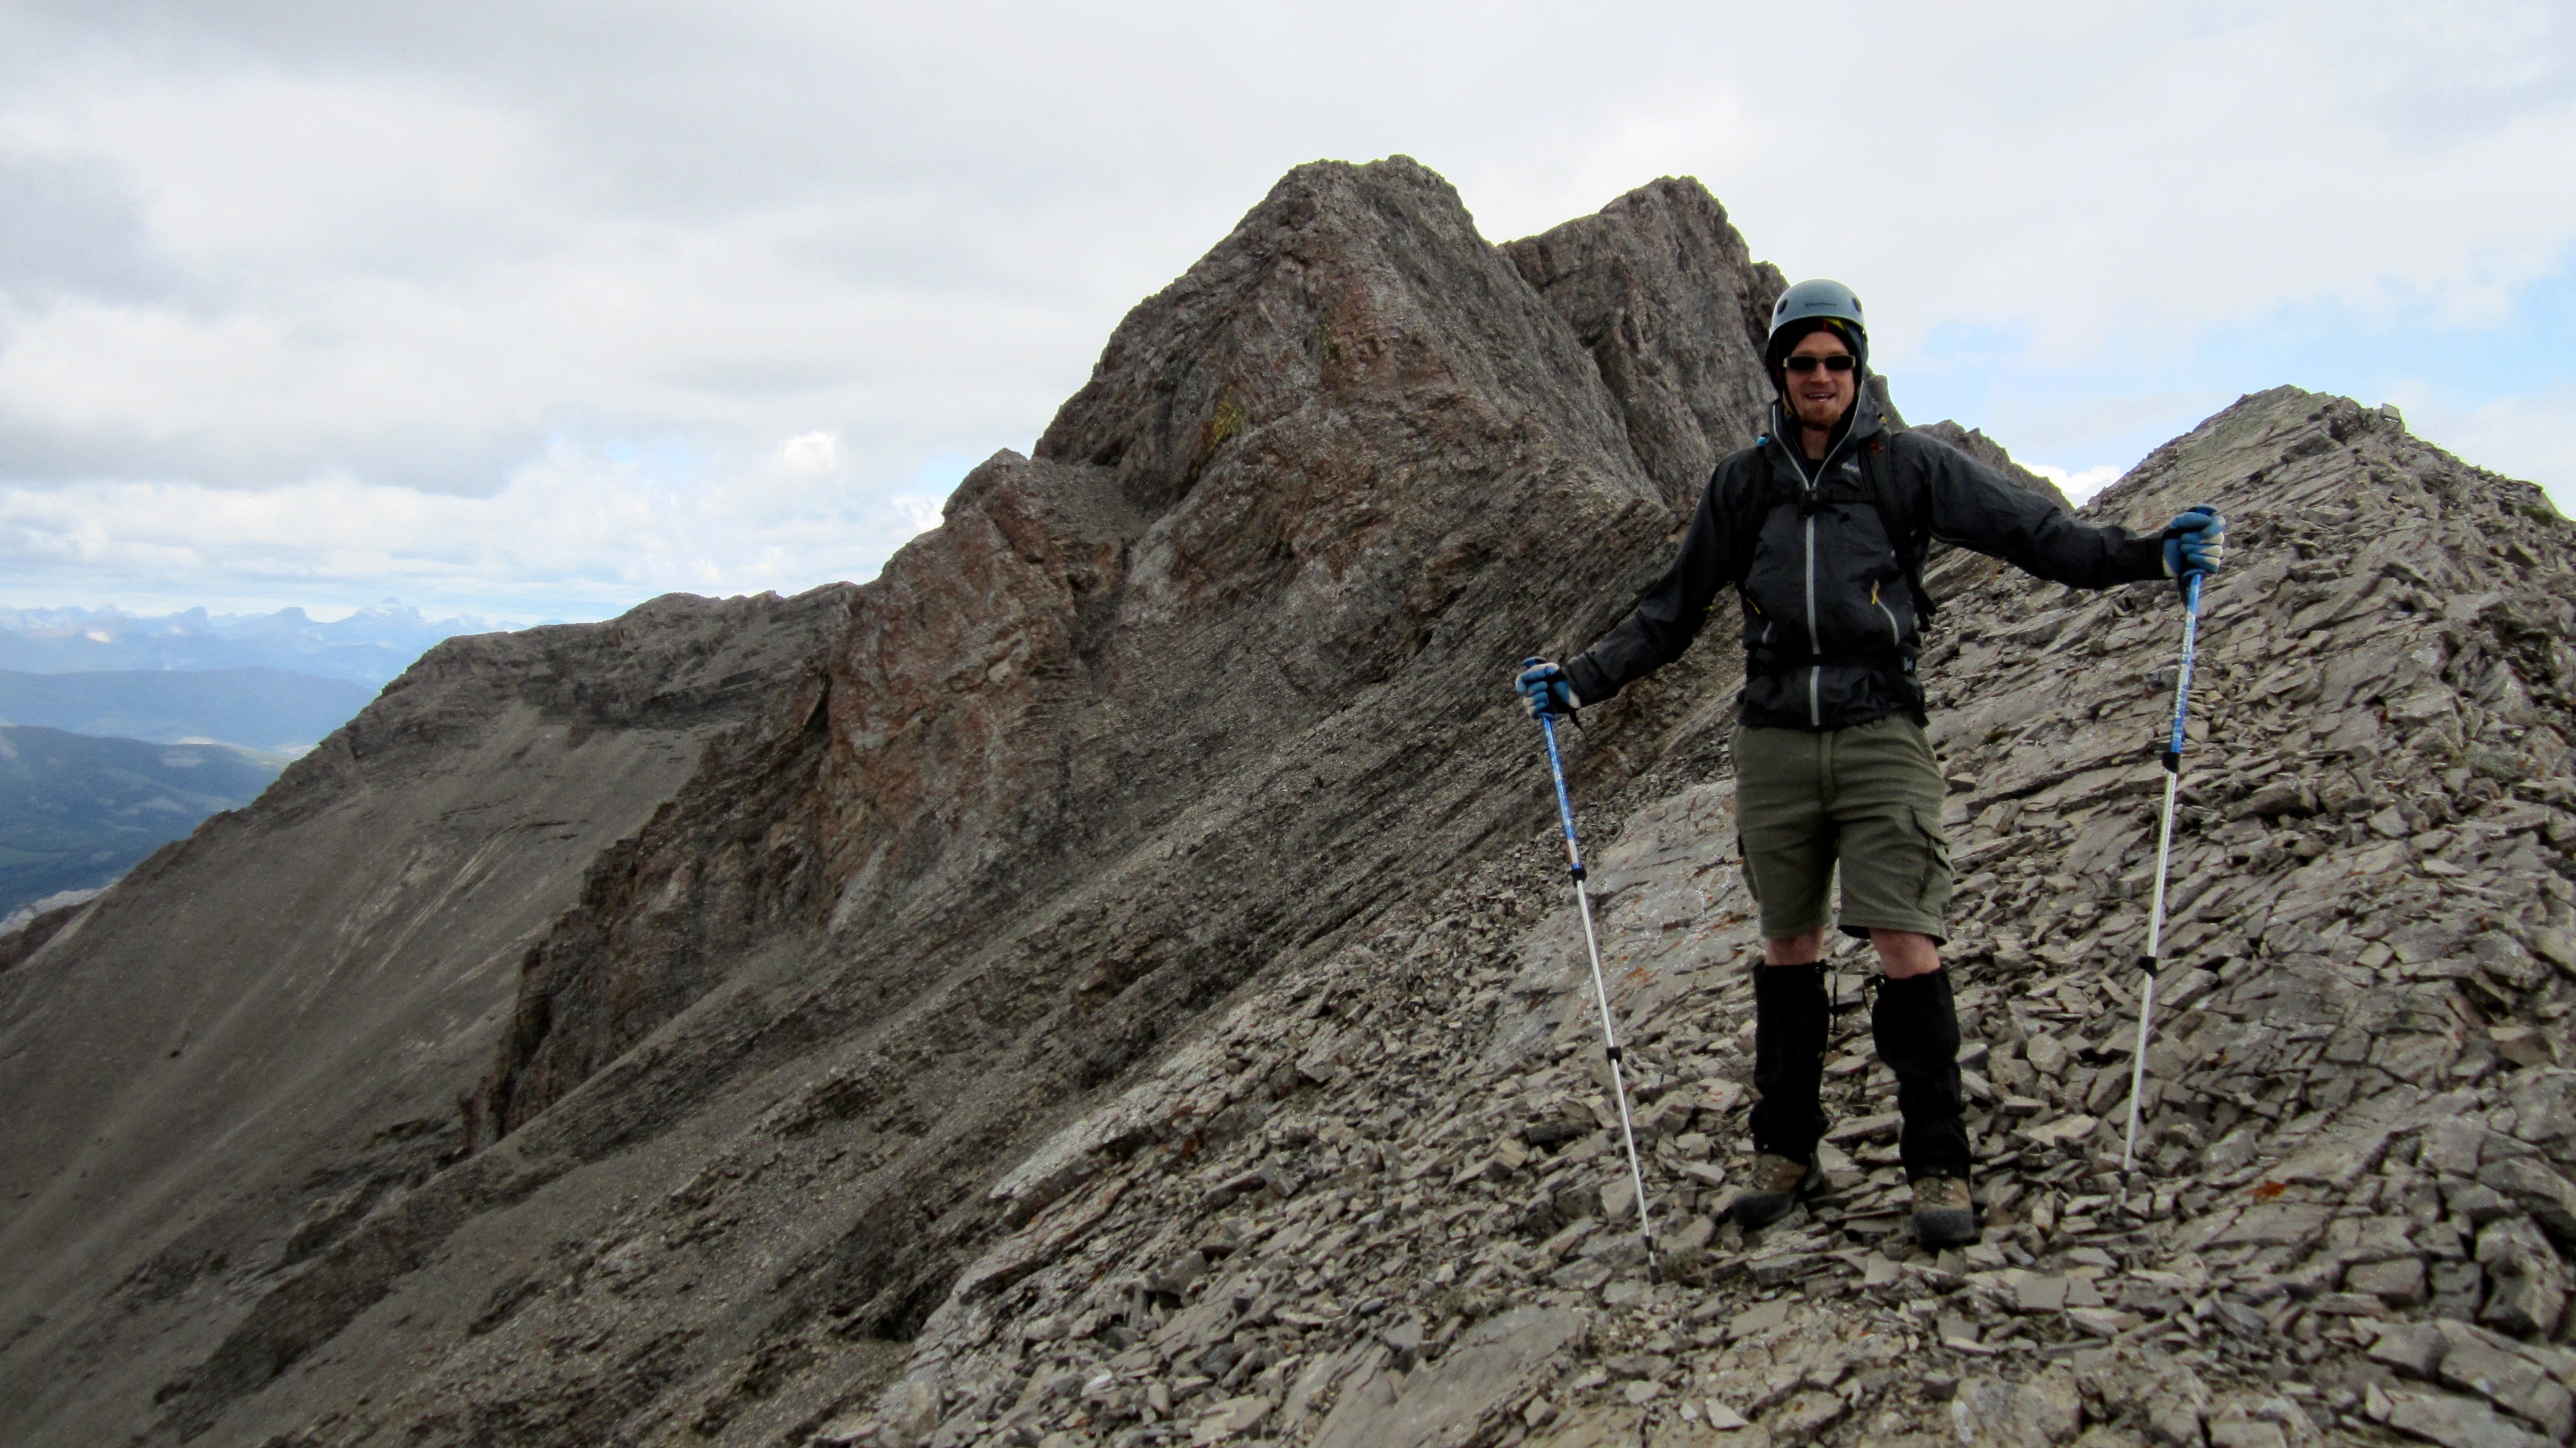
Marc poses for an ‘almost summit’ picture. The actual summit is in the background.

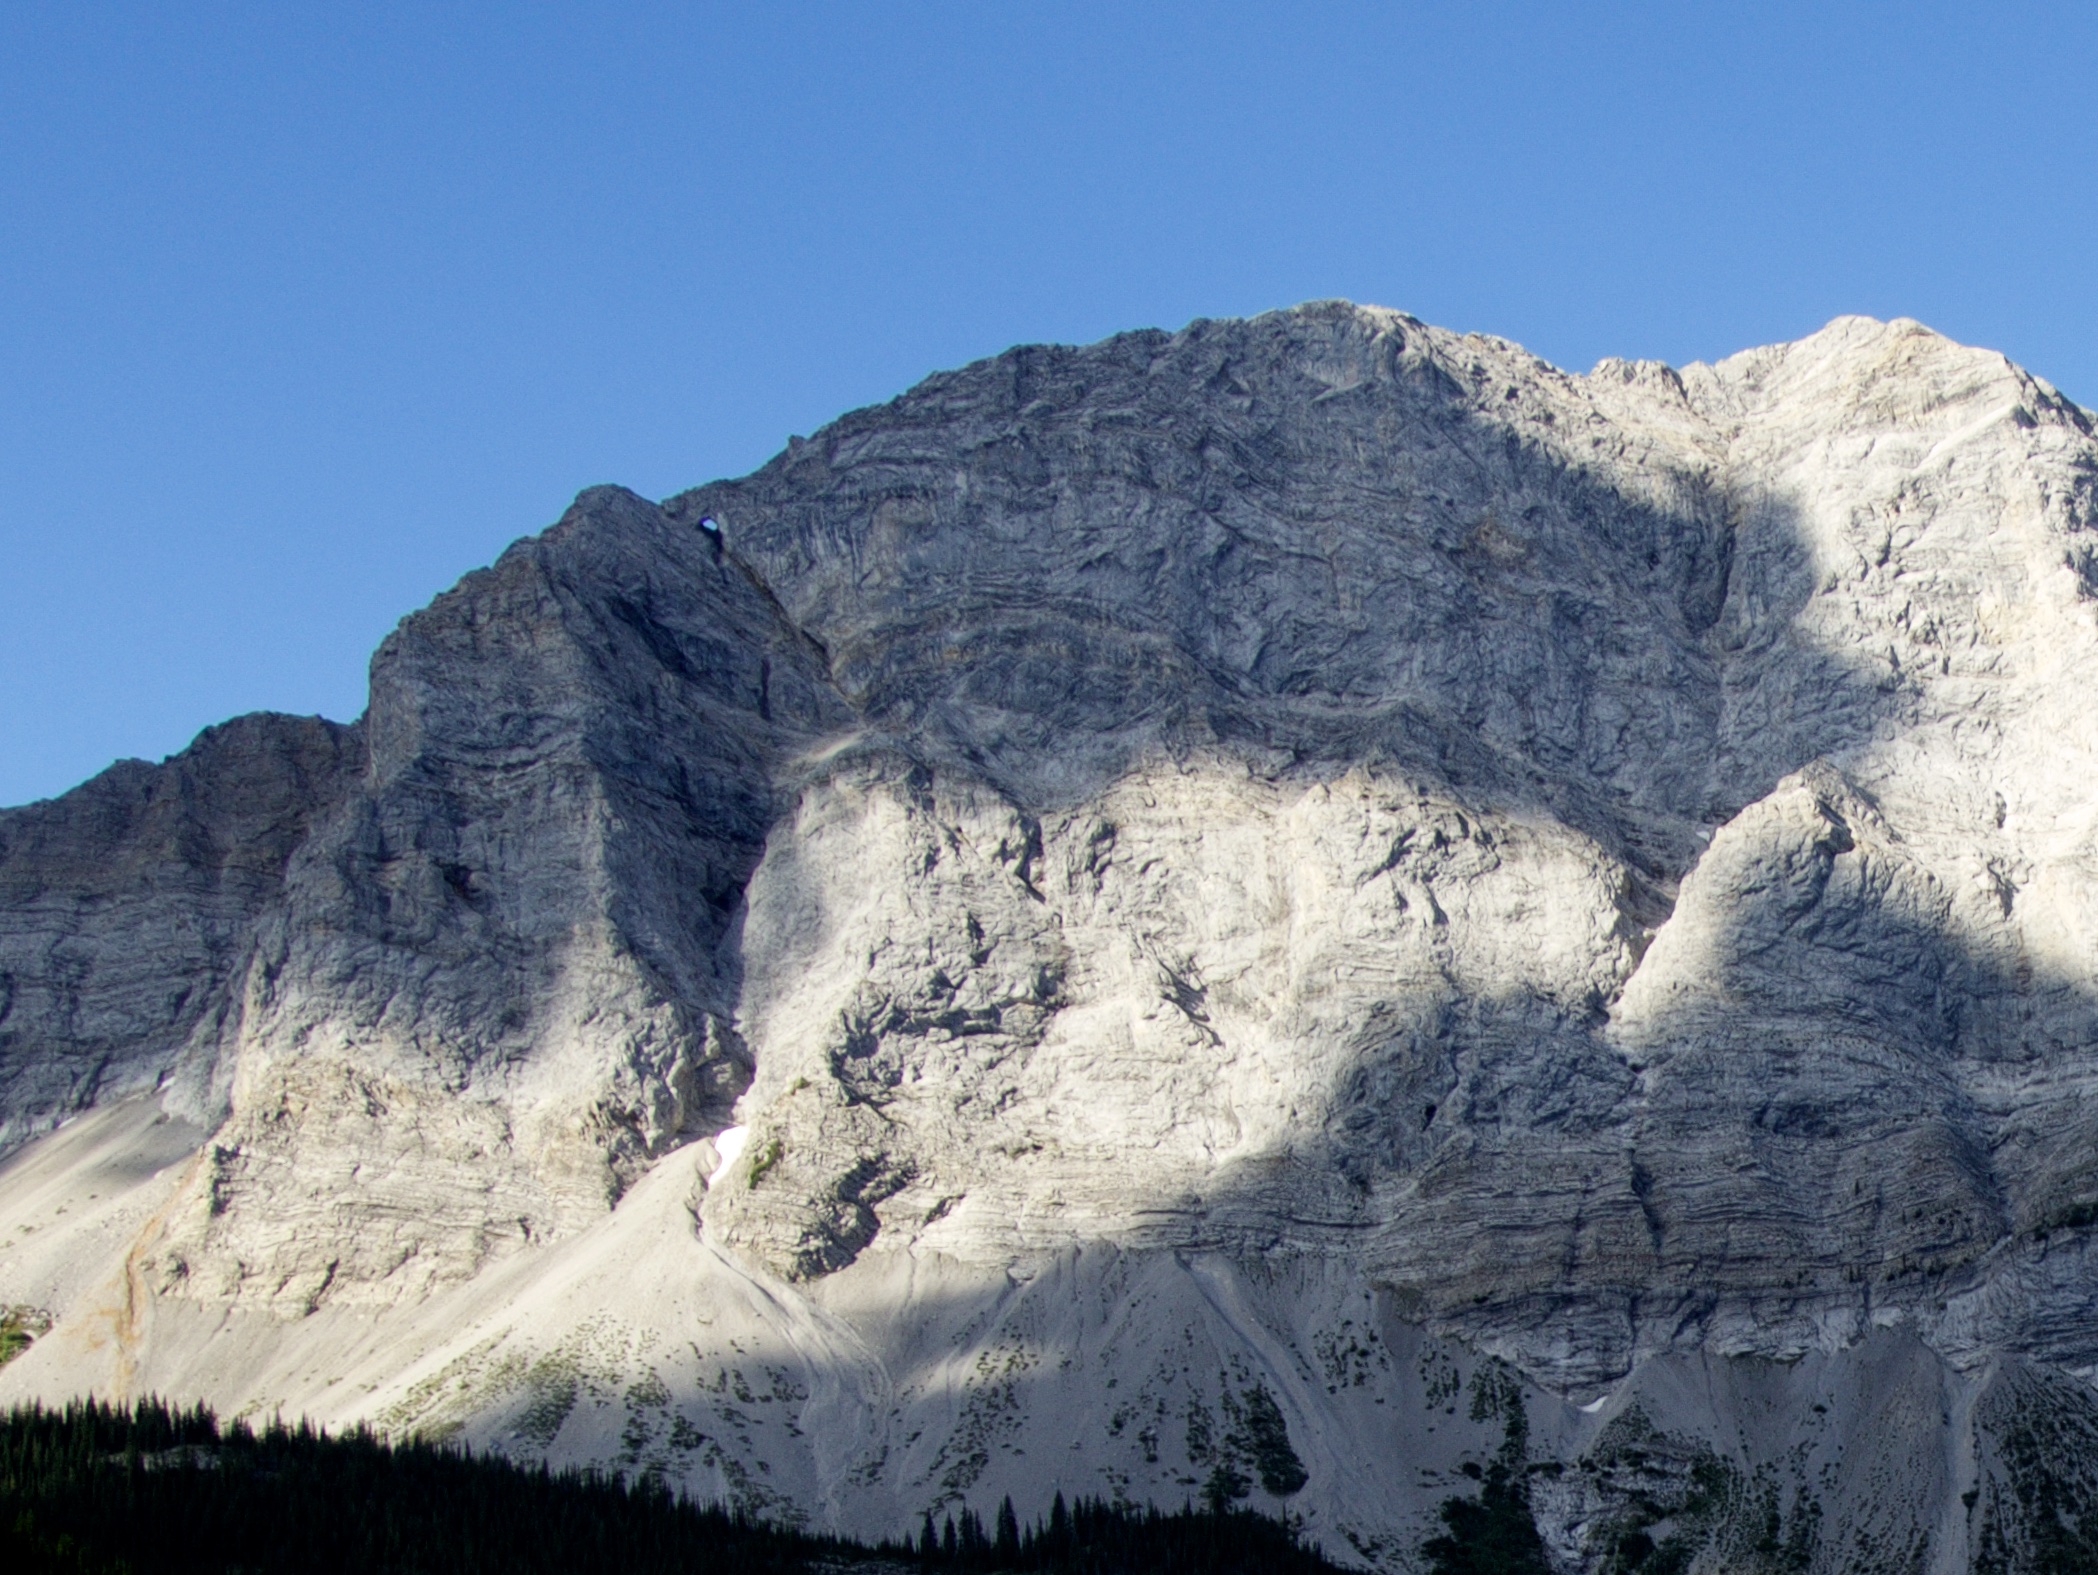
Standing at the base of the summit (2606m, right of centre). The highest point we reached was 2584m, which means that we were shy by 22 vertical metres over a hiking distance of approximately 187 metres. We were so close!!! However, though it might look tempting to some, there is no way that I would even try to scramble up from here. The rock literally pulls out of the mountain when you touch it and the exposure is unforgiving.

The east face of the summit from our lunch spot.
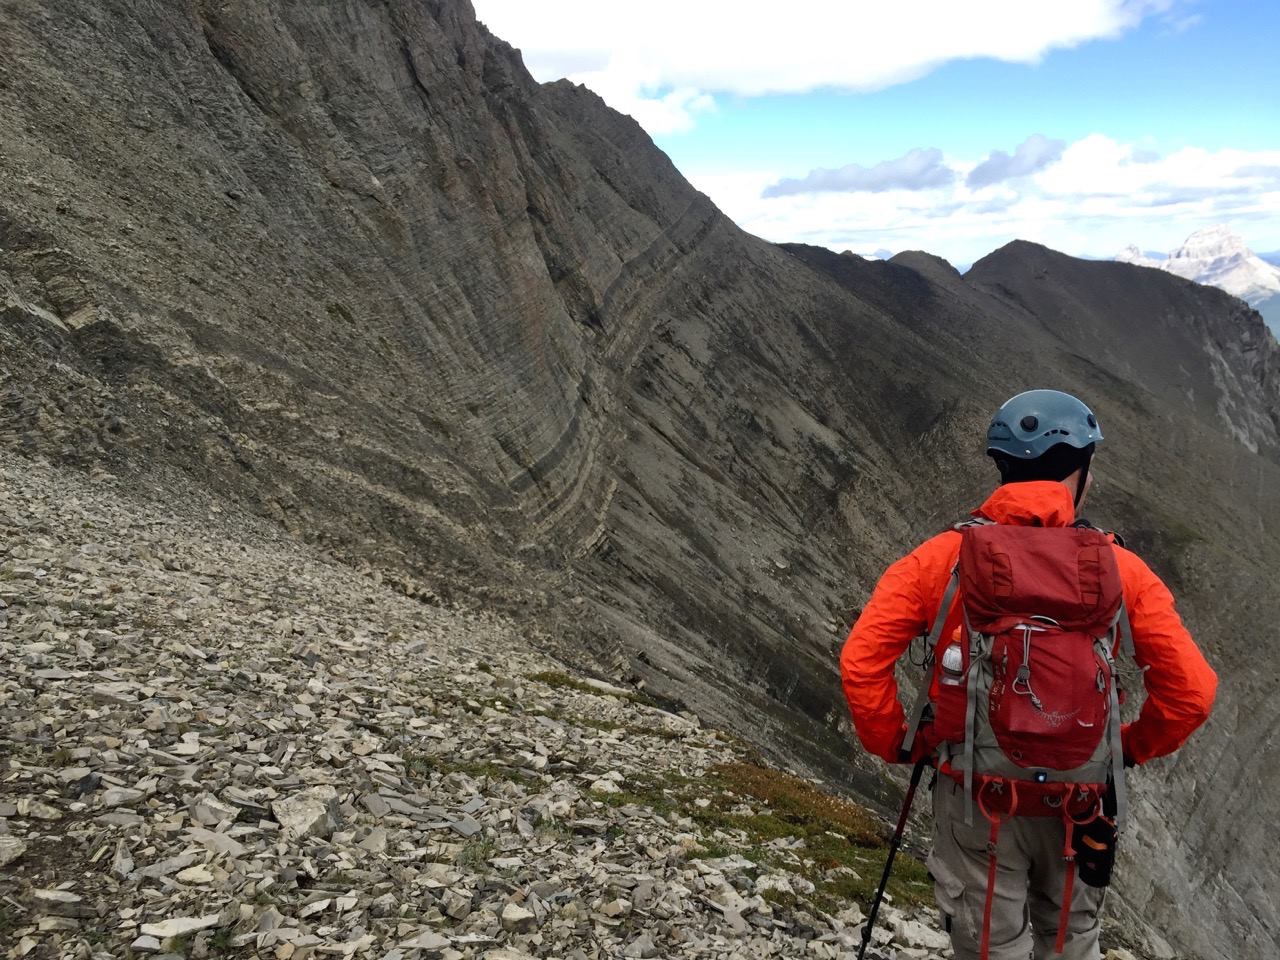
I searched in vain for a goat trail that would take us over to the NW ridge.

The views from beneath the summit were still impressive. In the centre is Crowsnest Mountain and to its right are “Vicary Creek Ridge”, Ma Butte, and McGillivray Ridge.

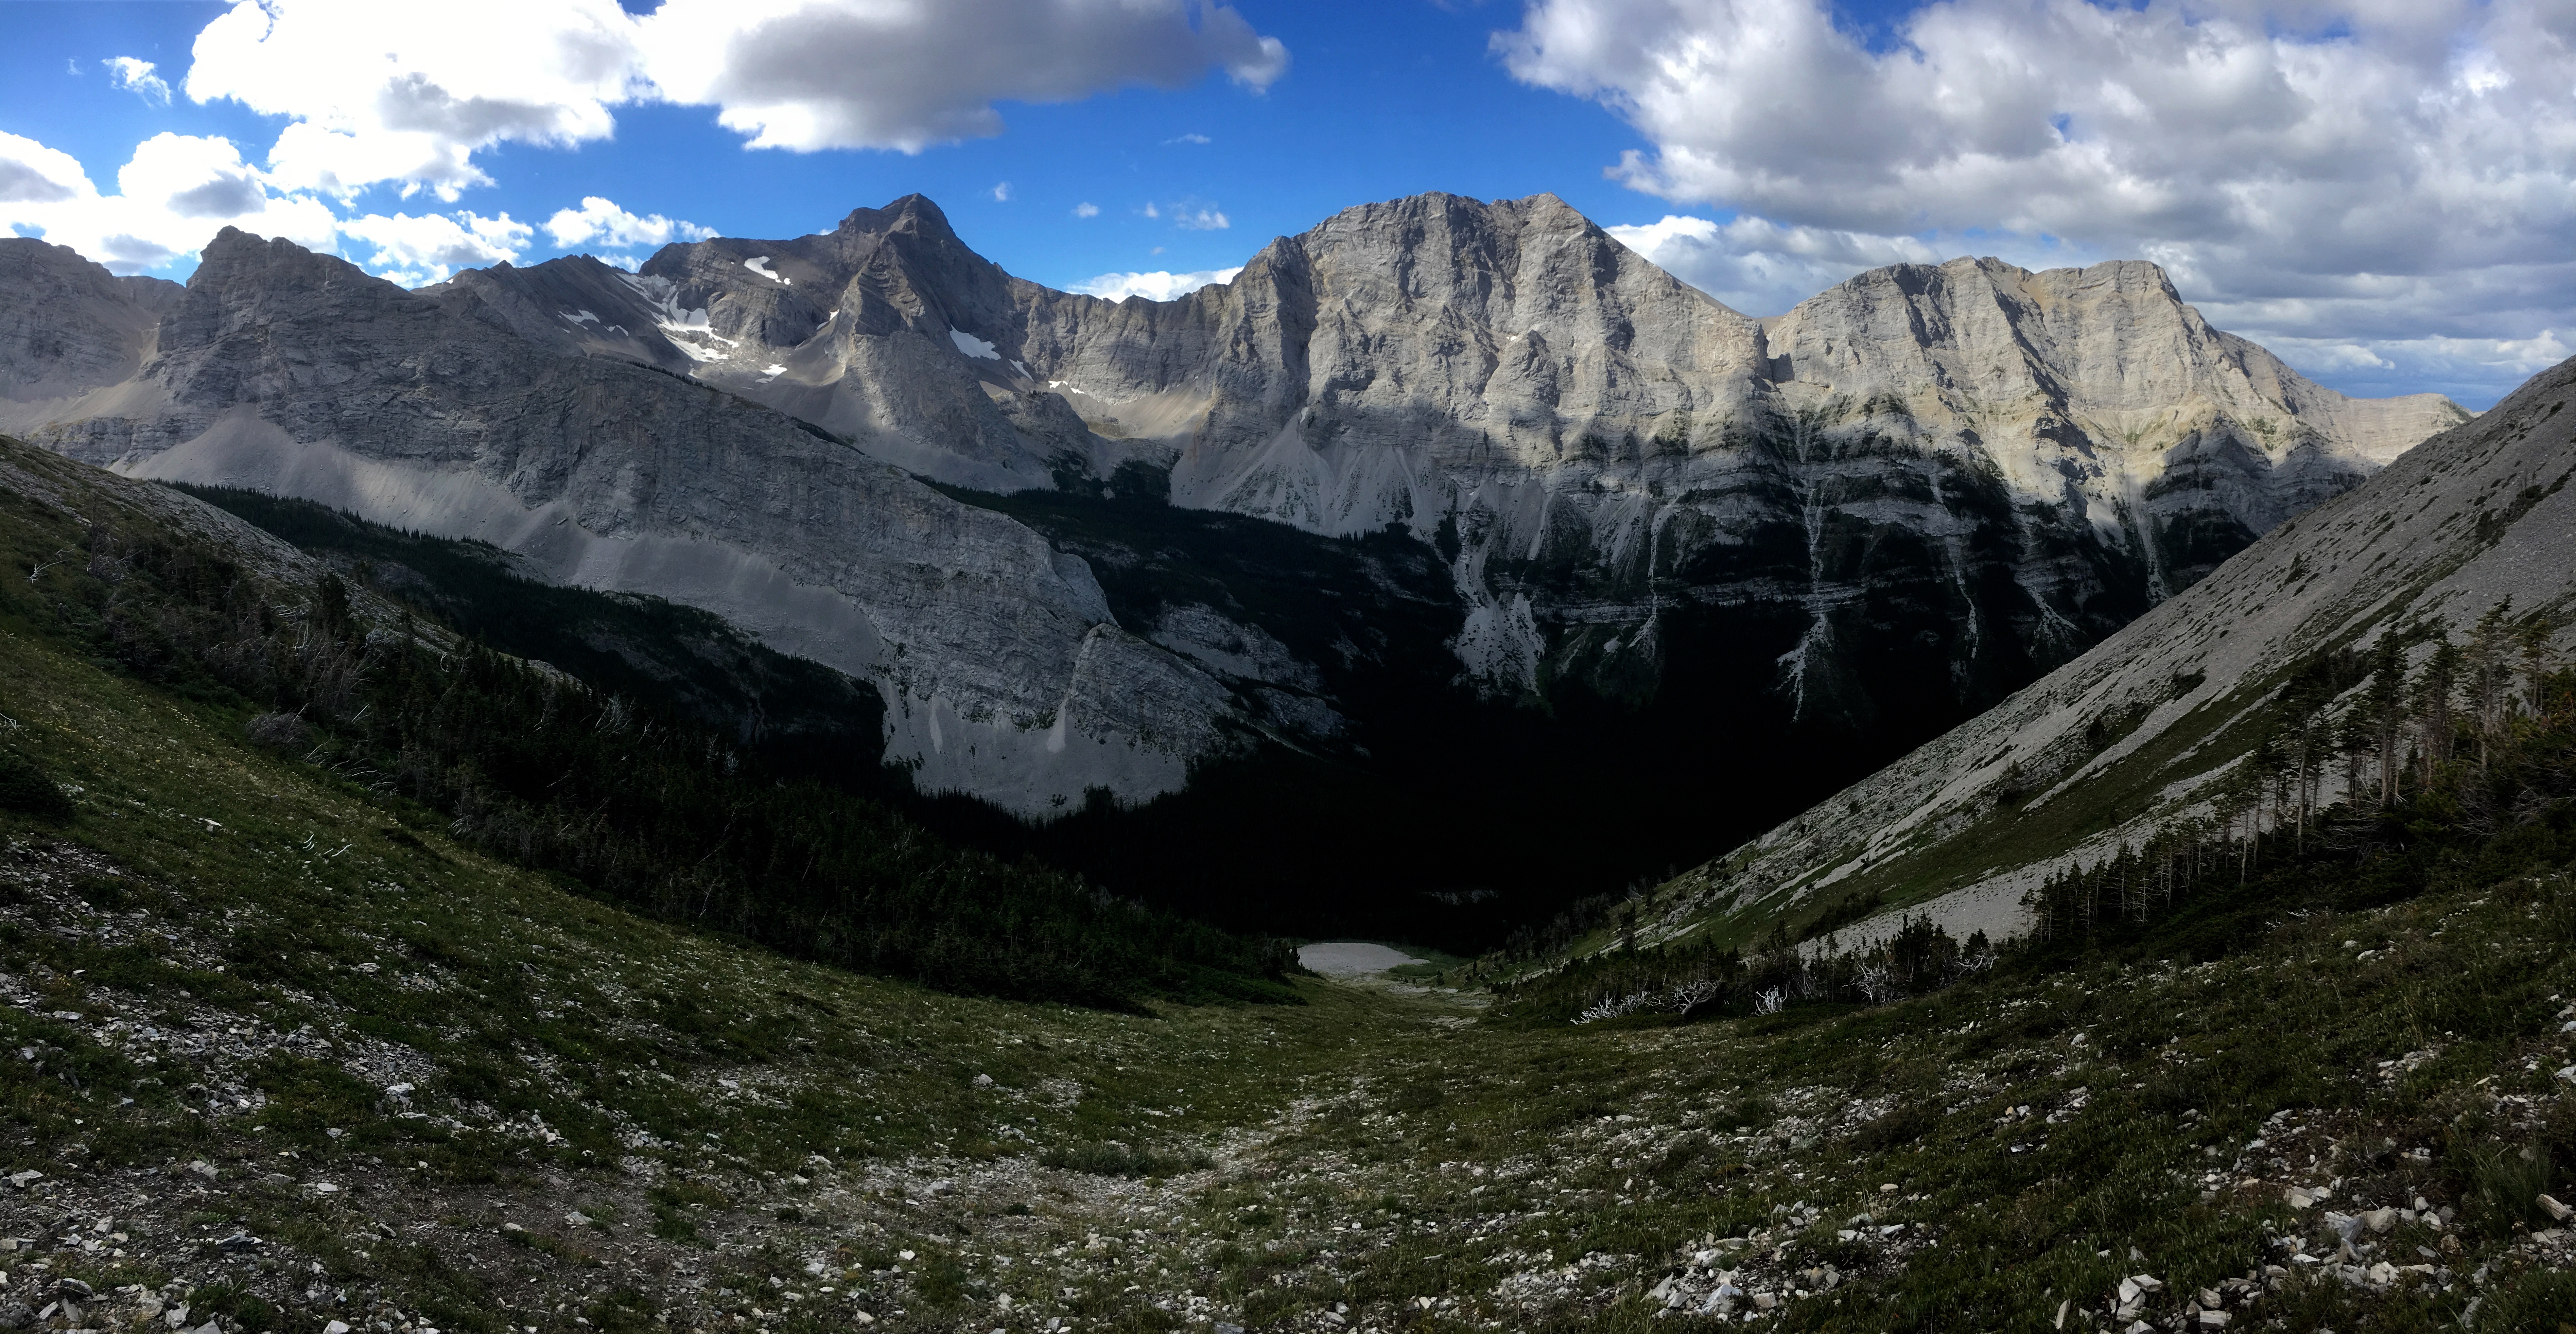
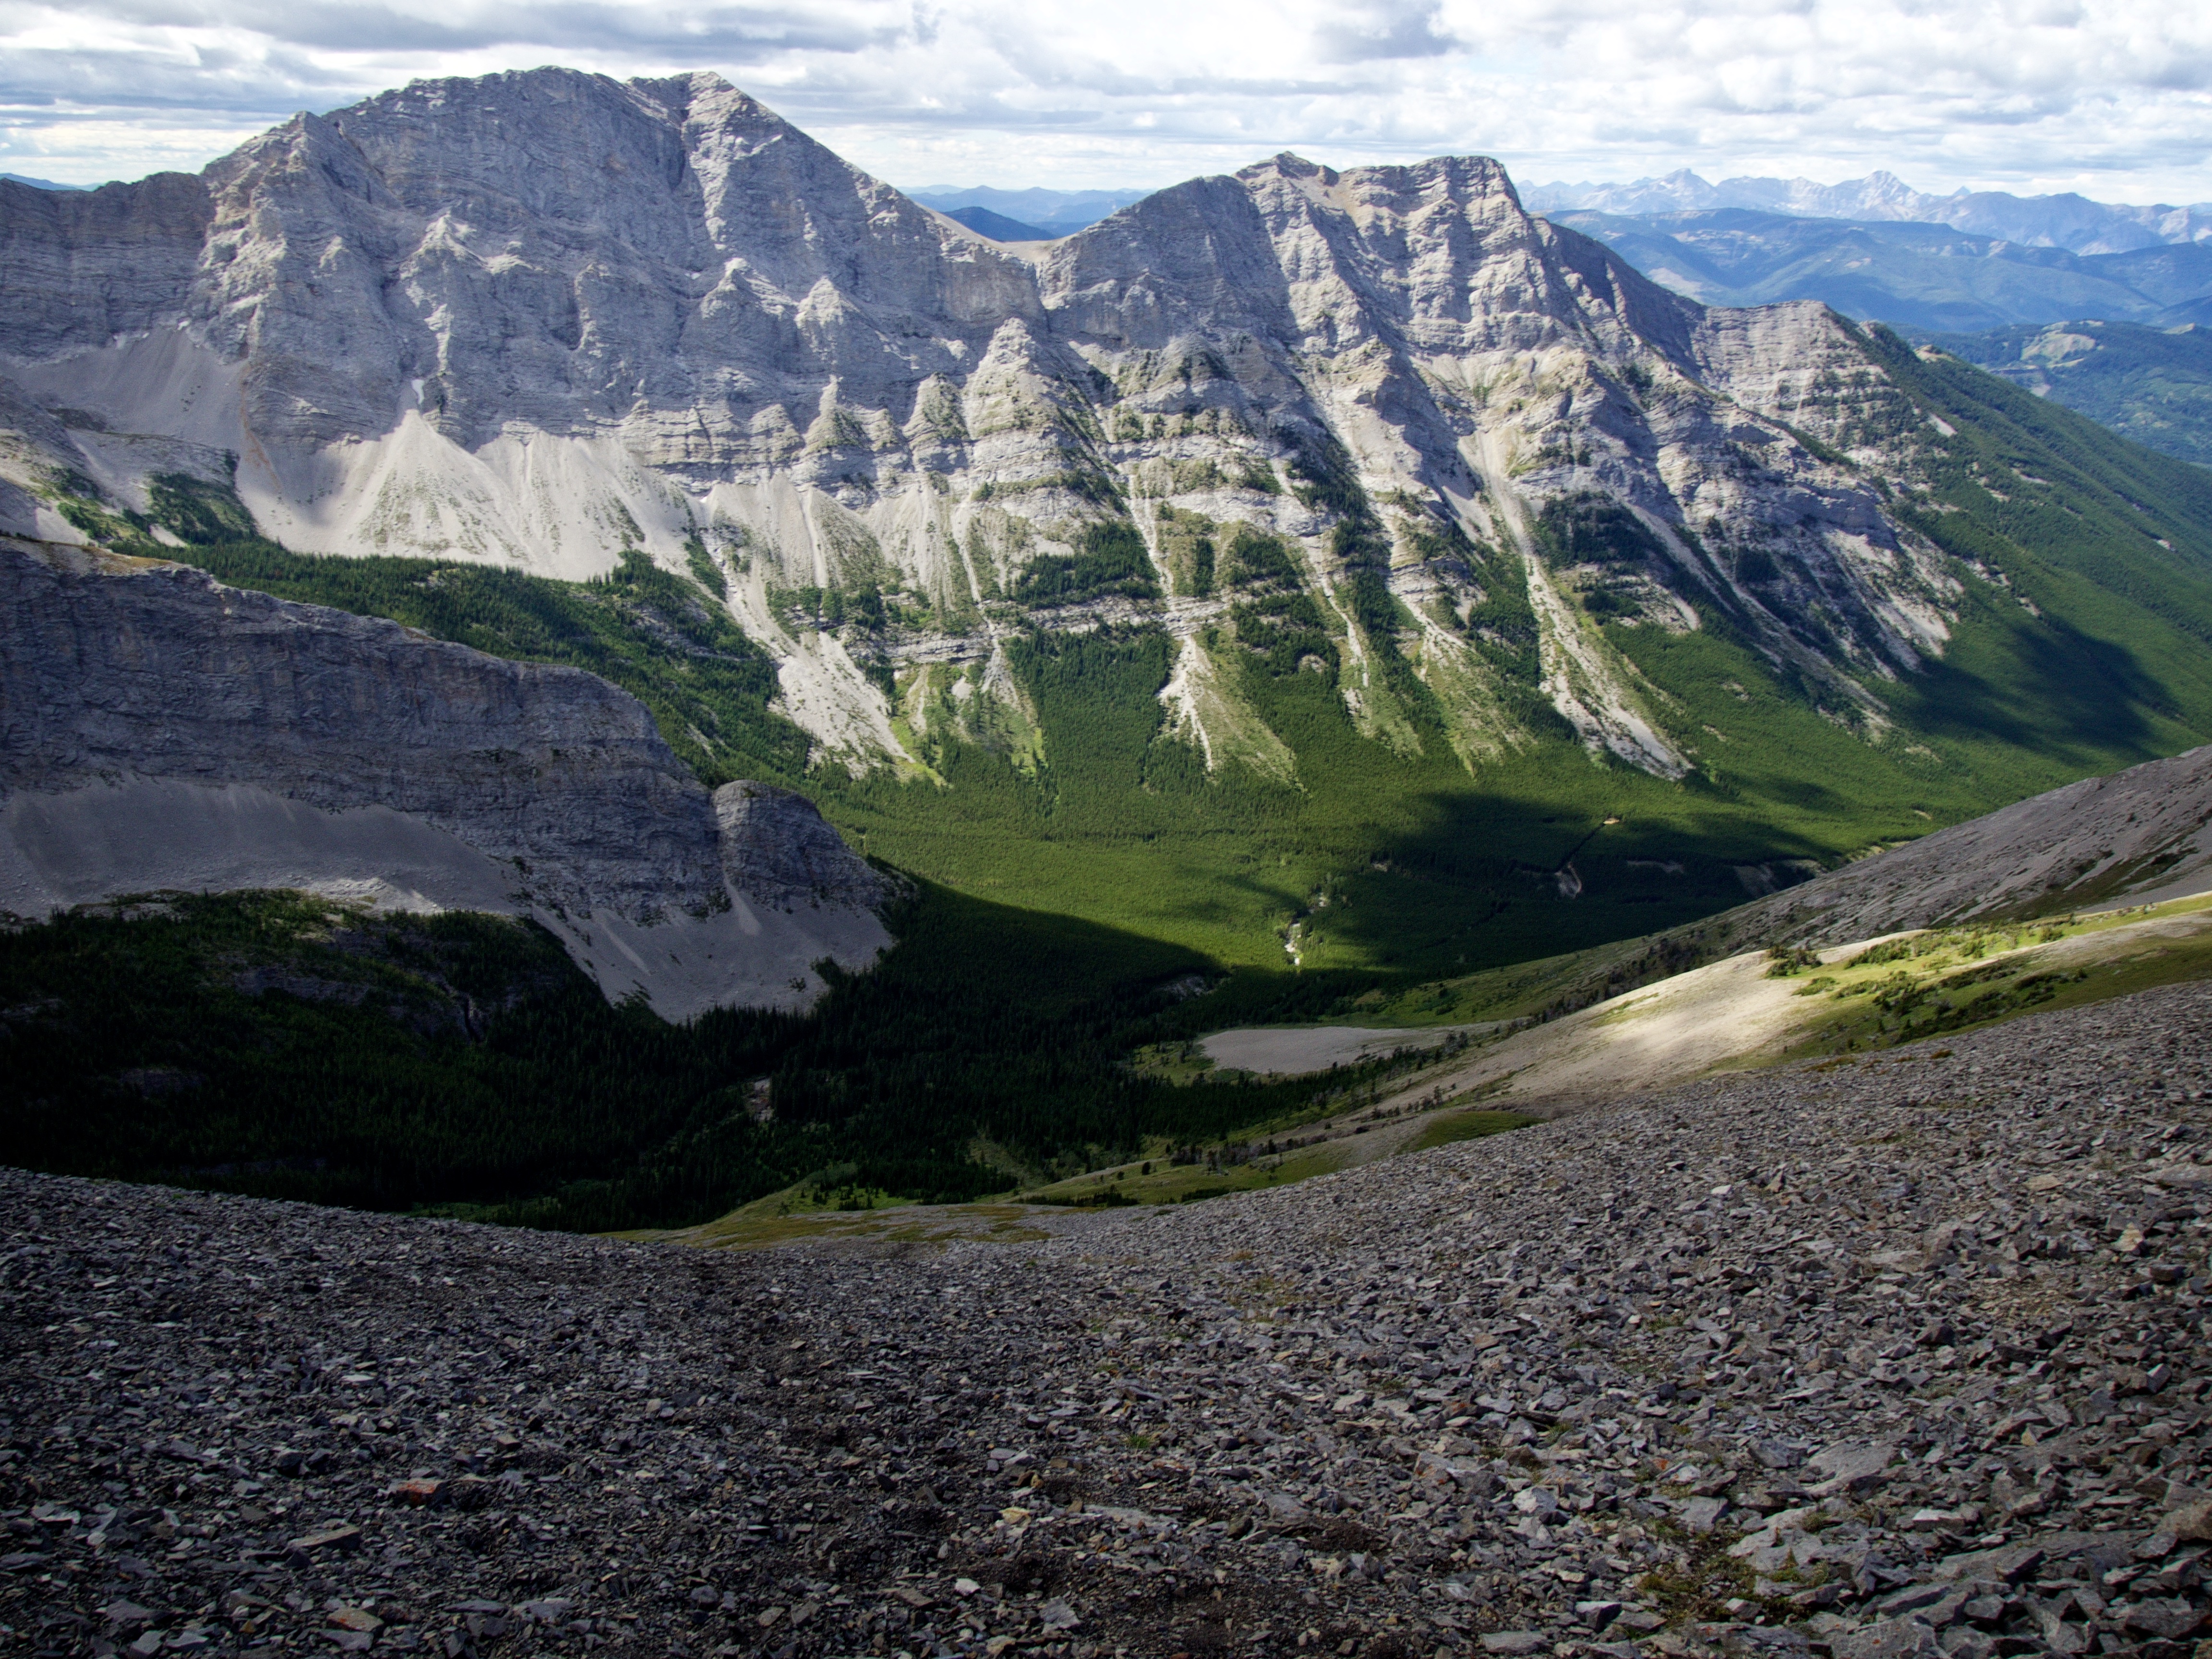
The spectacular view along the SE ridge. From left to right: Mount Parrish, Mount Coulthard, and Andy Good Peak.

Mount Ptolemy (left) and the 3 peaks (‘Pharaoh’s Peak’, ‘Anubis Peak’ and ‘Mummy Mountain’) of NROP.

Sunshine highlights Mount McLaren. In the background from left to right: Robertson Peak, Tallon Peak, Turtle Mountain, Willoughby Ridge, Hillcrest Mountain, Hearts Peak, and Spades Peak.

A partial pano looking to the NE at the Crowsnest Pass. Wedge Mountain, “Pa Butte”, Saskatoon Mountain, Grassy Mountain, Bluff Mountain, Centre Peak, Caudron Peak, and the “South Peak” are all visible. Even Thrift Peak and Thunder Mountain can be seen far off to the left of centre.

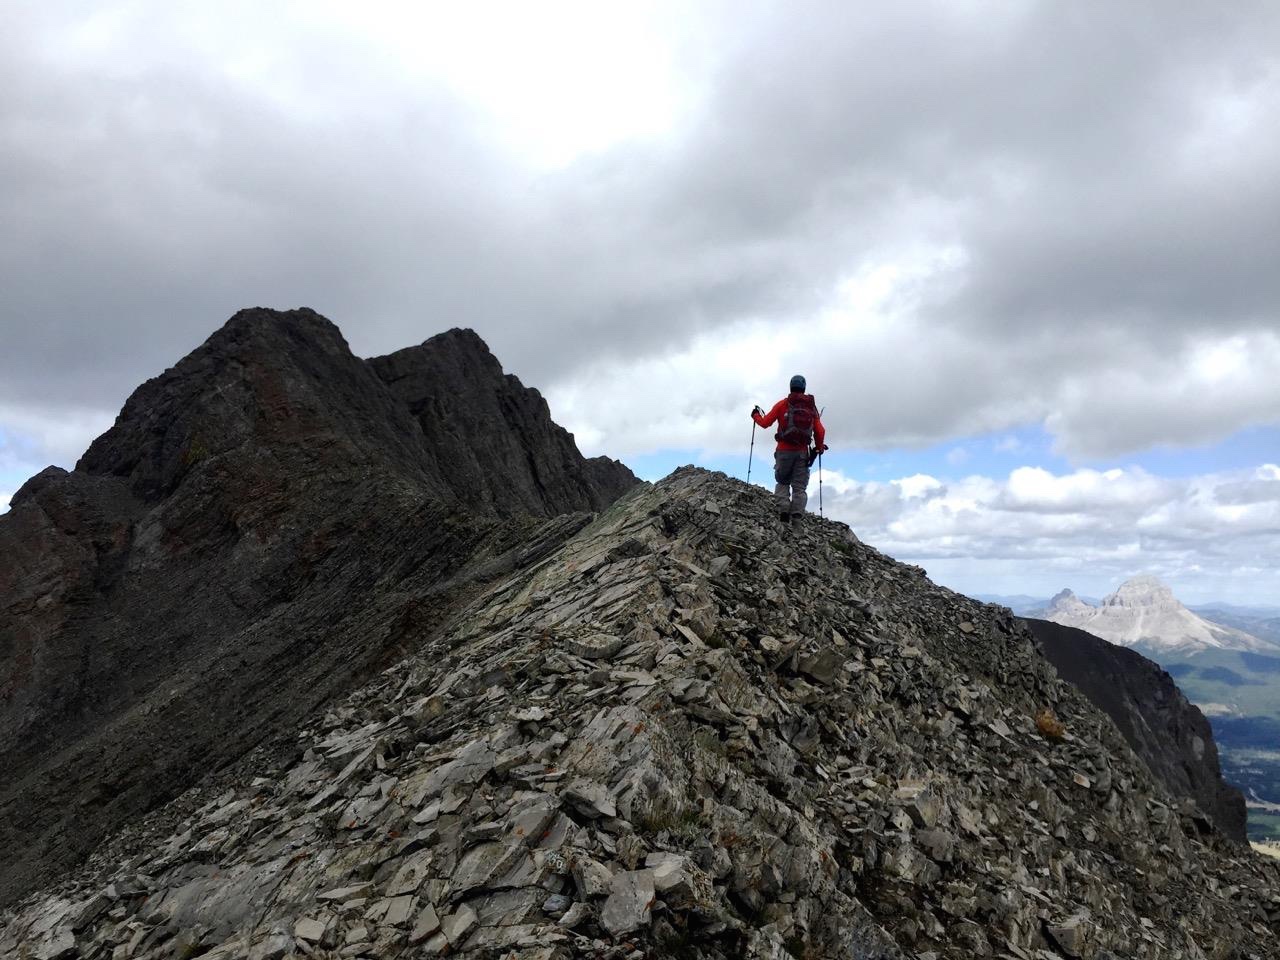
Marc sets off along the SE ridge. Our plan was to go as far as we could, but the intensity of the wind meant that travel on the goat trail between the outlier (centre) and Mount Parrish (left) would be too dangerous. Instead we walked to the edge of the outlier and descended down easy slopes to the trail below.

On the ridge and looking back towards the summit of Chinook Peak.

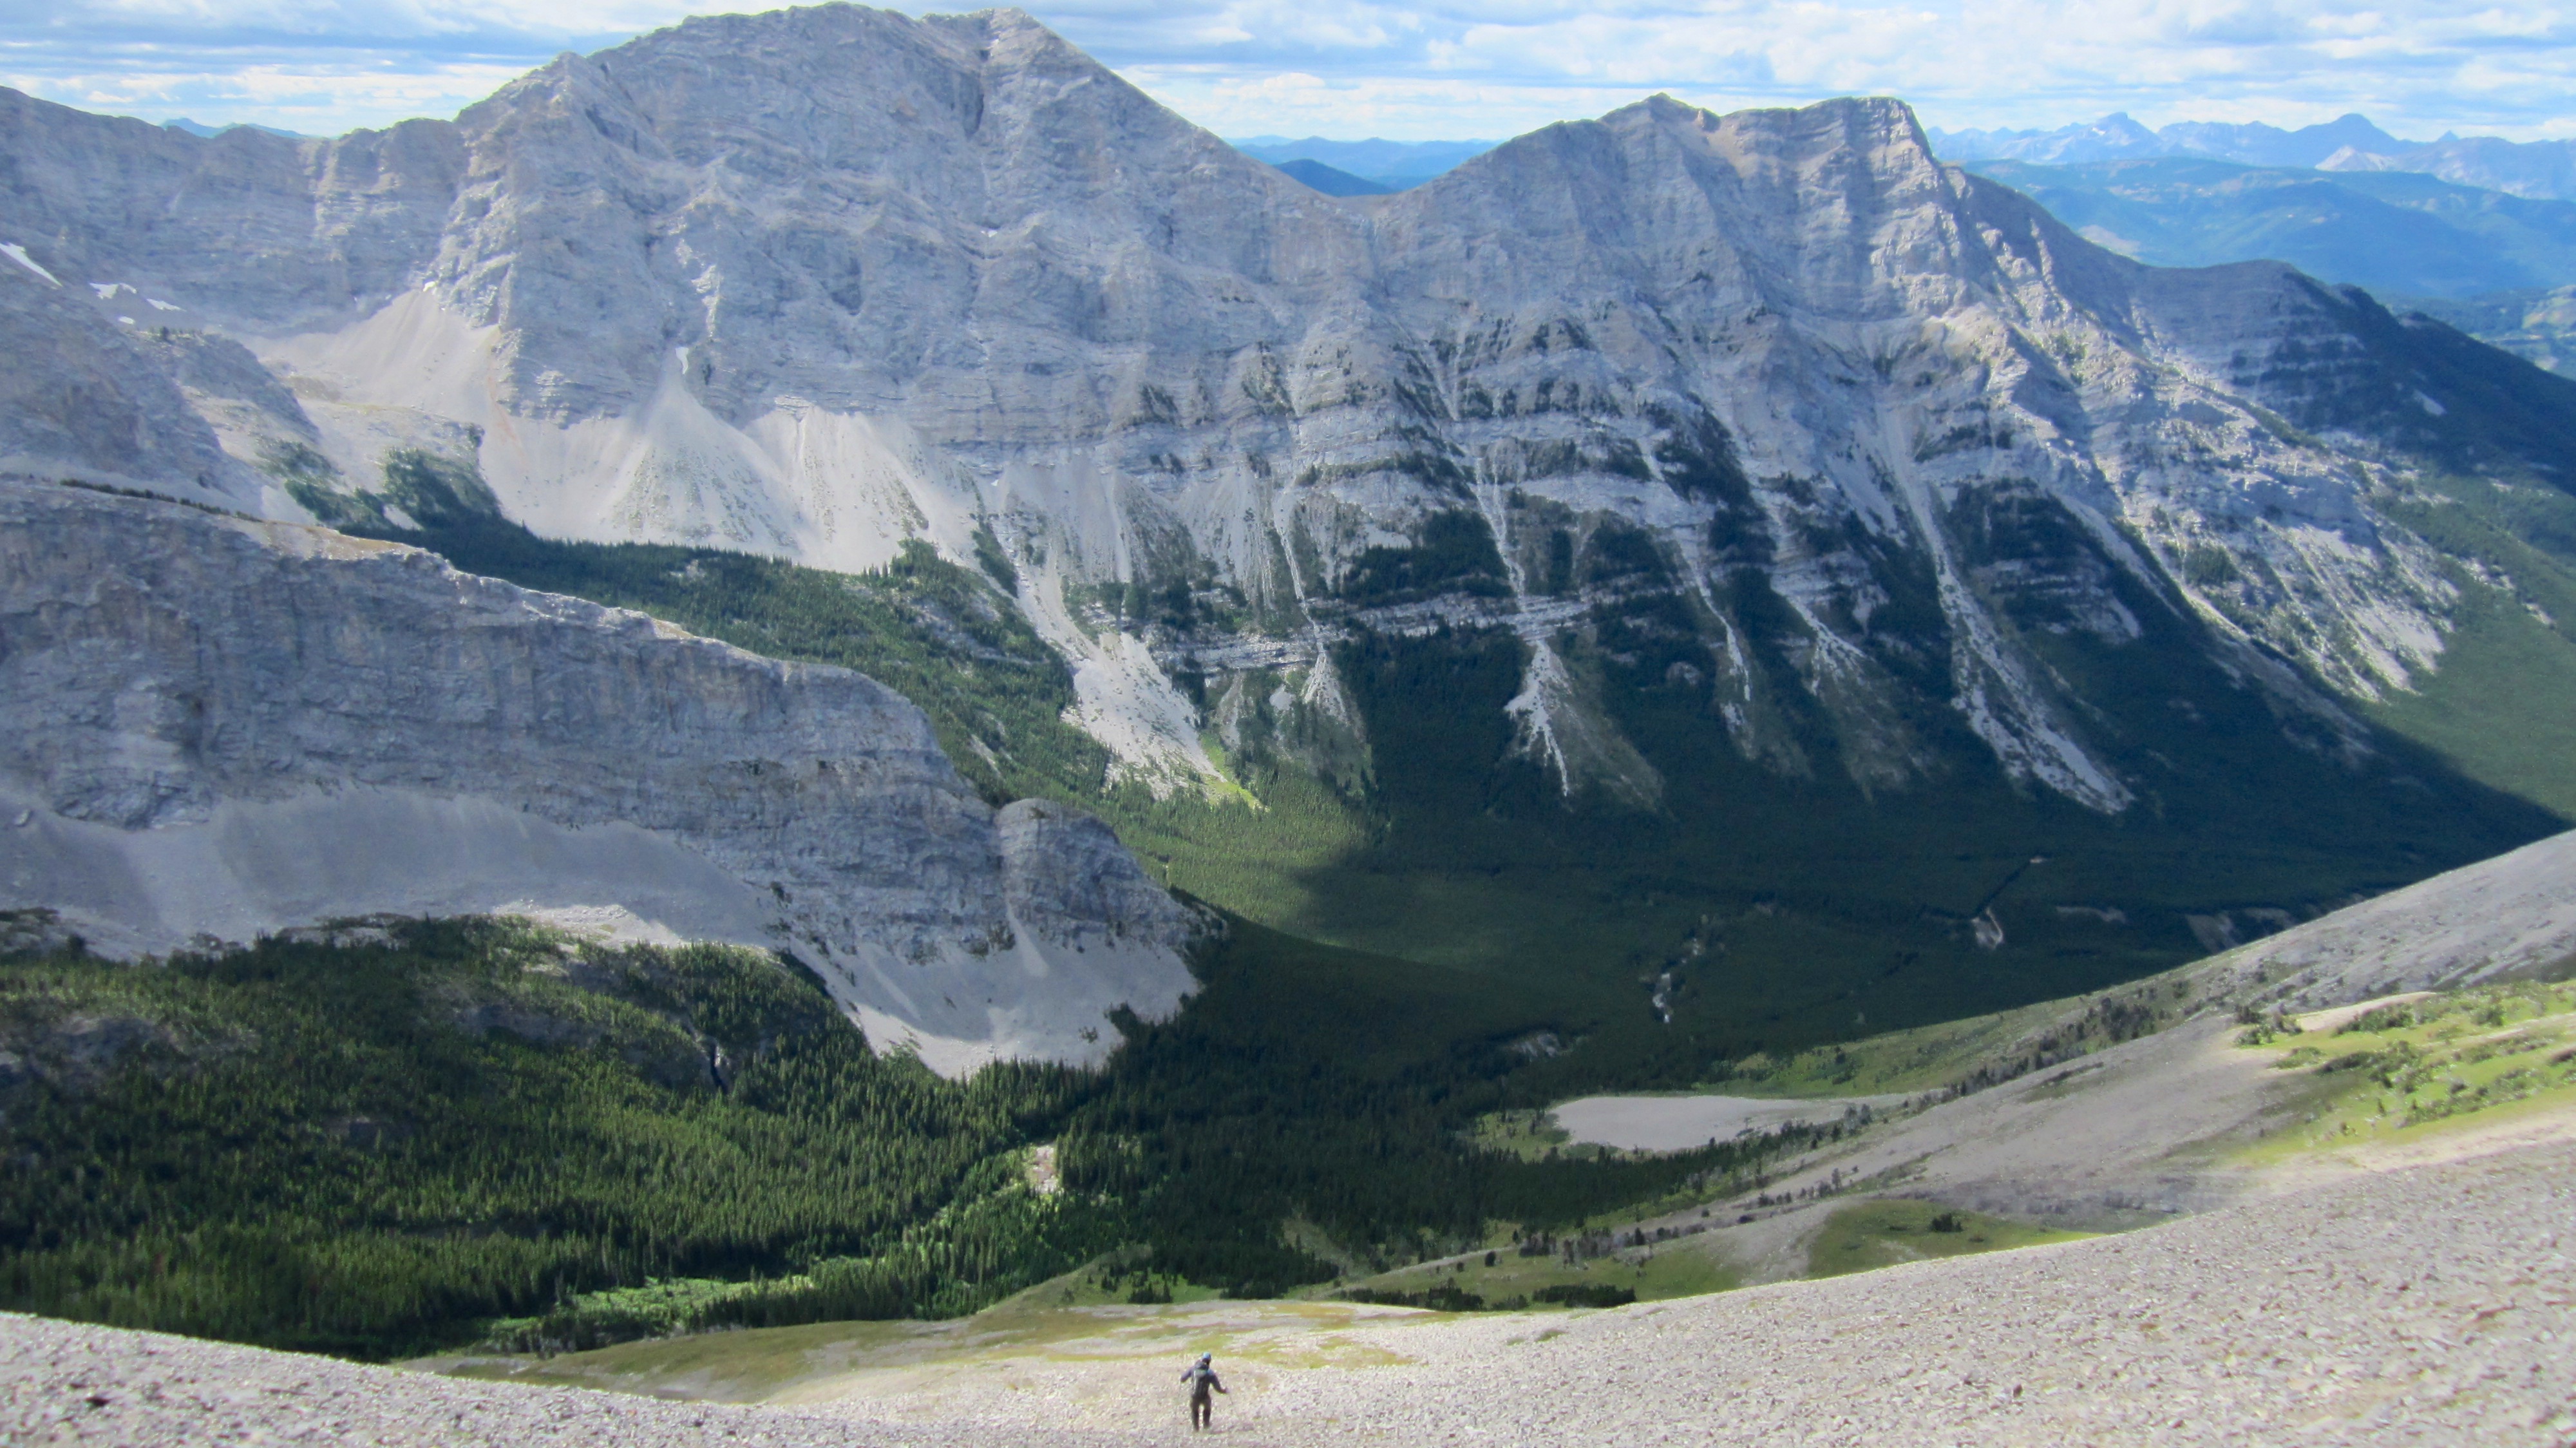
The north face of Mount Parrish and its outlier are impressive to behold.

Pummelled by intense gusts, we made sure to stay well below the crest.

Mount Ptolemy and the entrance to the Promised Land.
A well worn goat trail leads past the outlier towards Mount Parrish. Walking on this would not be for the faint of heart and travel would be especially dangerous on a windy day.
Our starting point up the west face of Chinook can clearly be seen from the SE ridge.

To ensure safety from the gusts, Marc lies flat as he peers over the edge of the ridge.
Descending from the ridge. Our next stop would be the alpine meadow situated at the base of Andy Good Peak.
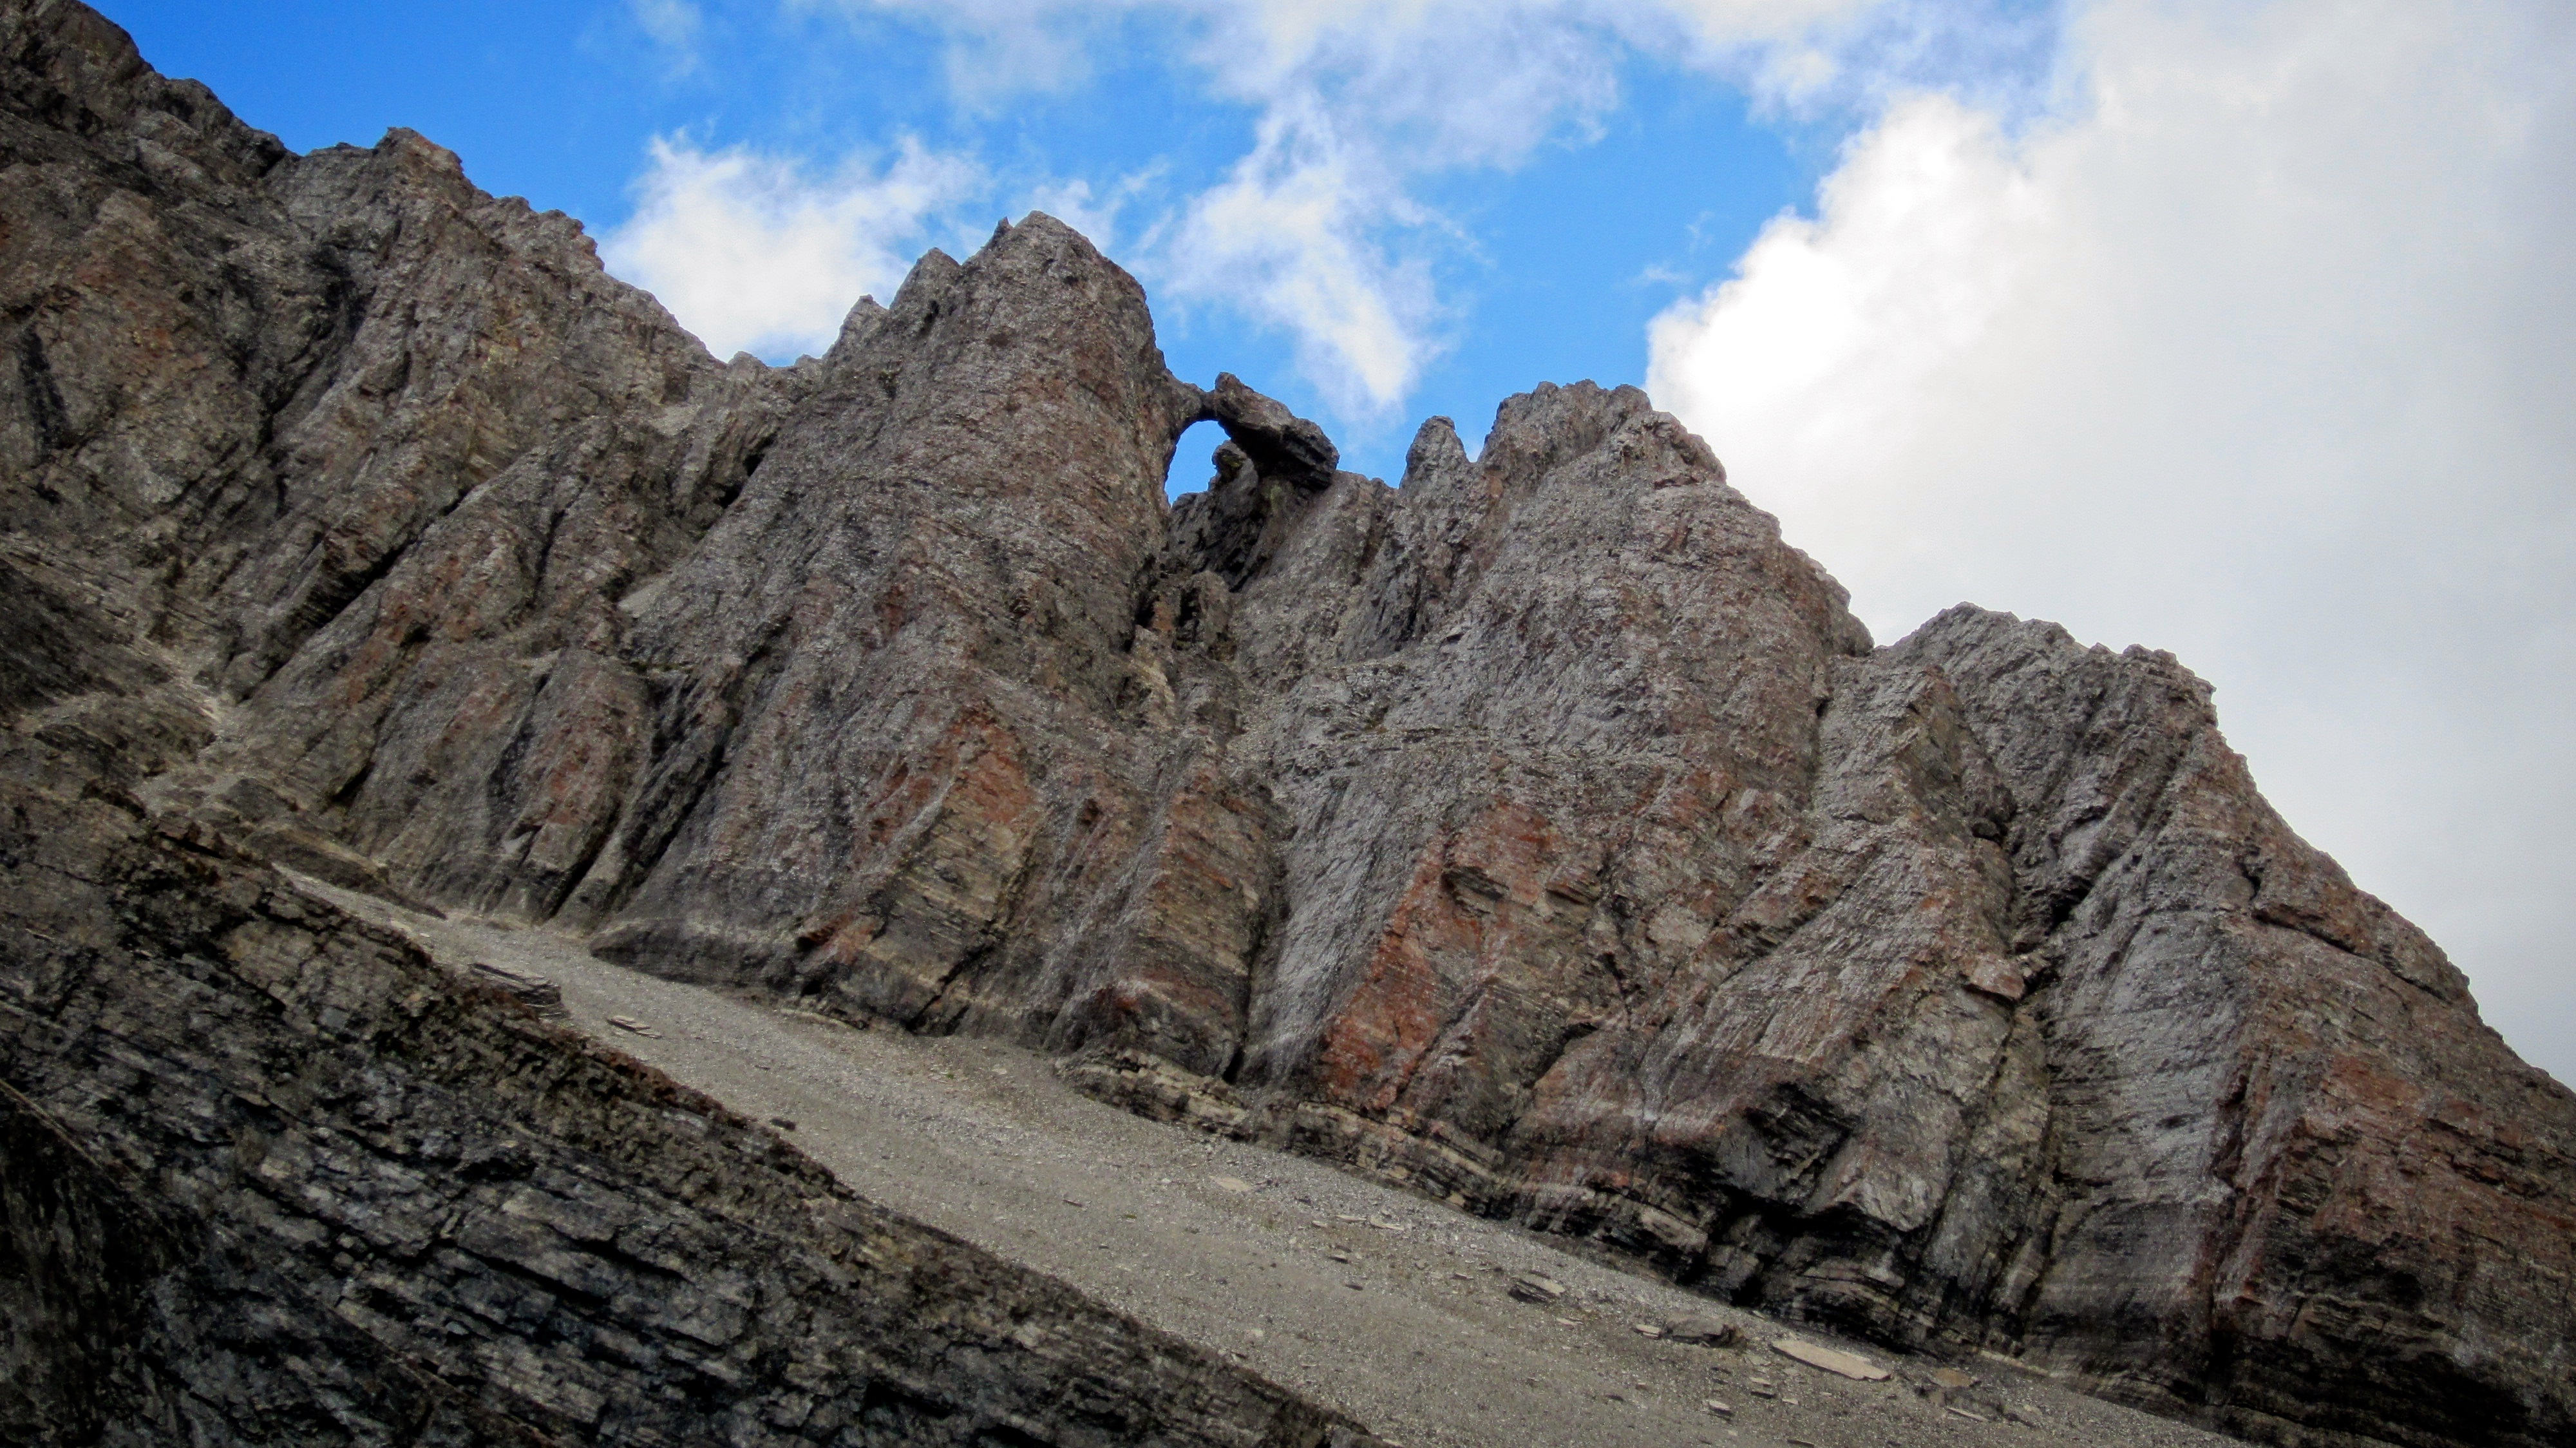
Part way down, we heard an unusual sound emanating from side of the outlier. This extremely large arch formation acted like a whistle as the wind charged through it. I think this is what is known as, ‘The Bridge of the Mastodons”…
We trended skier’s left as we descended. The trail can be seen directly in front of Marc.
On the trail and enjoying the hike towards Andy Good Peak.
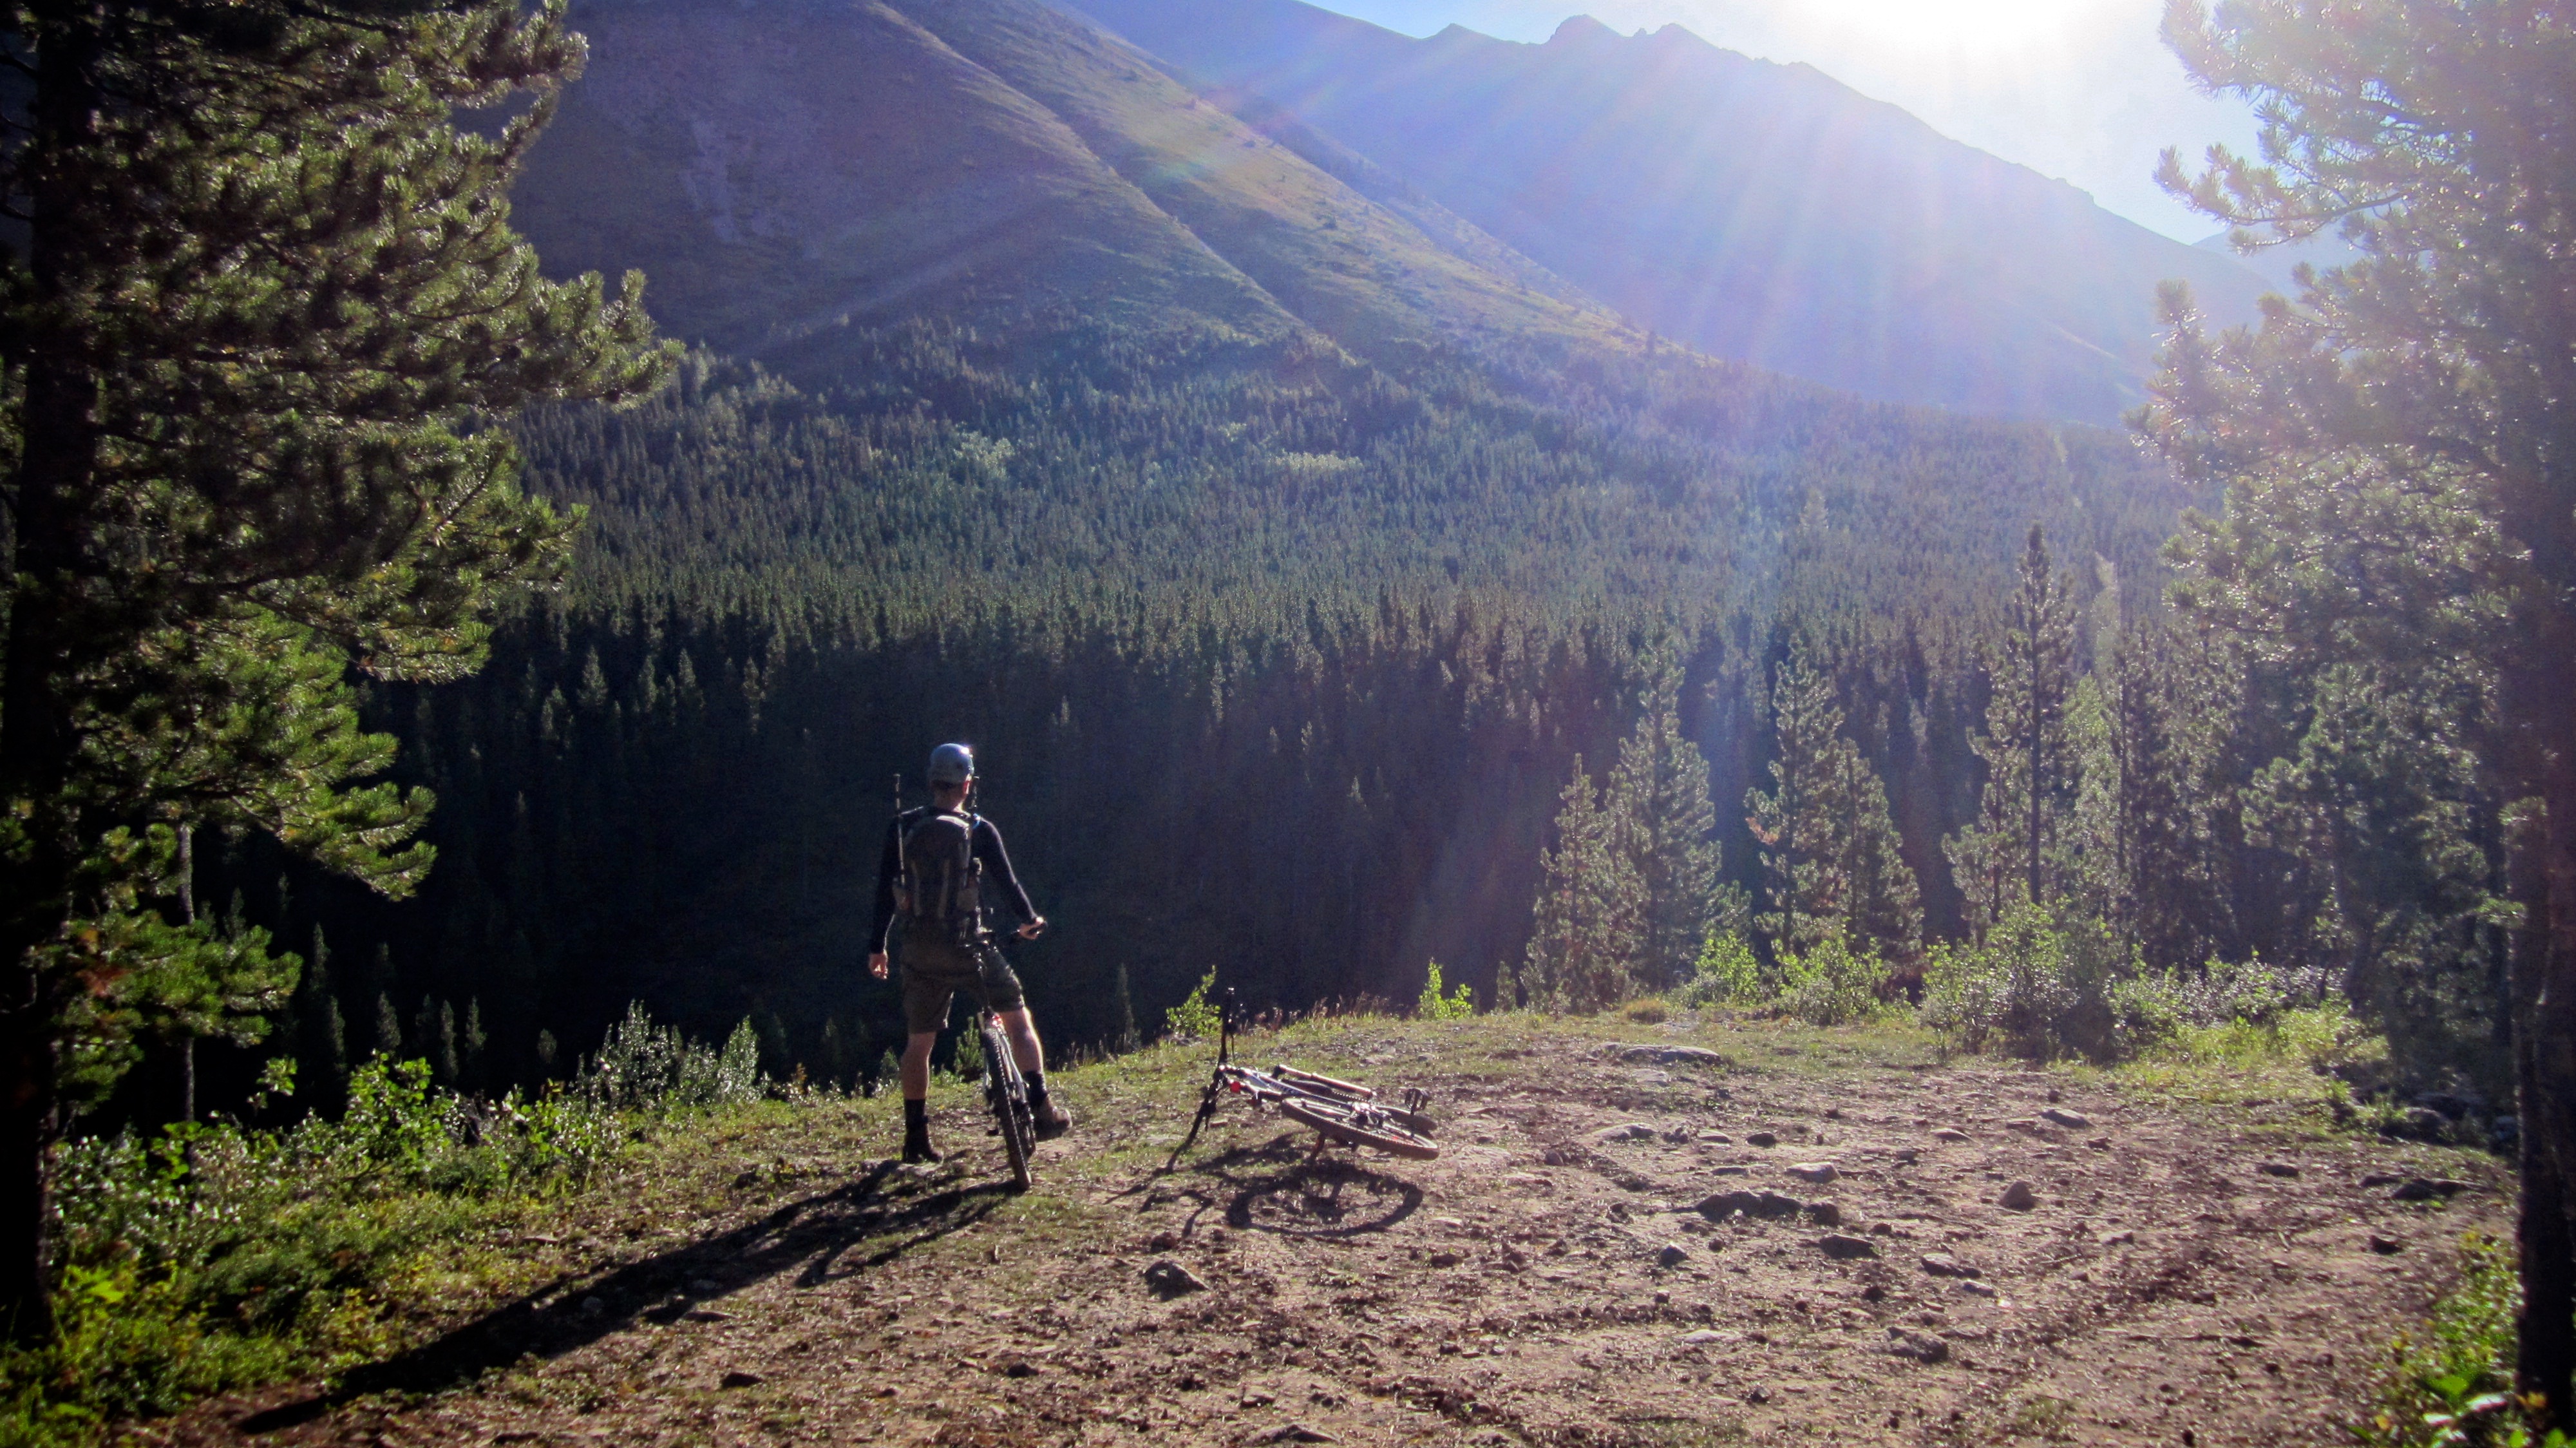
Marc pauses to enjoy the sunshine at the entrance to the meadow. Andy Good Peak is behind him.

Heading to the base of Andy Good. It’s almost a duplicate of the previous photo, but I couldn’t decide between them. I think I’m going to call it, ‘Almost there’. What a gorgeous place!

Looking back along the trail to the entrance.
This would be an awesome destination for a hike in and of itself! Last year when I attempted to summit Andy Good, I remember looking down at this place and marvelling at its beauty.

Mount Parrish.

After reaching the end of the trail, we doubled back towards a small tarn.
Wonder, risk, and awe. Re-creation and relationships. These things are why I love the mountains.

When I reattempt Andy Good, I think I will approach it from this valley and try to use the goat trail which begins behind the grassy slopes on the left and leads across the scree to the col on the right. Edit: Yes, this works!

Andy Good Peak. The Crowsnest Pass holds many hidden gems such as this.

Chinook Peak from the edge of the meadow.

On the trail and heading back down the valley. In the centre is Loop Ridge. The hike from the base of Andy Good to the bifurcation of the trail at clearing / campground is ~3.5km.

Marc treks across our starting point up Chinook Peak. Andy Good Peak is behind him.
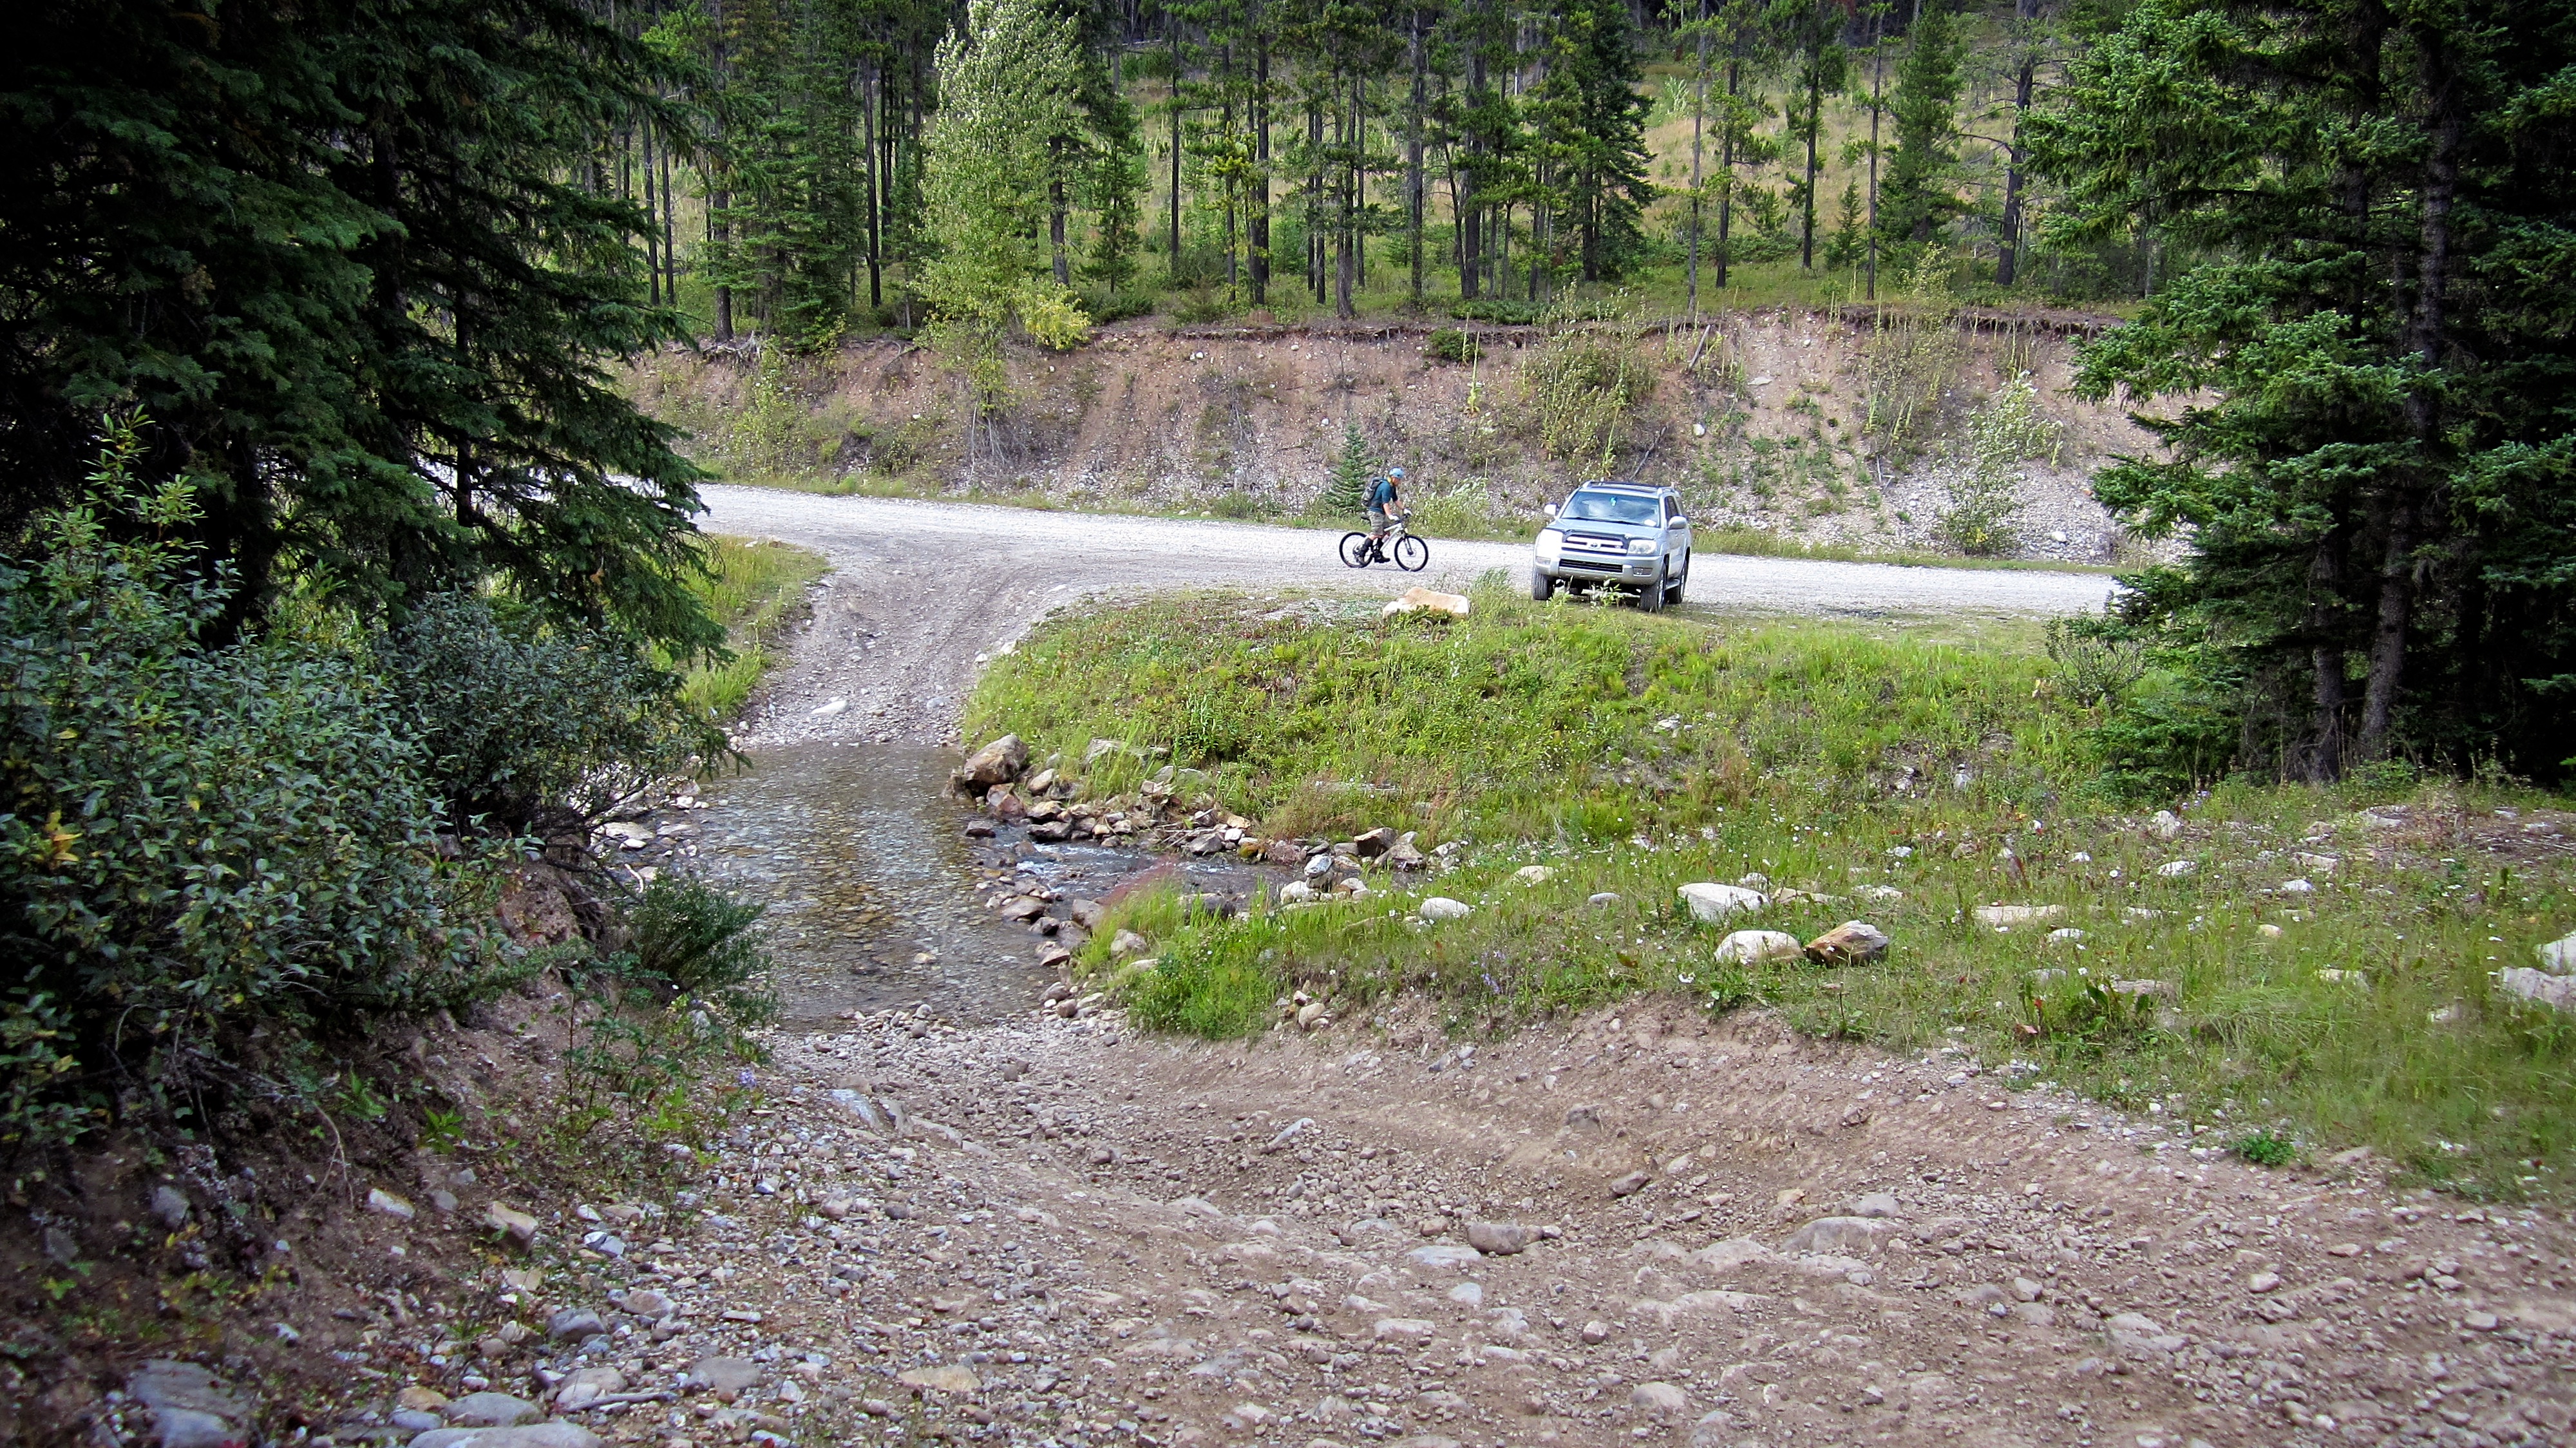
Back at the bikes and looking up the road towards the clearing / campground.
Heading home after an awesome day! It took us 40 minutes to bike out the remaining ~5 km and I loved every minute of it. The main thing to be careful of are the ‘babyheads’ which litter some of the steeper sections.
Marc arrives back at the trailhead on Coal Road. Even though we made a fateful decision which cost us the summit, the entire adventure made it feel like we had missed out on nothing at all. Thanks Marc for your company! I will readily venture back to this area again because I loved the trail and the scenery – and I have to remove that asterisk from the title! 🙂
Hello,
I believe the large arch formation in one of your pictures in The Bridge of Mastodons. I’m hoping to find it and I was wondering if you remember whereabouts on Chinook Peak you saw it?
Thanks,
Naomi
We followed a well-worn goat path towards Mount Parrish and as soon as it went onto the north face of the outlier between Parrish and Chinook, we began to drop down to the trail because it was so windy. It was while we were going down next to that outlier that we saw it. Hopefully that helps…
yes, thank you 🙂
Awesome! Have a great trip!