

⚠️ Hiking and scrambling are inherently dangerous activities. Please read my Disclaimer. ⚠️
Darrah S2 (DS2) is a peak that I’ve been eyeing for quite some time. In fact, I’ve wanted to get into the area south of Corbin for at least the past 5 years, but alas, there have been so many other fun distractions along the way! 😉 My longstanding ‘To Do’ list for the area includes Michelle Head, Barnes Peak & Limestone Ridge, Mount Corrigan, Centre Mountain, Mount Borsato, and of course, DS2 which at ~2660m, is one of the highest peaks in the immediate area outside of Mount Darrah (2758m) and Ptolemy SE5 (2661m).
Last winter I concluded that there may be a way up DS2 – or at least its slightly lower twin peak to the west – via the southwest ridge that begins near the Flathead Forest Service Road (FFSR). This past July, I spent an entire day driving the backroads around Corbin, scouting out many of my ‘To Do’ list peaks. I was surprised at how much land has been cordoned off by resource companies, barring almost all access to Michel Head, the Natal Fire Lookout, and Tent Mountain. I was also surprised at how beautiful and remote the landscape is to the south of Corbin. I love this area!
From the FFSR that day, I couldn’t see much of DS2 but the southwest ridge looked to be a plausible route. My only real concerns at the time, centred on the section immediately prior to the summit ridge of the west peak, and whether it was even possible to reach the summit of DS2 from the west peak. It looked like a pretty intimidating scramble from the col! On all of the topo maps that I looked at, the summit ridge to the west peak looked to be wide enough to hike on. In fact, the portion of the southwest ridge near the road had a far more ominous line, as if someone had pinched the map while it was printing. I determined that day that I would return to try this route before winter.
I also knew that when I came back, I was going to bring Andrew or Brad – or both if possible! 😁 Unfortunately, Brad was busy renovating his house but Andrew was more than game for an adventure up an unnamed peak using an unknown route. Some people might be put off by spending a day trying for a summit that is not a given, but not Andrew and not Brad! This is one of the many, many reasons why I love hiking with them. They love to explore and despite reaching the summit or not, it is never a bad day to be on a mountain – unless of course you fall off! 😉
To make a long story short, we didn’t make the summit of either the west peak or DS2. We came close, but ultimately what I was the least concerned about – the ridge leading to the summit of the west peak – proved to be precariously narrow and unstable with extreme exposure on either side, but more about that in a minute…
The original section that I was worried about, also proved tricky, with rotten rock, scree-covered slabs, nail biting exposure, and plenty of down-climbing. Yet with a degree of diligence, we found bypass points as needed, though they often involved losing and regaining elevation. However, Andrew had a particularly intense experience on a very narrow and exposed section that he would come to call “Apple Crumble Ridge”. The excitement came as he was about to down-climb a very narrow and exposed section of ridge, when he thankfully realized that the rock he was about to use as a hold, was completely loose. Had he used it, he may not be here today. Instead, he carefully cleared it off, sending boulders cascading down the cliffs on either side. Only then was he able to make the two moves needed to arrive on stable, but still exposed terrain. As the lead on this section, he yelled back to me, ‘Don’t try this!’ and I was more than happy not to! Instead, I backtracked and began to search for a bypass route. After losing quite a bit of elevation, I then had to make an awkward traverse where at one point, a large chunk of rock that I was using to support myself shifted towards me, scaring the Scotsman right out of me. Another couple of tricky down-climbs brought me onto a slope far beneath Andrew. I then began the long slog up to meet him, where we both expressed relief that the other was still alive and kicking.
Now back to the summit ridge. I had expected it to be walkable, and at first it was. Then it began to narrow not unlike Phillipps Peak – only it was much longer and full of crazy-loose rock. The final section prior to the west peak presented itself as a true knife ridge, with extreme exposure on either side. In true Raiders of the Lost Ark fashion, I then turned to Andrew and said, “Cliffs. Very dangerous – you go first.” 😉 Well, not exactly. Given our earlier experiences, I had used all of the adult diapers that I had brought with me and was more than ready to pull the plug. However, Andrew wanted to see what was beyond a small high point just in case things got better. He literally crawled for about 50 m along the ridge and upon reaching the high point, suddenly yelled out, “NOPE! Nope, Nope, and NOPE!” and maybe a few other things that I can’t remember. He had discovered that the remainder of the ridge not only grew narrower, it was comprised of terrible, terrible rock. Even if we were to attempt it, not knowing if there was a way off of the west peak could mean that we’d have to return the same way, and that would go beyond tempting fate to pretty much kicking her in the teeth. Andrew then carefully shimmied his way back to me and we called it quits.
A cool consolation to the summit however, was our trip into the beautiful bowl that sits beneath DS2. Here is perhaps the prettiest brown – yes, brown – tarn that I have ever seen and moreover, there is a terrific trail that leads right to it from the FFSR. I definitely want to return and see if there is another way up to DS2 from the bowl as I now know that will be a relatively quick and easy trip to reach this area once again. The col between the two peaks looked impossible from up on the ridge, but looked better the closer we got to the bowl. It may also be possible to get to Darrah S3 (DS3) from the bowl as well, but since the rock is so sketchy here, who knows… Anyway, both Andrew and I were also quite taken with Mount Corrigan, and I have a sneaking suspicion that before we come back to re-attempt DS2, we may find ourselves on the slopes of Corrigan – or even Barnes Peak… 🙂
Please make sure to read Andrew’s trip report as well!

To get to DS2 from Lethbridge, drive west on Highway 3 and cross the border into BC. From the end of Summit Lake drive another ~7 km until you come to the Corbin Road. Turn left and onto the Corbin Road and drive for another ~24 km until you reach Corbin. The Flathead Forest Service Road (FFSR) will be on on your right just prior to the entrance to the mine. The road is not maintained and you will need a 4×4 or high clearance vehicle – and preferably a narrow one as the road will lose width soon after passing the turnoff (~4.5 km from Corbin) that leads to the Barnes Lake trailhead. In one place, you will encounter a small sign that warns, ‘Narrow Road Ahead’. This is followed by some flagging tape that stretches halfway across the road to cordon off a section that has collapsed 200m or so into the creek below. This is why I was glad I had my 4Runner and not a full-sized pickup! The old gravel pit where we parked is found on the left side of the road ~9 km from Corbin, just before the road begins to lose elevation as it crosses onto the other side of Flathead Pass.

I cannot recommend the route we used but a much saner option would be to drive another ~700 m down the road to trailhead and hike the easy ATV track for 3.7 km until you reach the bowl beneath DS2. When I go back, I’m going to try the col between the west peak and the true summit as my first order of business. If that doesn’t look good, there appears to be gully further to the east, but if the rock is like the rest of the mountain, it may not be feasible. It looks possible to reach the high point between DS2 and DS3 from the tarn, but I doubt there is a way up DS2 from the col with the high point. Regardless if you make a summit or not, the tarn could be a very cool place to camp for a night or two.

Our total distance travelled was 12.5 km with total elevation gains of 963 m. Our roundtrip time was 5 hours and 53 minutes.

The start of the Flathead Forest Service Road (FFSR) in Corbin. The signs warn that the road is unmaintained and I definitely wouldn’t recommend trying it without a 4X4 or high clearance vehicle – and a narrow one at that! When I scouted DS2 and Barnes Peak back in July, I drove along a mostly dry road. Today it was a giant mud hole, but my trusty ’03 4Runner had no trouble. After passing the fork that leads to the Barnes Lake trailhead (~4.5km from Corbin), the road narrows considerably and remains so for the duration. In one place, there is a small sign that warns, ‘Narrow Road Ahead’. This is followed by some flagging tape that stretches halfway across the road to cordon off a section that has collapsed 200m or so into the creek below. This is why I was glad I had my 4Runner and not a full-sized pickup!

Andrew practices his Karate Kid moves as we gear up at the old gravel pit at Flathead Pass, approximately 9 km from Corbin. 😉 The entrance to the pit was so muddy that we put on our boots and packs on the road before backing in to park.

In the gravel pit and looking for a way to get through the soaking wet undergrowth.

Fortunately, the worst bushwhacking occurred as we left the gravel pit. After that, it was not bad as there were many animal trails we could follow. However, we still found ourselves completely soaked by the time we hit tree line.

Andrew tries to avoid getting even wetter as we follow an animal trail through the bush.

Hiking up open slopes with sweet Mount Corrigan in the background. I’m totally coming back to hike Corrigan!

Getting onto more rocky terrain. (Photo by Andrew Nugara)

‘Red and yellow, seasons changin’ gear, oh yeah’ – April Wine (Photo by Andrew Nugara)

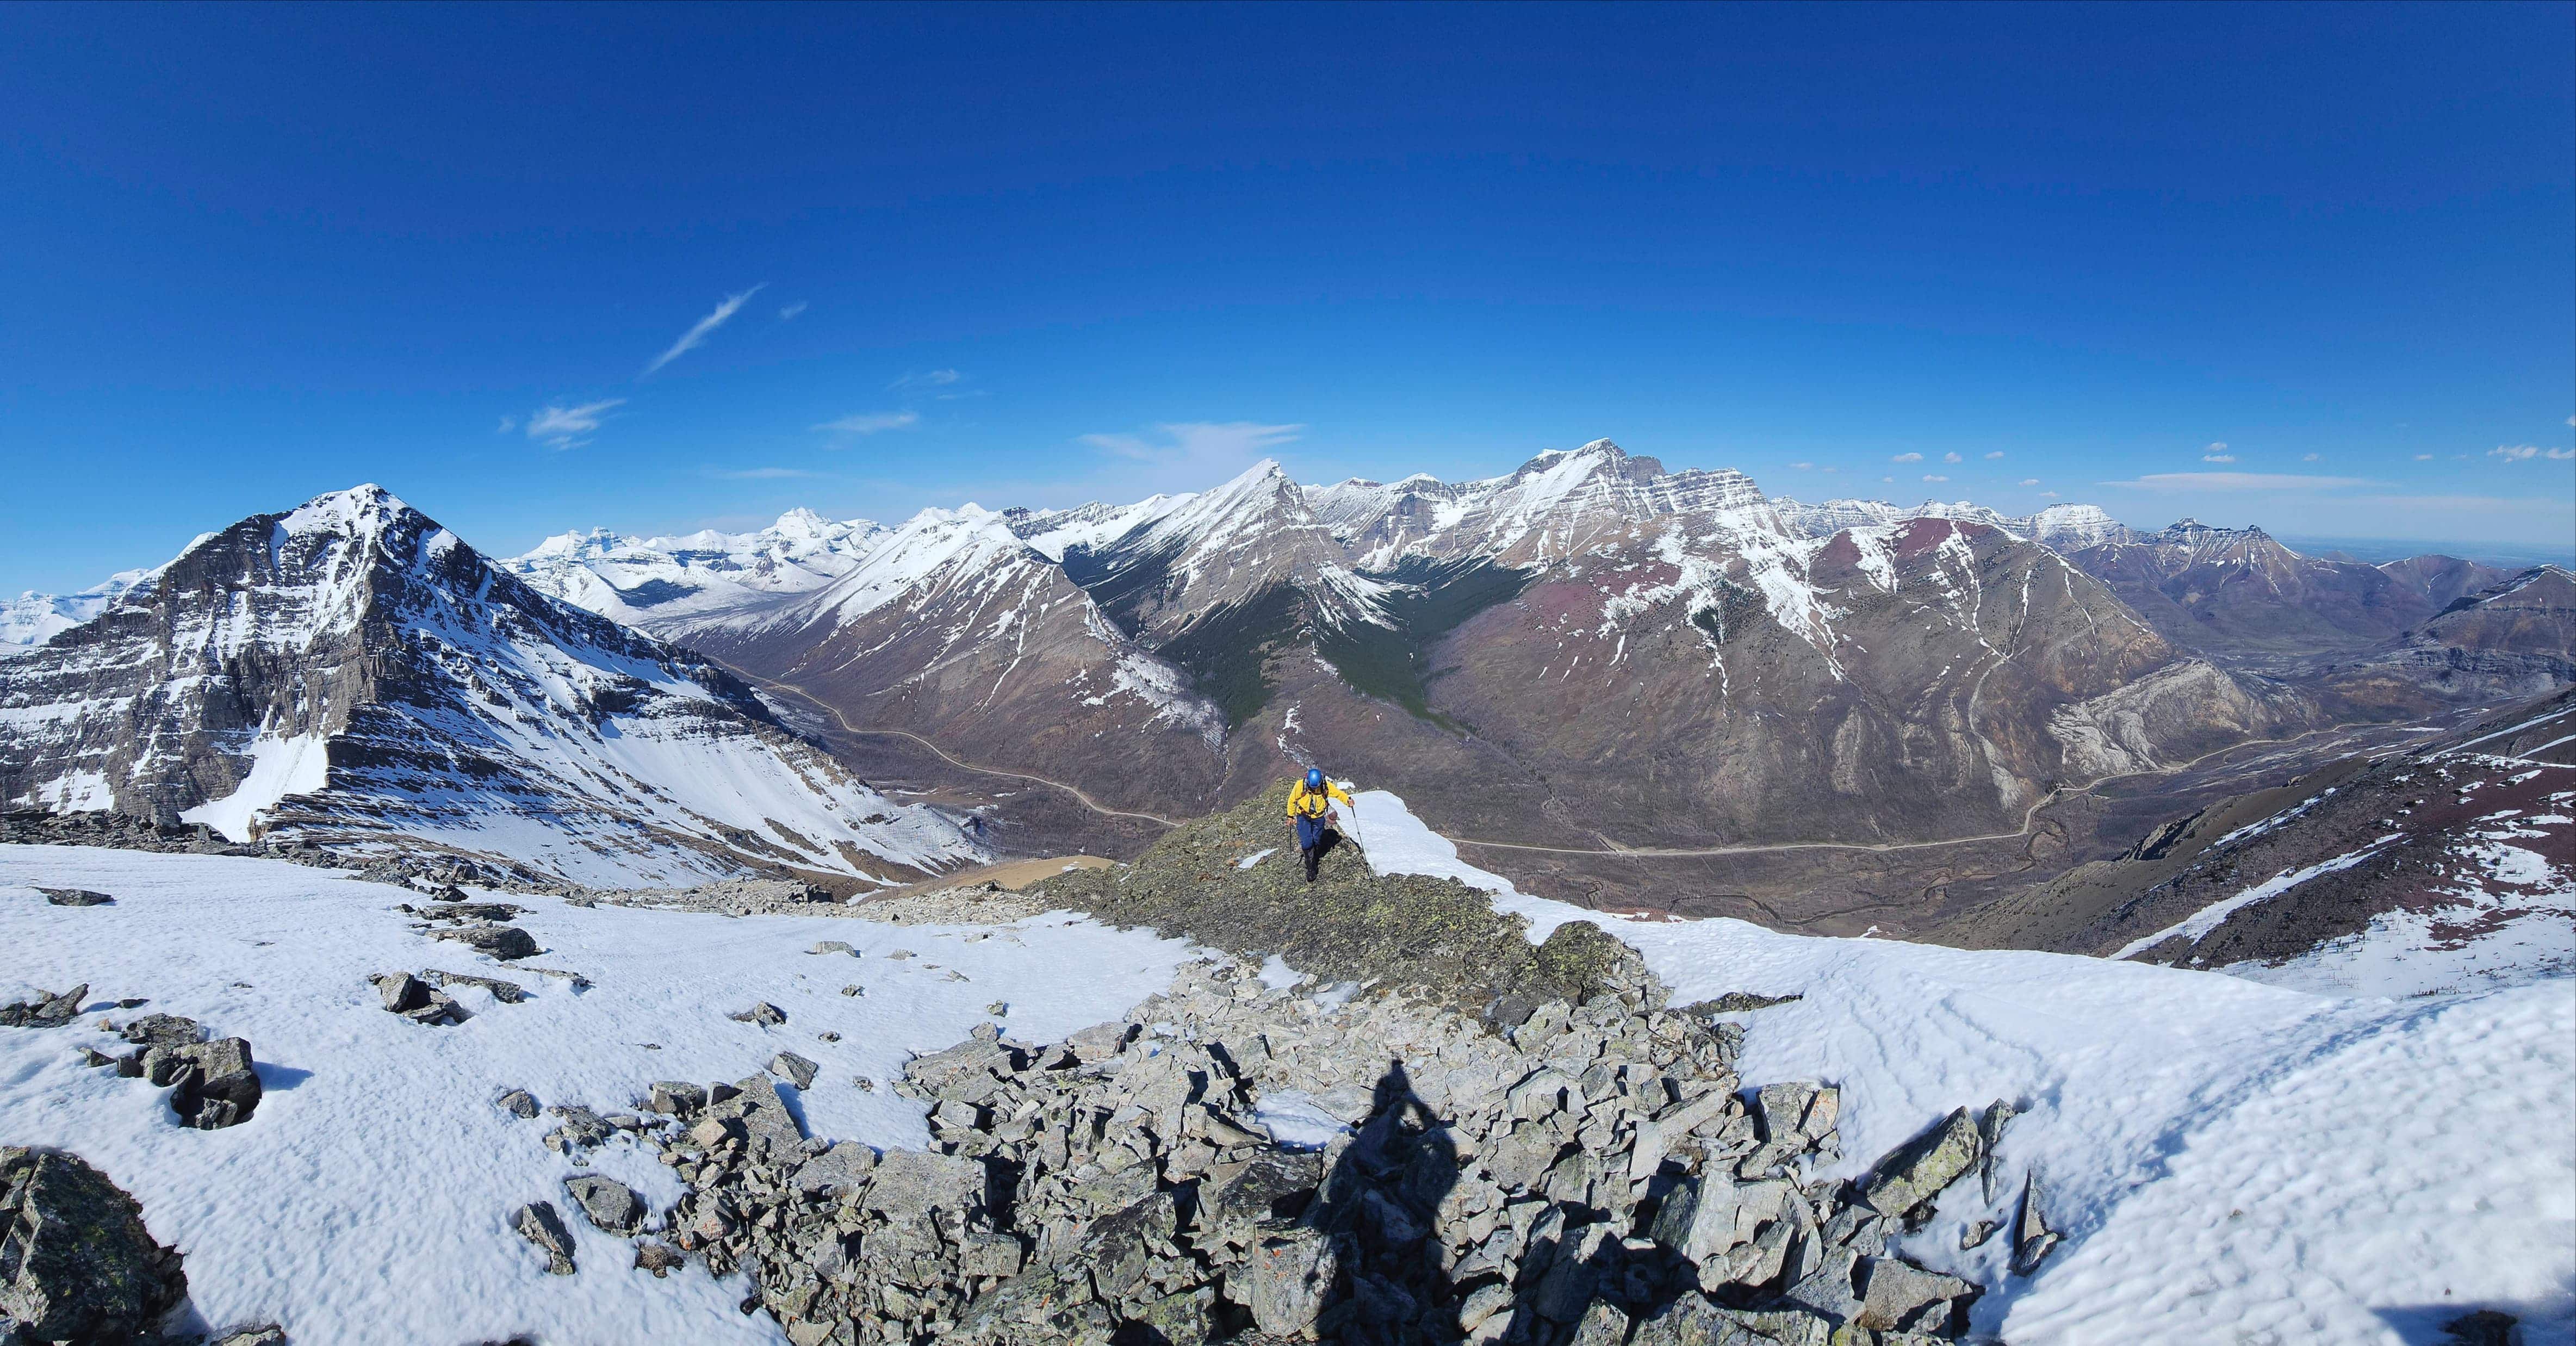
On the southwest ridge and looking towards the west peak (centre). The high point along the ridge is on the right.

Another look at Mount Corrigan. From the map it looks like there is a tarn directly beneath the summit on the east side.

Heading up the high point with the west peak of DS2 in the centre and Mount Darrah on the far left.

Gazing back at our route along the ridge to this point. In the background is Barnes Peak (centre) and Limestone Ridge (right).

The view from the top of the high point. This is where things began to get interesting! The summit of DS2 is poking over the west peak summit ridge in the centre.

A pano from the high point with Mount Darrah on the far left and Centre Mountain on the far right. Darrah S4 (DS4) is to the right of centre.

An even cooler pano by Andrew! We returned out the valley in the centre. (Photo by Andrew Nugara)

Andrew checks out a small gully that looked to be a route off of the high point. Unfortunately, this was a down-climb that we did not want to try unless we had a rope – or a stack of mattresses at the bottom.

Not able to find an immediate way off the high point, we had to lose a ton of elevation before we finally found a way off the cliff. An ominous sign perhaps…? 😉

Andrew down-climbs the first set of cliffs. Good thing he warmed up with those Karate Kid moves! 😉

Looking back reveals that unless you own a wing suit, there’s no way to follow the ridge proper from the high point.

We stayed beneath the ridge as we paralleled another impressive cliff band. This would eventually lead us onto the crest.

Eventually regaining the ridge, we had no trouble with any of the other down-climbs.

Another fantastic shot by Andrew as I check out the route to the west peak. What concerned me the most at this point, was the section in the centre that led up to the summit ridge. I was still naive enough at this point to think the summit ridge would be doable. (Photo by Andrew Nugara)

The west face is impressive! Mount Darrah is in the background.

The view south towards Centre Mountain which fittingly, is in the centre. 😉

A view back from the col. The north face is intense and offers few, if any opportunities for bypassing obstacles along the ridge. On the distant far right is the summit of Michelle Head.

Navigating my way along a narrow section of ridge. (Photo by Andrew Nugara)

Andrew follows suit.

A look back along the ridge highlights the many cliff bands.

Arriving at the section where I expected things to get tricky. (Photo by Andrew Nugara)

Up, up, and over! (Photo by Andrew Nugara)

Scoping out what comes next. (Photo by Andrew Nugara)

Carefully traversing below a narrow section. (Photo by Andrew Nugara)

Andrew follows me onto the same section of ridge. So many down-climbs…

Andrew descends a small couloir after we arrived at an impassable down-climb along the crest.

I descend the same couloir with my usual gracefulness. 😉 (Photo by Andrew Nugara)

Andrew ascends a ramp that led from the base of couloir back to the crest.

Looking back at the down-climb we bypassed by using the small couloir and ramp (both pictured on the left). (Photo by Andrew Nugara)

Andrew takes the lead as we tackle the next section.

This is where Andrew was about to down-climb a very narrow and exposed section of ridge using the stack of rocks in front of him, as a hold. Thankfully he realized that it was completely loose! He then spent several tense minutes knocking rocks and boulders off the ridge trying to find something solid to hold onto. Finally, he was able complete the down-climb with two very skillful moves. Afterwards, he nicknamed it, “Apple Crumble Ridge” and this is the one case in my life, where I was thankful not to have any dessert! 😉

After Andrew emphatically warned me not to follow, I searched for a way around “Apple Crumble Ridge”. I ended up losing a huge amount of elevation before making an awkward traverse across a slab-covered slope and then a section of rubble where at one point, a large chunk of rock that I was using to support myself shifted towards me. Yikes! A careful down-climb brought me to the point pictured above where I found myself looking up to the ridge and the long slog that lay ahead.

The coolest brown tarn that I’ve ever seen! DS3 is on the left and DS4 is on the right.

Getting close to rejoining Andrew on the ridge.

Arriving on the summit ridge with the west peak on the left and DS2 on the right.

The first section of the summit ridge was what I was expecting. From here it looked like we would be able to make the summit of the west peak…

However, the ridge began to narrow, and then narrow some more. (Photo by Andrew Nugara)

Andrew scrambles an extremely narrow and highly exposed section of the ridge that reminded me of Phillipps Peak – only here it was longer was comprised of terrible rock. At this point, I was ready to pull the plug, but Andrew wanted to recon the remainder of the ridge just in case things got better.

A pano to the east as Andrew carefully ascends the ridge.

The end of the line after Andrew yells out, “NOPE! Nope, Nope, and NOPE!” upon seeing what lay ahead.

Andrew’s view towards the west peak from his vantage in the previous picture. The remainder of the route was incredibly narrow, highly exposed, and full of loose rock. If the previous ridge was sketchy enough to be called, “Apple Crumble Ridge” then this was, “Pear, Apple, and Cherry Crumble Ridge”! (Photo by Andrew Nugara)

My reaction as Andrew declares it a no go. (Photo by Andrew Nugara)

A pano to the southeast with DS3 on the left, DS4 in the centre, and Centre Mountain on the right. I’m definitely looking forward to many more trips in this area!

A telephoto to the east highlights Victoria Peak (left), Castle Peak and Windsor Mountain (both to the right of centre).

Looking south at Centre Mountain.

A telephoto of Centre Mountain and Centre N1 (left).

Sweet Mount Corrigan ranks high on my ‘To Do’ list for the area…

As does Barnes Peak (centre), Barnes Lake, and Limestone Ridge (right). Edit: Done!

Andrew gingerly makes his way back. From the ridge, the col between the west peak and S2 looked nasty and there was no way that I’d want to try this section of the ridge again even if we did make it across alive.

Three cheers for living! 😉

Backtracking along the ridge after calling it quits. (Photo by Andrew Nugara))

Fortunately, we didn’t have to backtrack too far before we could see a descent line to the bowl.

That col is going to bug me. It looked menacing from the ridge, but as we lost elevation it looked less daunting and what looked to be a bit of a ramp can be seen behind Andrew. In fact, he suggested that we check it out, but at the time, I was more worried about how long it take. I should have listened to Andrew and at least checked it out…

Descending towards the scenic bowl.

Scouting a route through an upcoming cliff band. (Photo by Andrew Nugara)

There looks to be a definite way up from the tarn to the col between DS2 and the outlier (far left) that sits between DS2 and DS3 (right). (Photo by Andrew Nugara)

A closer look at DS2 and the outlier.

This is the prettiest brown tarn that I’ve ever seen! This would be a cool place to camp for a night or two as access from the road is quick.

DS2 definitely looks more subdued from the lake. The gully on the left looks intriguing but given our experience on the ridge, it’s probably steeper than it looks and full of crappy rock, but it’s still worth checking out.

I kind of liked DS3. Maybe there is a way up from the tarn?

DS4 looks cool too, though those scree ramps are much steeper than they look and I doubt you could follow the ridge to the summit which is on the far right.

The view back to the summit ridge with the west peak to the right of centre.

A smaller tarn (right) also shares the bowl.

Dear humans, please take your crap home when you leave! Andrew is now 10 cents richer. 😉

Gazing back at the west peak (left) and DS2 (centre) as we leave the bowl.

The summit of DS4 is behind Andrew.

We picked up a faint trail soon after we left the bowl…

And the further we went, the more defined it became.

Until it became a distinctive ATV double track.

A closer look at our route in along the southwest ridge.

Some fresh ATV tracks.

The trail led us to this beautiful creek and waterfall.

The waterfall had two tiers. (Photo by Andrew Nugara)

From the creek onwards, the trail became super easy to follow. Not far from the waterfall, Andrew walks past a place where people obviously camp – in fact, there were fresh orange peels in the hearth, so someone had been here recently.

The trail out was super awesome!

Andrew stands at the fork where trail leads into the next valley and beneath Centre N1.

Looking back at the fork. The one on the left leads to the bowl beneath S2, the one on the right goes into the next valley.

Andrew stands at a second fork where the actual trail (left) and a shortcut (right) diverge – or converge if you are ascending. We took the shortcut.

Andrew trucks it down the shortcut.

Looking back where the shortcut (left) and the main trail (right) converge – or diverge if you are ascending. 😉

This is why I want to come back and try S2 again. This trail will make for a quick ~3.7 km trip from the road to the bowl.

Arriving back at the FFSR.

Looking back at the trailhead from the road. Note the orange flagging in the tree on the right.

On the road and looking at the southwest ridge. This view is what intrigued me when I scouted the area back in July.

Arriving back at my 4Runner after an uneventful ~700 m walk from the trailhead. I wouldn’t recommend trying our route because, well, it didn’t work and it’s full of sketchy, sketchy, terrain. However, part of what’s so fun about being in the mountains is route finding, so I’m hopeful that there may be another way up DS2 and/or the west peak from the bowl. Another part of what’s so fun about the mountains is spending time with great friends like Andrew. 🙂 Even though we didn’t make either summit, it was still an awesome day and I’m even more stoked about coming back again and again to this part of the Rockies!


Leave a Reply