

⚠️ Hiking and scrambling are inherently dangerous activities. Please read my Disclaimer. ⚠️
Until today, every time that I’d think about ascending Bluff Mountain, I’d get the theme song from Mad TV’s “Lowered Expectations” going through my head. After all, its summit is completely covered in trees and most of the approach looked liked it would be a treed ridge walk with no views, save for the odd patch of mountain baldness. How enjoyable could that be?
So when my friend Brad suggested that we climb Bluff Mountain, I immediately searched for alternative ways to justify such an excursion. In order of priority, I came up with the following three reasons: 1) Brad also brings scotch with him when he hikes and since my flask had developed a leak – a common middle-aged male thing 😉 – I was at least assured of a mountainside tipple; 2) I knew I had to bag this peak at some point and I might as well get it over with and besides, Brad would have scotch; and 3) it would be very cool to search for the pictographs that are supposedly located “near timberline” but which none of my archeologist colleagues had heard of before. Oh, and Brad is a fantastic guy to spend a day in the mountains with no matter what the objective is!
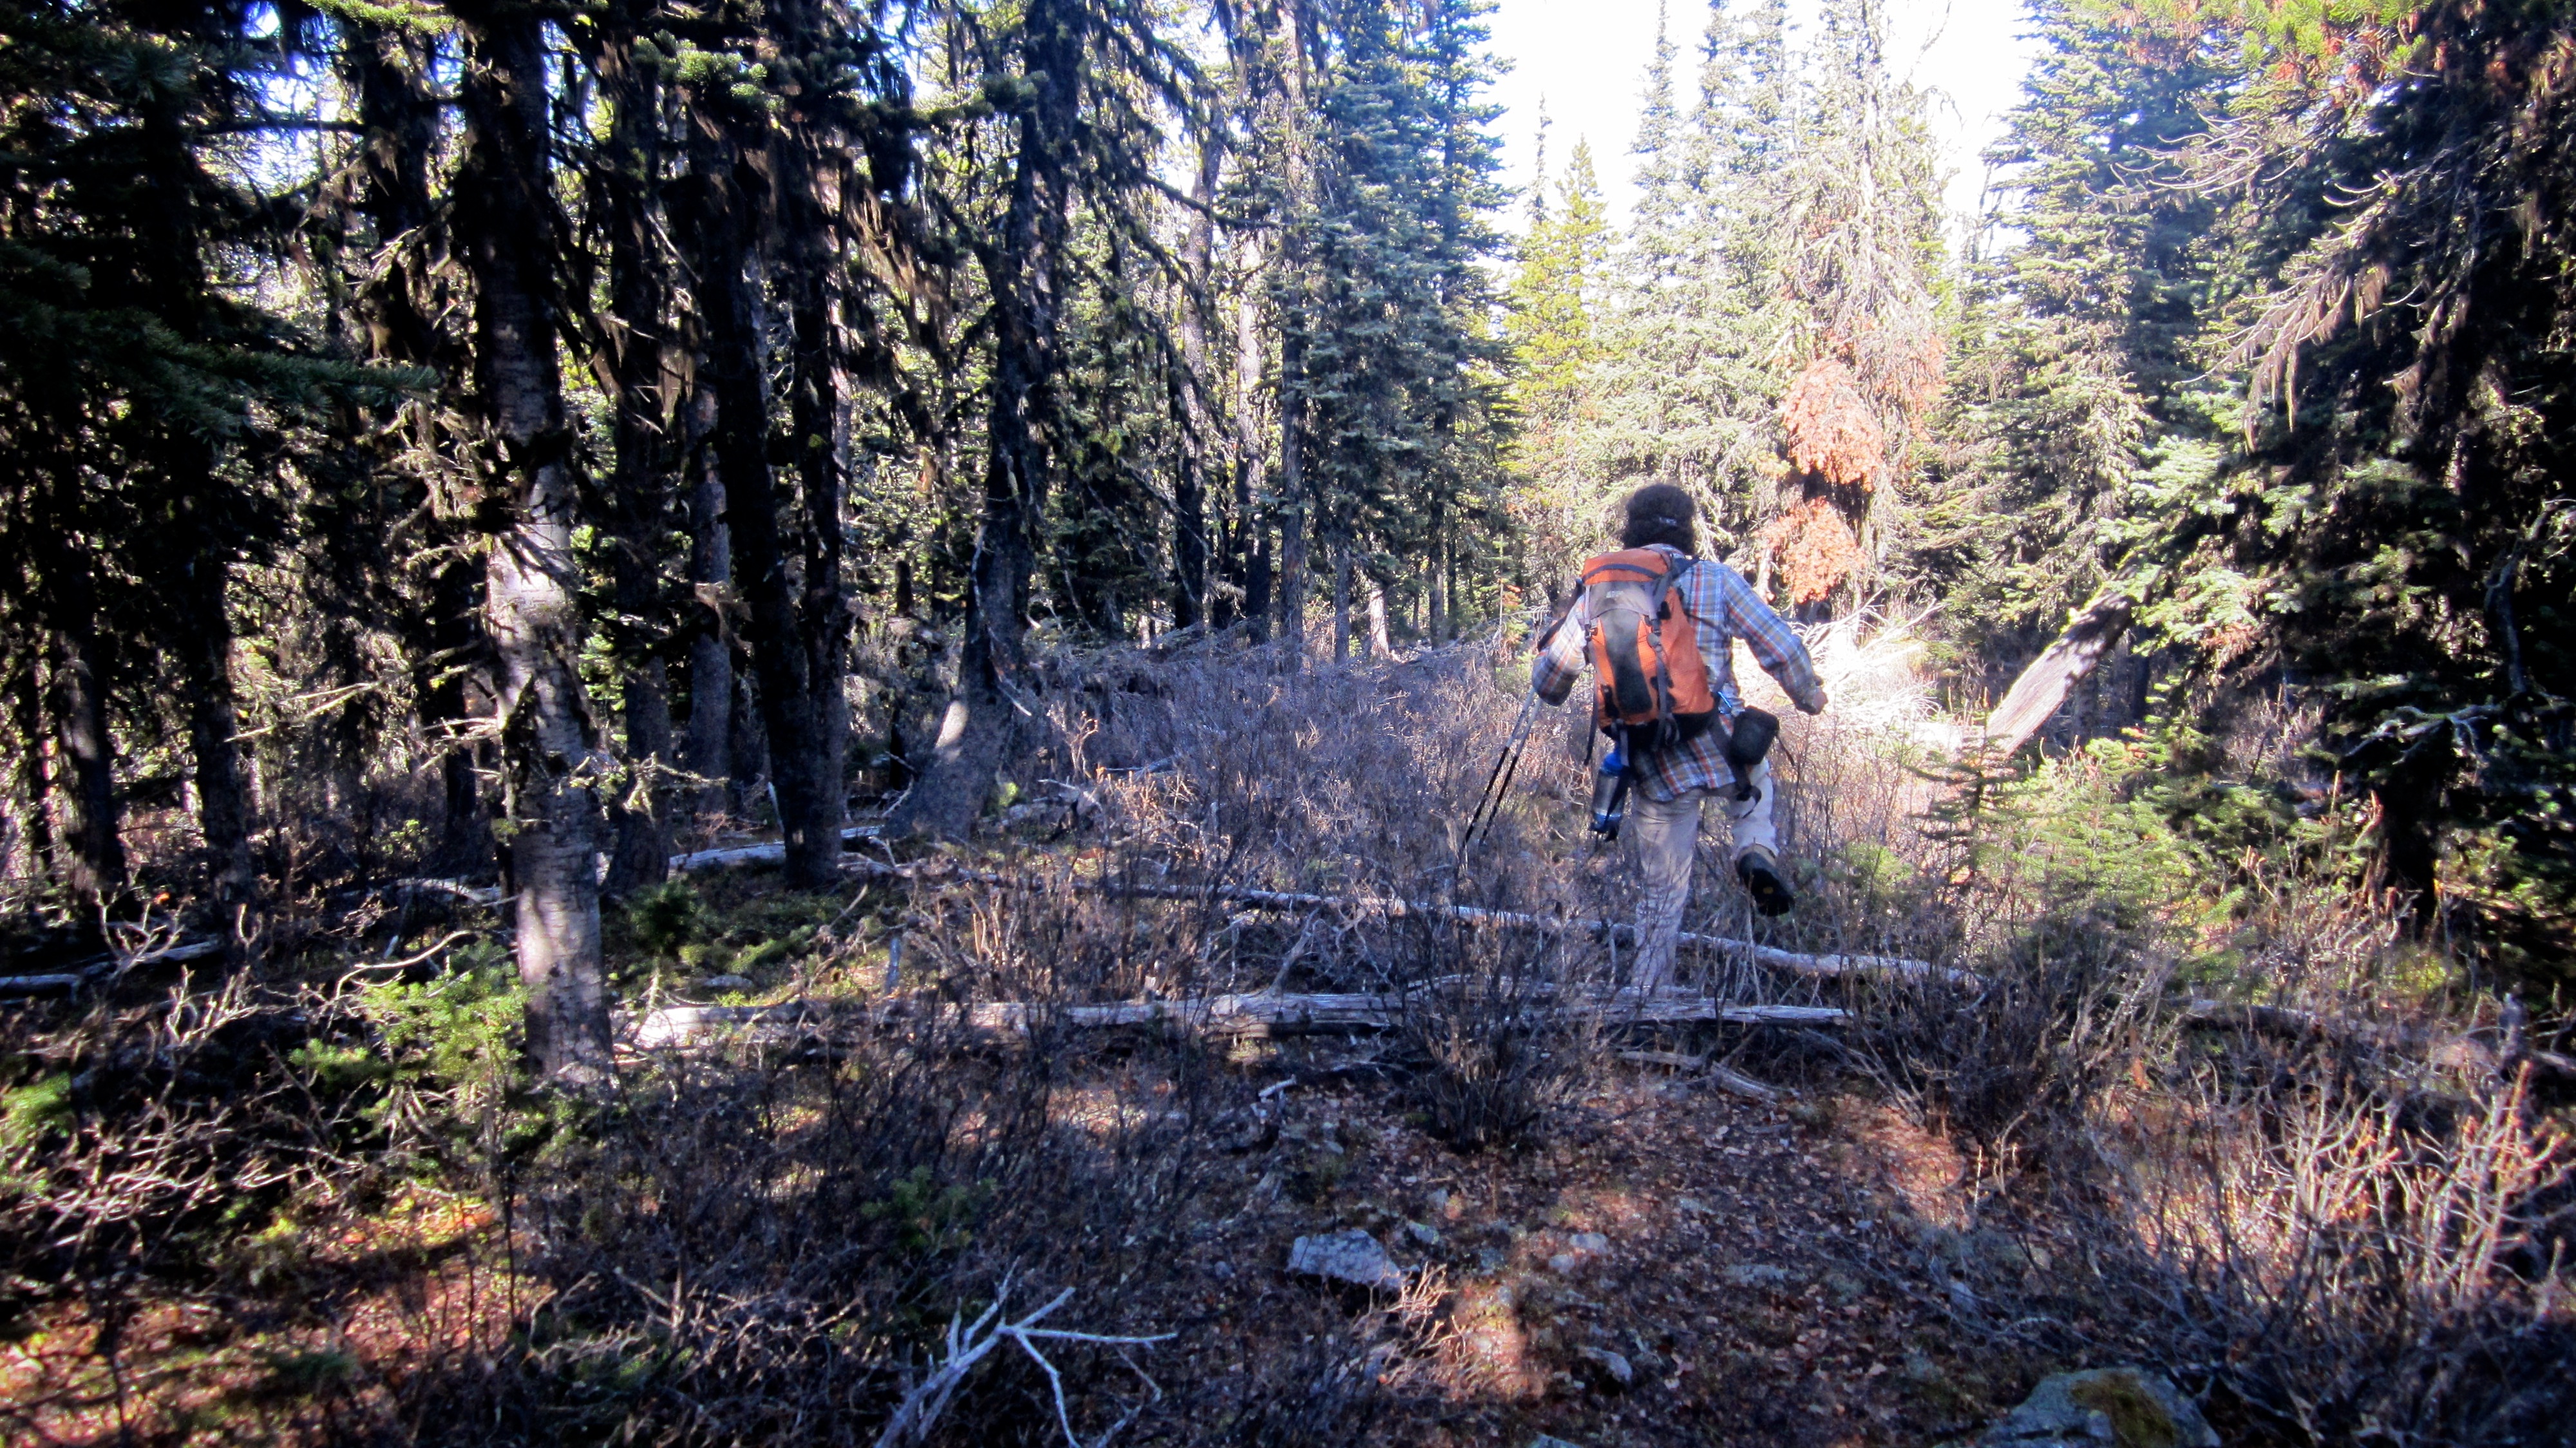
Well, my mind was blown and it wasn’t from the scotch! Brad kept insisting to me that for the first hour or so, Bluff Mountain would prove to be one of the best scrambles in the Crowsnest Pass. He would know since he had previously tried to summit Bluff Mountain using a scrambling route on three separate occasions and from two different directions, but had always run out of time. It had become sort of a life mission for him to summit Bluff Mountain and while I thought it would be a 4 hour trip, Brad assured me that we needed to budget a full day – and what a day it proved to be!
Bluff Mountain was one of my best days on a mountain this year. Brad was right, the scrambling for the first hour was awesome and then afterwards, we were surprised at how stunning the views were from along the SE ridge which was more open than we had expected. We also feel privileged to have found the pictographs and have stood in such a special place. As a throw in on our way to the summit, Brad also suggested that we do a loop and summit Greenhill Ridge on our descent. This was also an excellent idea!
Bluff Mountain had successfully bluffed me all these years into thinking that it was a lowly destination, when in fact it is just the opposite. Well played mountain [slow clap], well played [slow clap].

Heading west from Lethbridge, we drove until we reached the bridge over the Crowsnest River that is located between Frank and Blairmore. As soon as we crossed the bridge and passed the guardrail, we immediately turned right and onto a dirt track which took us to the base of Bluff Mountain’s SE ridge. From here we scrambled up to the small antenna station that is located at the top of ridge. We continued along the SE ridge, staying to the right, until we came to a large cliff band (bald patch on the map). We bypassed the south facing cliffs by staying to the right and scrambling up the east side of the cliff face. From here it was an enjoyable ridge walk to the summit.
From the summit, we headed north on an old trail until we came to an open rubble slope on our left. We descended the slope while doubling back in a southward direction until we we could see Greenhill Ridge below us. We then began to descend parallel to a large drainage. Fortunately, we came across another man-made trail in the trees which led us across the drainage, through the trees, and almost to the base of Greenhill Ridge. Here is where we left the trail and hiked to the base where we ascended a grassy slope to the summit. The trickiest part of Greenhill Ridge is getting off without trespassing on private land, so once we came to a gate with a ‘No Trespassing’ sign, we headed straight down the west slopes until we came to the Grassy Mountain Road which we then followed back to Highway 3 and then to the vehicle.

For some reason my GPS knocked off about a kilometre and a half from the total distance so I will have to approximate a bit. Our total distance travelled was ~13.5 km with total elevation gains of 1016 m. Our total roundtrip time was 6 hours and 50 minutes.

Brad and I took our time on this scramble because we were looking for pictographs that were left by indigenous peoples between 1500 and 5000 years ago. (Alberta Government’s Frank Slide Interpretive Centre) Apart from doing an extensive search of academic databases, this was the only online or printed source that I could find which made reference to the existence of pictographs on Bluff Mountain. Other web pages (a big thank you to Bob Spirko for raising my initial curiosity) only directed me back to this site and provided no evidence of discovery. Furthermore, in the days prior to our trip, I had asked two colleagues who are archeologists if they had any information on these pictographs, and both responded in the negative. So Brad and I made a list of specific things to look for while we were on the mountain and after careful searching, we were delighted to find faded red ochre pictographs (above). There was also evidence that the site had been used by the First Nations in more recent times.
We took several pictures but made sure not to disturb the site in any way. I immediately sent the pictures to one of my colleagues who in turn verified through the Alberta Archeological Survey, that this was indeed a site that had been documented in 1998 and then revisited in 2007. It is referred to as the “Bluff Mountain Site” or the “Bluff Mountain Pictograph.”
Here is an excerpt from the official 1998 site description that my colleague sent to me:
These smears were produced by dipping the index, middle and ring fingers into ochre and then drawing the tips of the fingers down the rock face. The finger smears, and the patterning and context of the pictographs, are consistent with similar sites identified as Central Montana or Foothills Abstract rock art in west-central Montana. The pictographs are quite faint, and the original observers mistakenly identified several sets of finger smears as being joined, with an upper set of smears forming the head and arms, and a lower set forming legs and genitals. Indeed, the tops of the finger smears are slightly enlarged, resulting from the initial placing of the finger pad against the rock, which makes the top of the middle finger smear look a bit like a head. However, careful observation of the pictographs shows they are finger smears. (1998 description)
Both Brad and I feel very privileged to have visited this site and to have stood in such a special place. Since Brad’s area of scholarship is in religious studies and mine is in history, it was a wonderful merging of worlds. That said however, I’m not going to disclose the location of the pictographs because it’s a protected archaeological site and because it’s a sacred place for the First Nations who may on occasion, still use it.
** If you do happen to discover this site, please take only pictures and nothing else **

The eastern side of Bluff Mountain is illuminated by the early morning sun. Our route followed the skyline from left to right.

A closeup of the lower section and some of the cliff bands. Our scrambling route is on the left.

Brad gears up at our starting point next to the Crowsnest River. It was a beautiful day!

There are so many options for scrambling up the SE ridge of Bluff Mountain. It is also a place where people come to rock climb, so good route finding abilities are important. We found that most of the serious scrambling sections could be avoided by keeping to either the left or the right. We would begin our ascent via more friendly slopes off to the right of this picture.

Brad heads up from the base.

Shortly after we started, we found a trail that we followed as far as we could. This allowed us to bypass some of the lower sections of rock and took us over to the large cliff face on the eastern side of the mountain.

Now off of the trail, the real scrambling fun begins.

Brad makes his way up one of many cliff bands.

Not a cloud in the sky and not a hint of wind. What an awesome morning to be on a mountain!

It wasn’t long until Bluff Mountain began to show off its views. Turtle Mountain is on the left.

Looking east towards the rising sun. Burmis Mountain is in the distance.

One of many large cliff bands that we encountered. Fortunately, the rock became more reliable the higher we went.

Brad’s a climber and so he tackled the difficult sections head on. I avoided this face by keeping to the left and scrambling up a more moderate route.

We continued to enjoy section after section of good scrambling.

How this got here is beyond me. Perhaps someone had packed a club and hit some golf balls from the antenna station? Maybe the sheep like to play a few rounds on their days off?

Brad takes a rest break in the middle section of an exposed climb. The Pass Powder Keg ski hill is in the foreground and Willoughby Ridge is just behind it. In the distance is the Flathead Range with Chinook Peak, Mount McLaren, Mount Parrish, Andy Good Peak, and Mount Coulthard all visible.

Brad continues his exposed climb.

Even with a vertical composition, I could only capture half of this rock face.

And the fun continues…

It really is a case of choose your own adventure on Bluff’s SE ridge. Most of the difficult scrambling can be avoided, but you can also choose to get into some class 4 + sections. Good route finding skills are important because it’s also possible to find yourself in a place beyond your abilities.

The last major set of cliffs before reaching the antenna station. This was a two stage process. We scrambled up the first section to the treed shelf in the middle. From here we searched for a route past the upper cliff face. We ended up ascending between the two trees that are growing out of the cliff face just to the left of centre.

Brad tackles a slab on the lower section.

Searching for a way up.

A nice shot by Brad as I try to follow his route up the cliff face. (Photo by Brad Wolcott)

‘Hey, who took all of the holds?’ (Photo by Brad Wolcott)

Brad is justifiably satisfied after scrambling up a difficult route.
 After reaching the shelf we began to search for a route past the final cliff face.

Our route went up just to the right of the tree in the centre. Note the dead section at the top of the tree.

There was a small shelf at the top of this section (just above Brad’s head) before the route continued onwards for about an equal distance to the top of the cliff.

Looking back from the top of the last cliff face before reaching the antenna tower. The top of the tree that we climbed past in the previous picture is visible on the lower right (dead branches). This view also shows some of the other cliff bands that we encountered. As I mentioned earlier, there are many routes to get to the top of the ridge.

Our first view of the summit (centre) came just after we gained the ridge. It’s still a long way off from here.

Once we gained the ridge, it was an easy walk to the antenna station.

The view to the SW from the antenna station.

The view to the west. In addition to the Flathead summits that I previously named, Sentry Mountain, Mount Tecumseh, “Deadman Peak”, Crowsnest Mountain, and the Seven Sisters are also visible.

The walls of the antenna station have the names of previous parties carved into the side. This is one reason why I don’t want to disclose the location of the pictographs. I’m sure that many people enjoy the scramble up to this point and then turn around.

Turtle Mountain rises behind Brad as we begin our ridge walk to the summit.

The summit is visible on the left. We would stay as far to the right as possible as we walked along the ridge. This helped us to avoid some potential losses in elevation.

Though the ridge is treed, it was more open than we had expected.

Surprisingly, the ridge offered sustained views of the surrounding landscape

There is one major cliff band along the ridge that we had to tackle. Here is where keeping to right and sticking to the high ground allowed us to avoid a potentially big elevation loss to the base of the cliff. After assessing our options, we would end up following the ridge past the right (east) side of the cliff and then scrambling up a short section through the trees. This was more appealing and probably quicker than going up one of the scree ramps.

Hiking with Brad always means there will be Hemingway moments 😉

The ridge narrows as it approaches the cliff band.

A more comprehensive view of the cliff from the ridge. We chose not to scramble up one of the scree ramps but instead, used a scrambling route through the trees on the far right.

Sticking to the high ground on the ridge is not only essential for avoiding the elevation loss before the cliffs, but also for enjoying the magnificent views!

The Flathead Range can bee seen in the distance. The low bump on the far right is “The Saddle”.

The view back as we made our way to the east side of the cliff face. From left to right: Turtle Mountain, Mount Darrah, Mount Pengelly, Mount McGladrey, Mount Coulthard, Andy Good Peak, Mount McLaren, Chinook Peak, Sentry Mountain, Crowsnest Ridge, and Mount Tecumseh. The lower bumps include Willoughby Ridge and “The Saddle”.

There are a few options for scrambling up the east side of the cliff face. This route has the most exposure.

We chose to go up a less exposed route that was located between two trees.

More stellar views of the Pass from on top of the cliff.

It’s always so much fun to find fossils.

Brad gets a small glimpse of the fantastic views to come.

Travel through the trees was not difficult and occasionally we would get a glimpse of the summit.

I liked the ‘electric’ look of this old tree.

Someone had built a large cairn along the ridge but far removed from the summit.

The last of our complete views to the south. Soon we would be treated to awesome views of the Livingstone Range.

The ridge remained open until it began to swing back to the west just prior to the summit. Centre Peak of the Livingstone Range is in the distance.

Looking across at Morin Peak (centre left) and just behind it, the South Peak of the Livingstone. “The Dog” is the summit just to the right of centre.

The Piitaistakis Eagle Watch Site (Two Mine Ridge), Robertson Peak, and Tallon Peak are on the left. In the distance is Burmis Mountain and Byron Hill. It was also possible to see many peaks in the Castle Wilderness including Victoria Peak.

A telephoto of Morin Peak (foreground centre). The South Peak of the Livingstone is poking up just behind it. One of Brad’s favourite climbs in the Crowsnest Pass is Morin Peak.

I had always assumed that many of these smaller peaks were unnamed, but at the Frank Slide Interpretive Centre, there is a labeled panorama that identifies the local names for many of these mountains. (Photo by Brad Wolcott)

Many years ago someone made a homemade bench to enjoy the views. From this point on, we followed a trail to the summit.

To my great surprise, Bluff Mountain ended up being an incredibly scenic hike. “Lightning Peak”, Centre Peak, and Caudron Peak are all visible.

Colourful yellow lichen.

The trail leading to the summit from the ridge was easy to follow.

The summit of Bluff Mountain (2149m). Brad is overcome with emotion as he realizes the completion of his life’s goal 😉

The summit was so weird. Many years ago, someone took time to make this clearing but never removed enough trees to create a view. They also never built a cairn. We would find a similar clearing further to the north on our way to Greenhill Ridge. There was also an old man-made trail which traversed the summit ridge.

The highest point that we reached.

Brad plans out our route to Greenhill Ridge while we enjoyed lunch on the summit. I was still in shock that there wasn’t a hint of wind.
At the north end of the clearing we discovered an old trail that we would use to reach the open slopes above Greenhill Ridge. Click to continue our trip to Greenhill Ridge.


Leave a Reply