

⚠️ Hiking and scrambling are inherently dangerous activities. Please read my Disclaimer. ⚠️
It was during our January ascent of Tent Mountain that I first ‘noticed’ the Northwest Ridge of Ptolemy (NROP). I remember mentioning to Jeff and Brad that it looked like it had the potential to be an interesting traverse. Brad, being the guru of Crowsnest Pass hiking knowledge that he his, subsequently informed me that he and his dad had ascended the ridge several years before, but hadn’t ventured further than the two most northerly prominences. He did remark however, that they came away impressed by a peak they happened to see further to the south. Later, during one of his many trips up to Gargantua and the Ptolemy Plateau, Brad scouted the rest of the ridge from both the east and the south – and saw an even larger peak immediately to the northwest of Mount Ptolemy. I also remembered seeing these peaks from both Sentry Mountain and from the west side of Andy Good, so I began to scour online for a trip report as well as study maps and photos. I never did find a trip report which made this trip even more interesting to plan.
The end result was an awesome mid-week excursion that included 3 peaks – all of which offered immersive views of the Flathead Range and the Ptolemy Plateau. Peak 3, the one immediately to the north of Mount Ptolemy, was the most impressive and according to my topo map, is roughly equivalent in elevation to nearby Chinook Peak (the last topo lines stop at 2560m, however, my GPS recorded the height of Peak 3 as 2622m and Bivouac lists the height of Chinook at 2606m). Even though Mount Ptolemy (2812m) justifiably draws all of the attention, both Brad and I were surprised that none of the peaks were named, in particular Peaks 1 and 3. On top of this, I will add that the ridge walk itself was amazing, with just enough exposure at times to get the heart pumping. NROP will definitely go down in my mind as a superb traverse.
Edit 11 June 2016: Brad did some research on Mount Ptolemy and from the 1870s to 1914, it was referred to as Mummy Mountain because it resembled a recumbent Pharaoh when viewed from the west. In 1914, the Boundary Commission changed the name to Mount Ptolemy (after the ancient Greek astronomer) because there were Pharaoh peaks elsewhere in the Rockies. Therefore, as a tribute to the history of the mountain, Brad nicknamed Peak 1, “Mummy Mountain” and Peak 3, “Pharaoh’s Peak”. To keep with the theme, I guess I’ll nickname Peak 2, “Anubis Peak” because he was the Egyptian god associated with mummification.
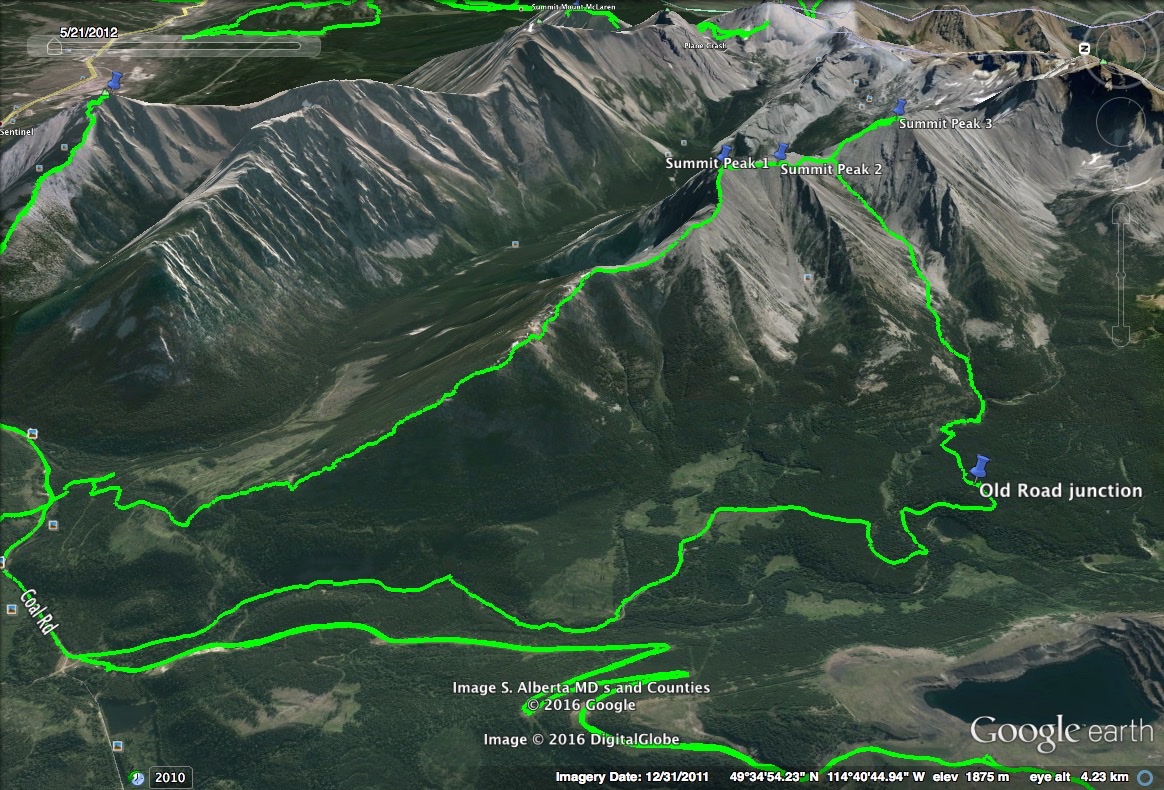
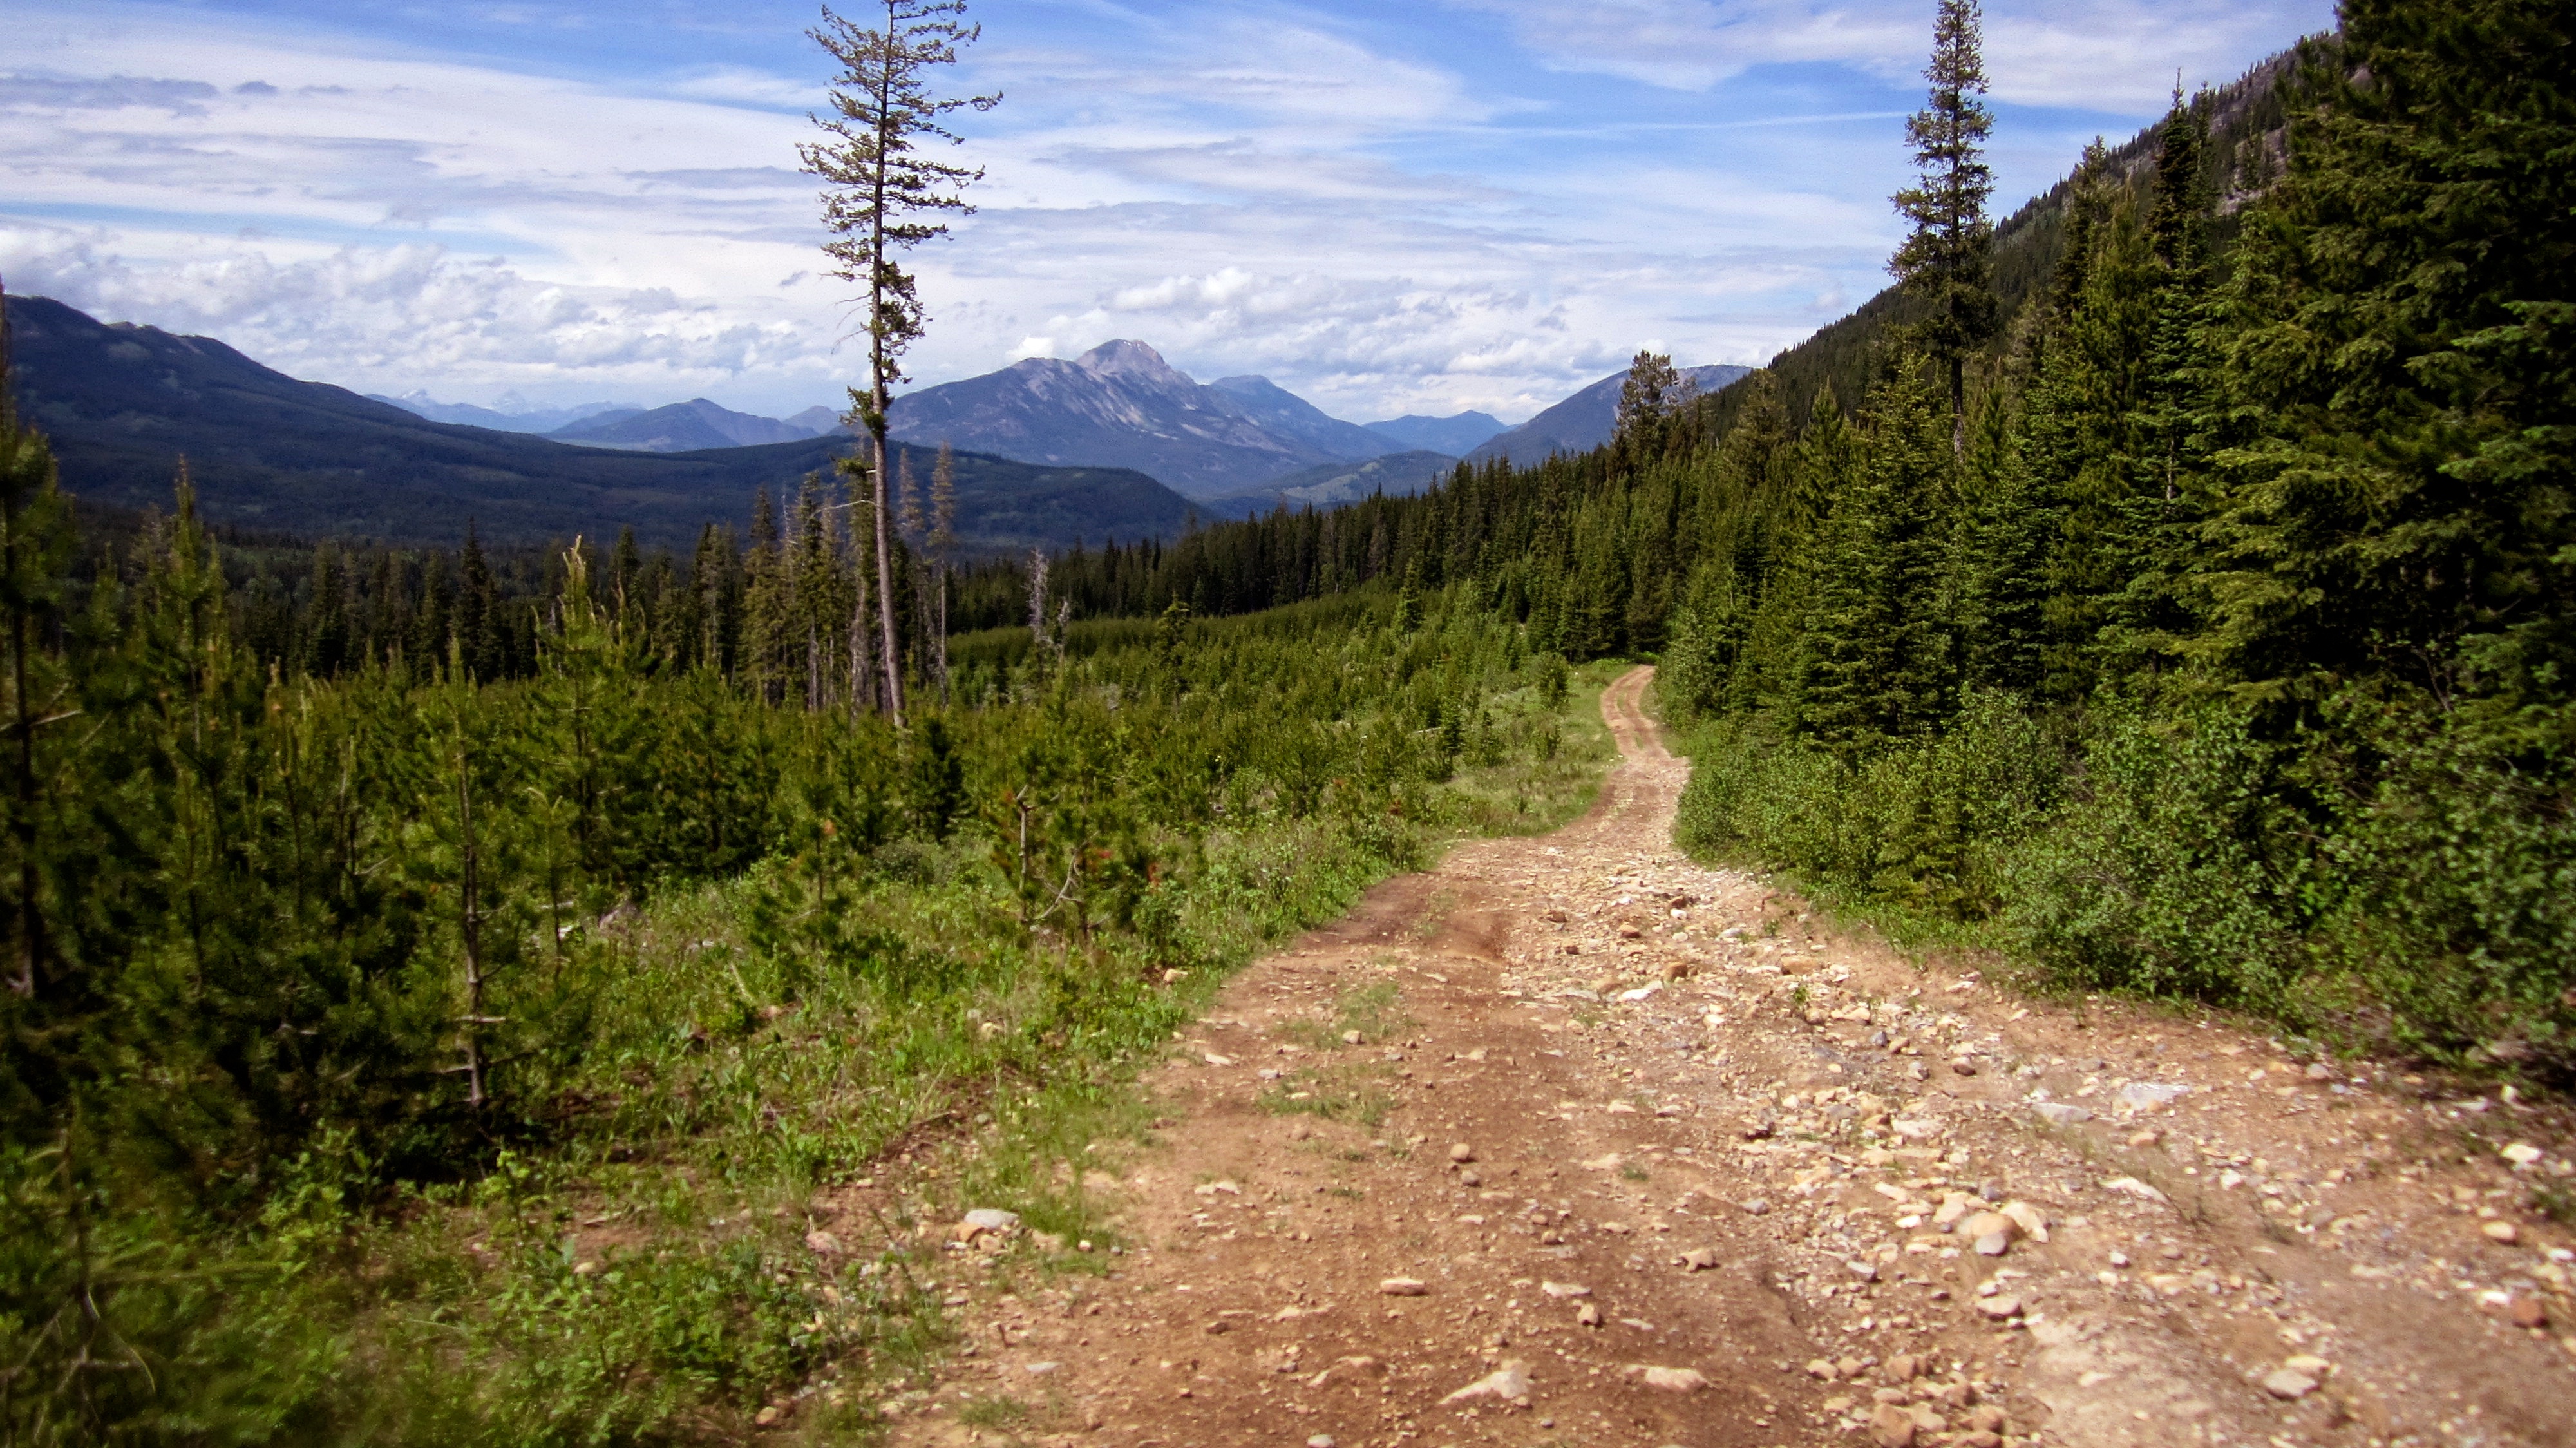
Pardon all of the previous GPS trip lines – it was taking too long to try to find and blank them out on Google Earth so I just gave up… To get to NROP, we followed Highway 3 past Coleman towards the B.C. border. After driving 1.3km beyond the rest area at the far west end of Crowsnest Lake, we turned left onto Coal Road. From here we drove ~3.2 to our parking spot at the Ptolemy Creek / Valley of the Seven Bridges trailhead. After following the main trail for ~250m, we then turned right onto a side road which took us to northern end of the ridge. As soon as the road began to lose elevation (~900m from the main trail) we left it and began to follow the contour of the ridge south through the trees. Once on the crest, it was an enjoyable hike to reach the 2 prominences located just before Peak 1. From here, the scrambling work began as we followed the ridge upwards towards the impressive looking peak. Fortunately, the west side of the peak and the upper ridge are forgiving and their bark was worse than their bite.
From Peak 1, we followed the ridge as closely as possible to Peak 2. There are lots of slabs in this section and while staying on the crest makes travel easier, it is also very exposed. From the summit of Peak 2, we tried to follow the ridge crest to the col at the base of Peak 3, but were stymied by a couple of large drops. Instead, we descended further to the west and eventually made our way back to the col. Reaching the summit of the much higher, Peak 3, was a steep 266m slog up a rubble slope. To descend, we followed the drainage located between Peaks 2 and 3 until we chanced upon an overgrown logging road that took us directly to the Ptolemy Pass trail. We then followed this for 5.1 km back to Coal Road.

A more detailed view of our route to gain the ridge. As I previously mentioned, we followed the main trail for ~250m before we turned onto a side road that took us to northern end of the ridge. As soon as the road began to lose elevation (~900m from the main trail) we left it and began to follow the contour of the ridge south through the trees. For the most part, the bushwhacking was light and we reached the crest approximately 1.5 hours after starting.
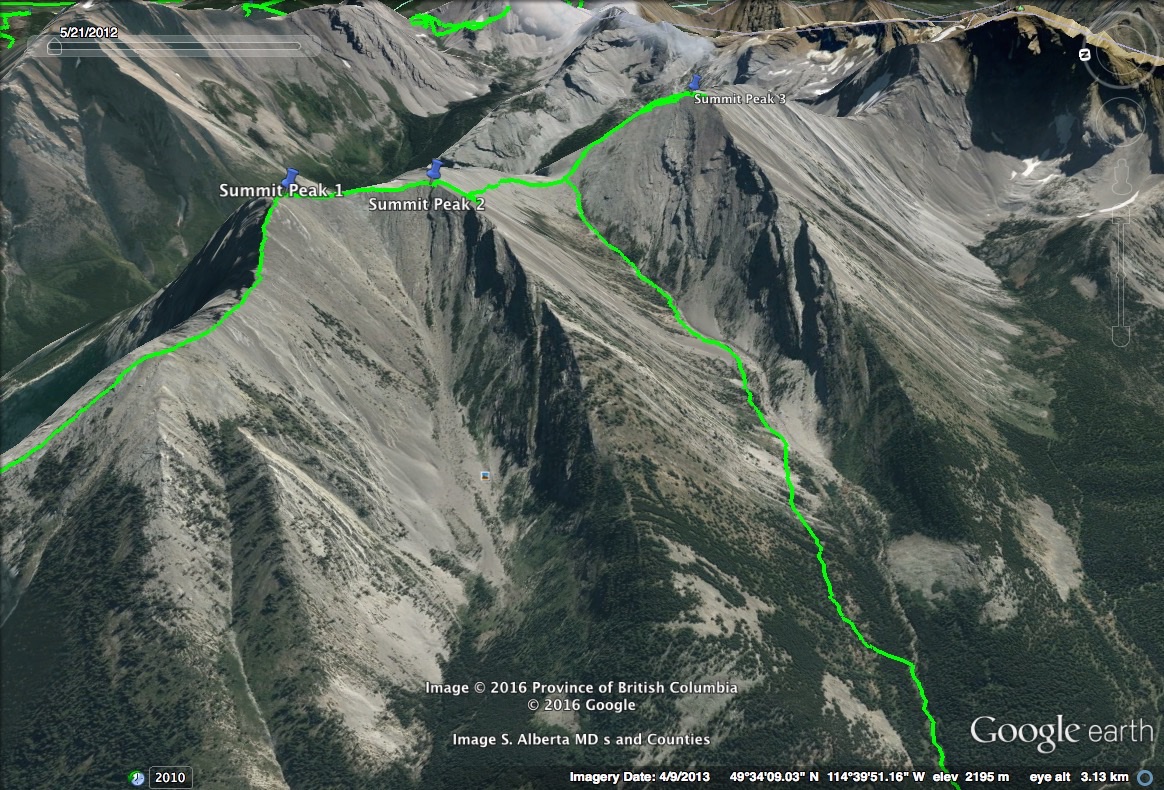
Another look at our route between the peaks and on descent. Peaks 1 and 2 are equivalent in elevation, however, for some reason Peak 2 sports a massive cairn while neither Peaks 1 or 3 had one at all. We couldn’t follow the ridge crest between Peak 2 and 3 because of a couple sizeable drops and were forced to descend between scree covered slabs further to the west before eventually making our way over to the col. There is approximately a 157m elevation loss between Peak 2 and the col and then a 266m elevation gain to reach the summit of Peak 3. On descent, we would advise following the drainage west until just after it begins to curve north at the base of the ridge. We stayed in it too long and it became a heinous bushwhacking experience. Instead, had we left the drainage just after it had begun to curve and continued bushwhacking west for ~150m, we would have reached an old logging road much sooner and minimized our frustration.

The topo map highlights the similar elevation between Peak 3 (bottom left) and Chinook Peak. My GPS recorded the height of Peak 3 as 2622m and Bivouac lists the height of Chinook at 2606m – so take that for what its worth. Peak 1 registered on my GPS as 2517m and Peak 2 as 2514m, so they are more or less the same size, though Peak 1 is more impressive looking.
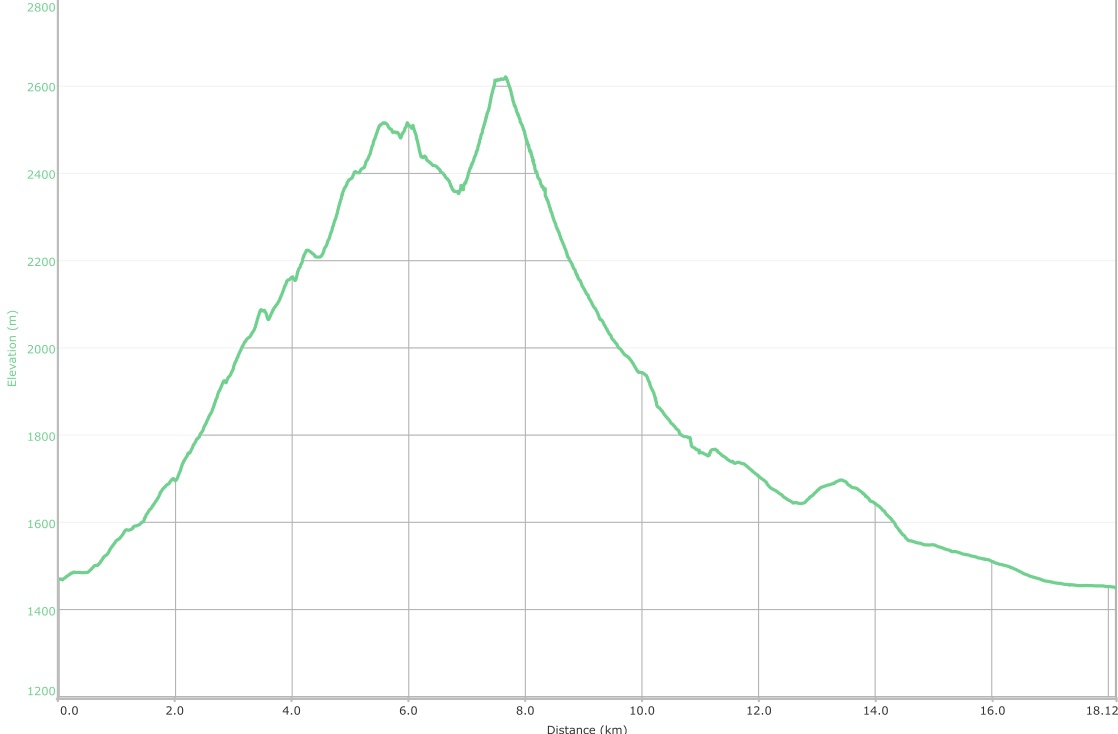
Our total roundtrip distance was 18.1 km with total elevation gains of 1474m. At Brad’s suggestion, we got off to an early start, but it still ended up taking us 10 hours and 31 minutes to complete.

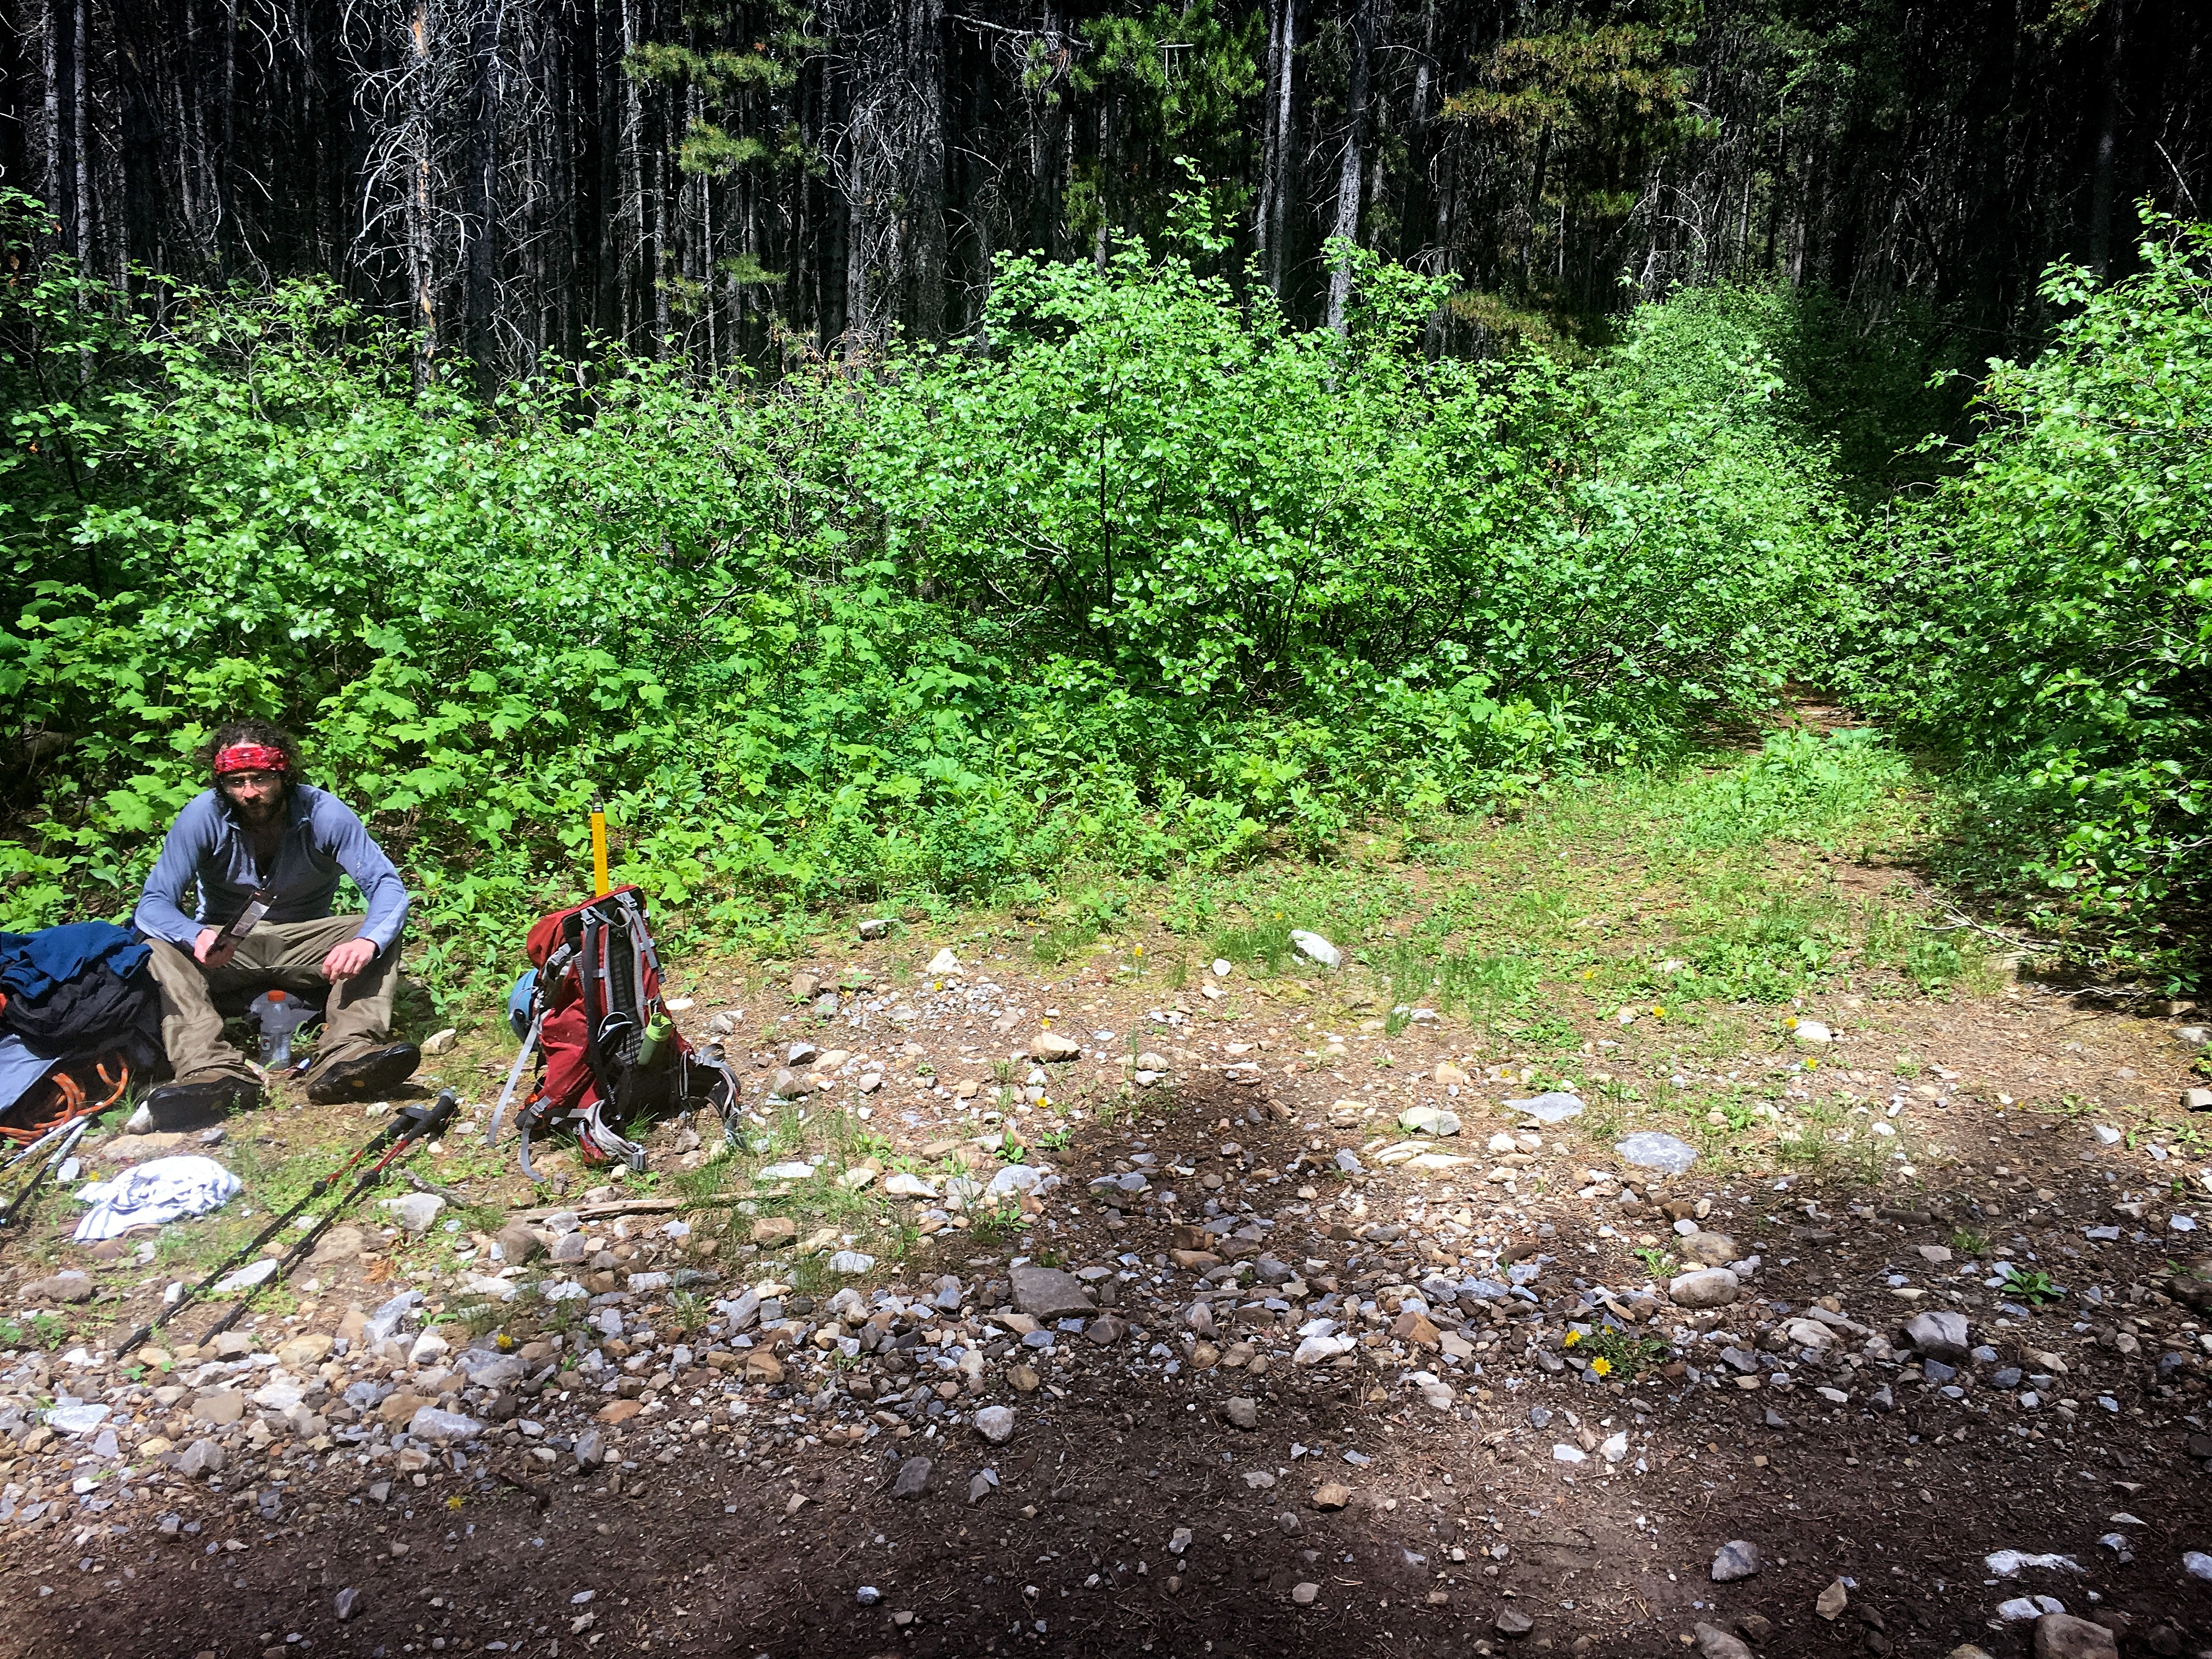
Rise and shine! It’s 6 am and we’re already gearing up at the Ptolemy Creek trailhead. Brad suggested an early start to try and avoid forecasted afternoon thunderstorms and boy, am I glad he did! Just after we had descended from Peak 3, we were drenched by rain and while this made our egress out the drainage unpleasant, had it occurred while we were on the mountain – particularly between Peaks 1 and 2 – it would have made things somewhat treacherous.
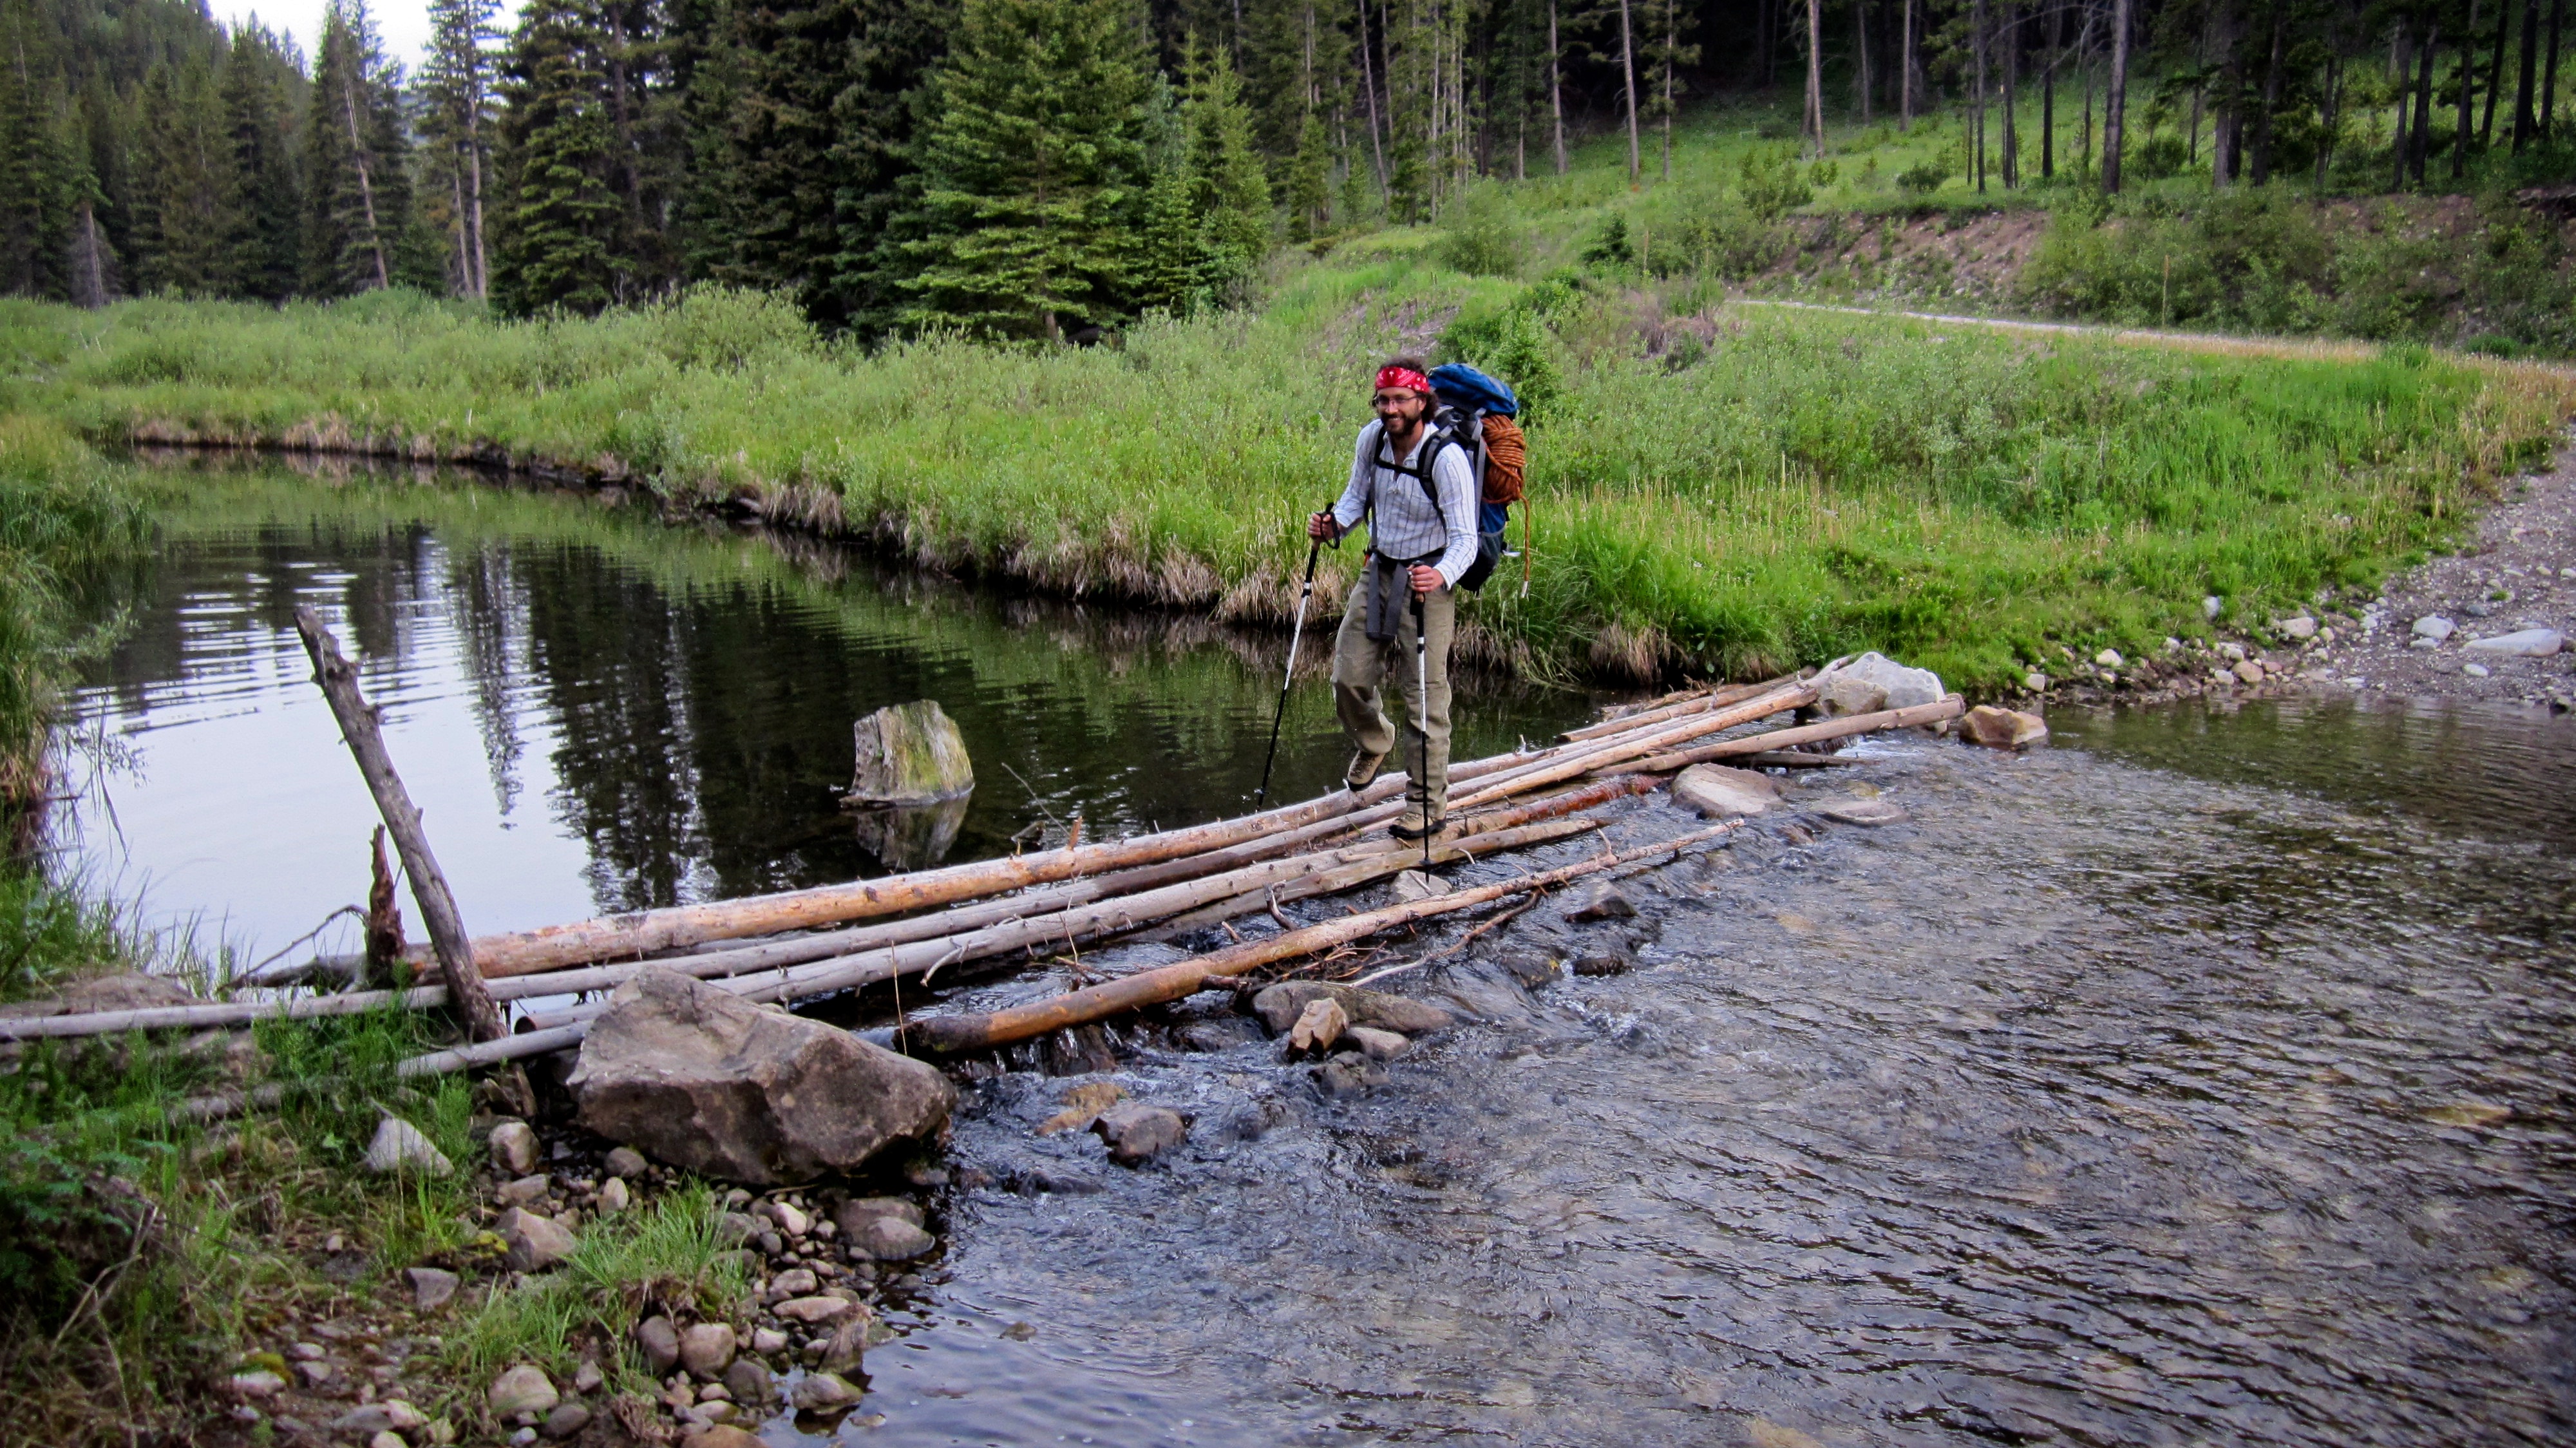
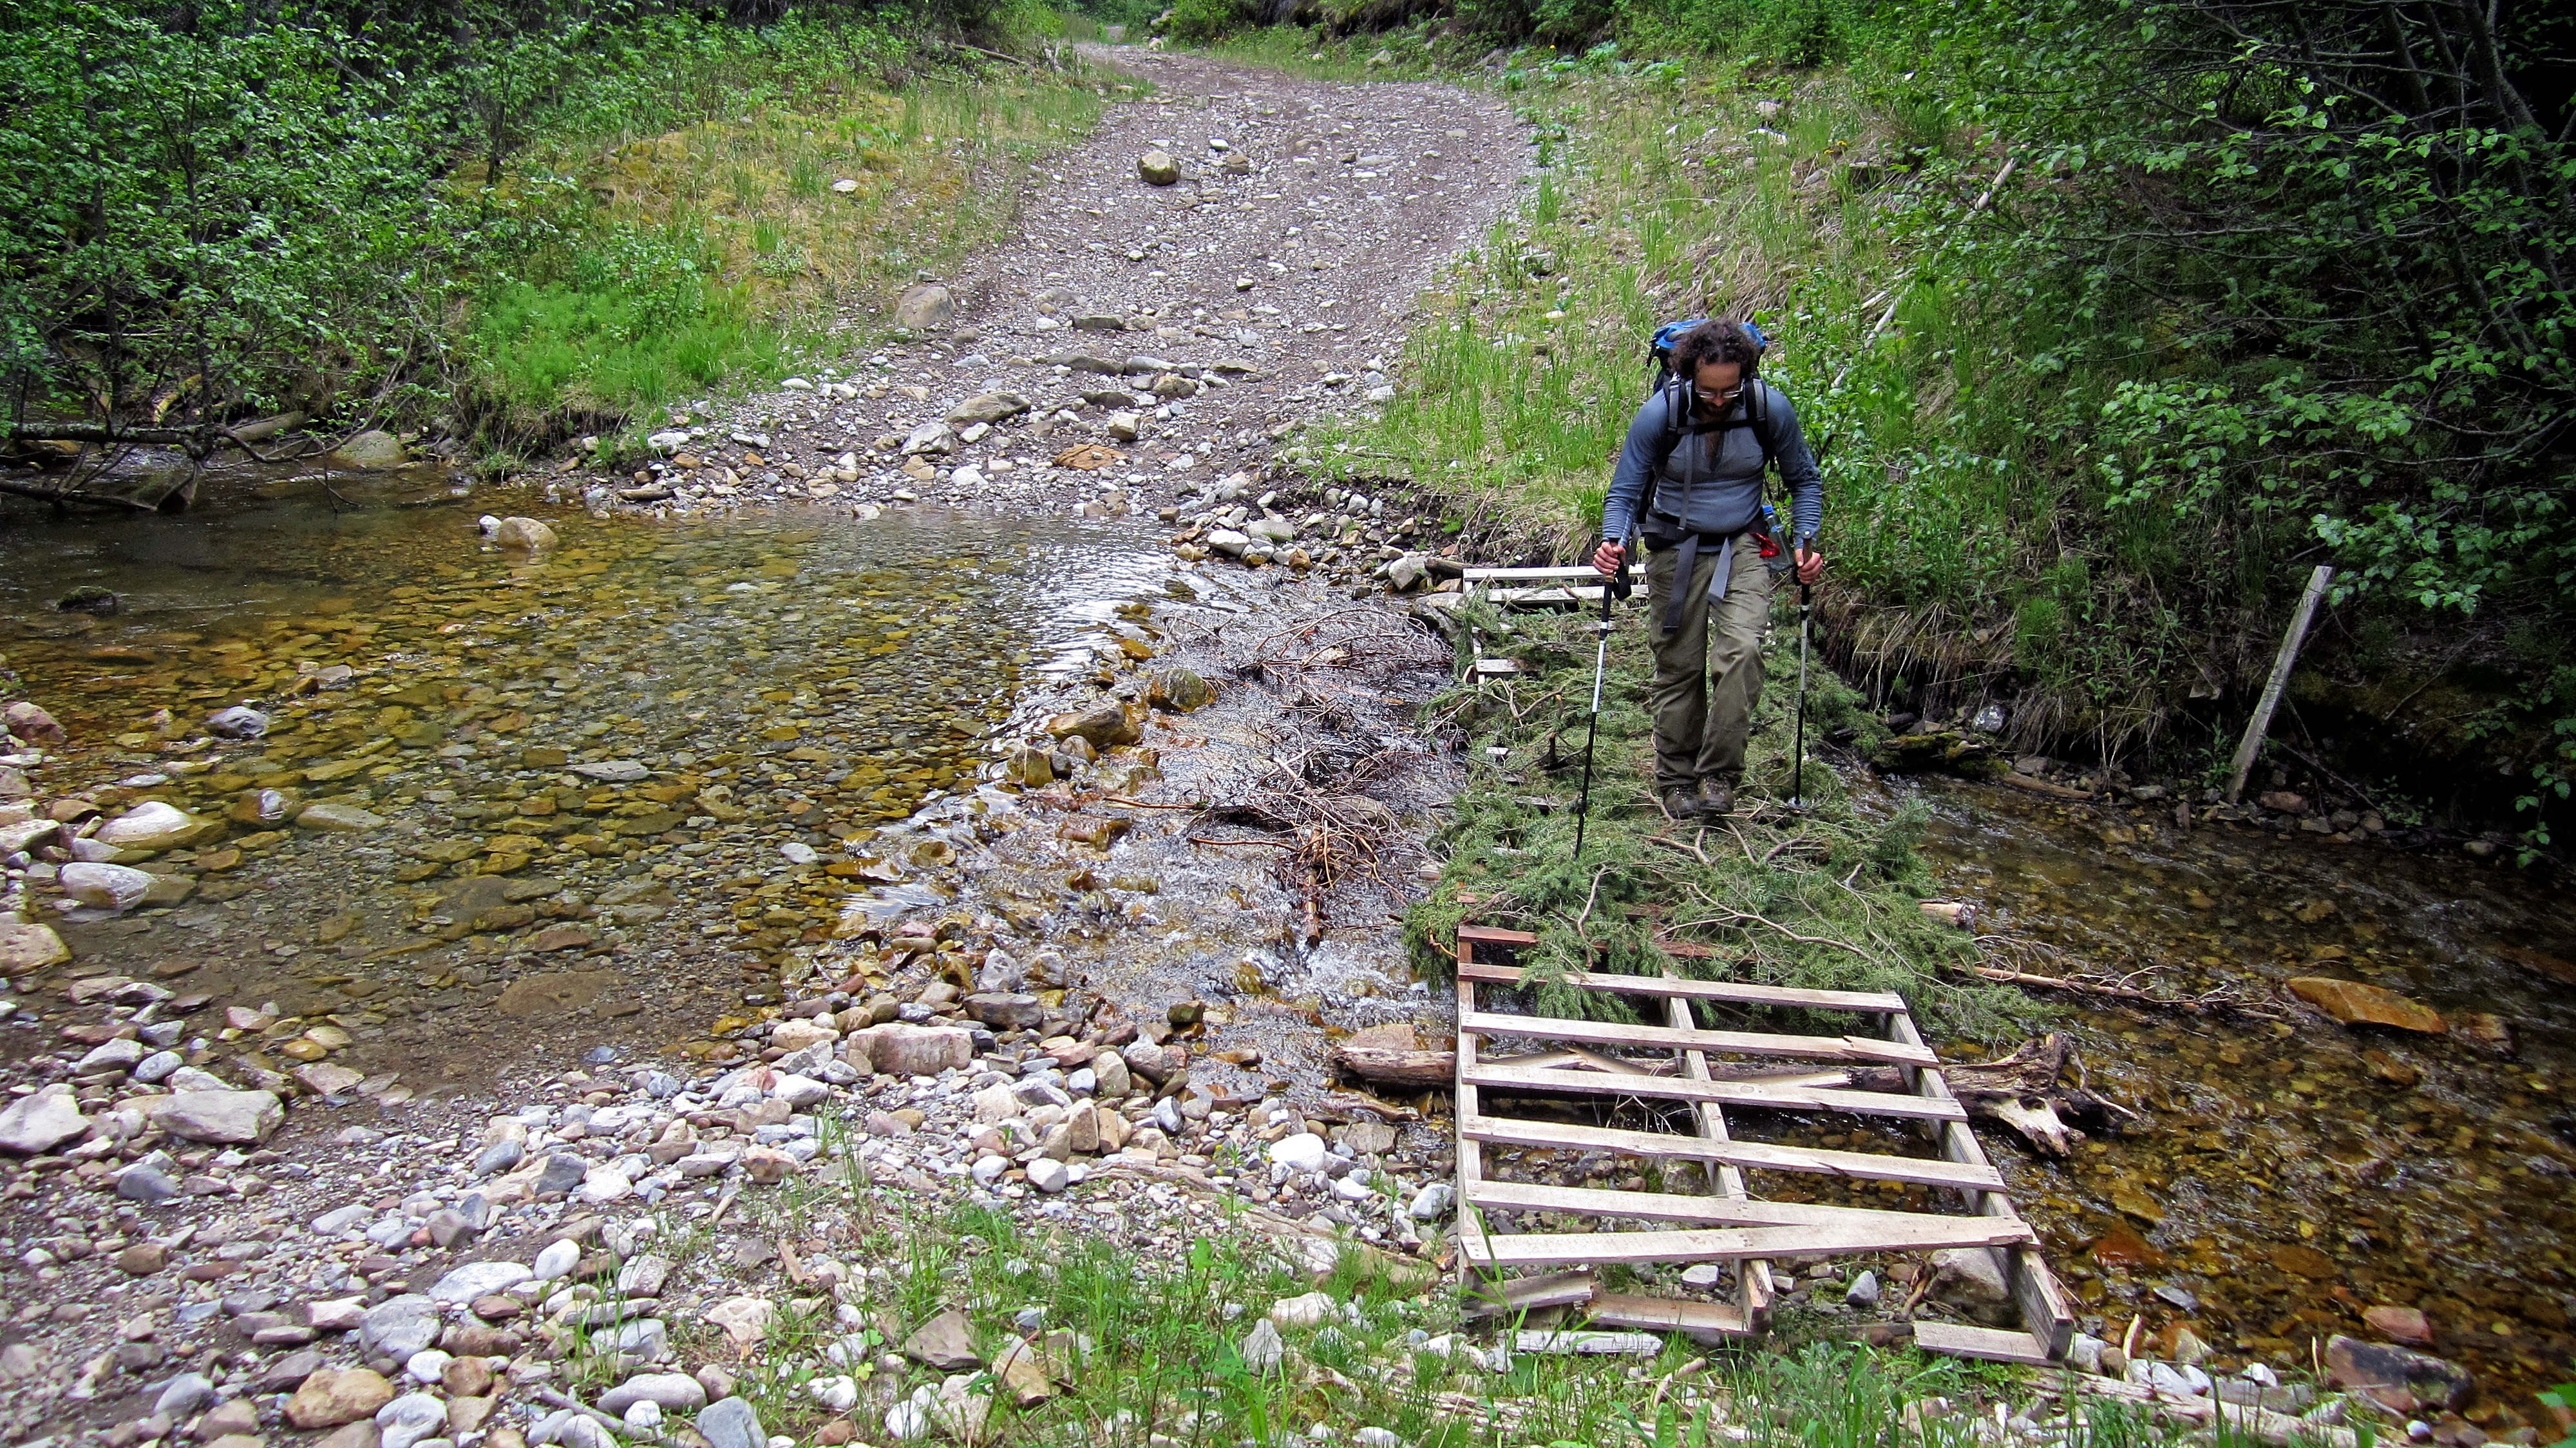
Brad crosses a makeshift bridge over Crowsnest Creek.

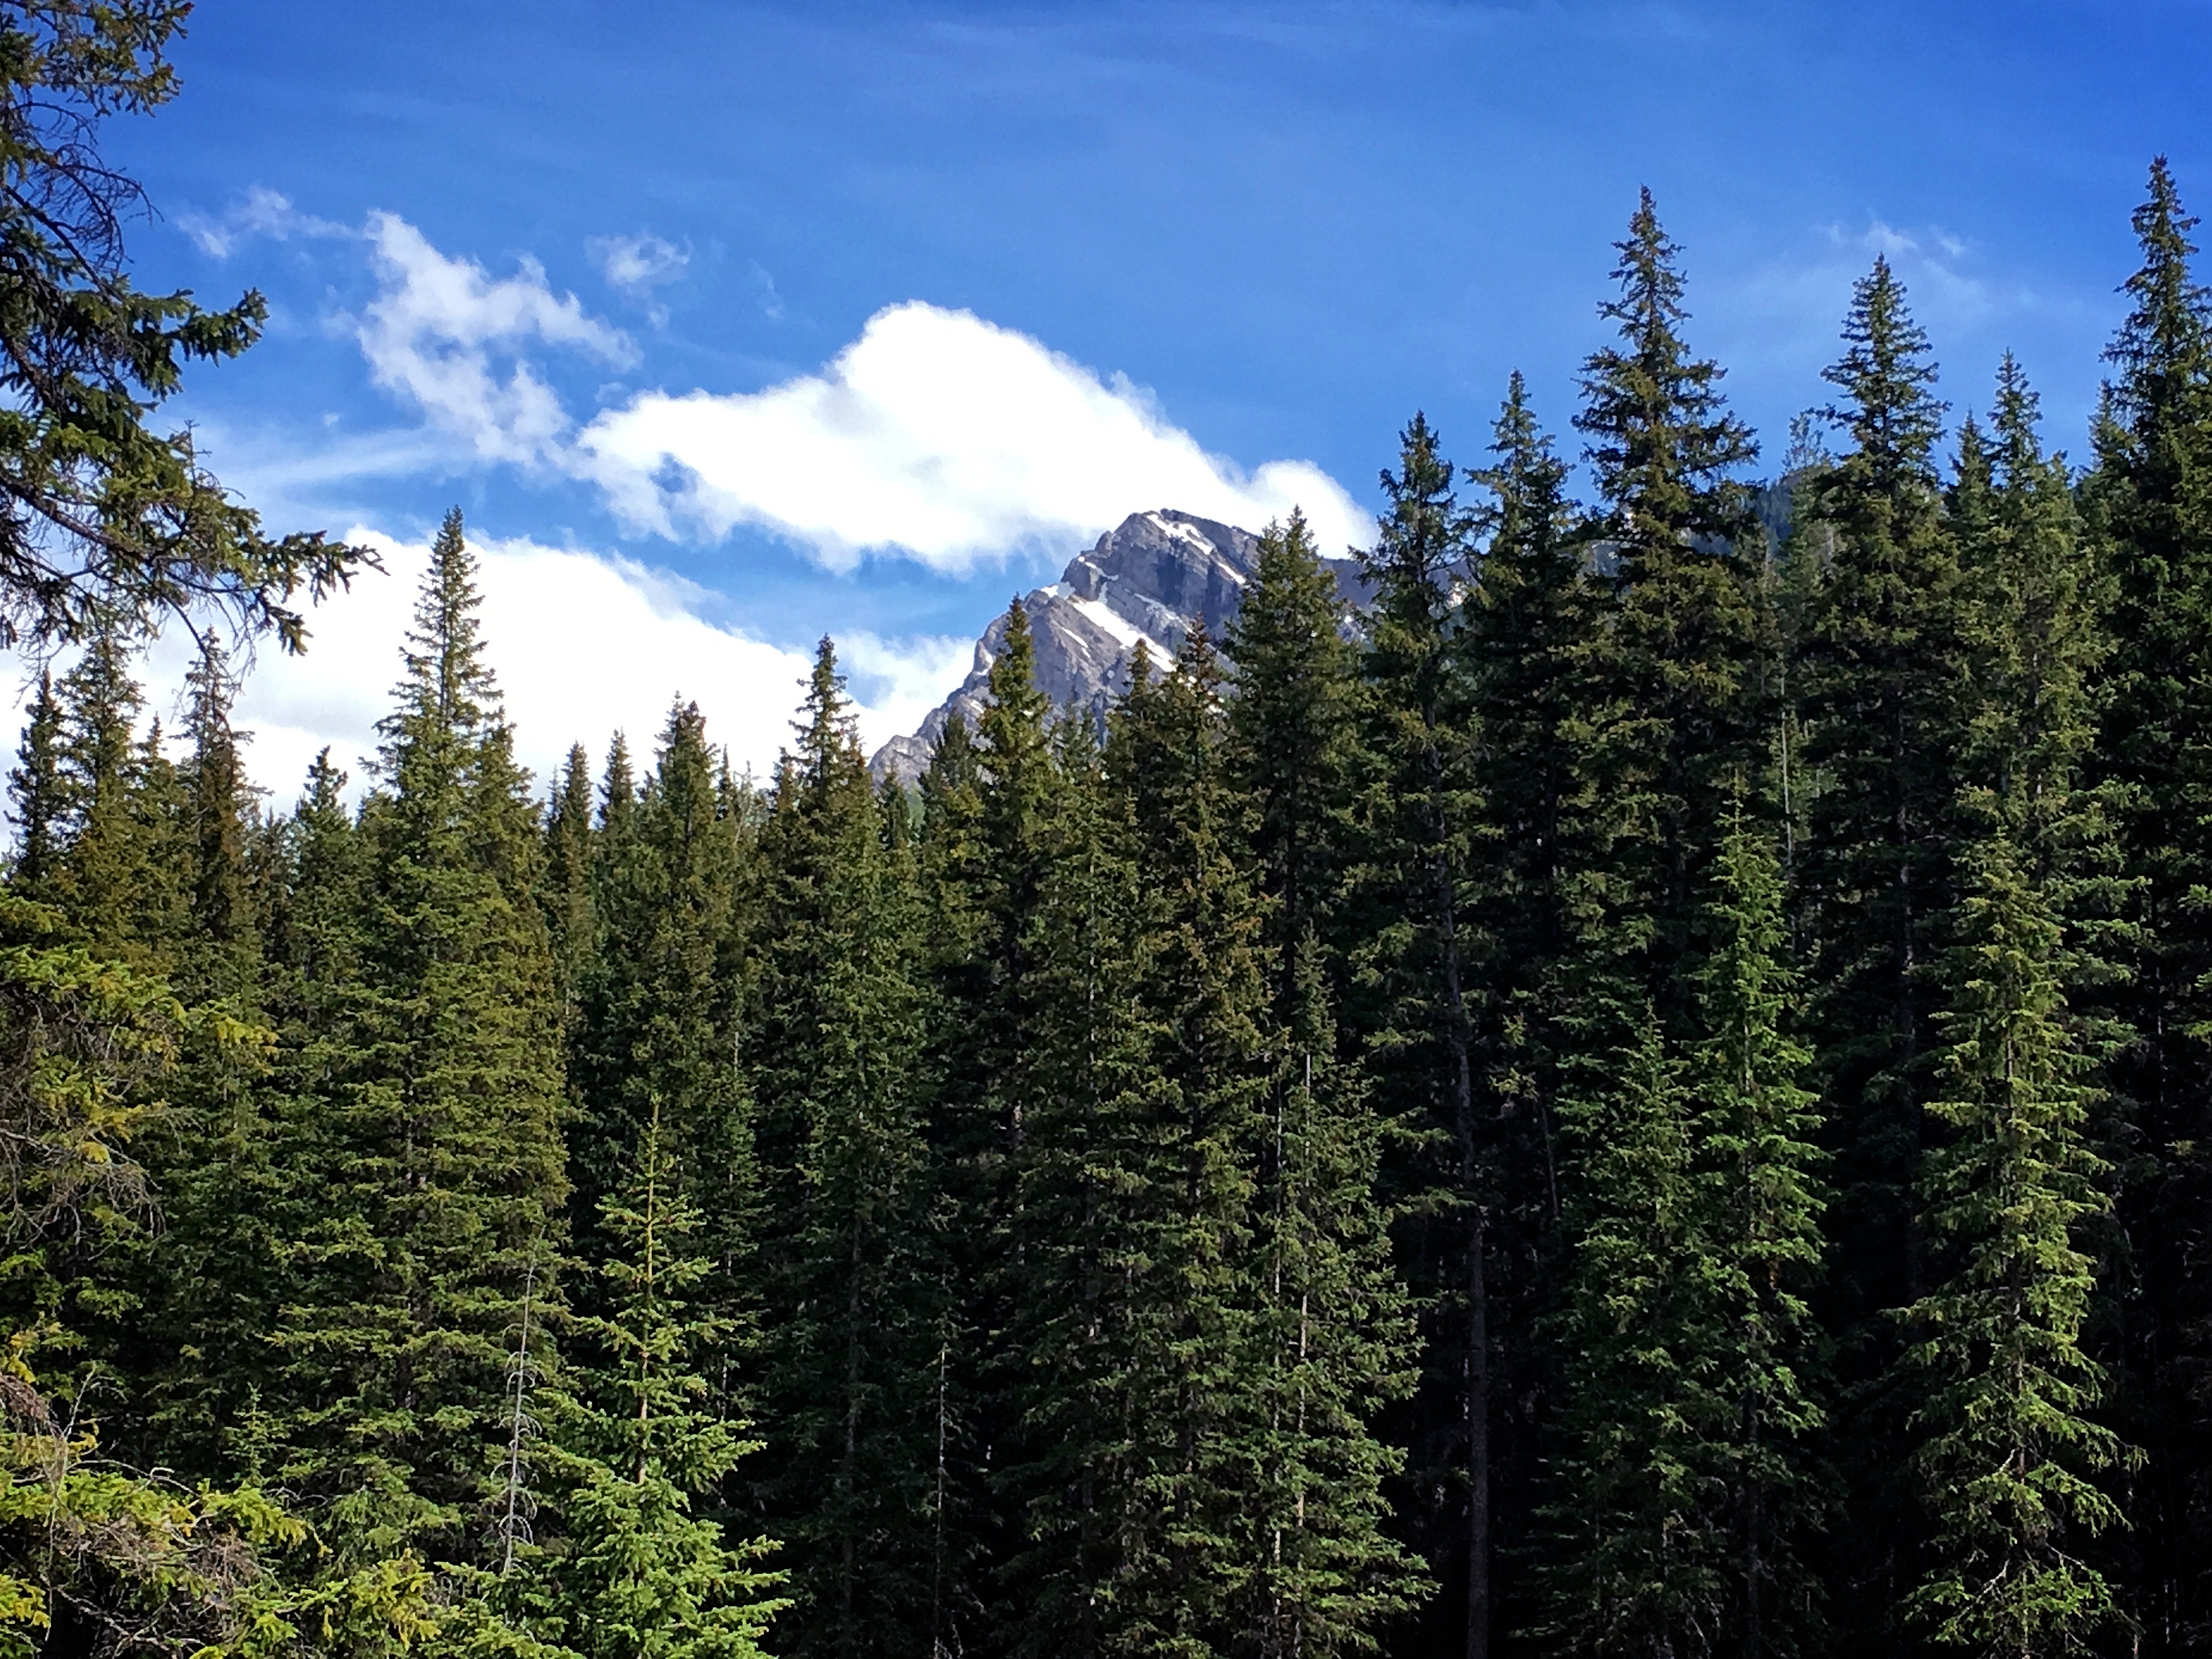
Shortly after starting we came to a pretty meadow. Peak 1 of NROP (Mummy Mountain) can be seen on the right.
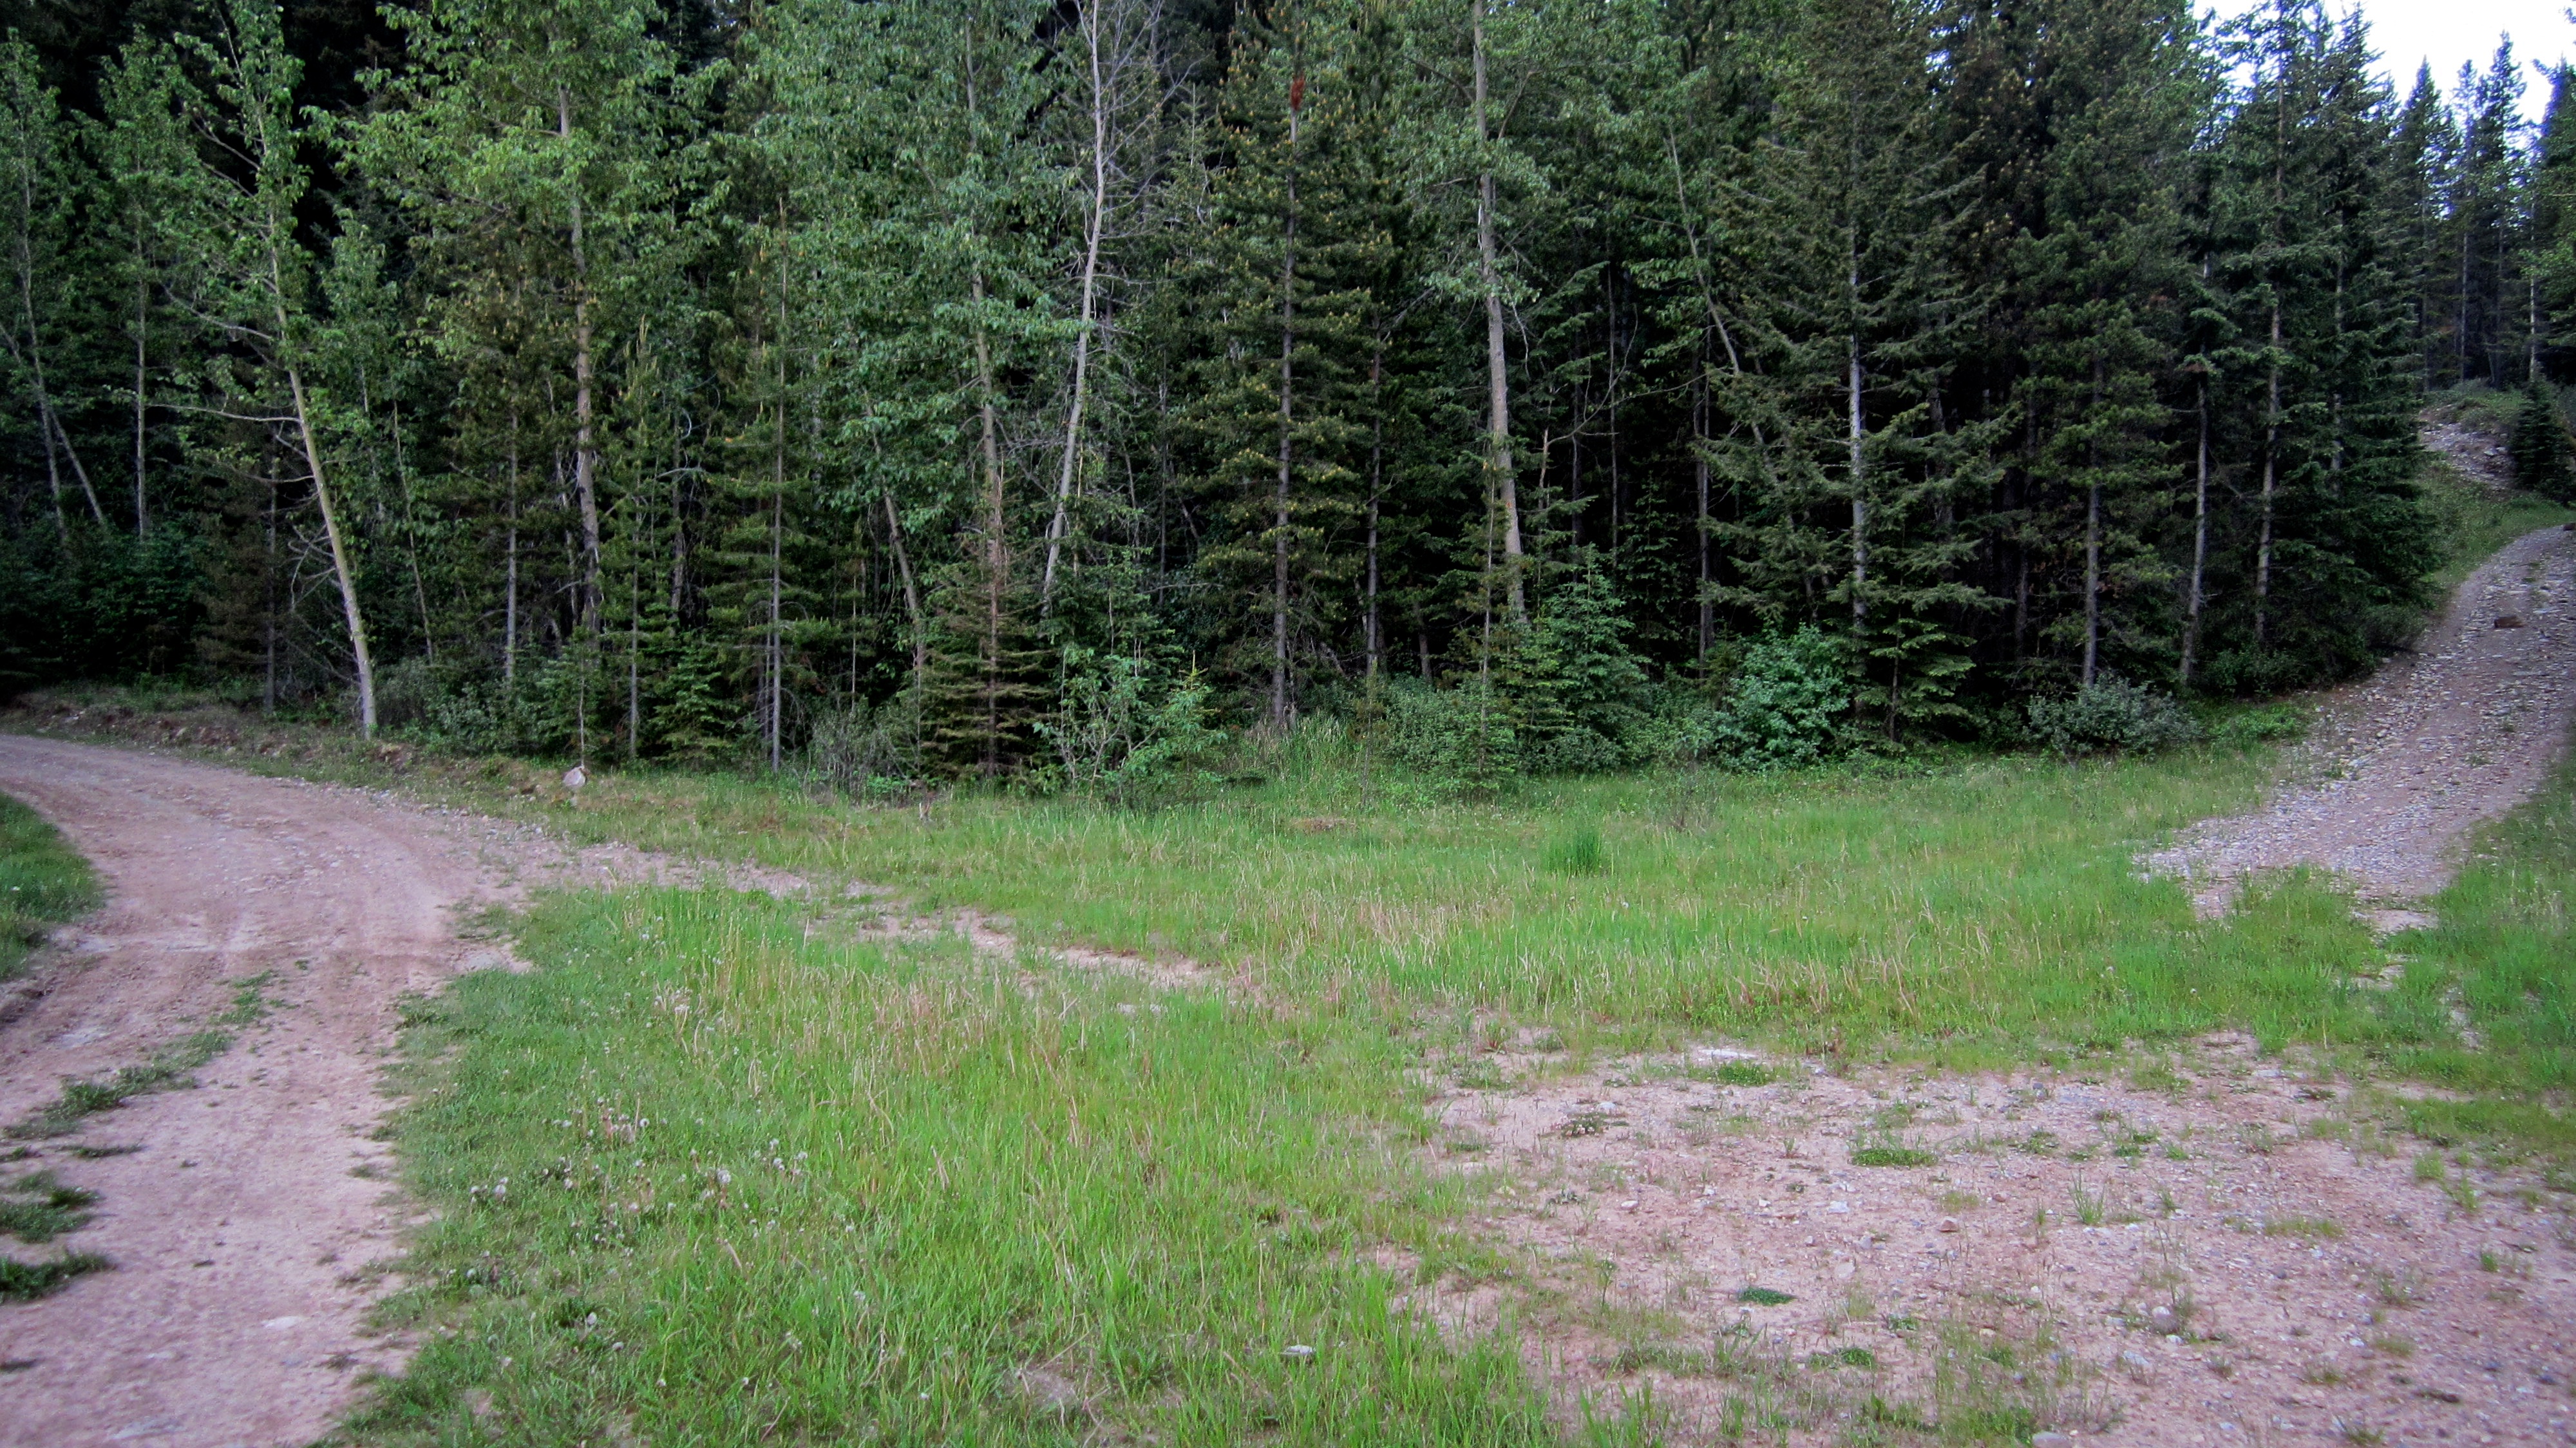
Just as the trail left the meadow (or ~250 from Coal Road) we came to a side road on our right. We would follow this to the base of the ridge.
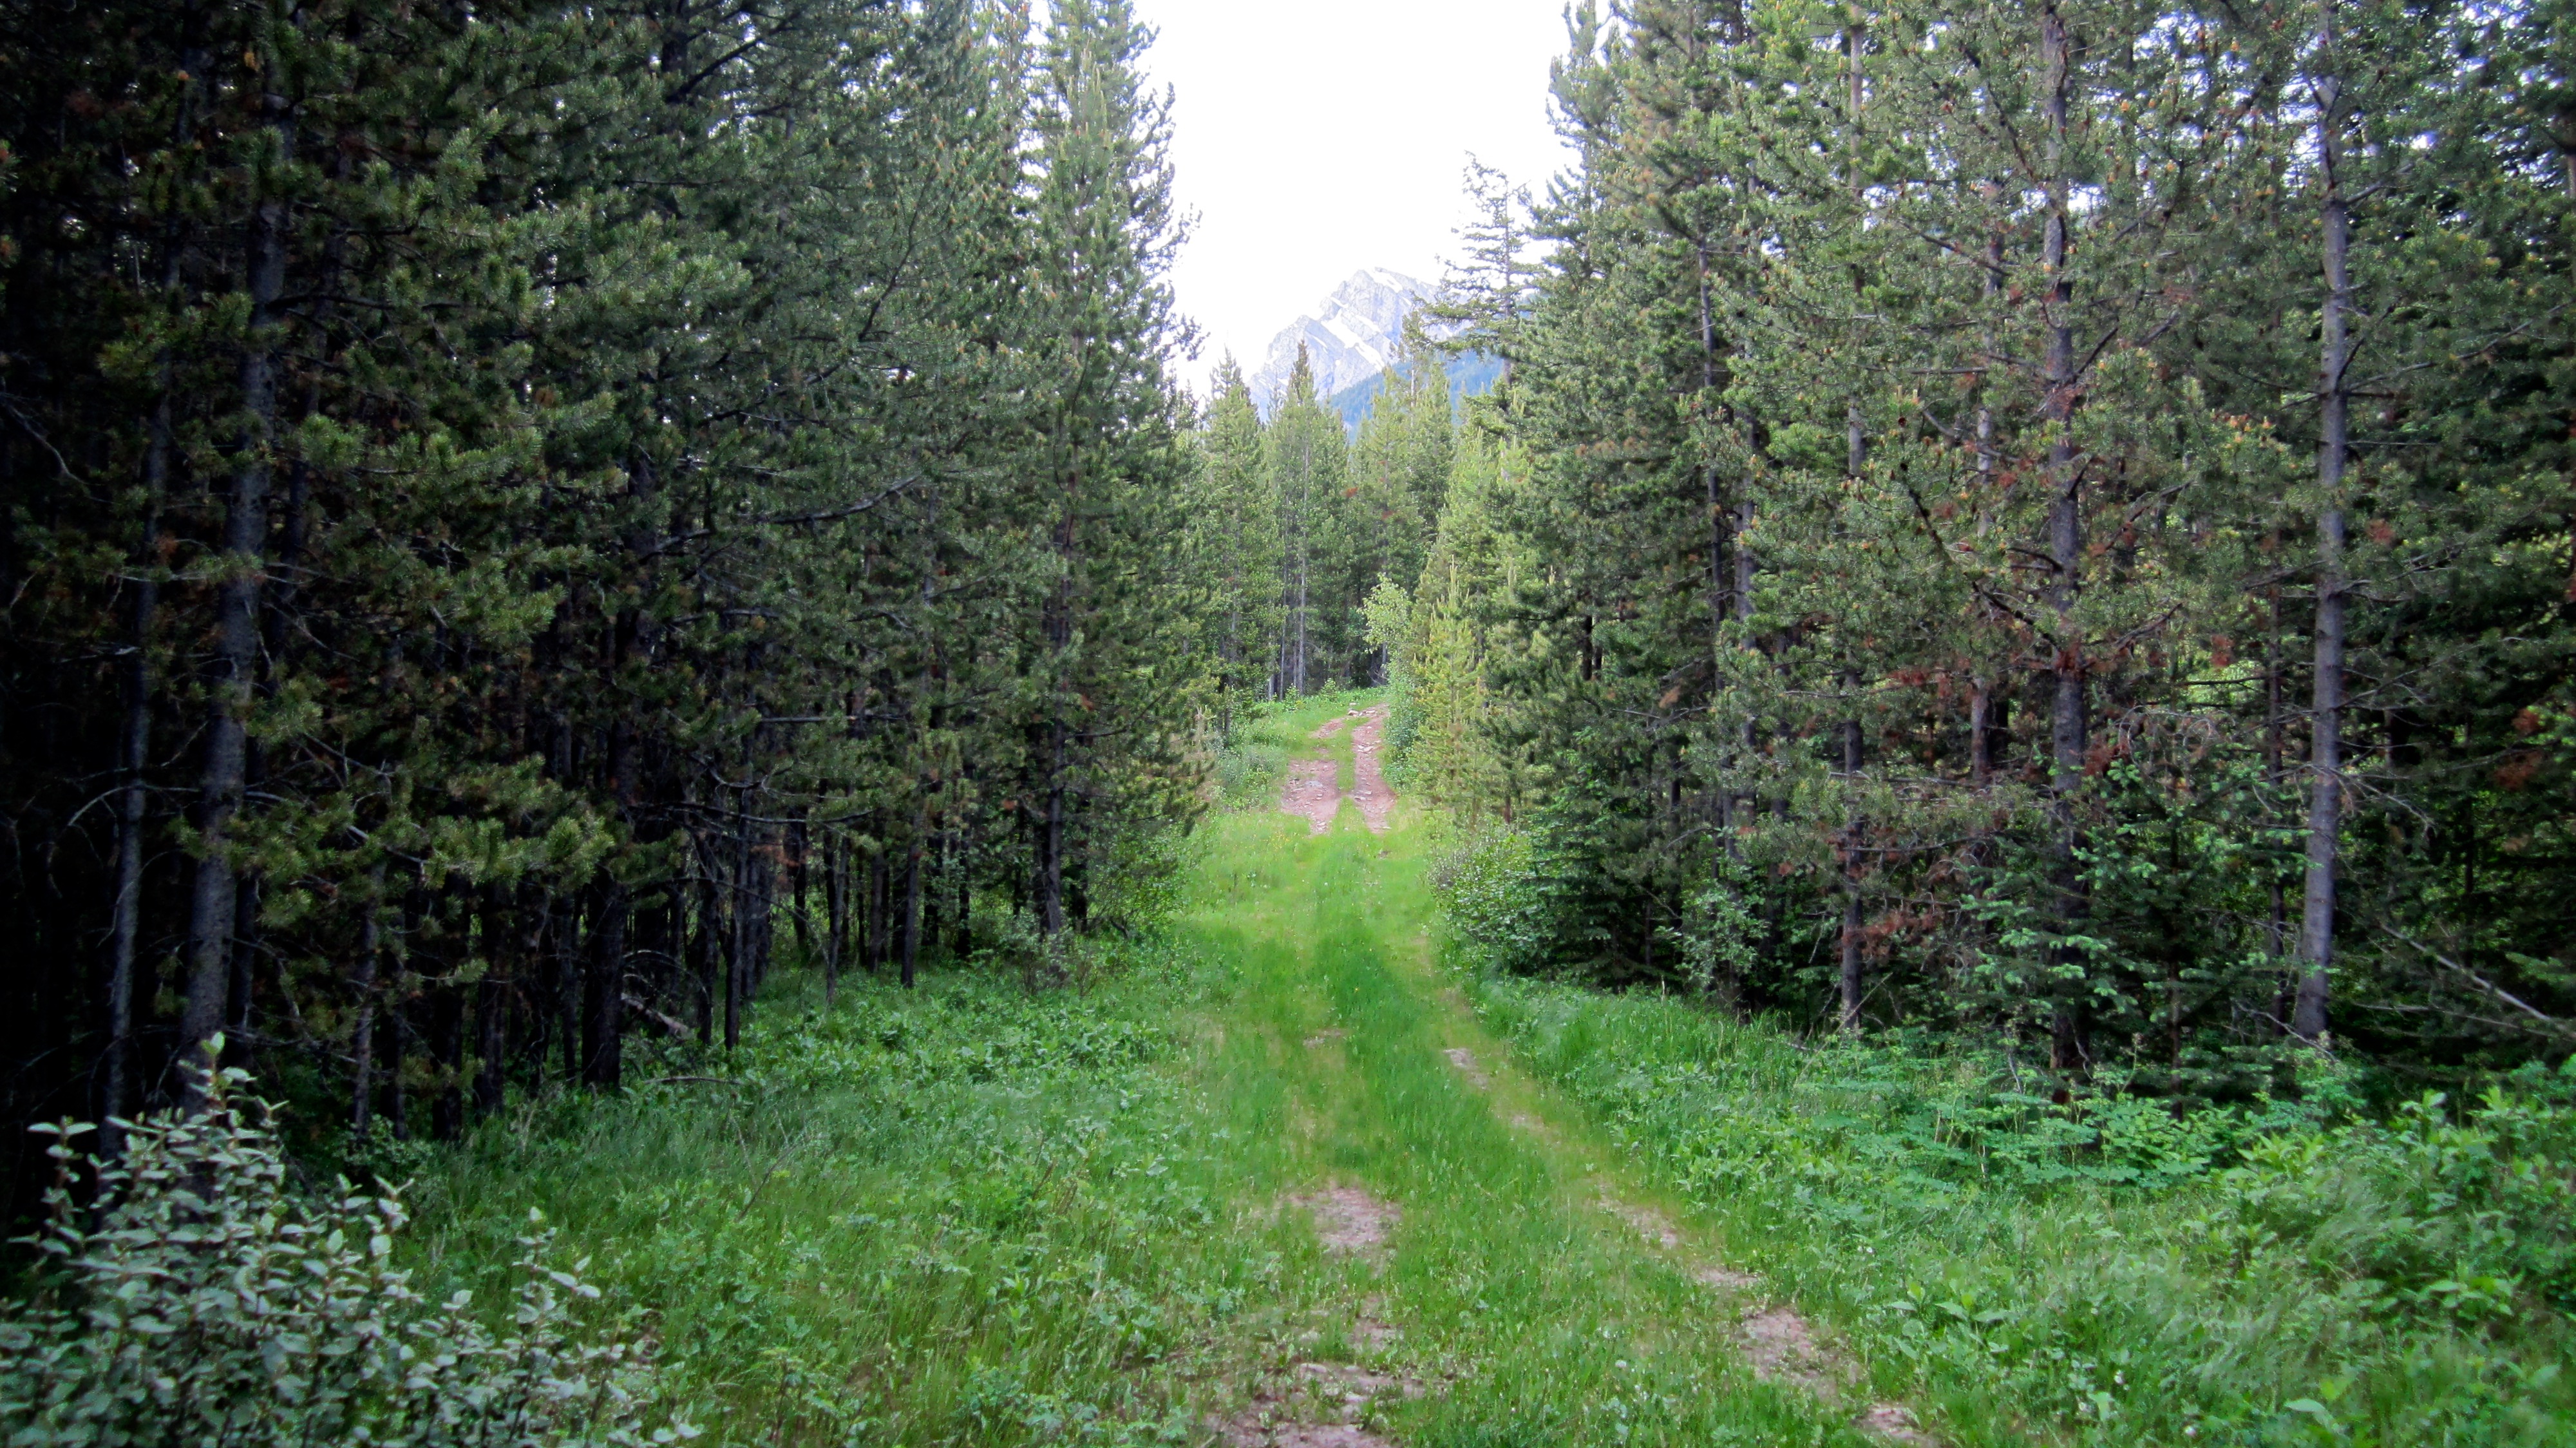
The road was easy to follow as it wound its way through the trees. In various places it appeared that someone had randomly moved large stones into the middle of the road, presumably to discourage ATV usage.

Approximately 900m from the main trail, the road began to lose elevation as it curved sharply to the north. This is were we would head into the woods and begin to follow the contour of the ridge to its crest.

After some light bushwhacking through the forest we reached more open slopes on the west side of the ridge. Behind Brad from left to right is: Trail Hill, Mount Erickson, Island Ridge, “Alexander Creek Mountain,” Phillipps Peak, and Mount Tecumseh.

The sun rises over Sentry Mountain. What a beautiful morning!

Higher up, the slope reverted back to light forest.

We followed the west side of the ridge until we came to a small gully that blocked our path. This is looking back after we were forced to descend and cross over to the other side.
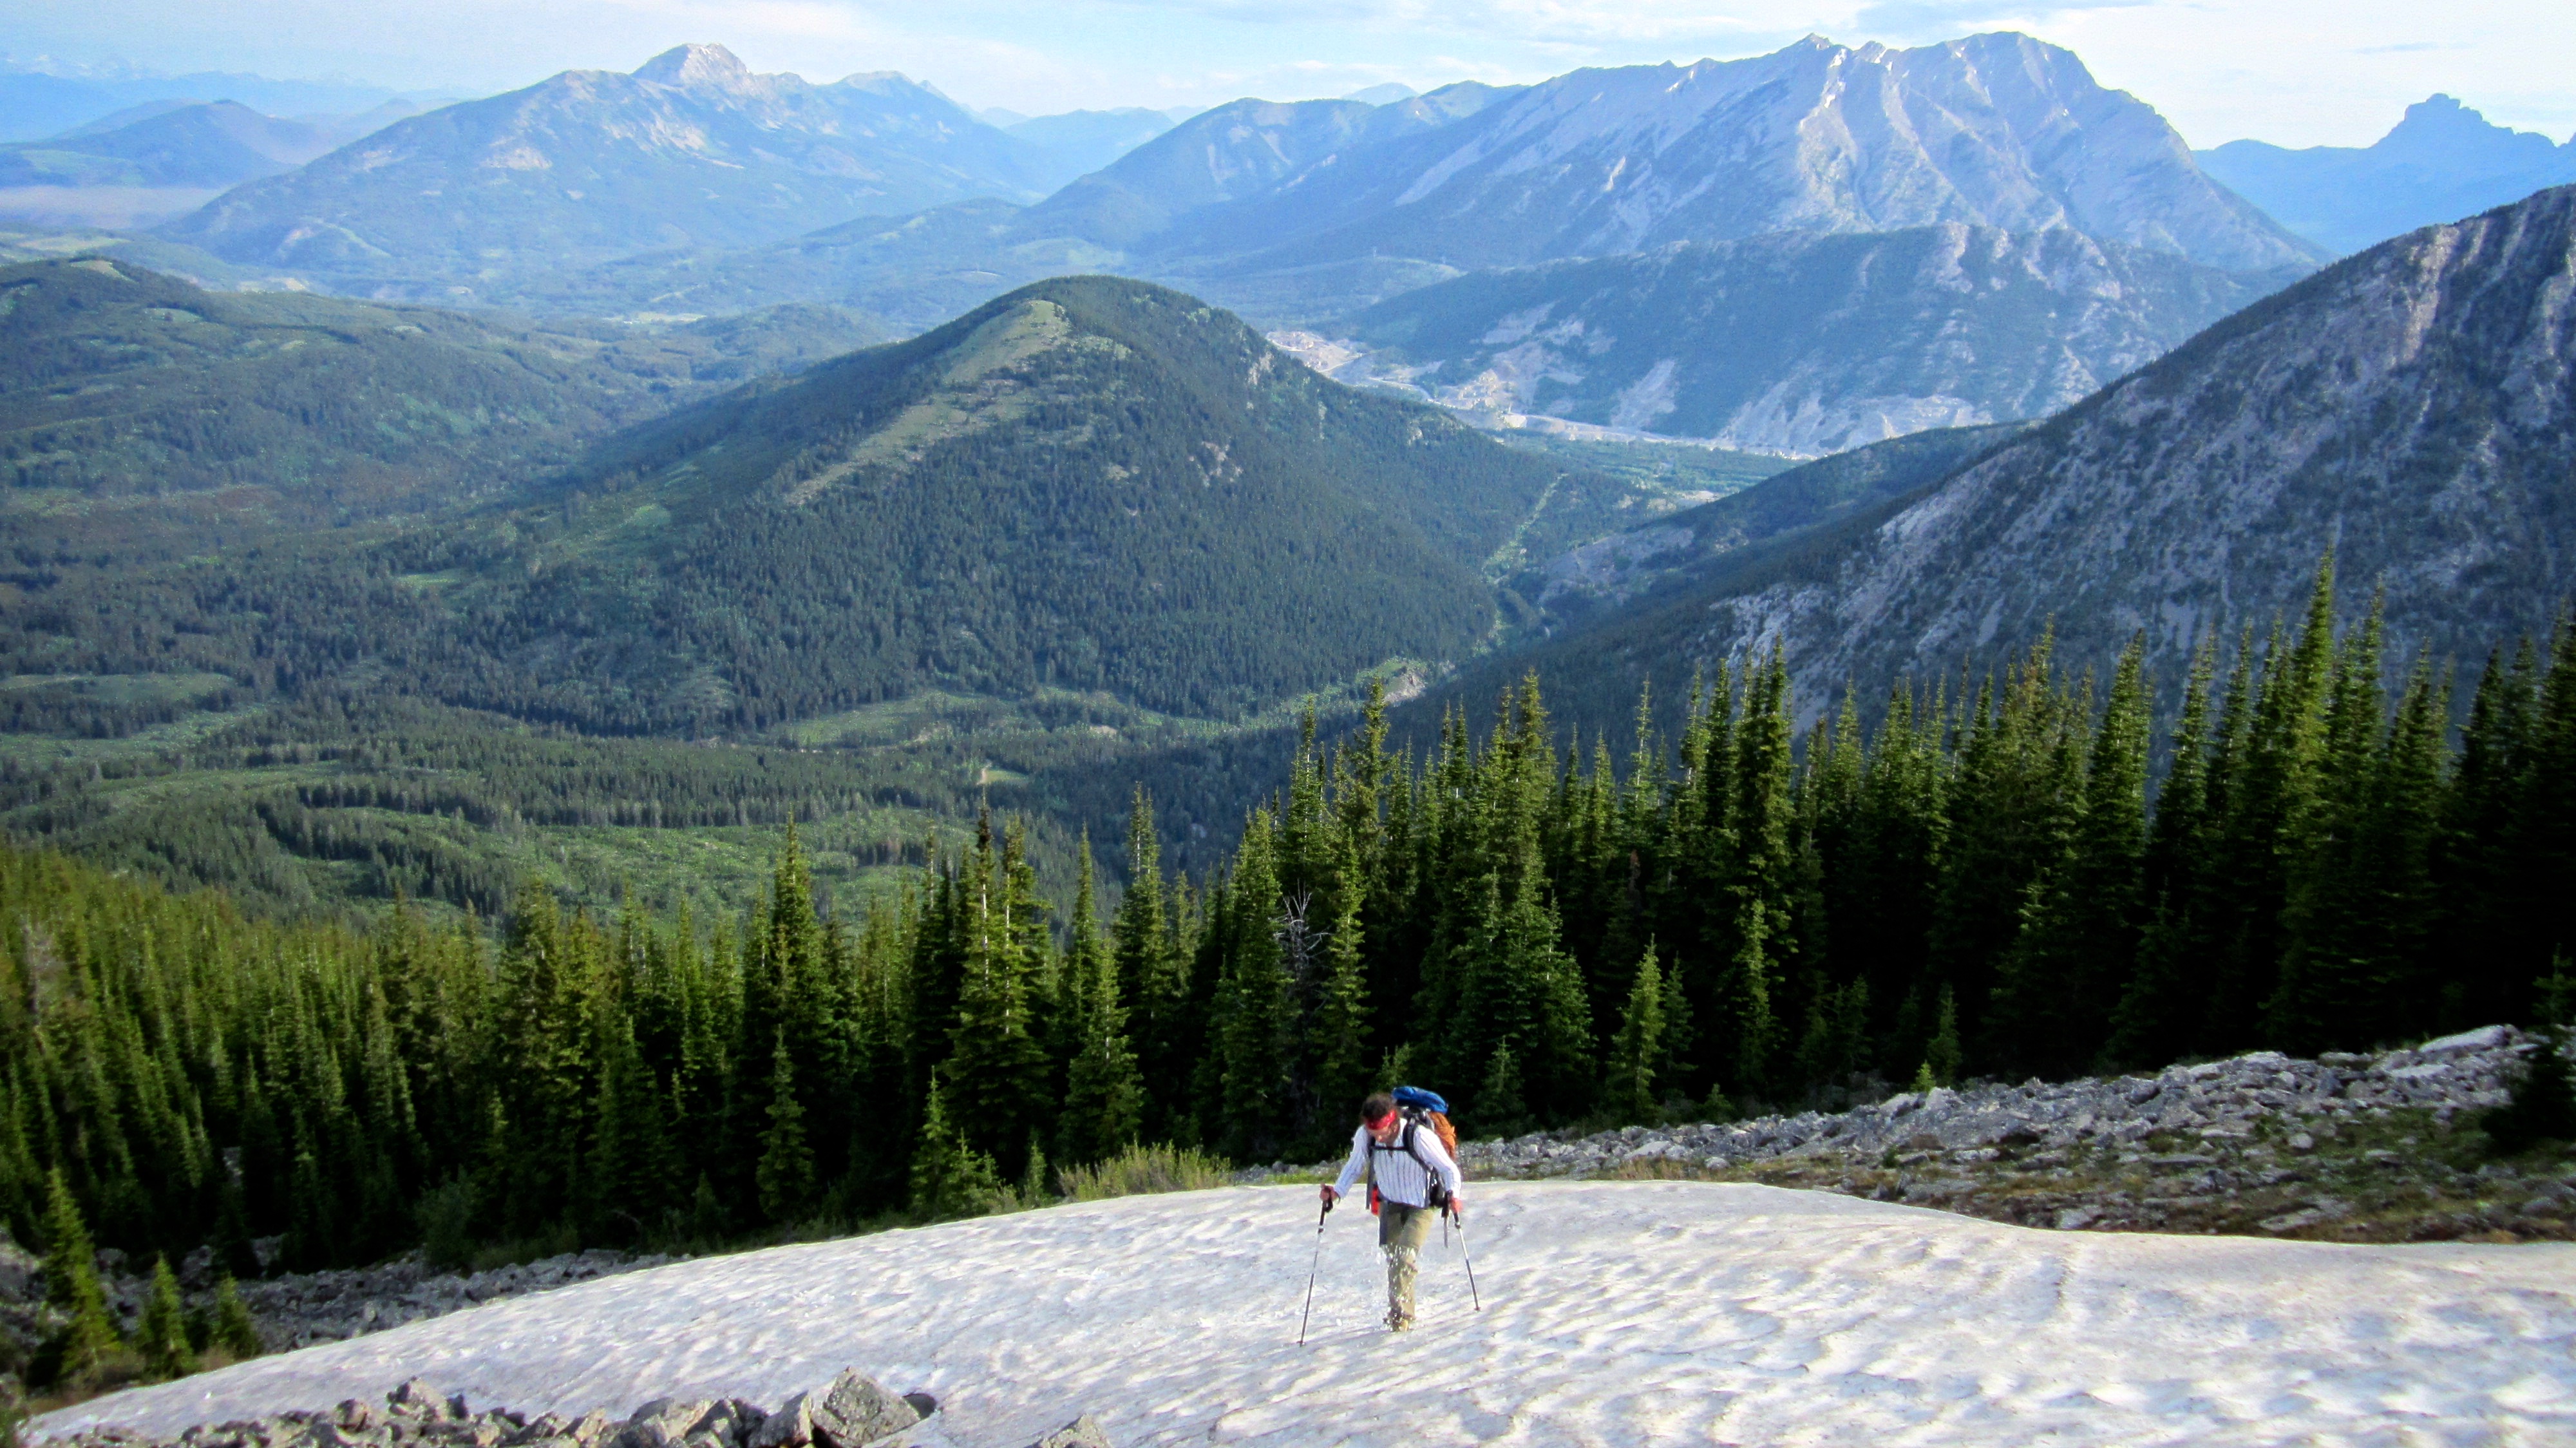
Brad uses a lingering patch of snow to expedite his ascent.
After approximately 1.5 hours, we reached the ridge crest.

Looking south along the ridge towards Peak 1. The two prominences in the foreground are where Brad and his dad had previously turned around.
Peak 1 (Mummy Mountain) is an impressive sight from the top of the second prominence. Our route would closely follow the crest to the summit.

Brad wasn’t sure what type of terrain we would encounter so he brought along some climbing gear just in case. We never did end up using it but I’m sure he was grateful for the workout he received from carrying the extra weight 😉
Looking back at our route as we begin scrambling. The bump on the far left is where we gained the ridge.

A closer look at the ridge leading to the summit of Peak 1.
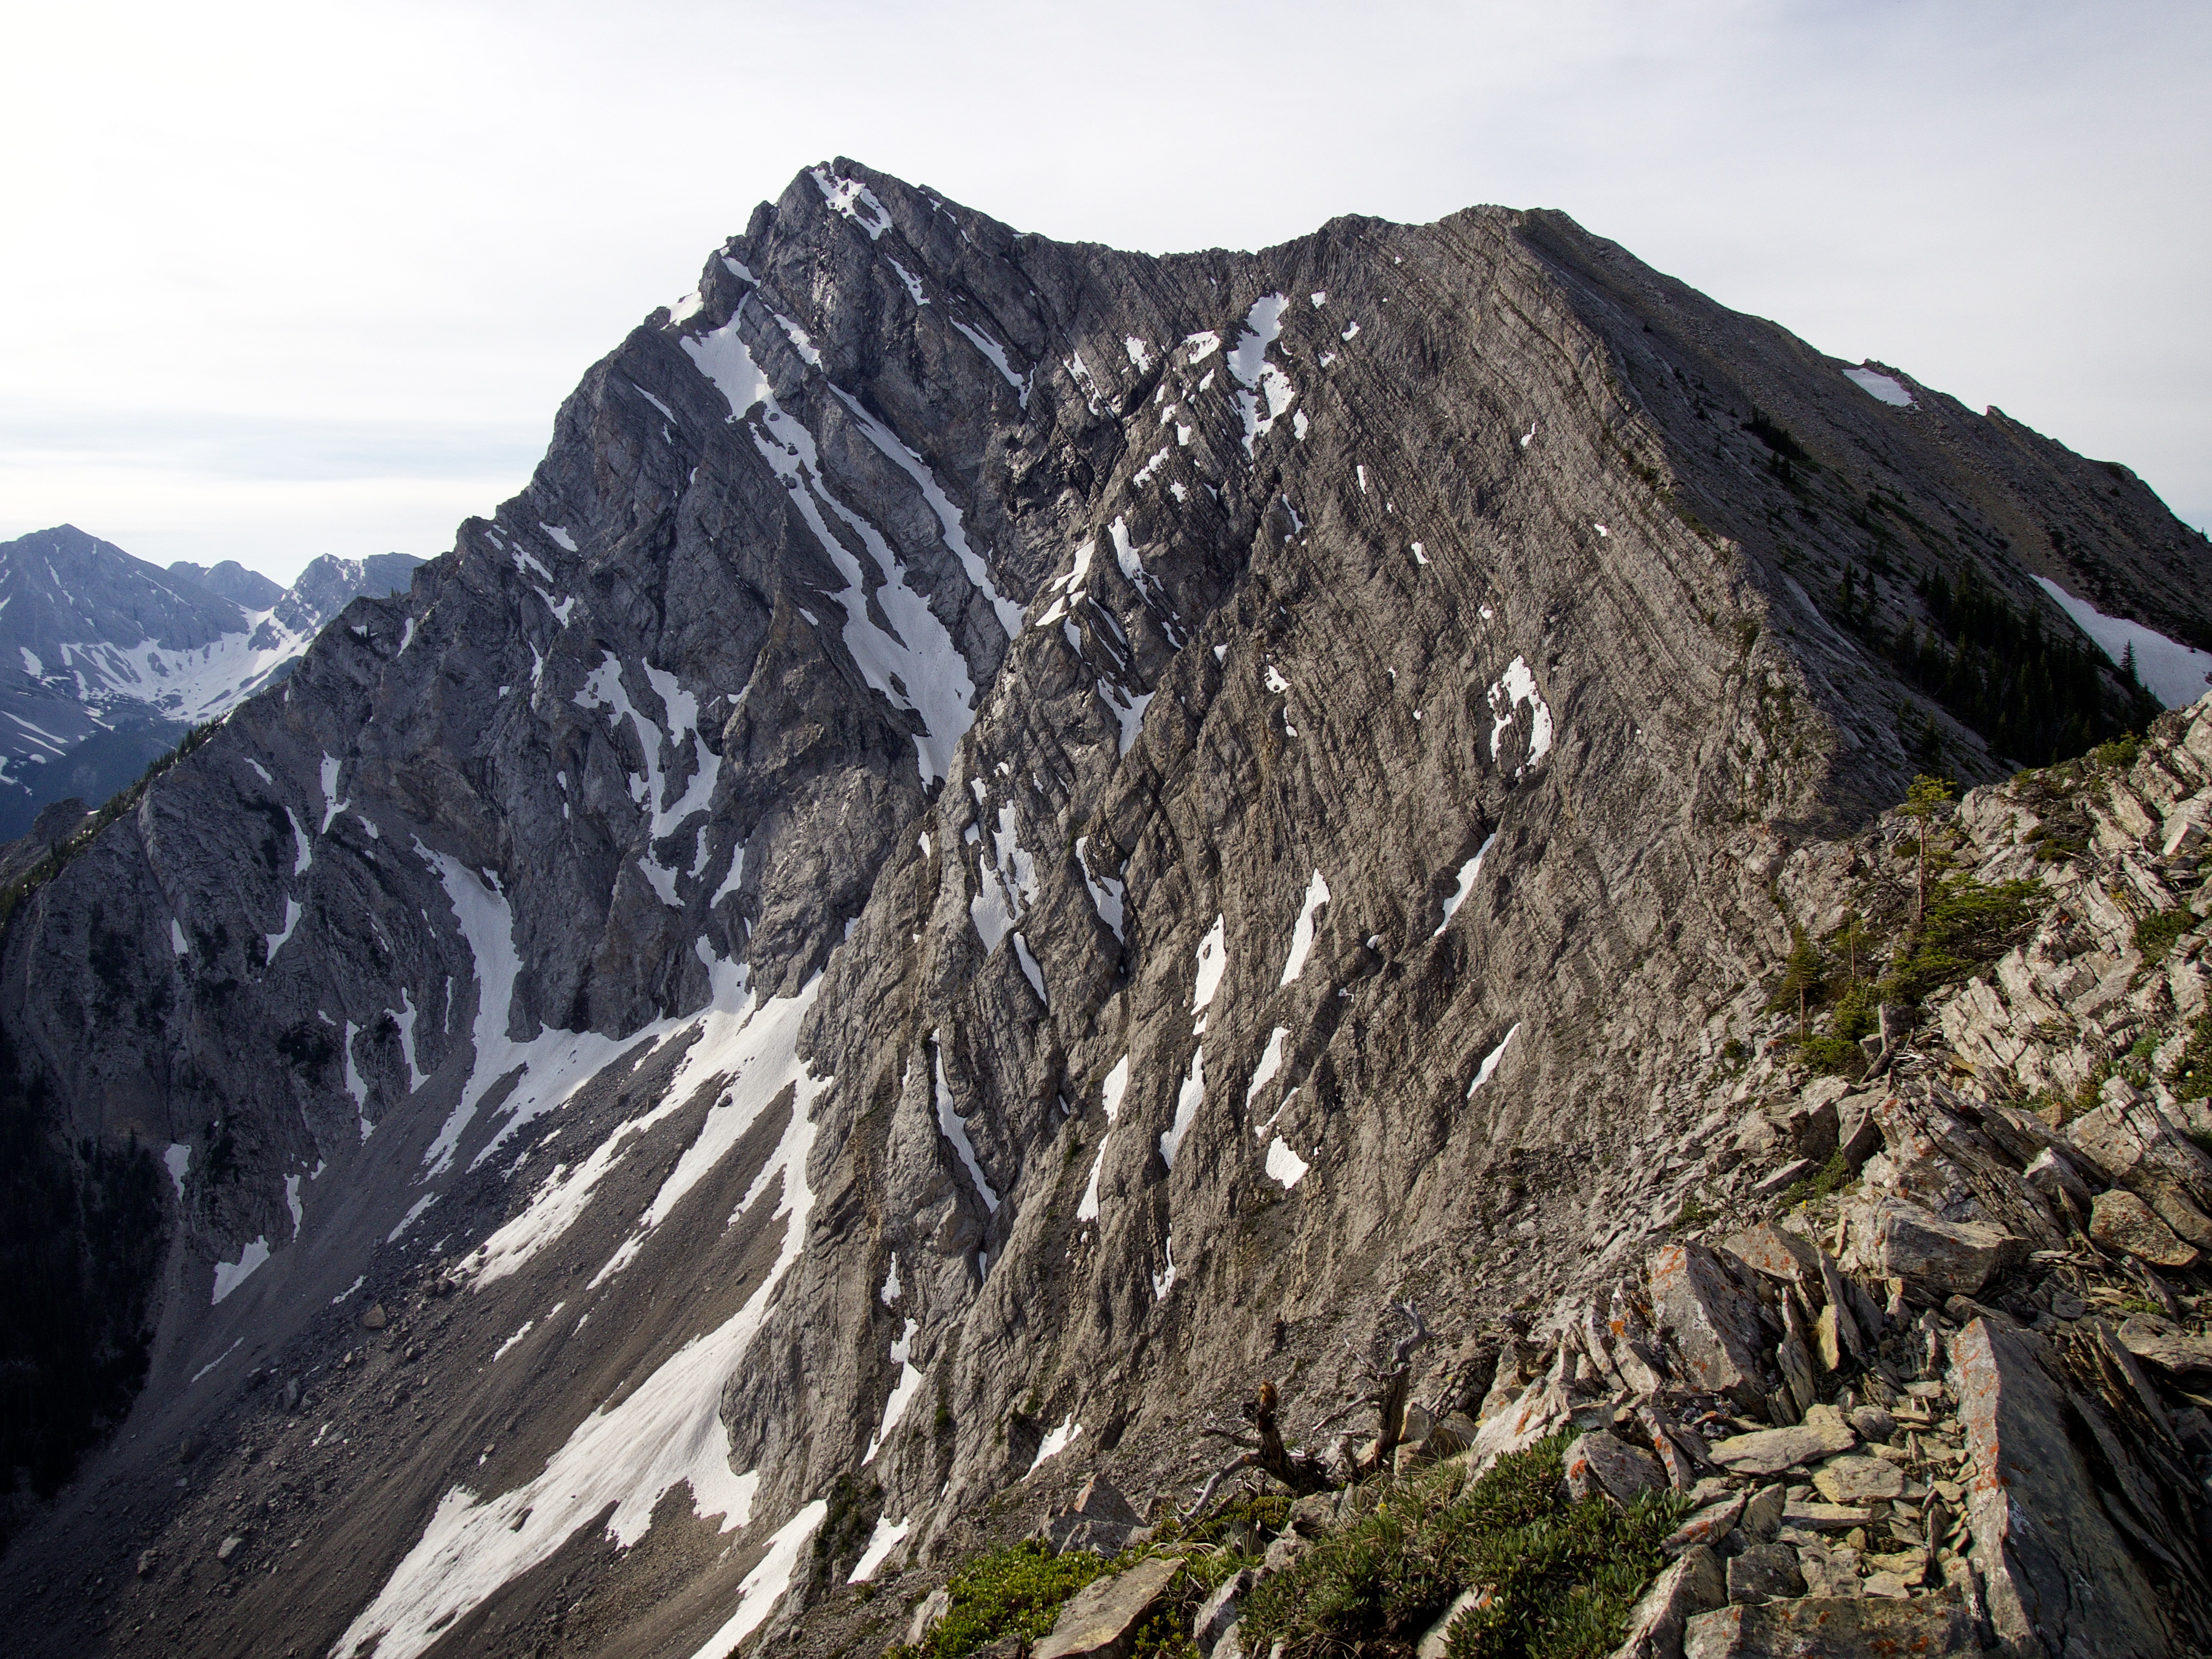
The NE face of Peak 1 (Mummy Mountain) is truly an impressive sight!
Brad leads the way up.

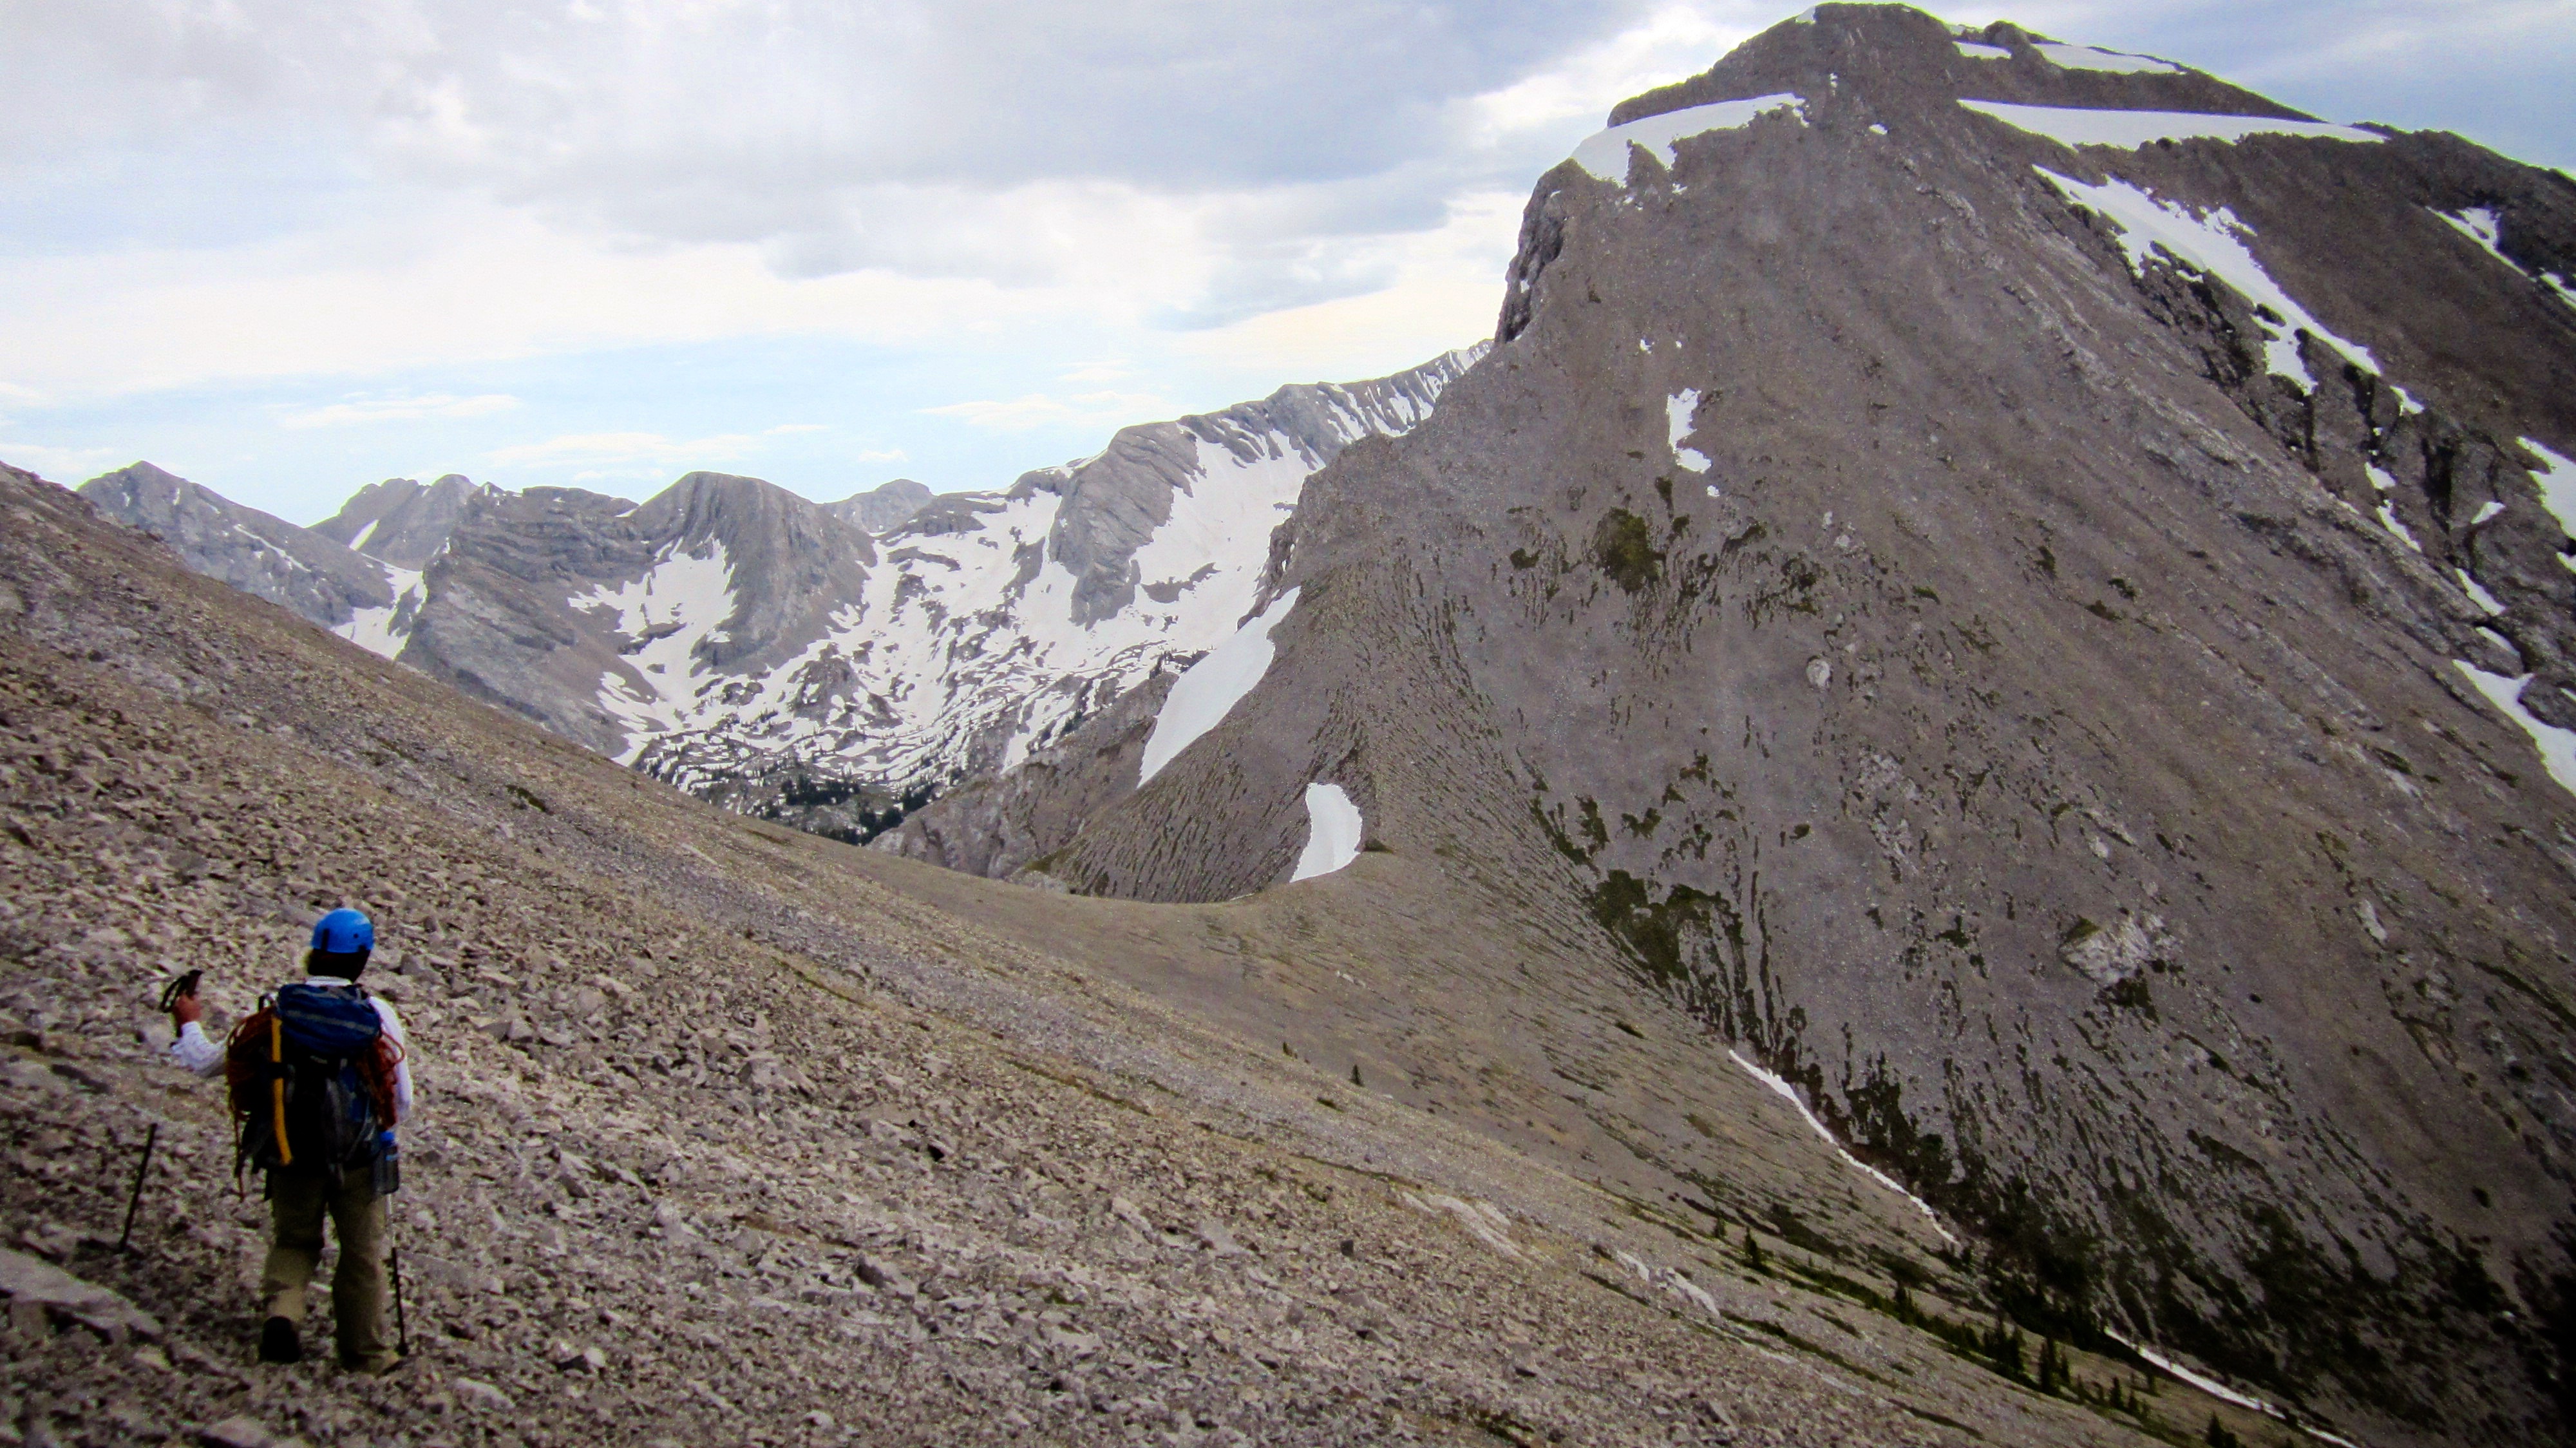
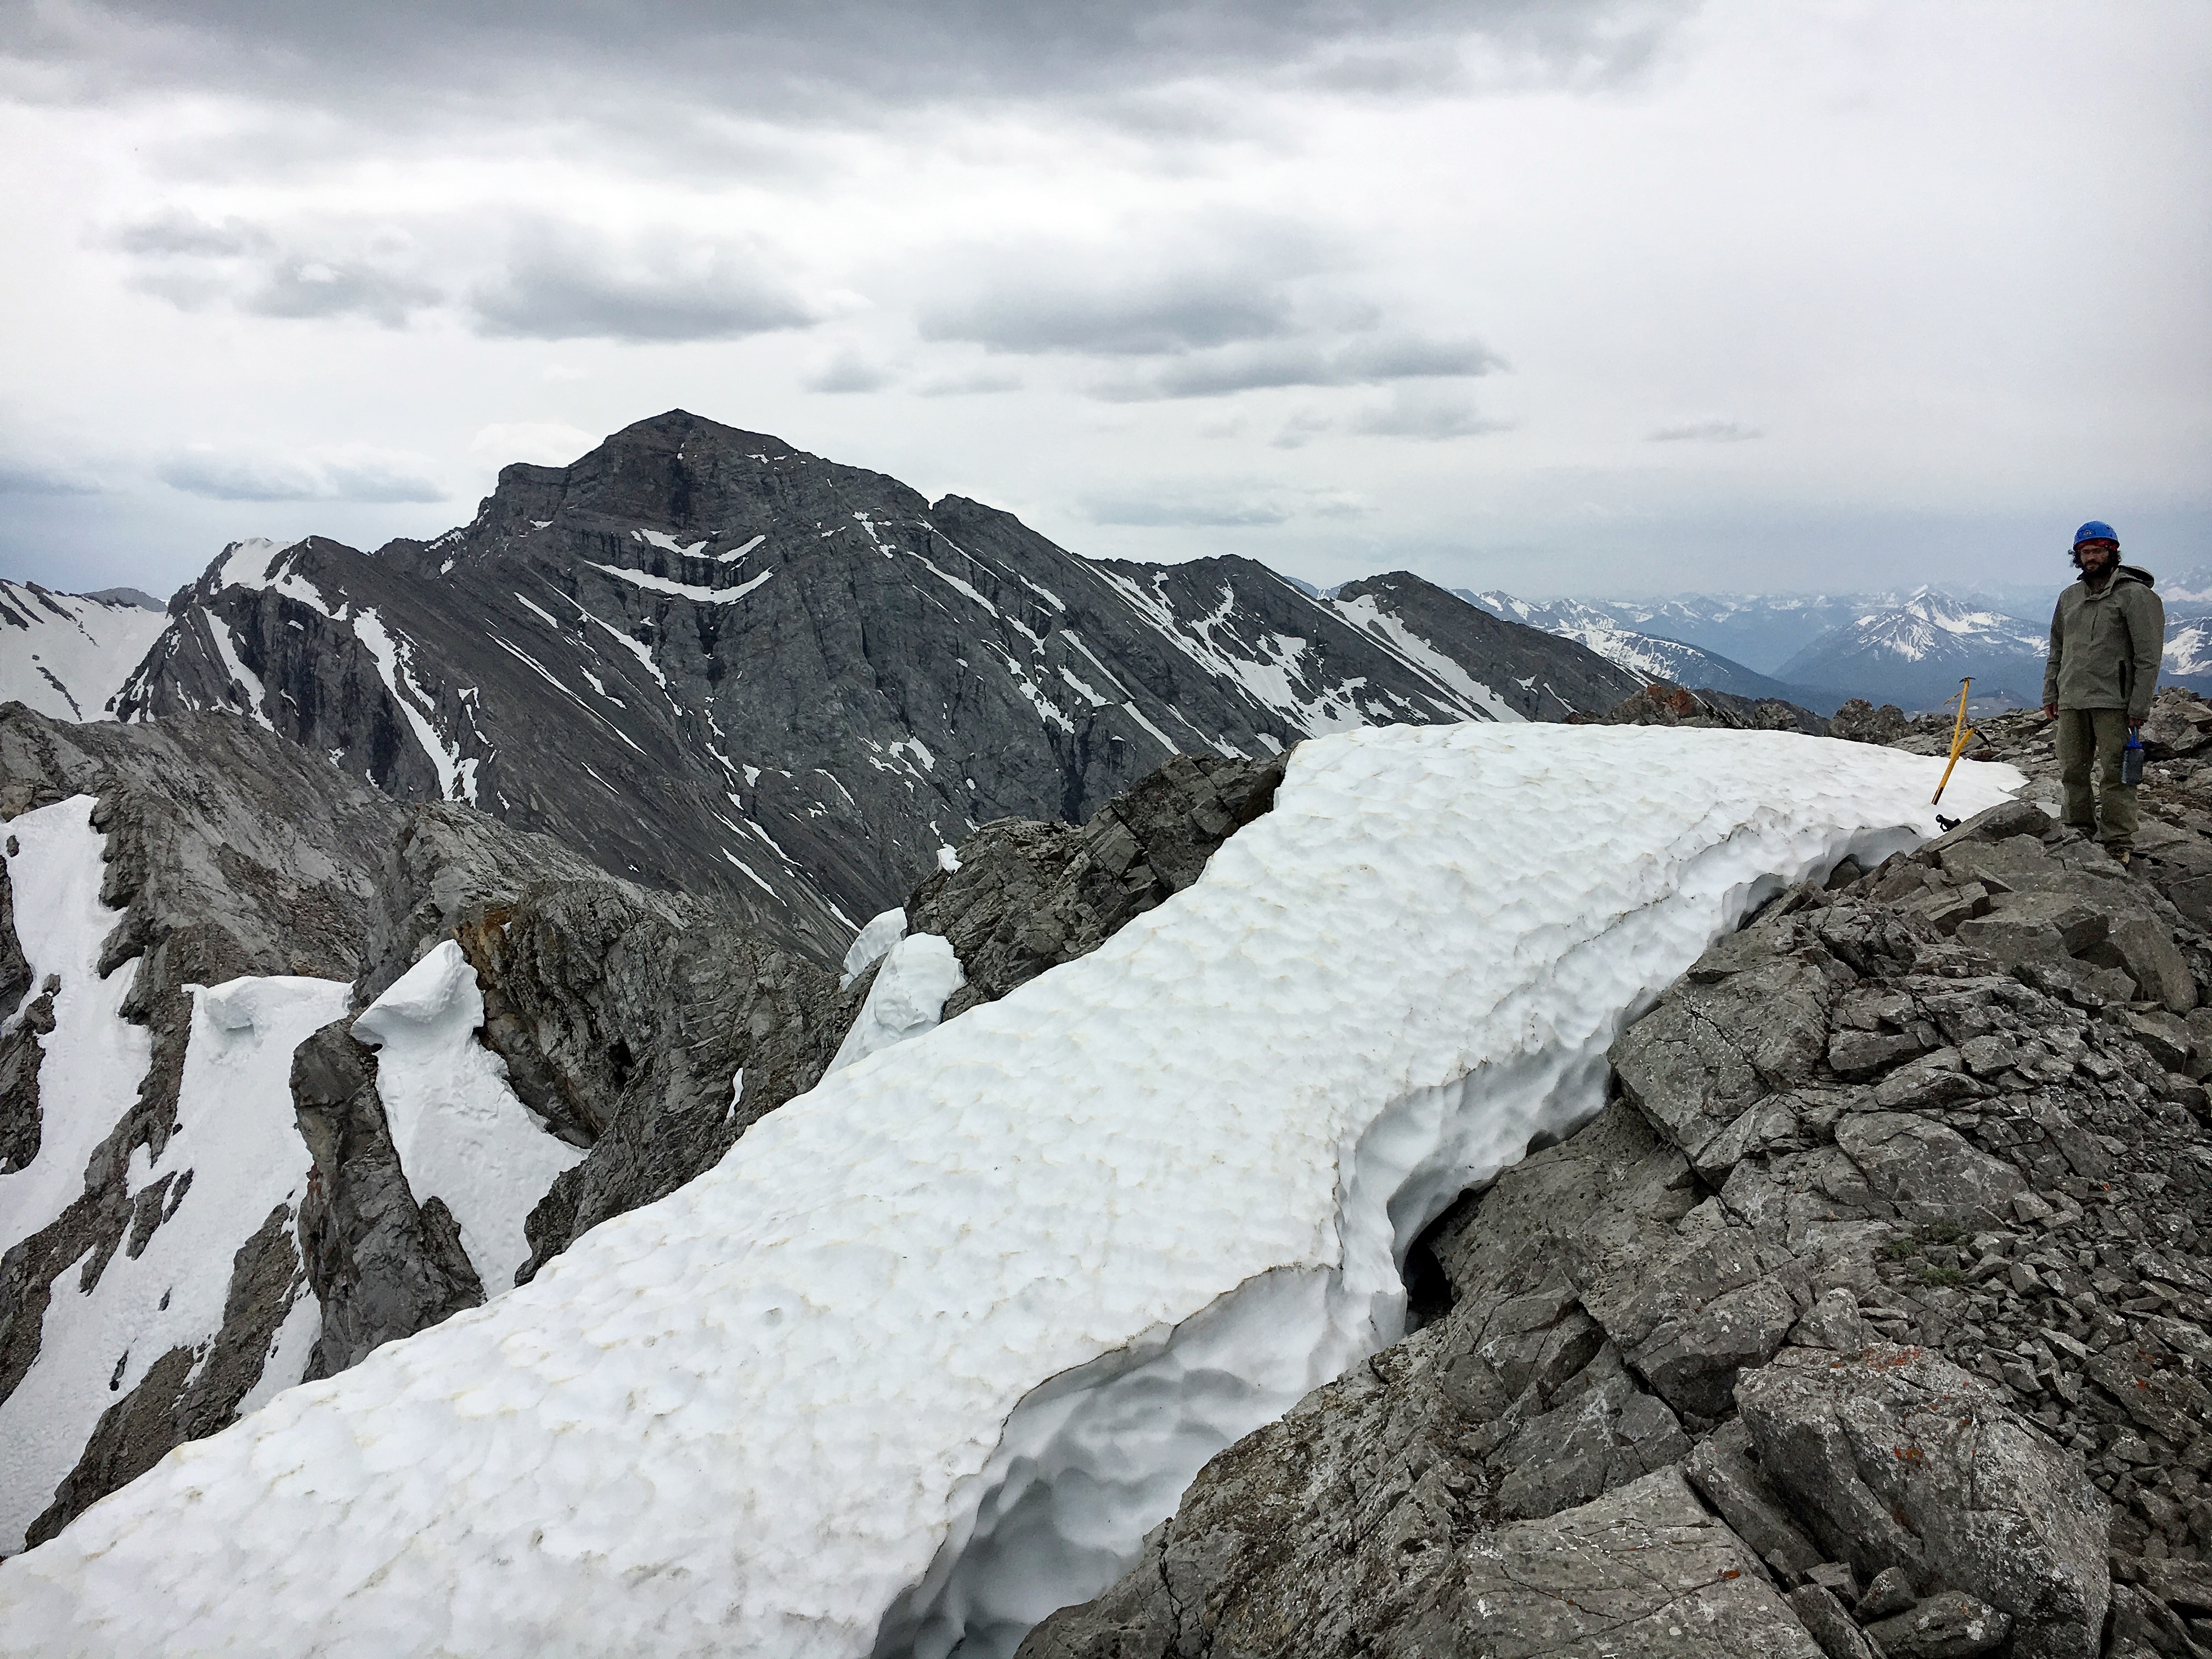
Relaxing on the ridge before tackling our first summit of the day. For the first time we could see all three peaks with Peak 1 (Mummy Mountain) on the left, Peak 2 (Anubis Peak) in the centre, and Peak 3 (Pharaoh’s Peak) on the right. On the far right is the summit of Mount Ptolemy.

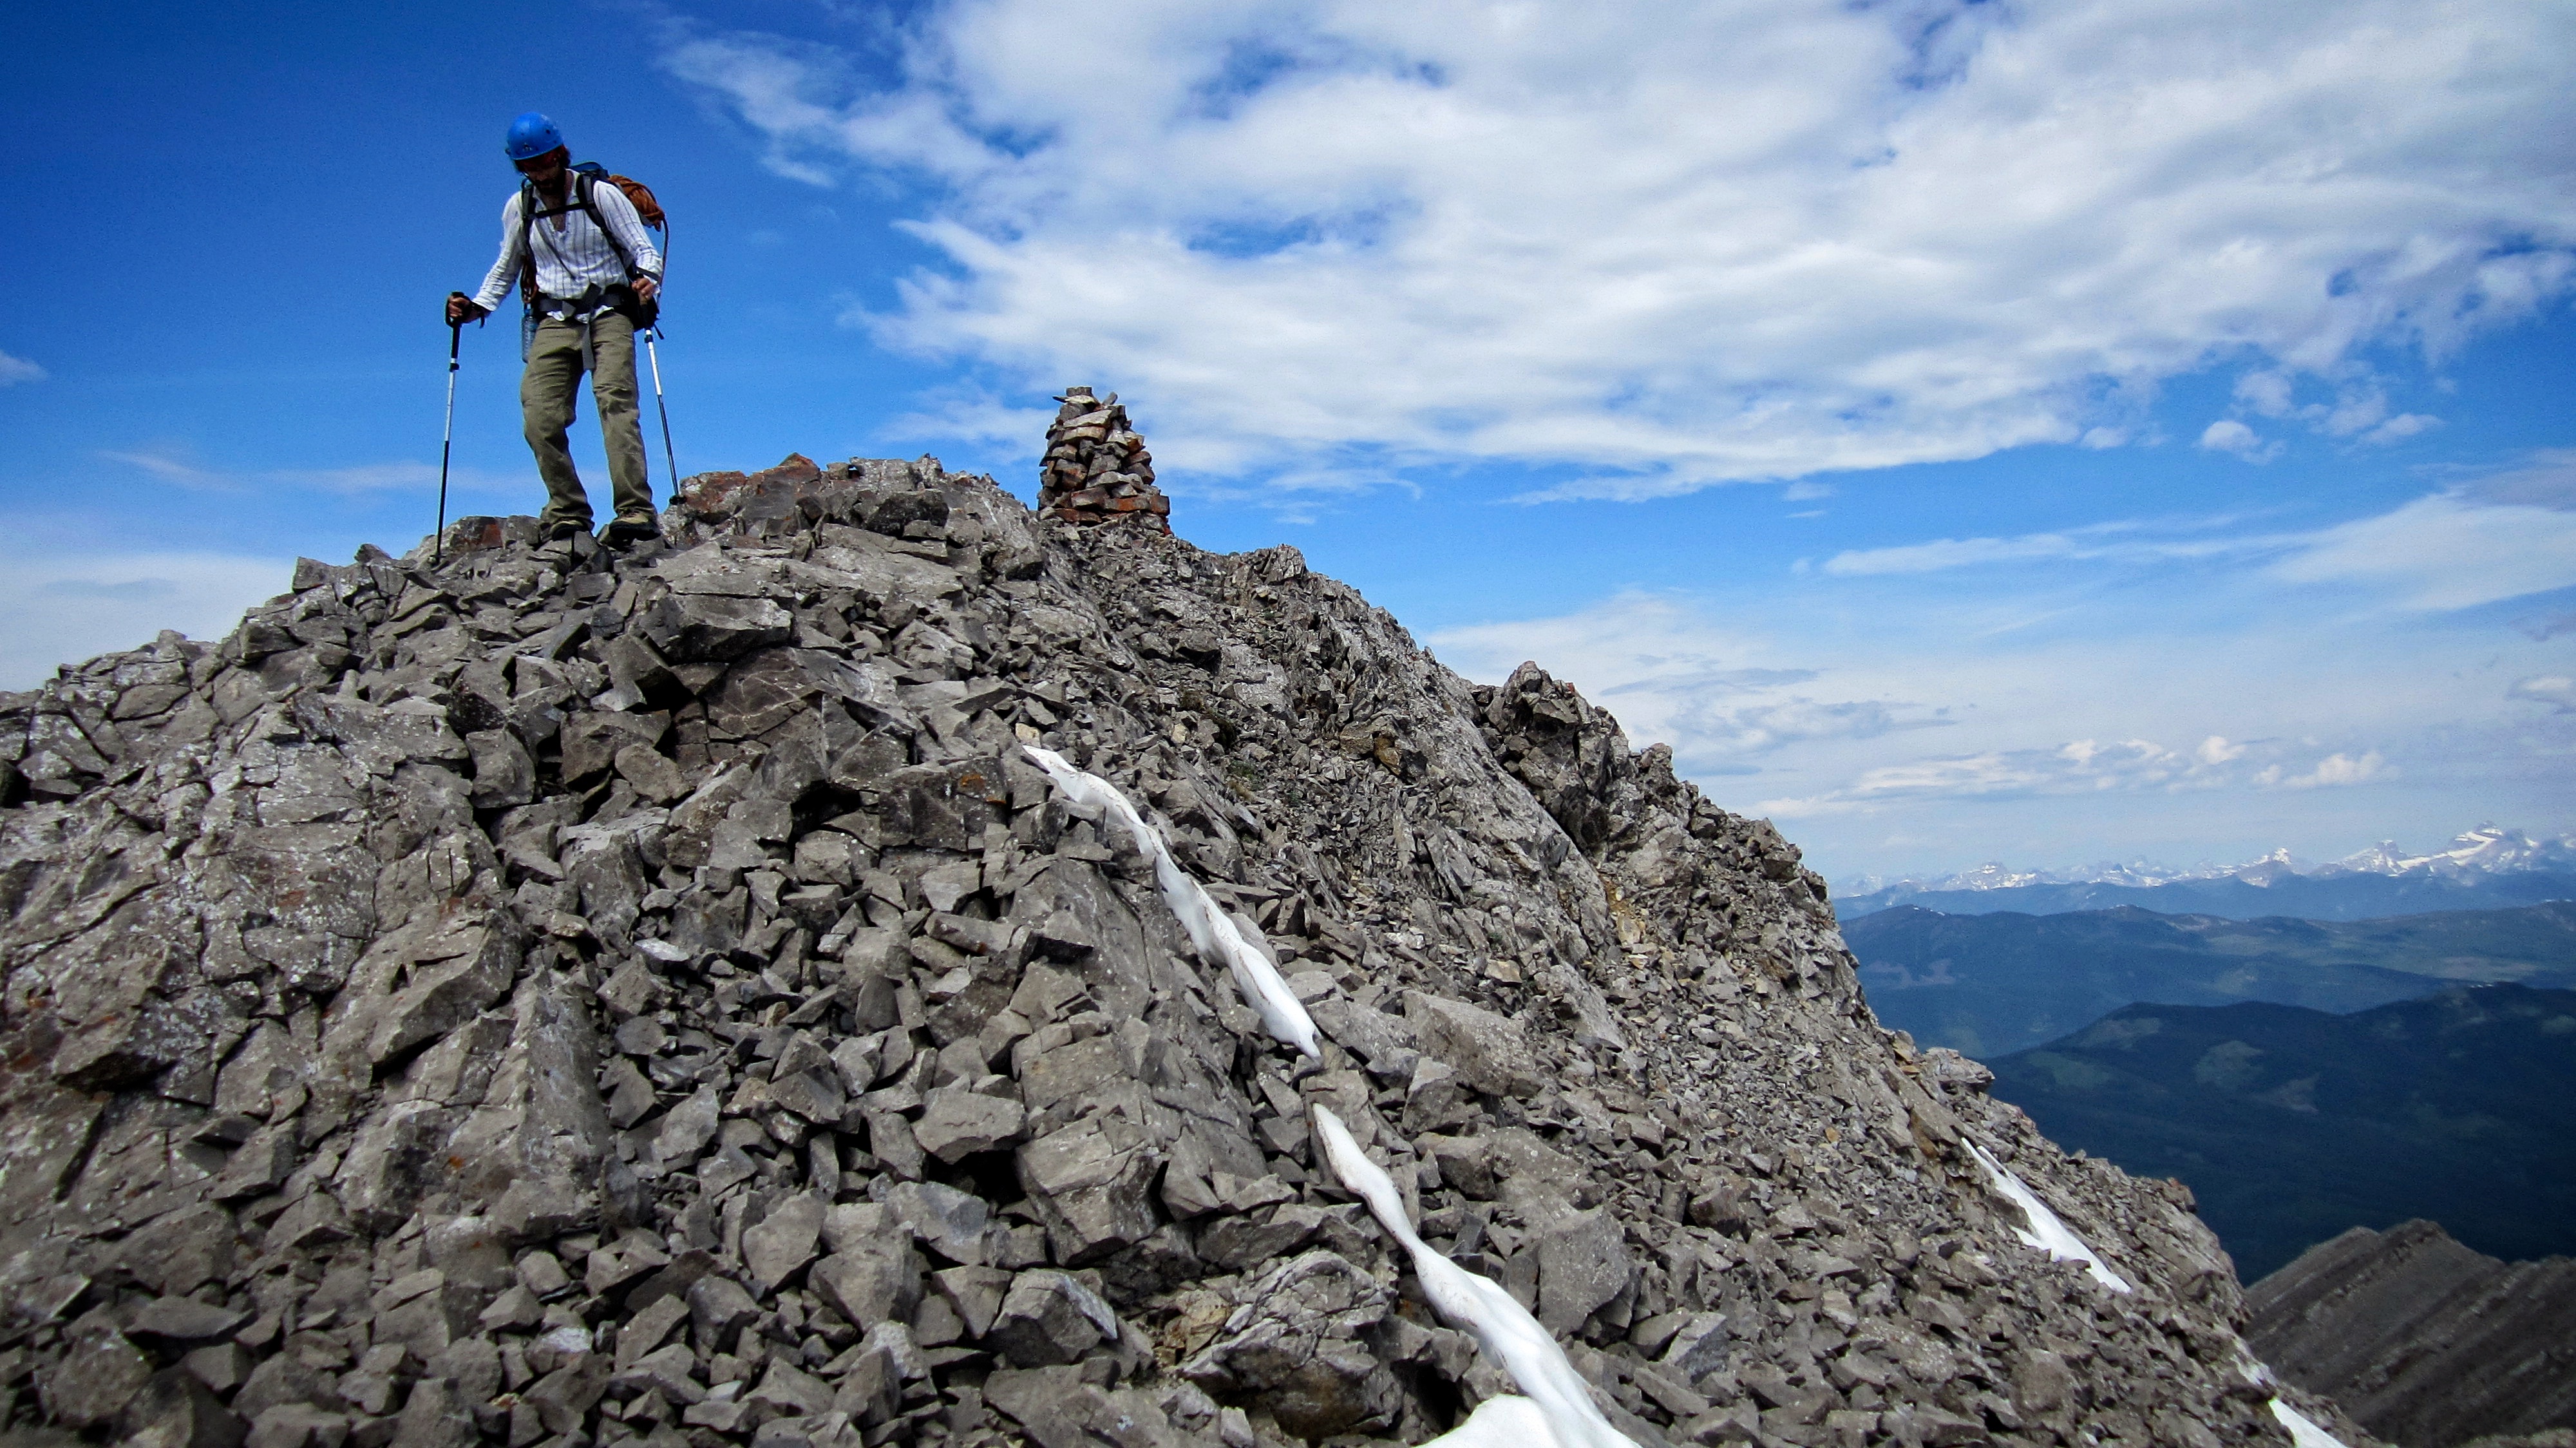
We were surprised to see a massive cairn sitting on the summit of Peak 2. Neither Peak 1 nor the much higher Peak 3 had cairns.
Looking down the east face of Peak 1.
The Natal Fire Lookout and Loop Ridge can be seen in the background behind Brad. On the far distant left you can see the Three Sisters and Mount Bisaro which are located near Fernie, BC.

The lower portion of Peak 1 starts off as a fairly simple hike…

..however it soon becomes a scramble.
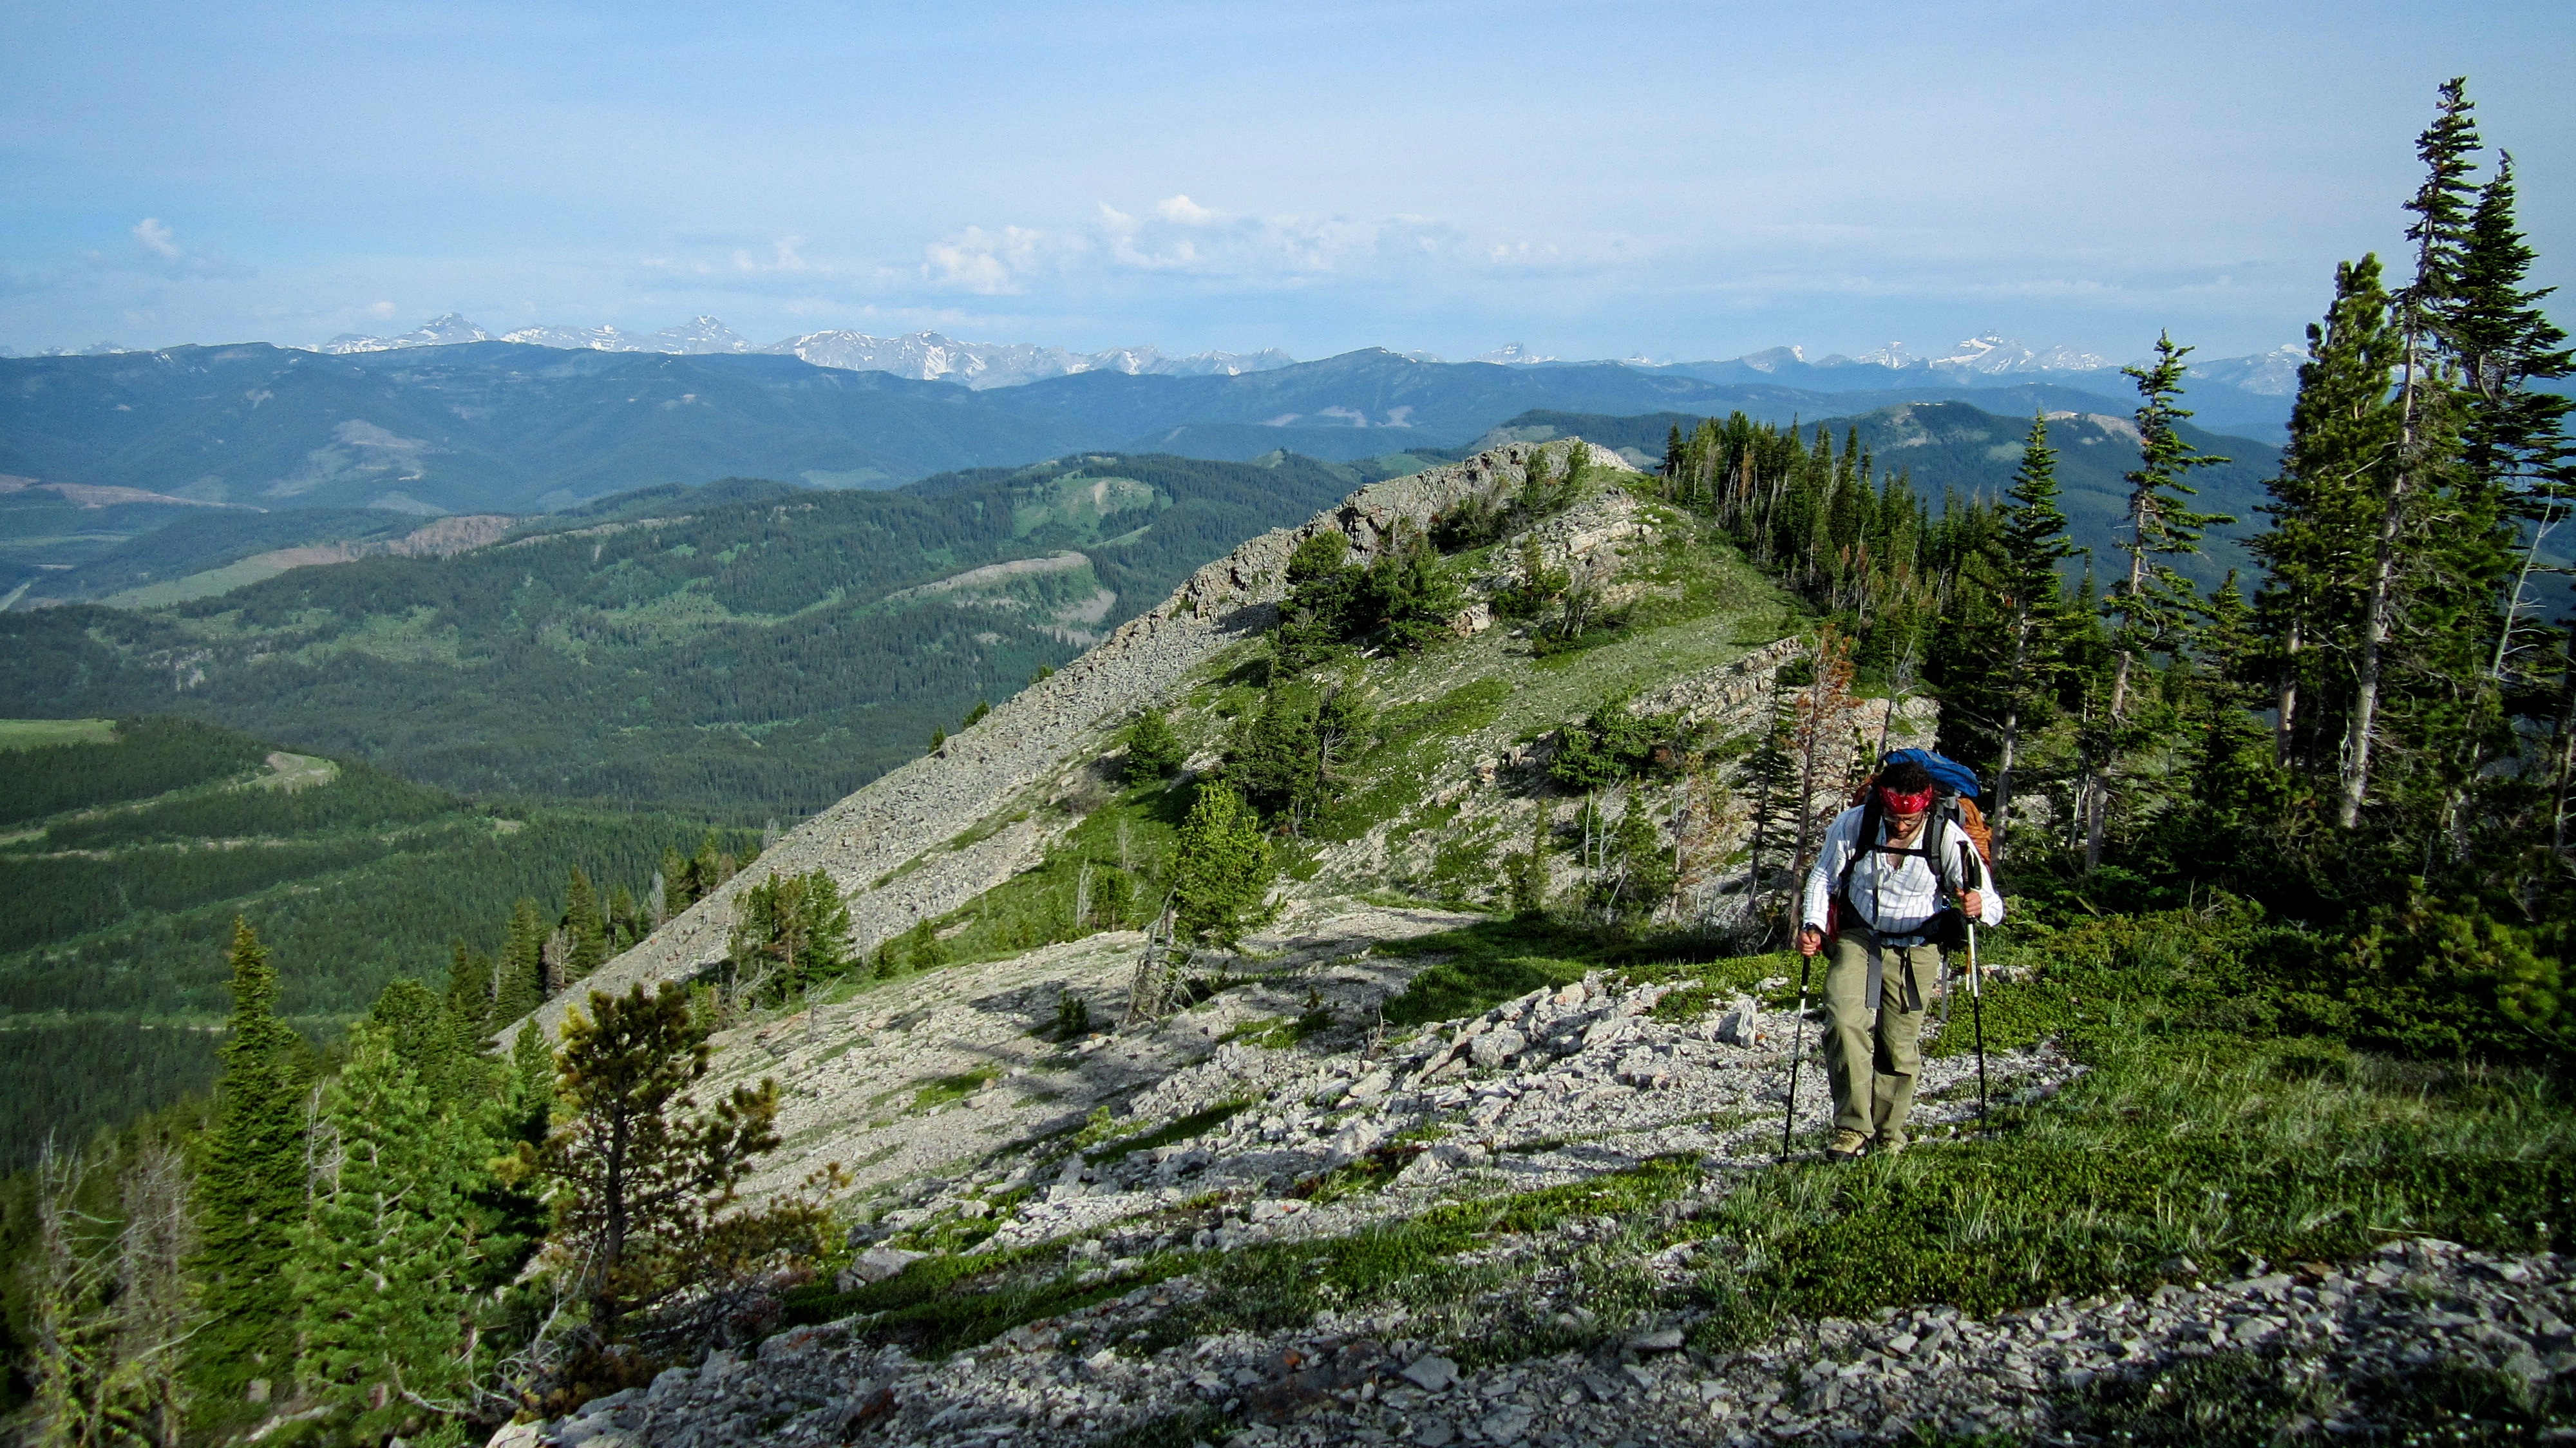
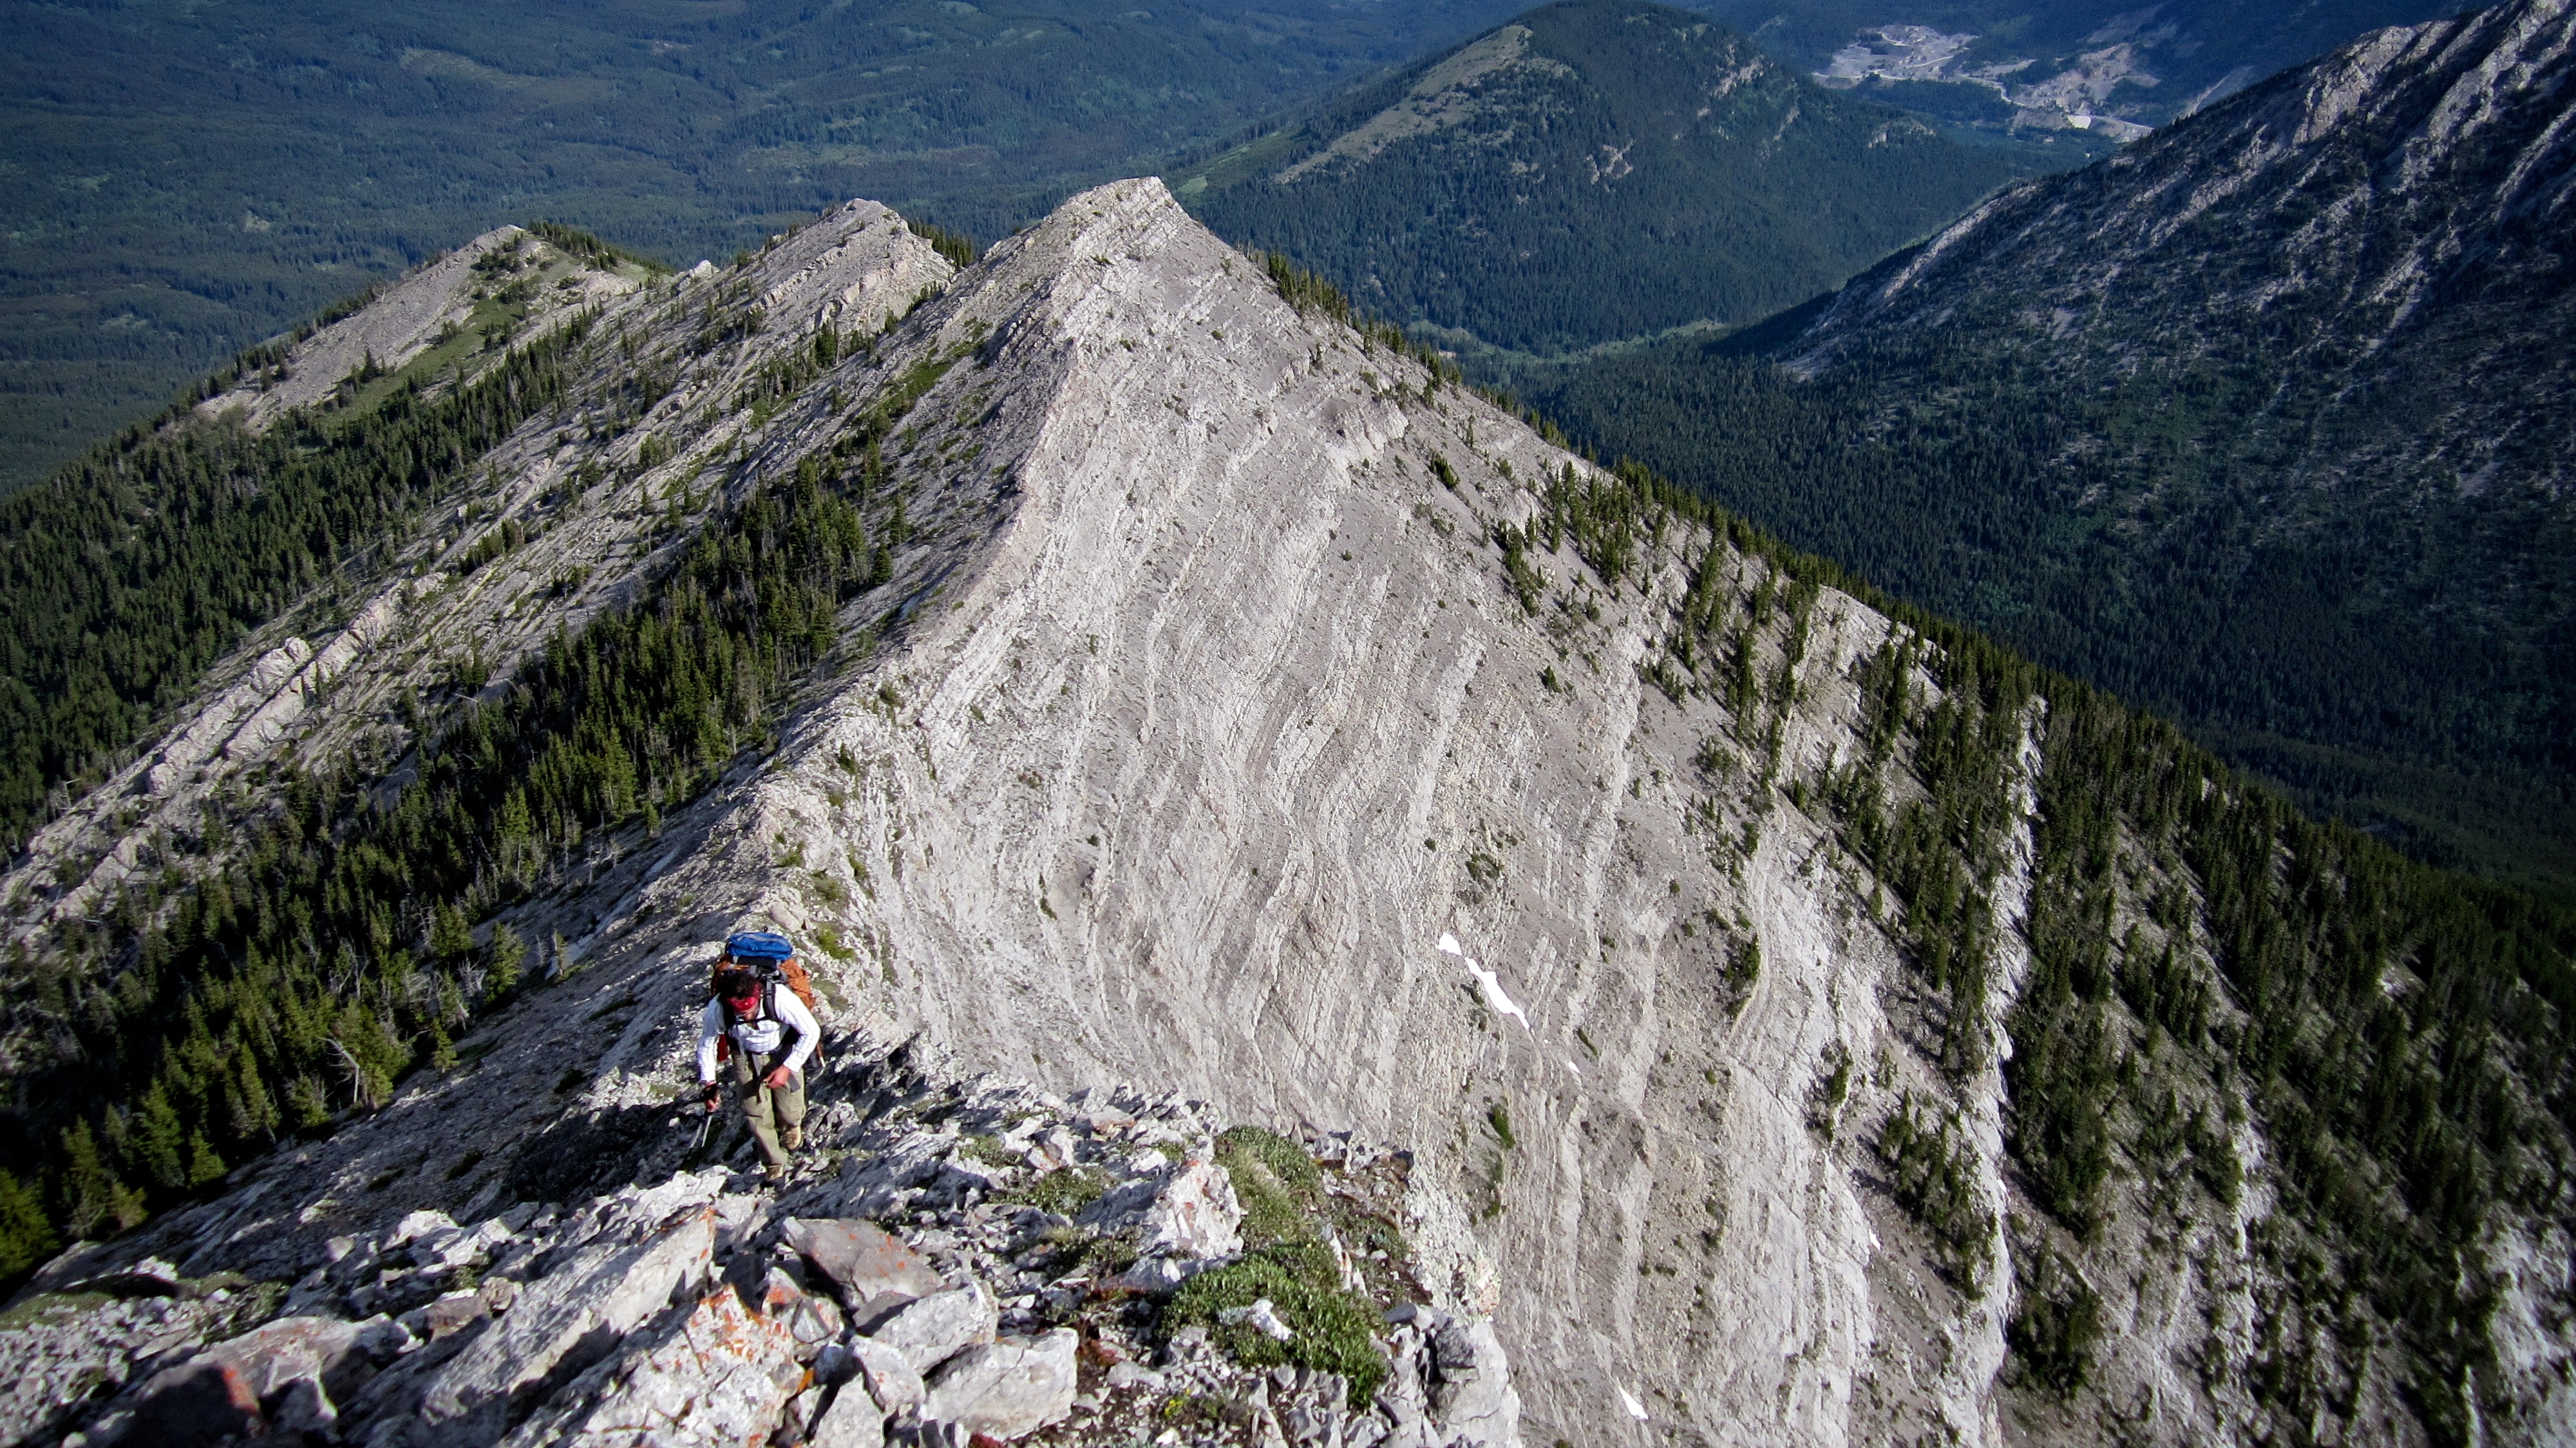
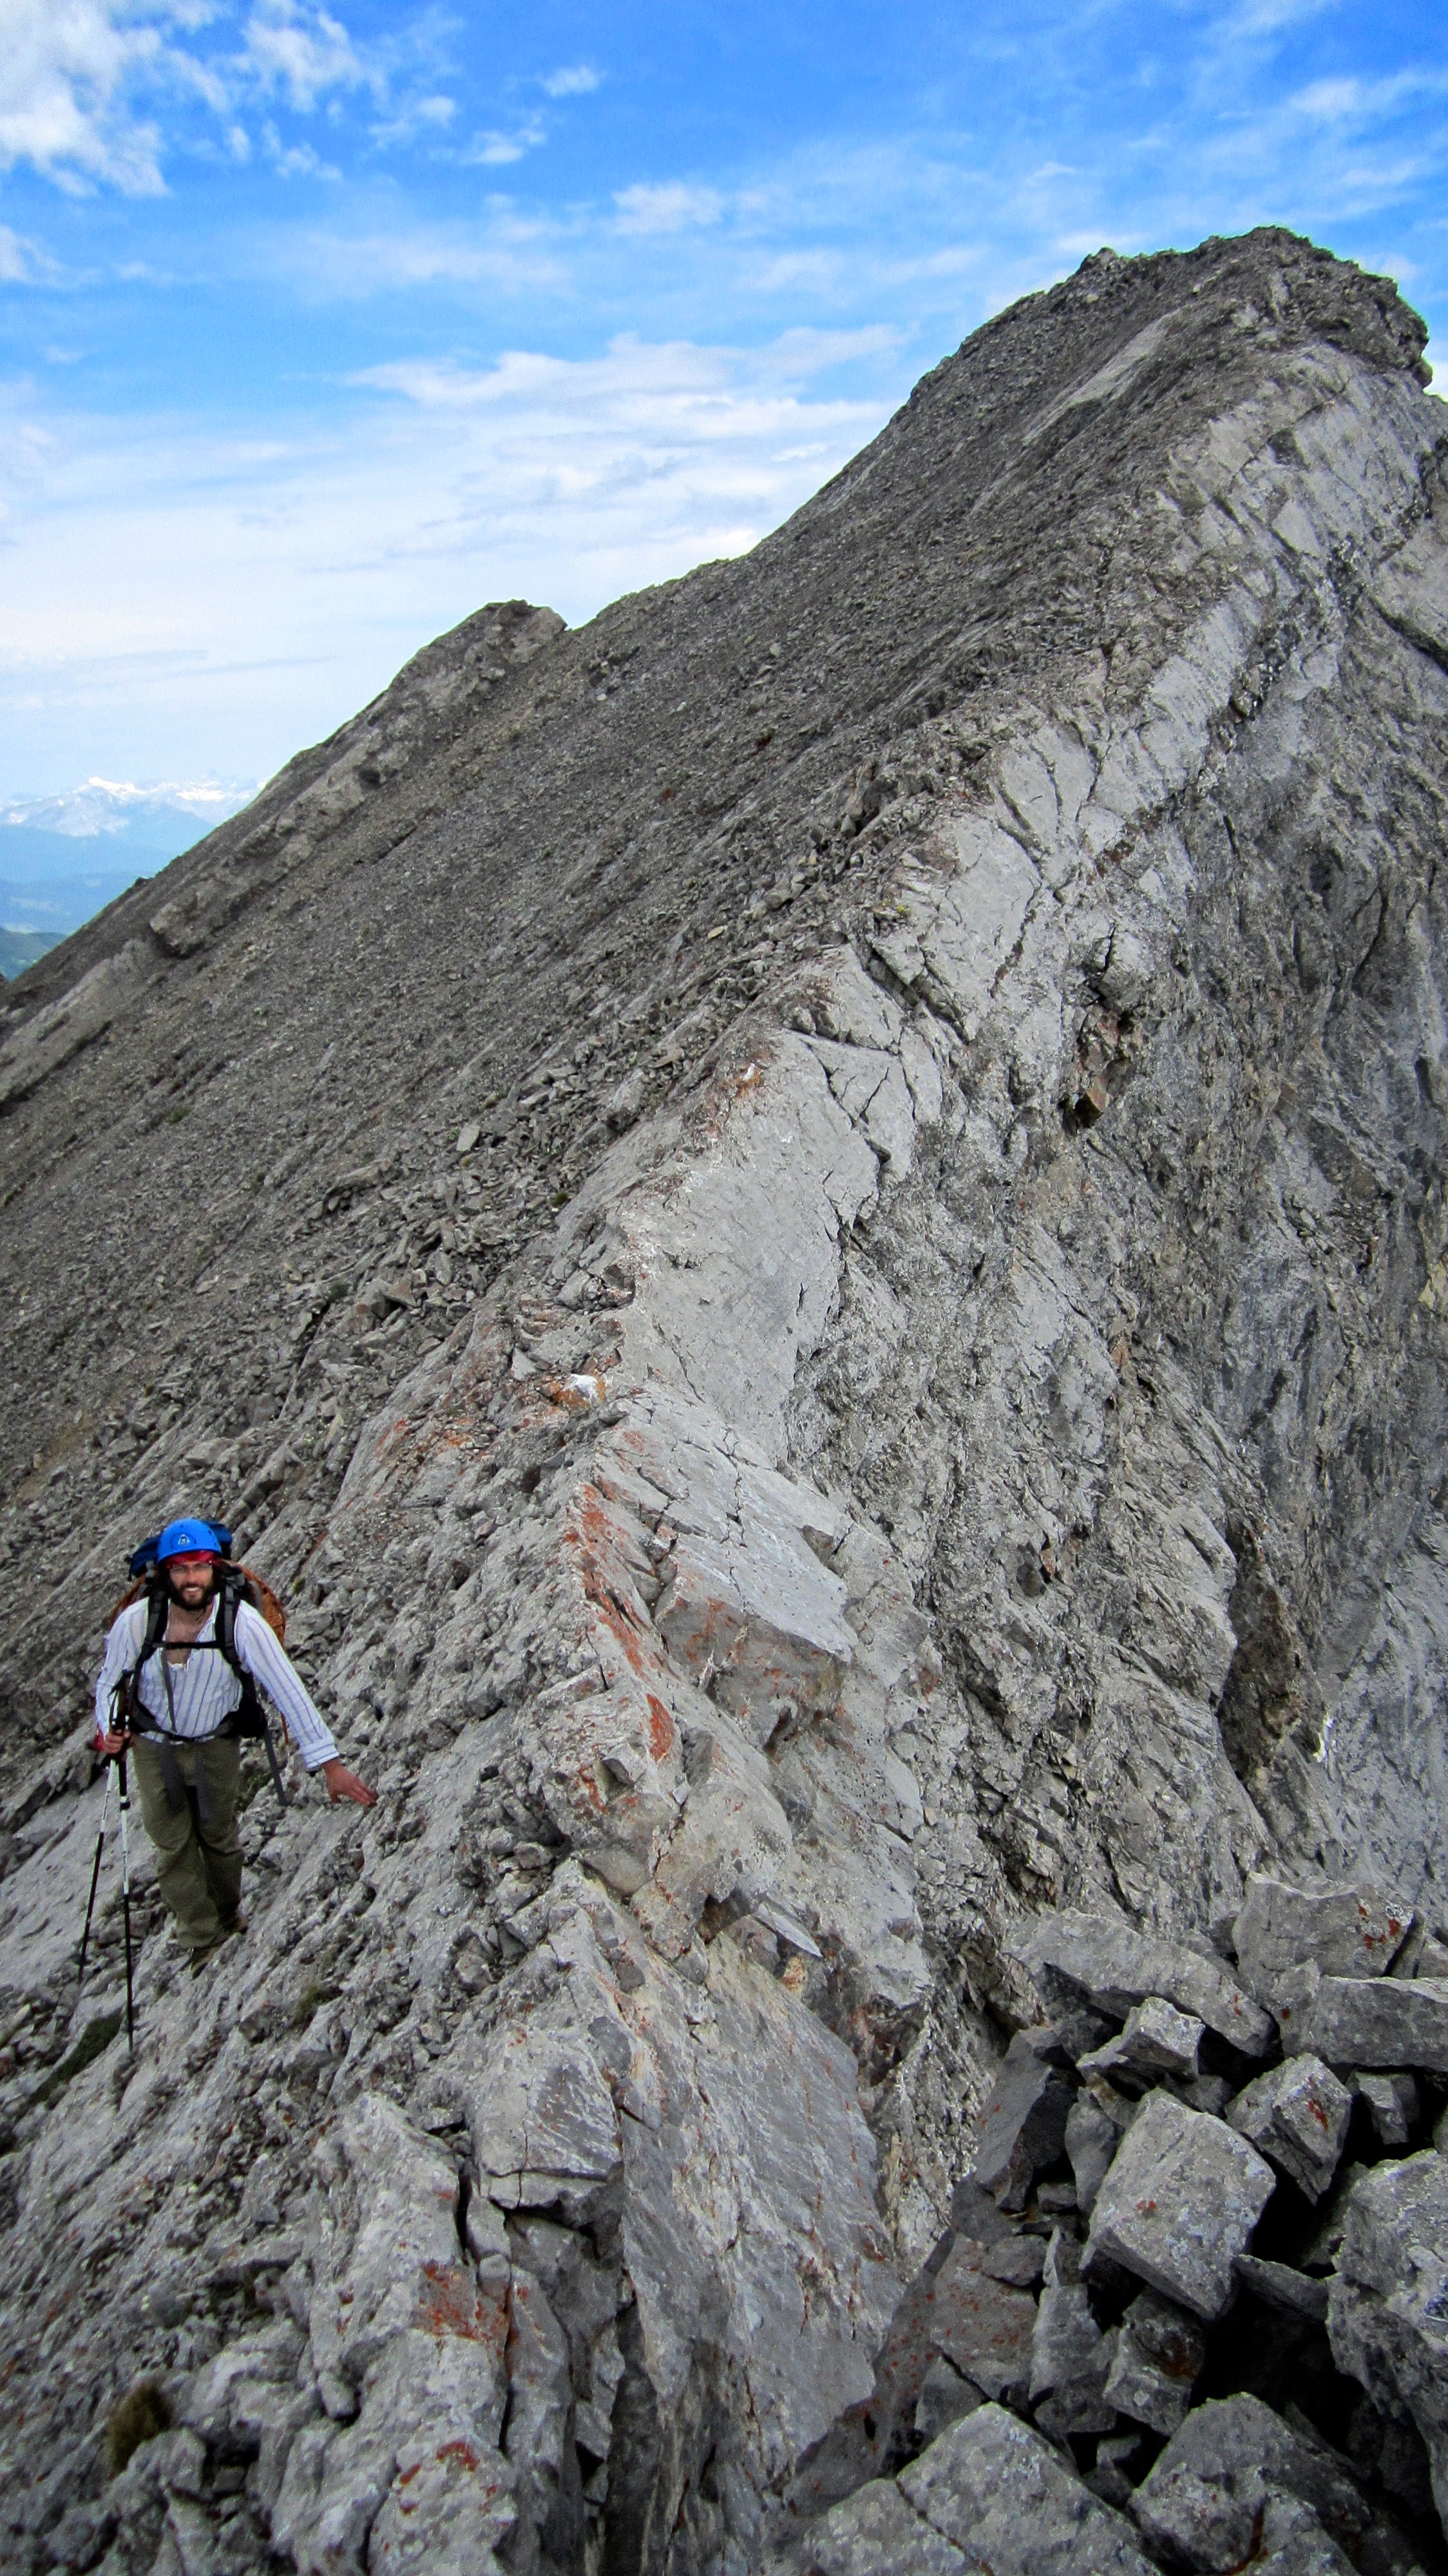
A good look back at our route from the halfway point on our ~4 km ridge walk. (Photo by Brad Wolcott)
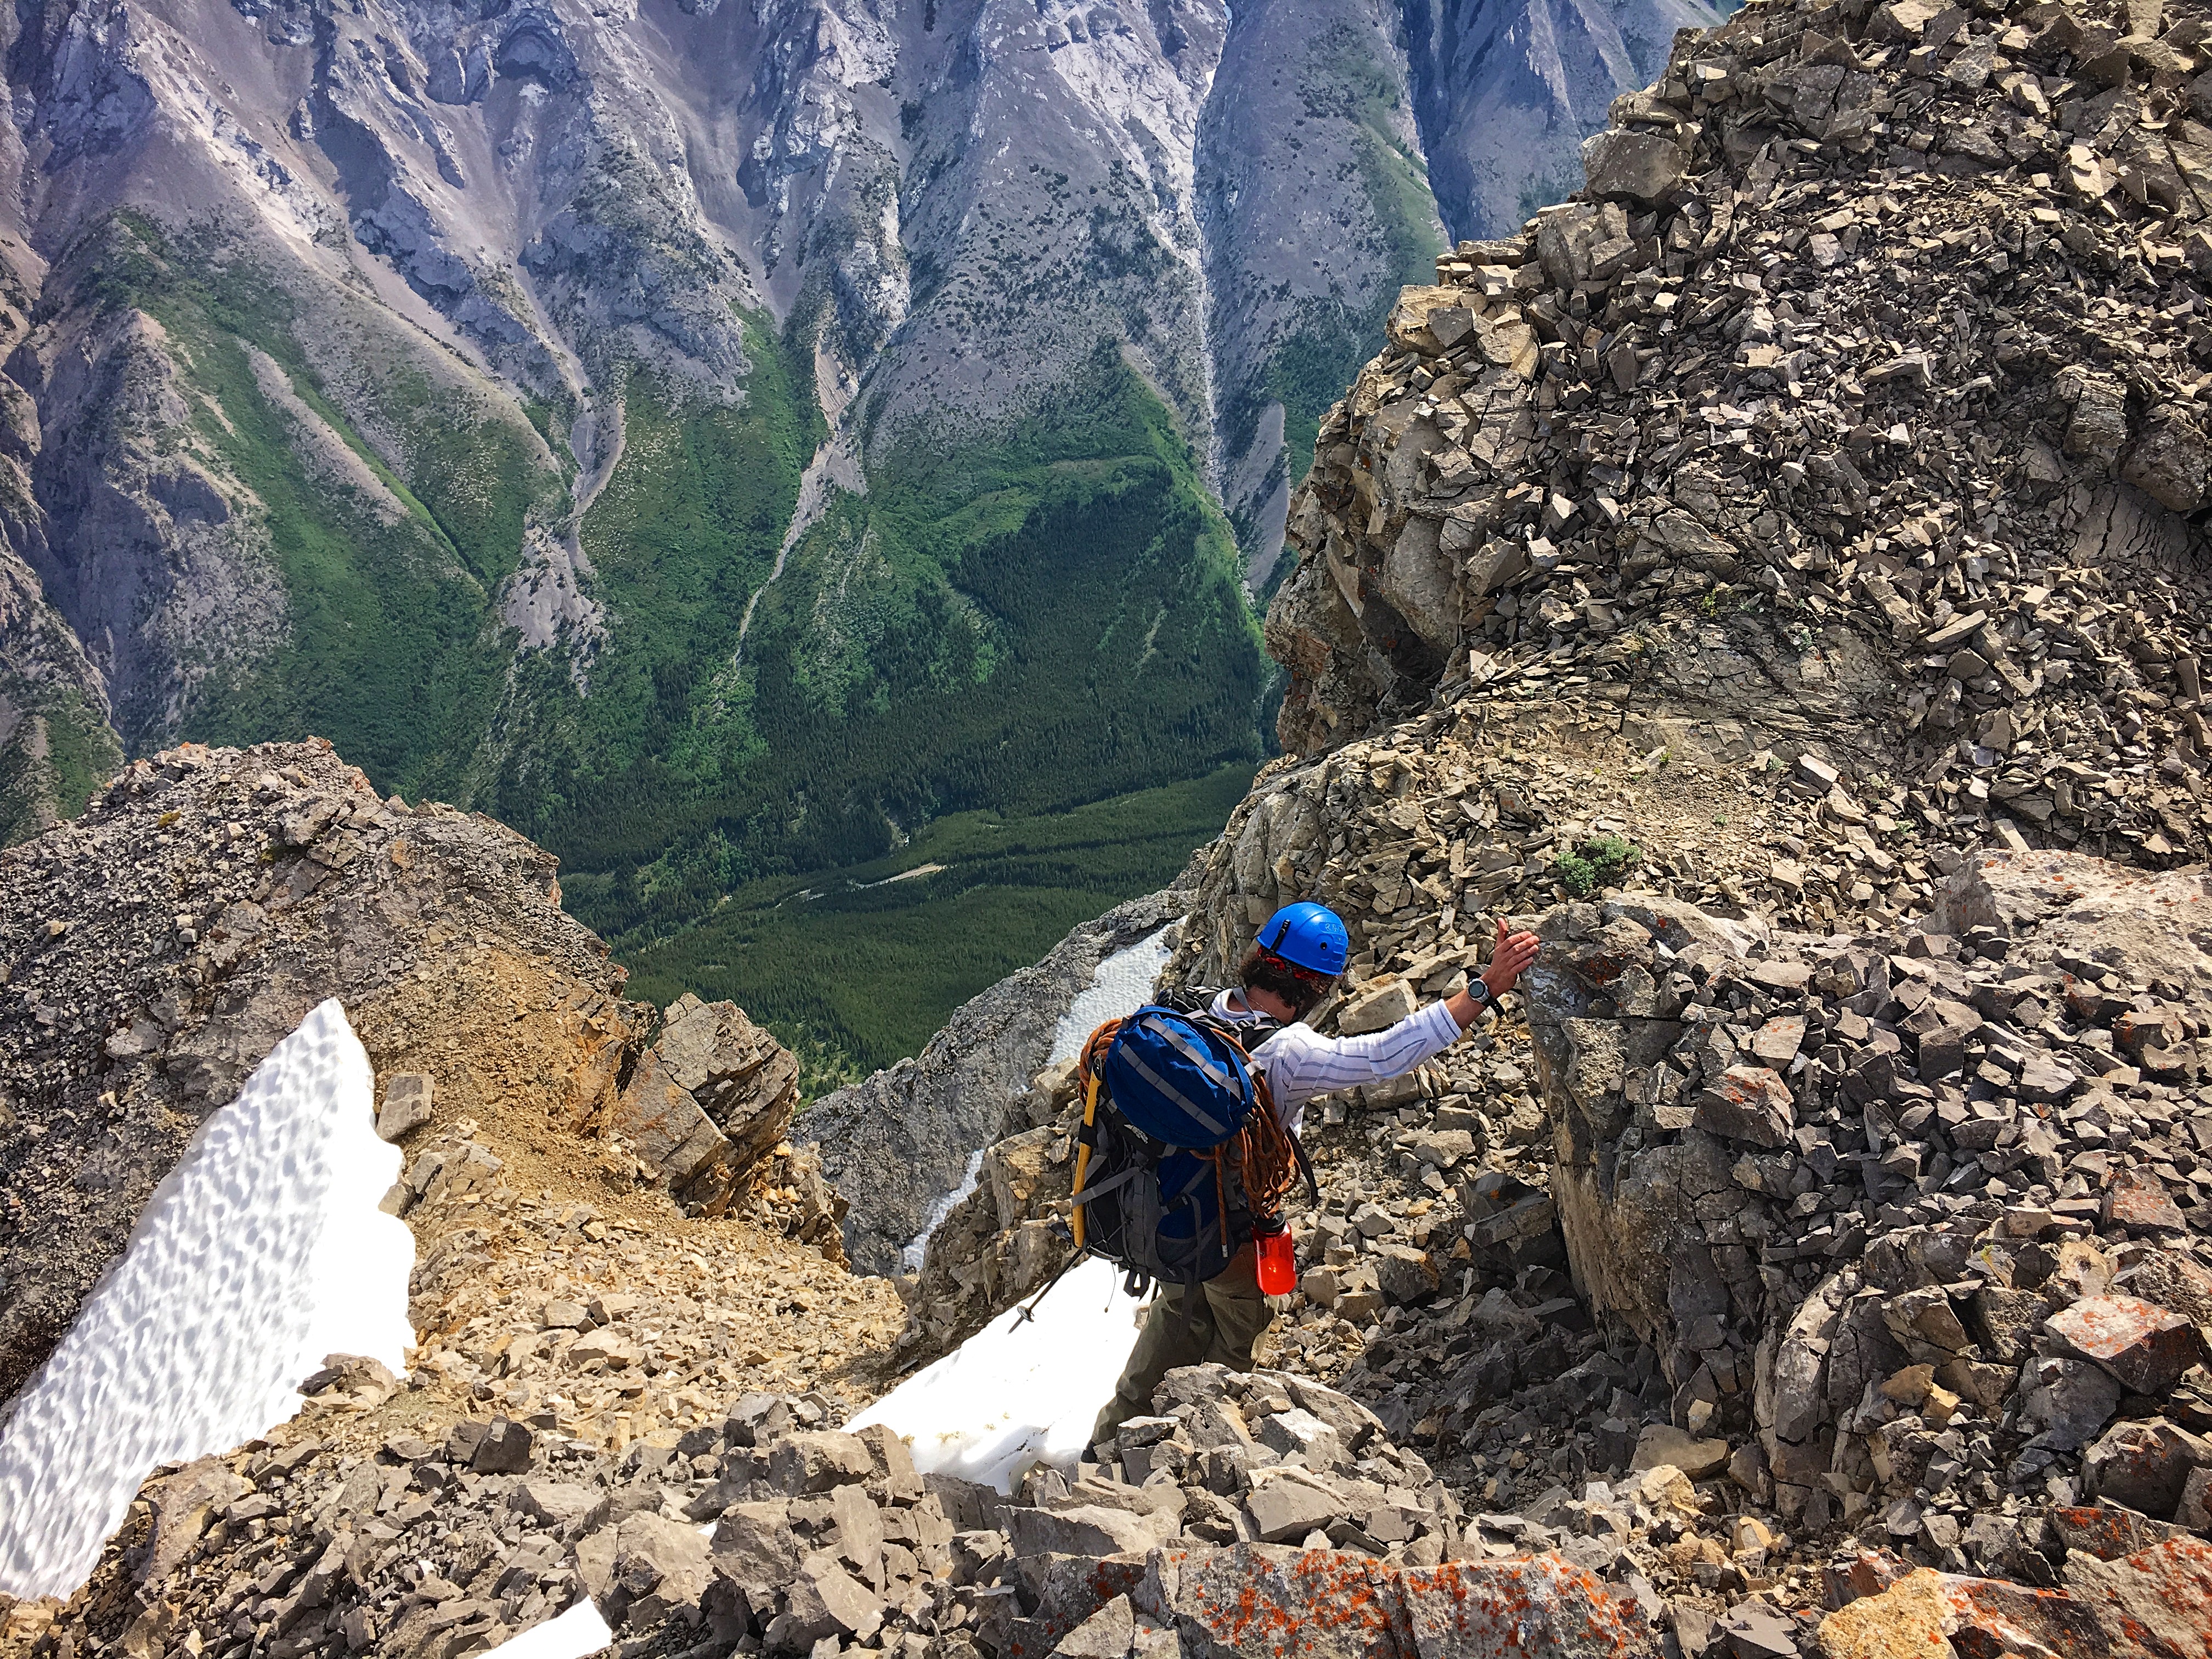
Brad negotiates a partially exposed section near the summit.
My turn to navigate the same section. Now you see me… (Photo by Brad Wolcott)
…now you almost don’t. 😉 (Photo by Brad Wolcott)

Almost at the summit of Peak 1 (Mummy Mountain).
A pano looking SE from the summit of Peak 1 or “Mummy Mountain” (2517m my GPS). Chinook Peak, Mount Parrish, Andy Good Peak, and Mount Coulthard are all to the left of centre. Mount Ptolemy rises behind Peak 3 (Pharaoh’s Peak) on the right and Peak 2 (Anubis Peak) is directly behind Brad.
Looking NE from the summit. In the foreground to the left of centre is Sentry Mountain while Chinook Peak is foreground right. In the distance on the left is “Alexander Creek Mountain”, Phillipps Peak and Mount Tecumseh. Crowsnest Mountain and the Seven Sisters are easily recognized in the background.

The view west centres on Tent Mountain, Mount Taylor, and Michel Head.
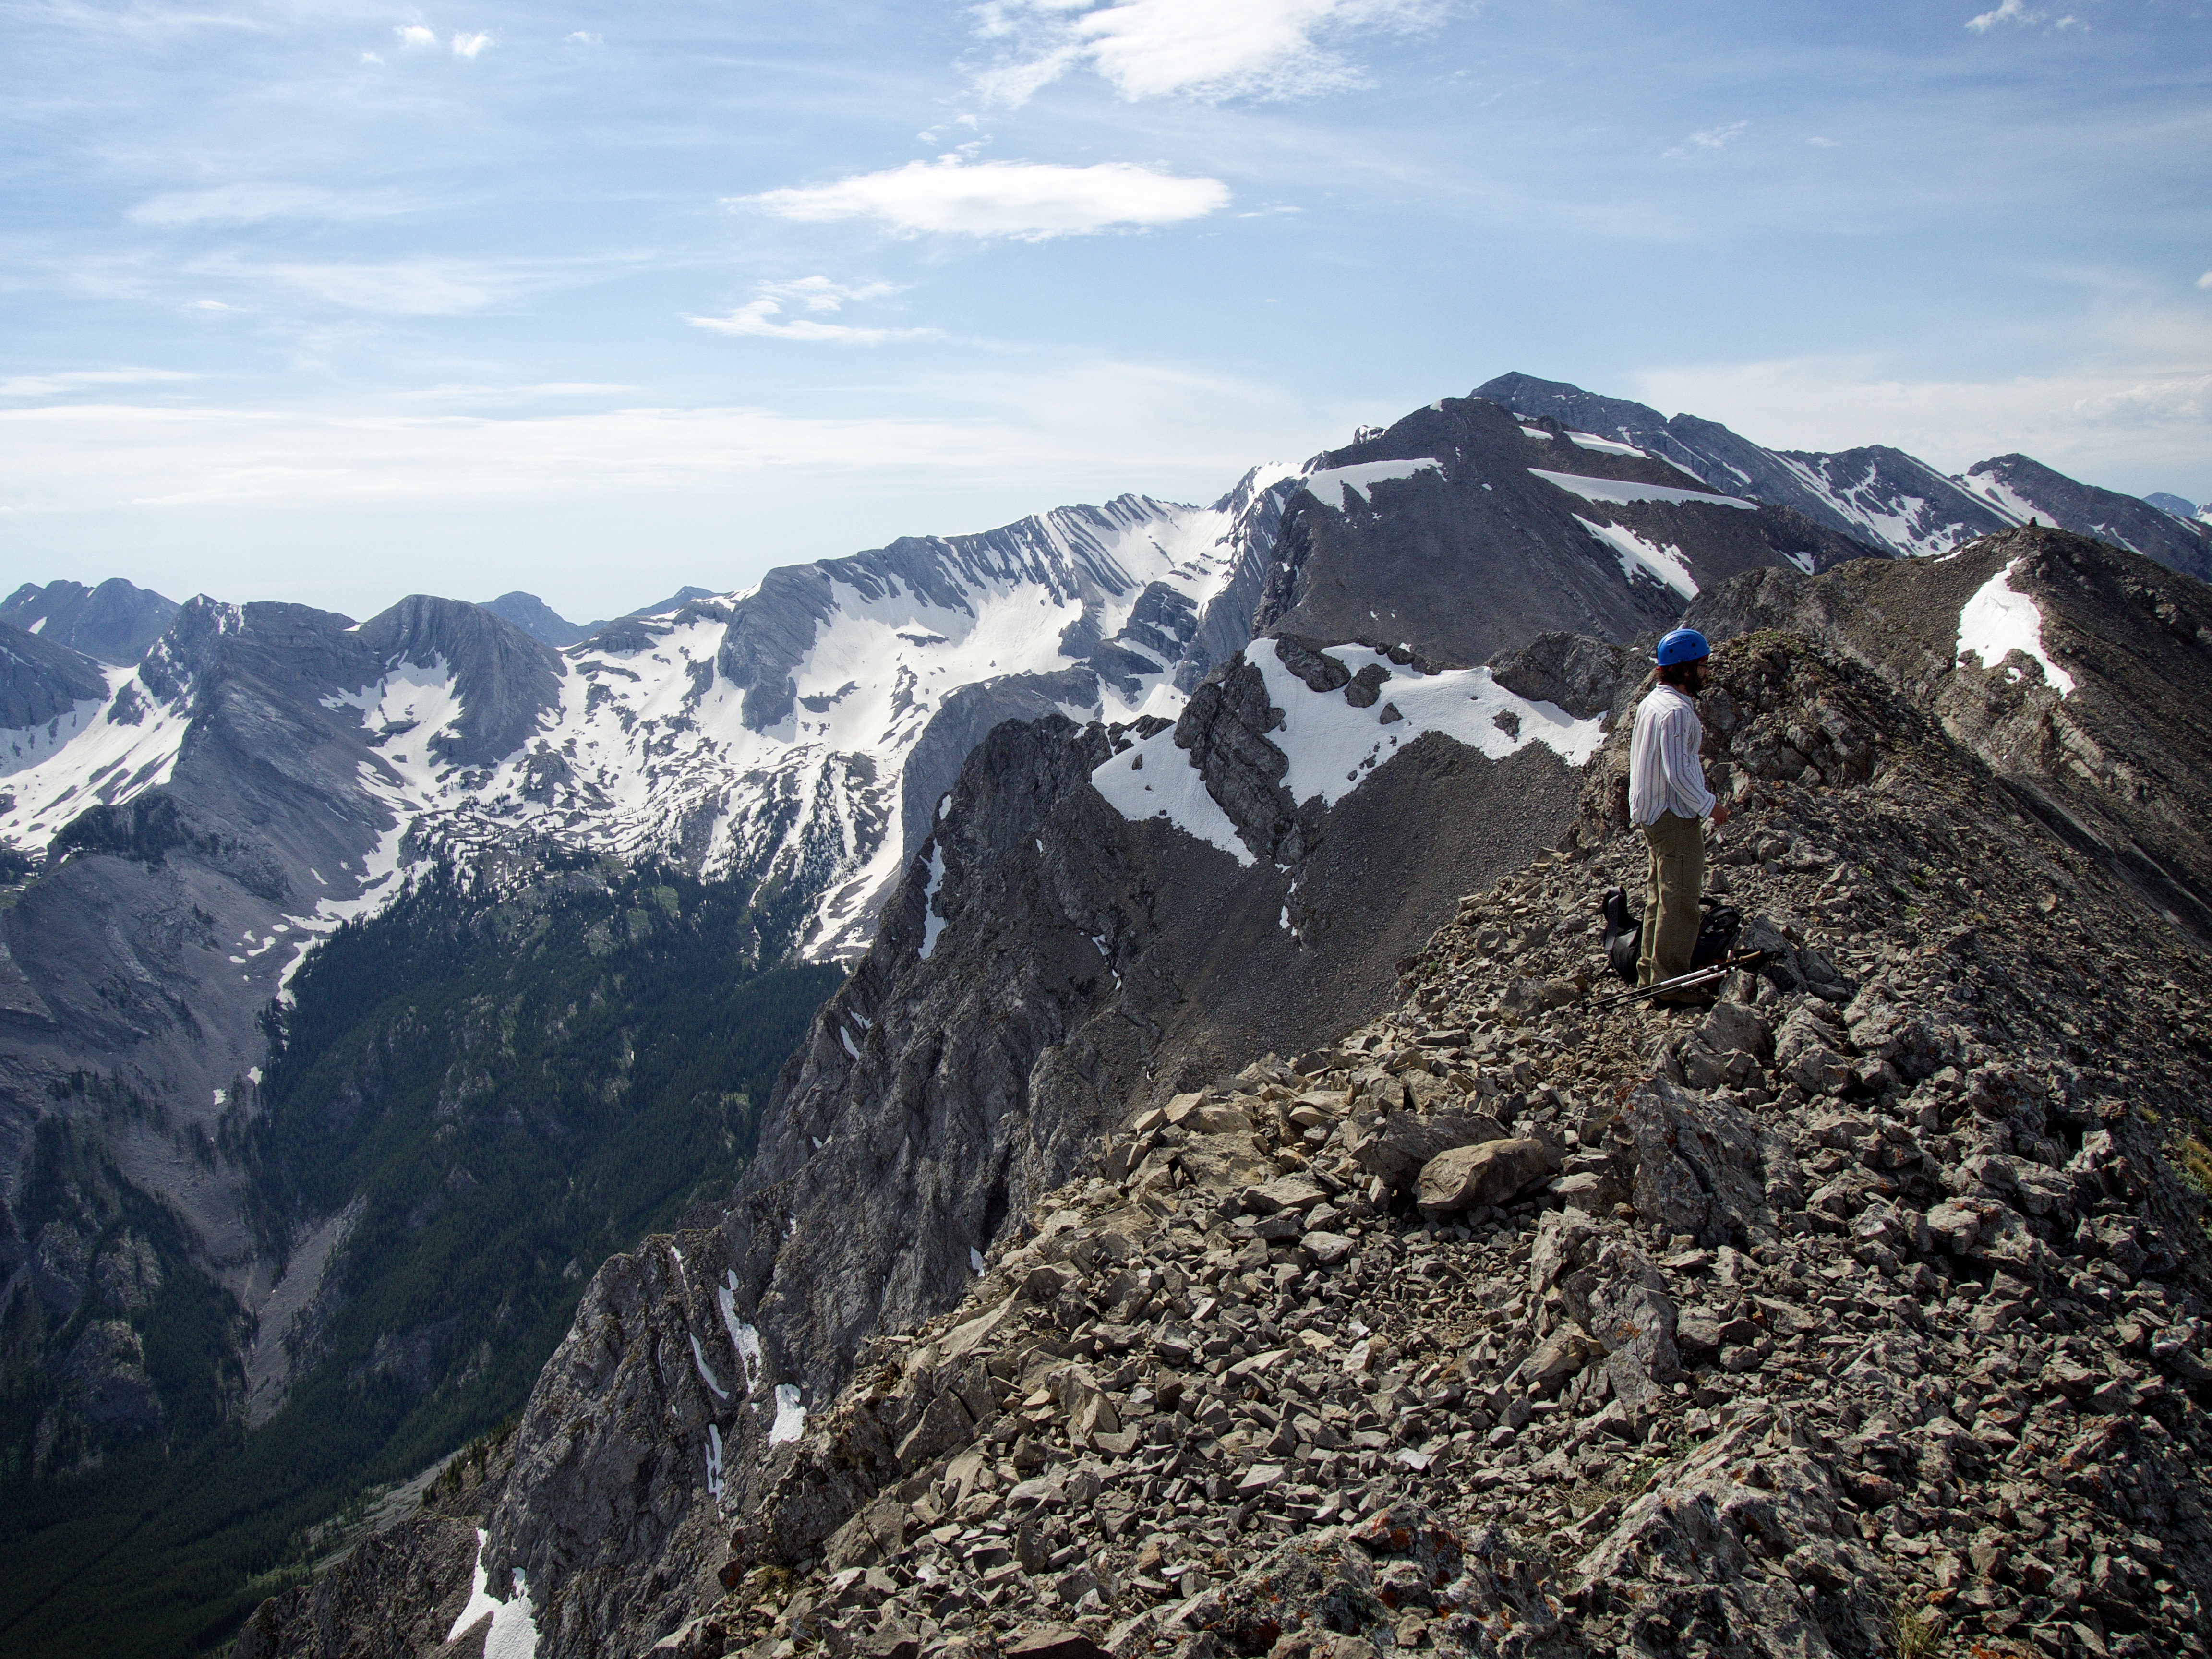
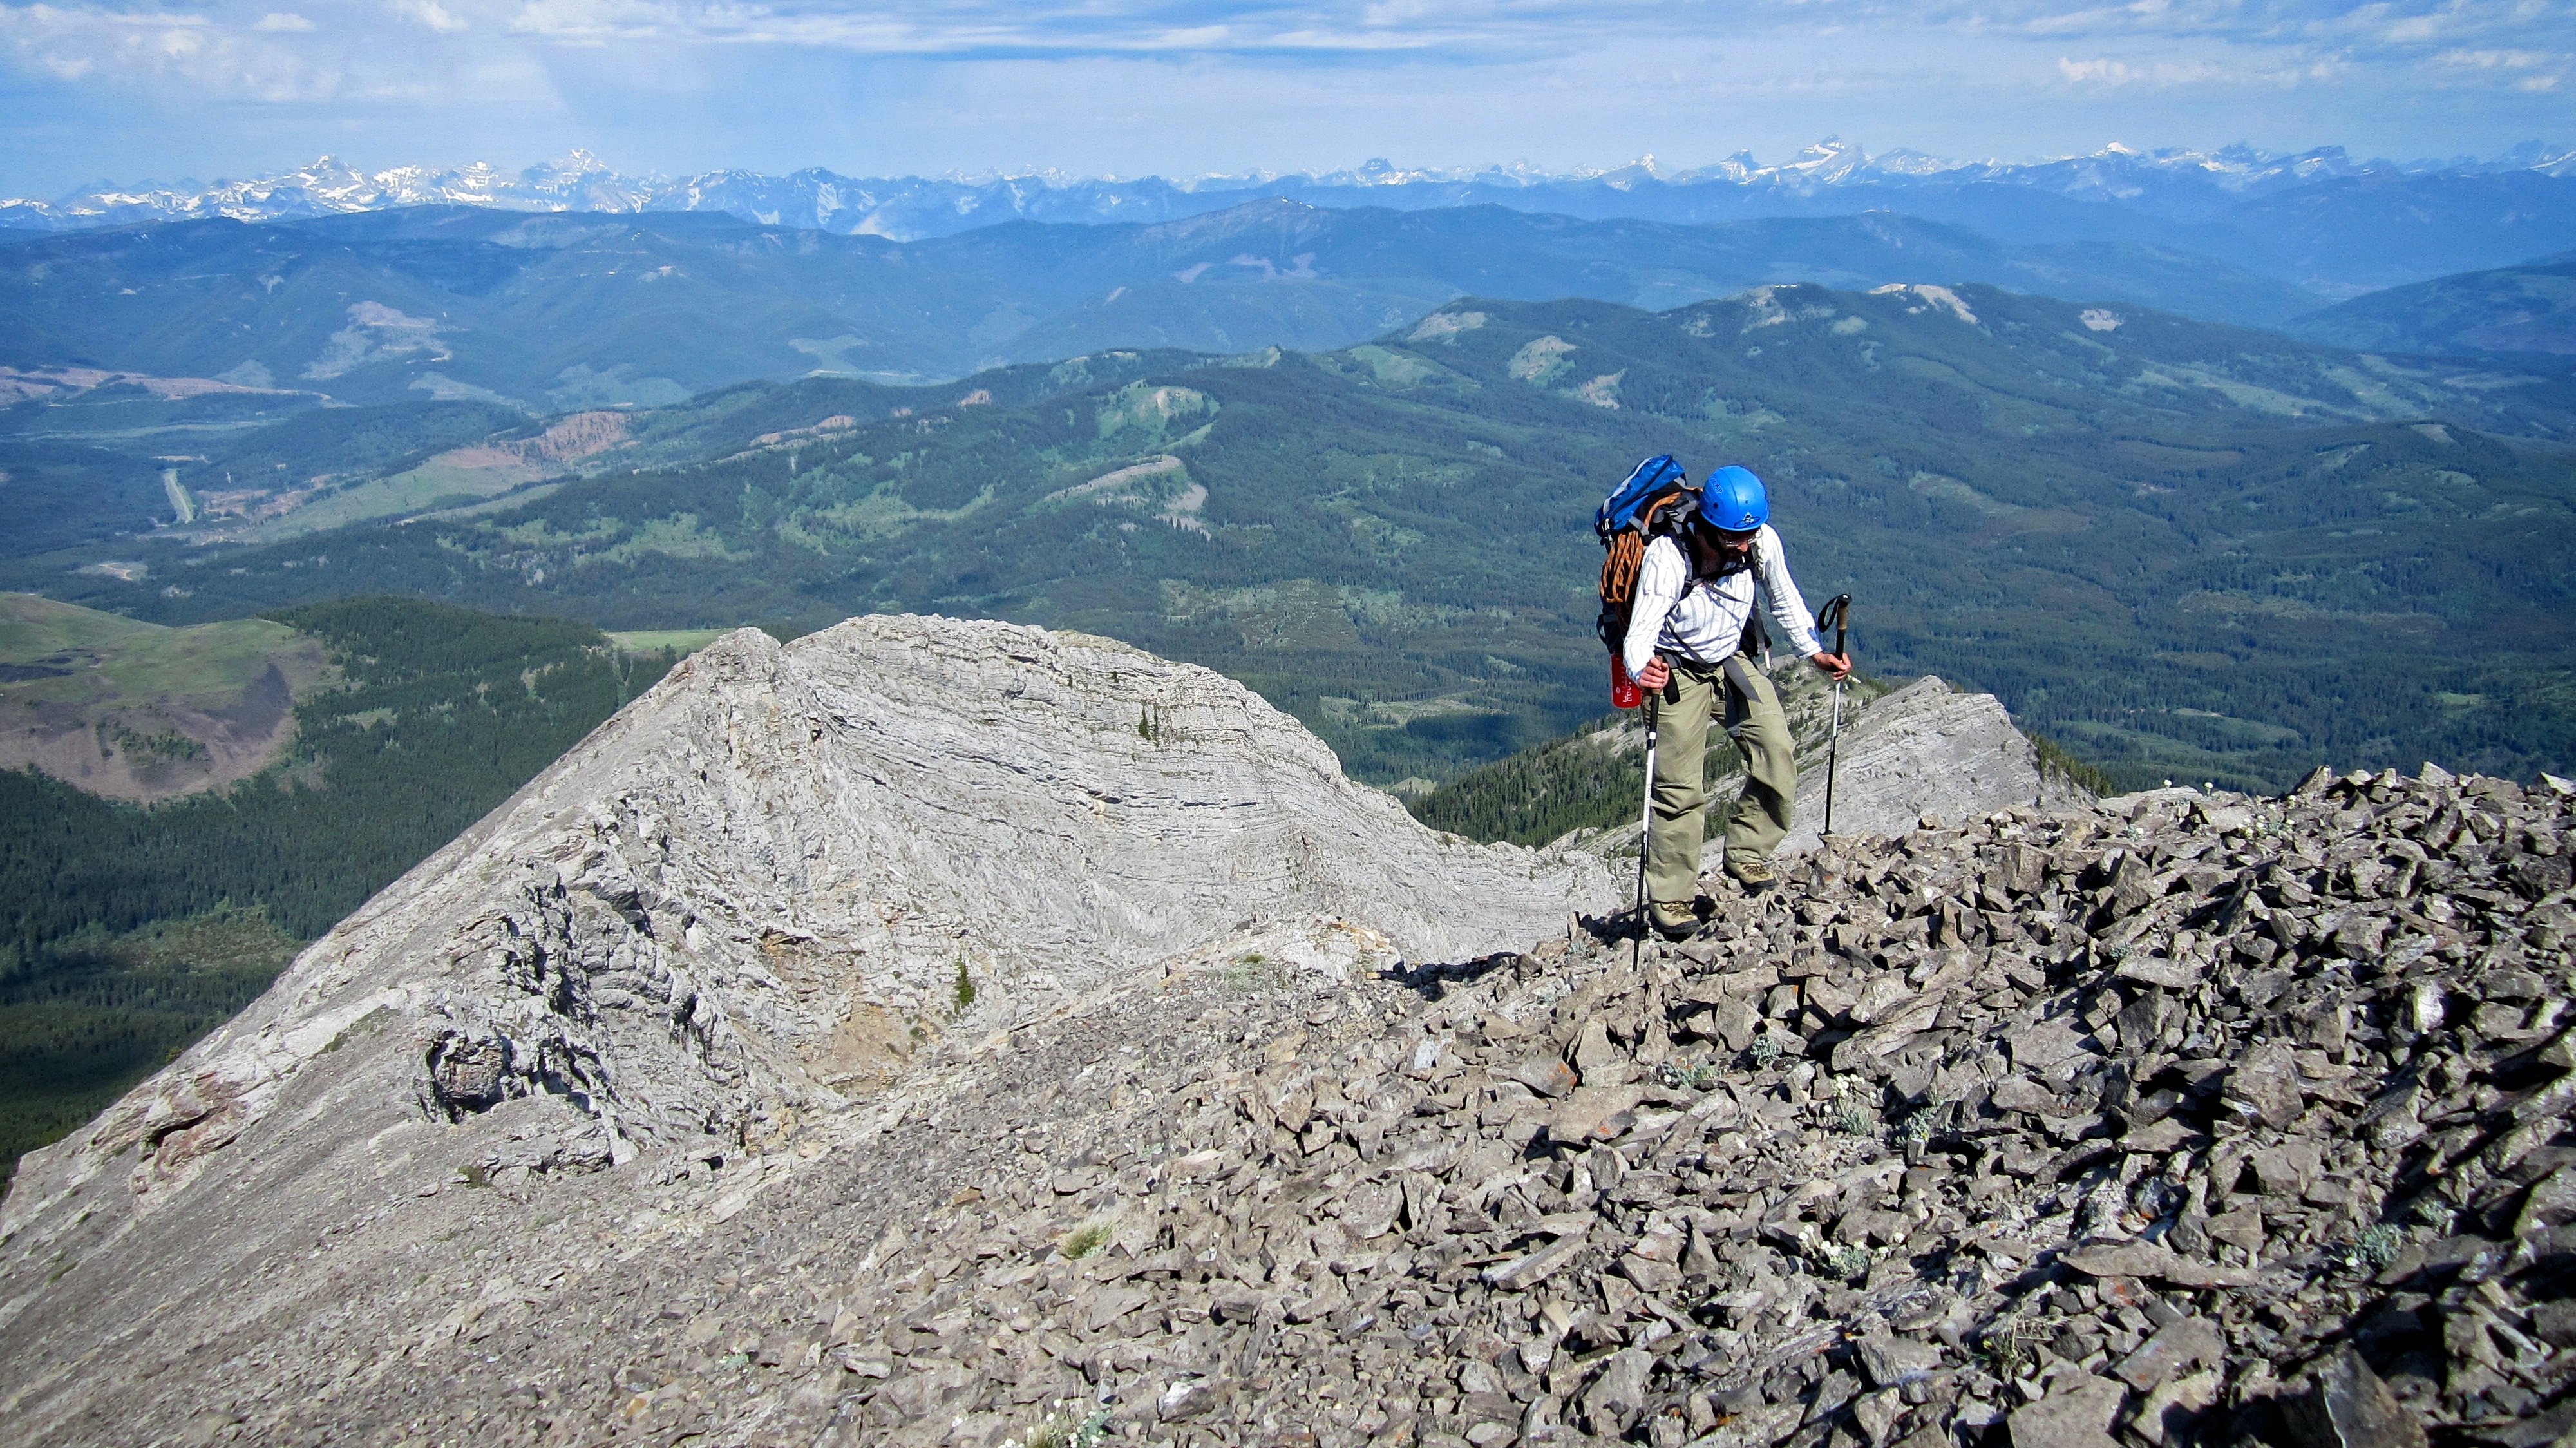
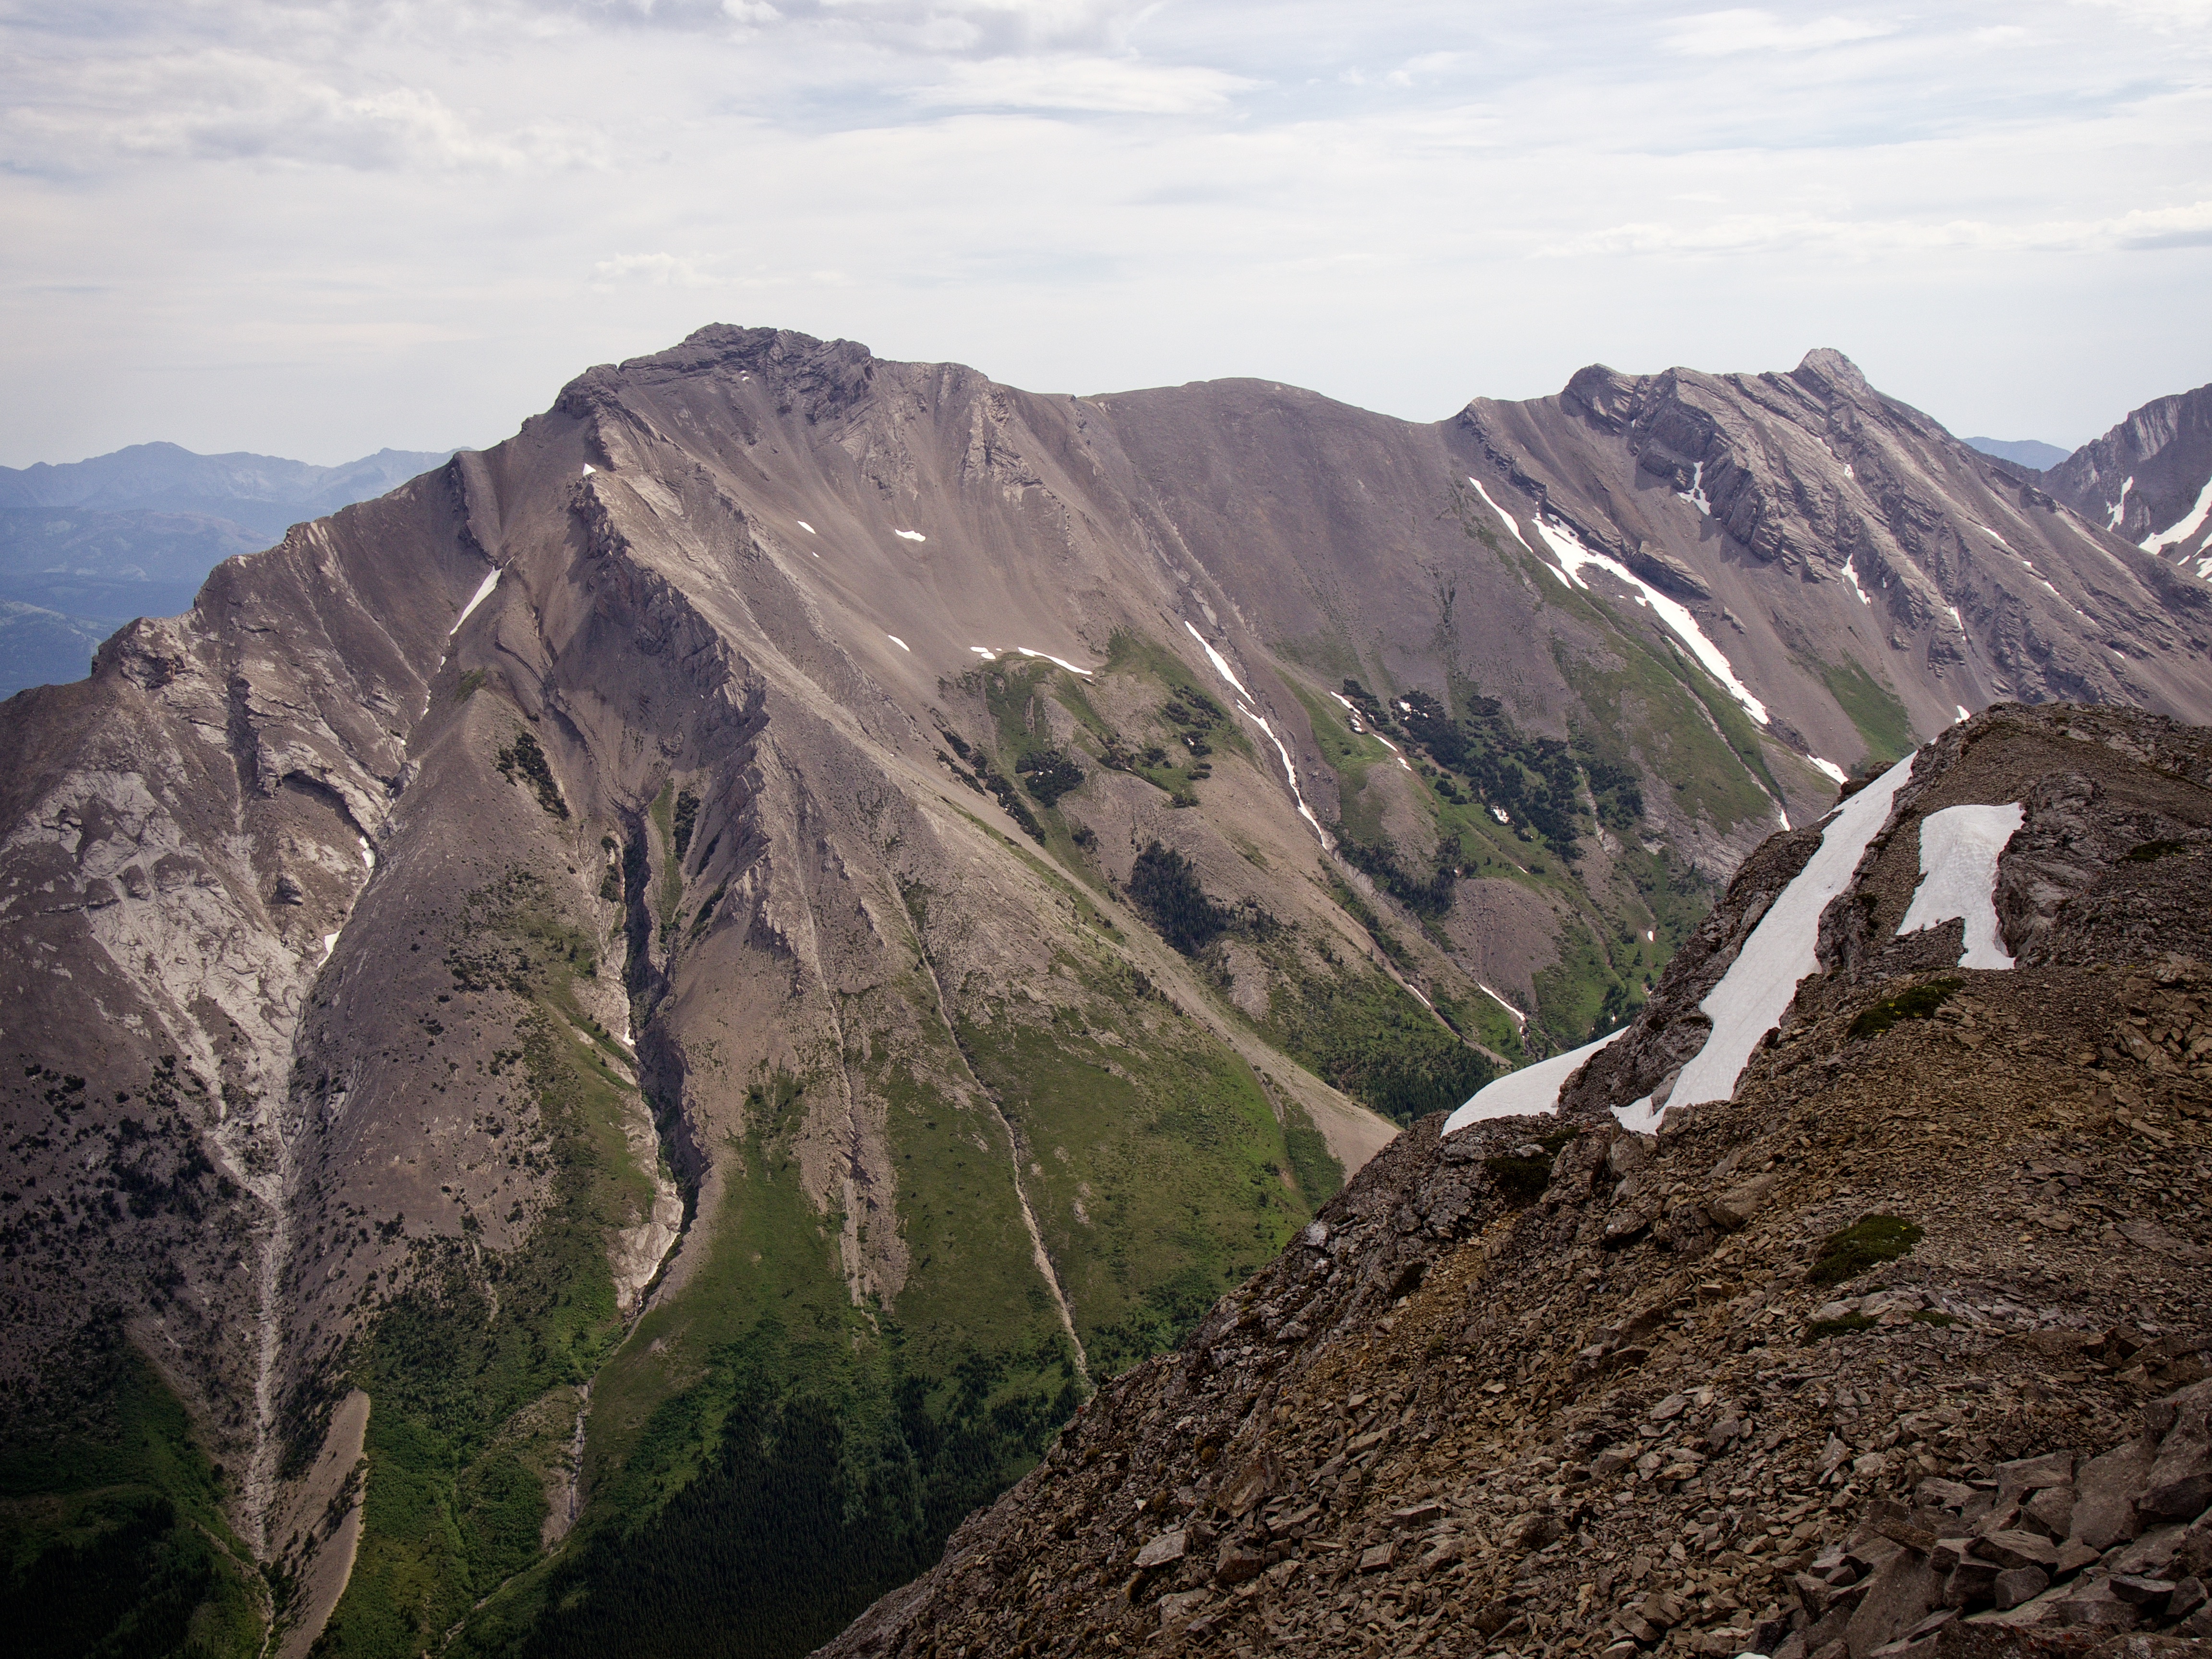
Looking south along the ridge to Peaks 2 (Anubis Peak) and 3 (Pharaoh’s Peak). Being ~105m taller than its siblings, Peak 3 definitely caught our attention.

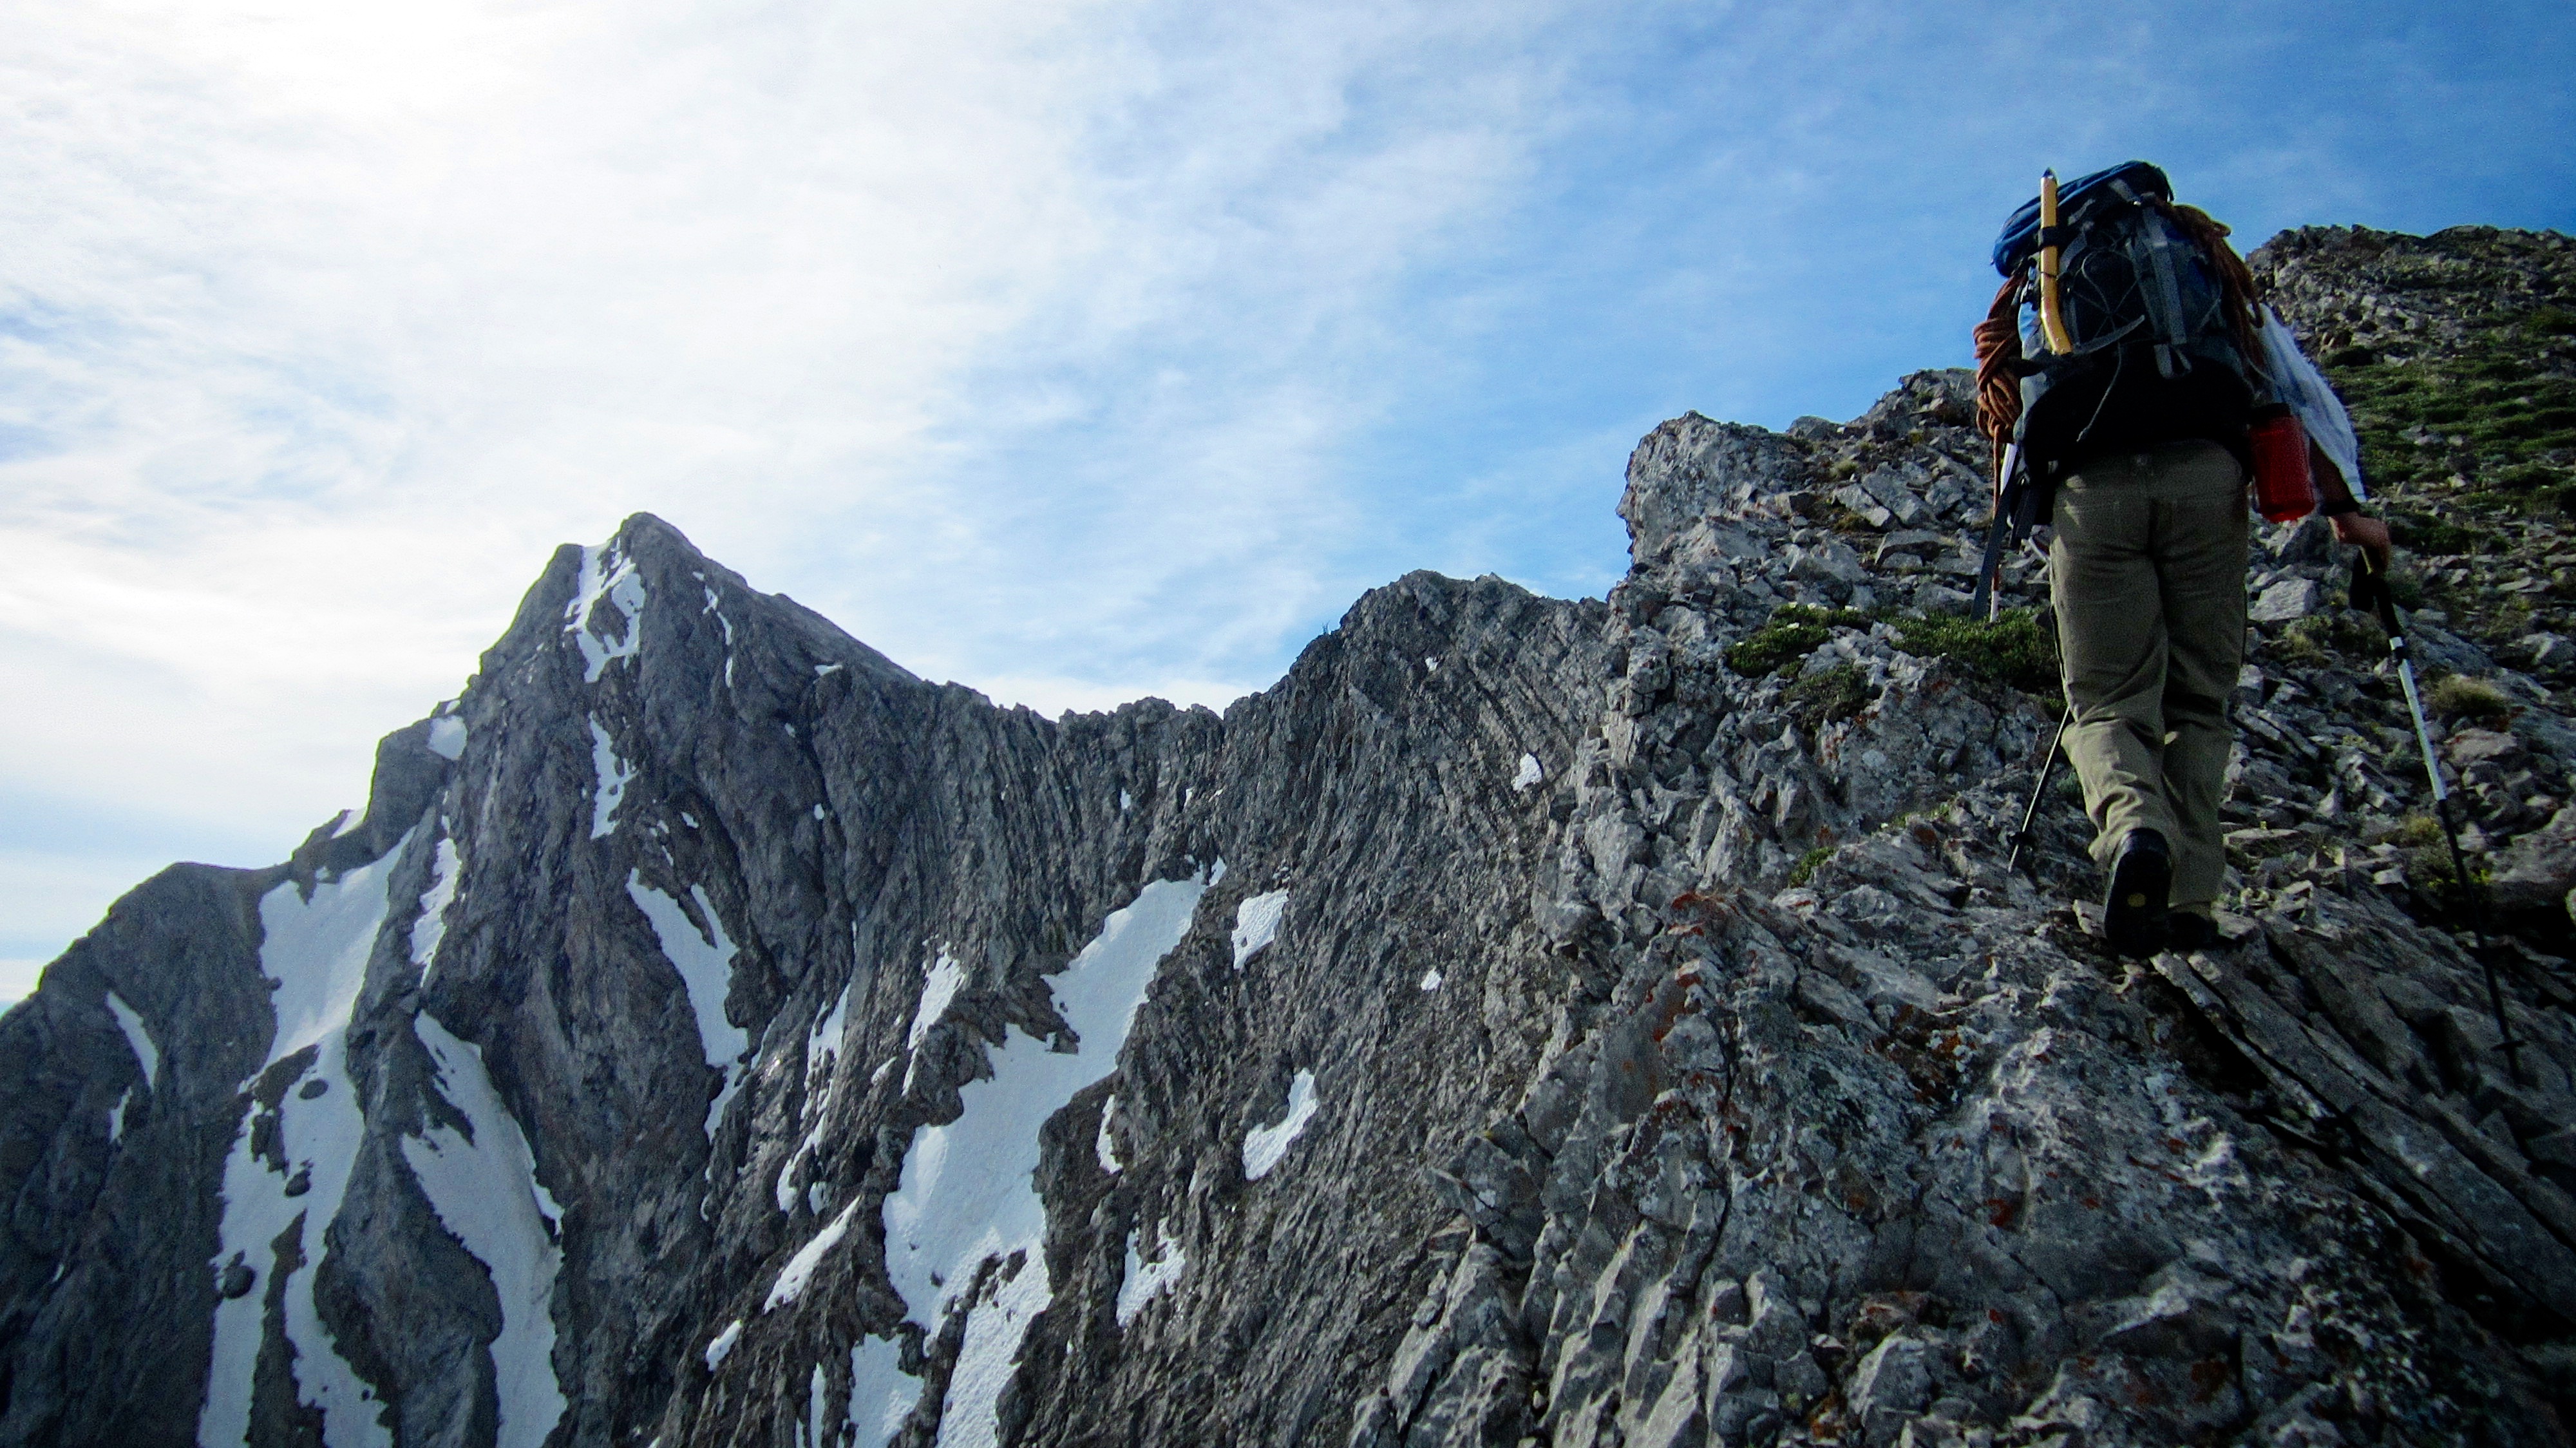
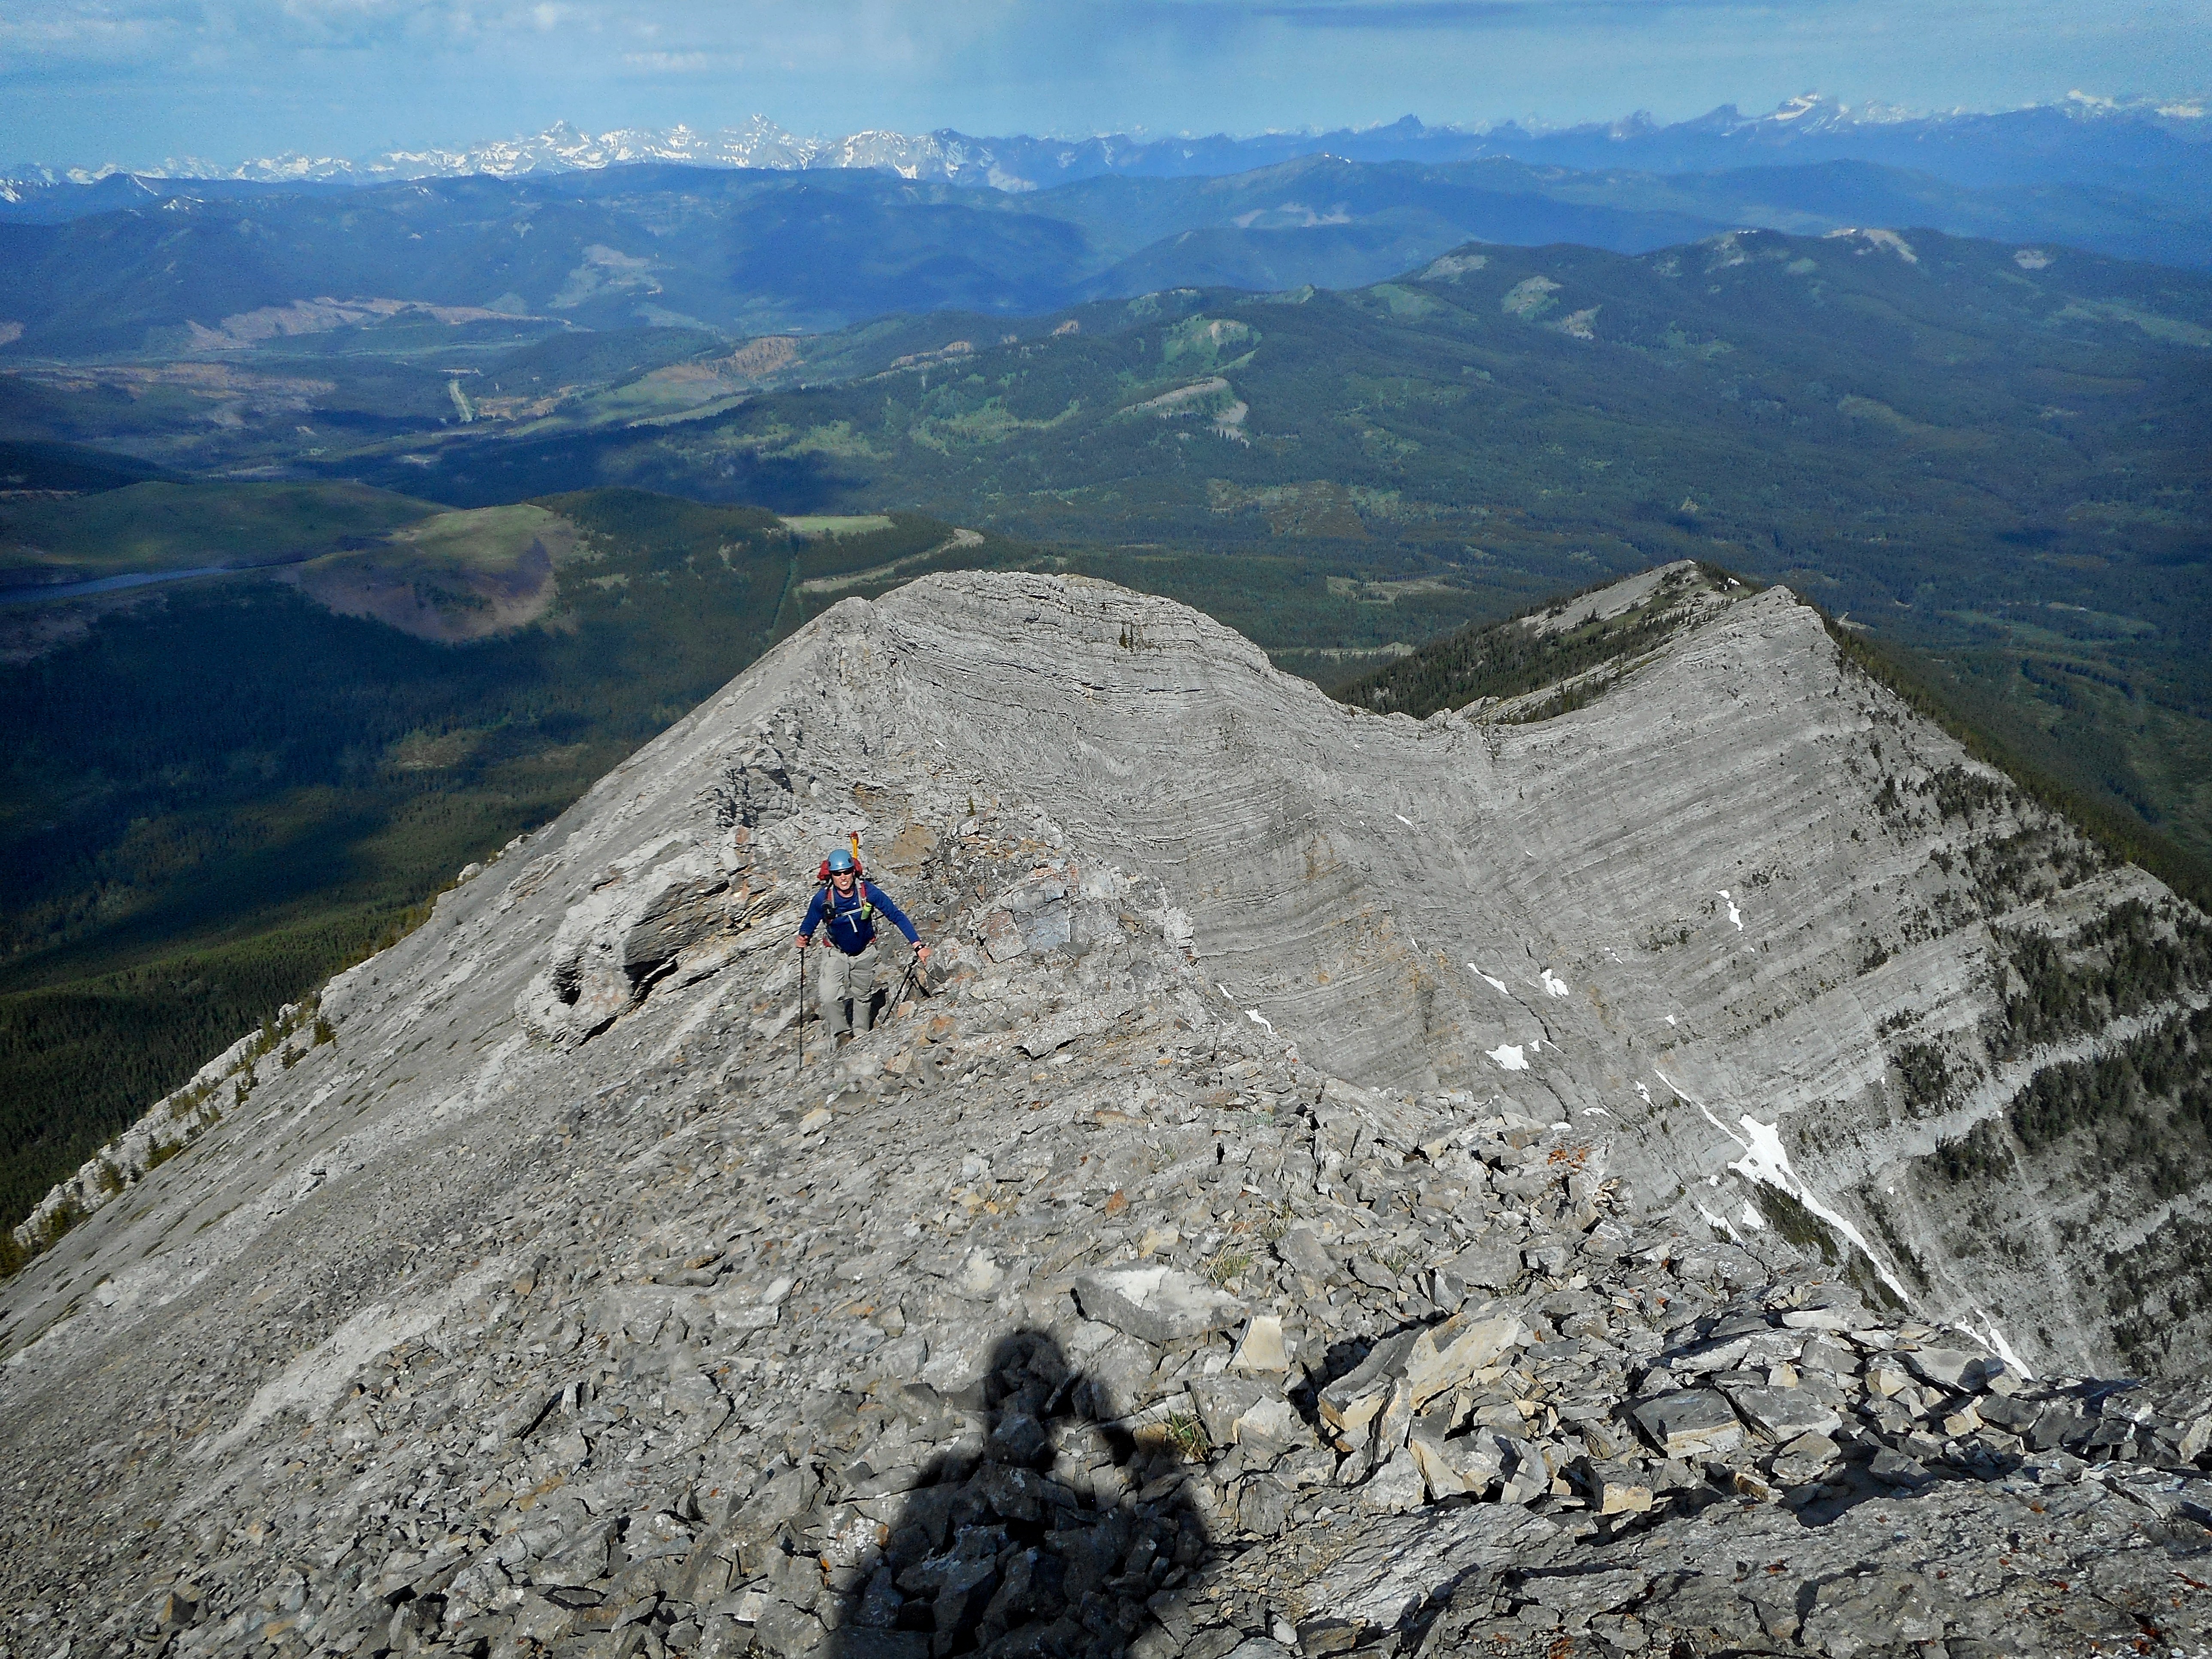
Leaving the summit and heading to Peak 2. This is where the traverse takes on a higher level of difficulty.

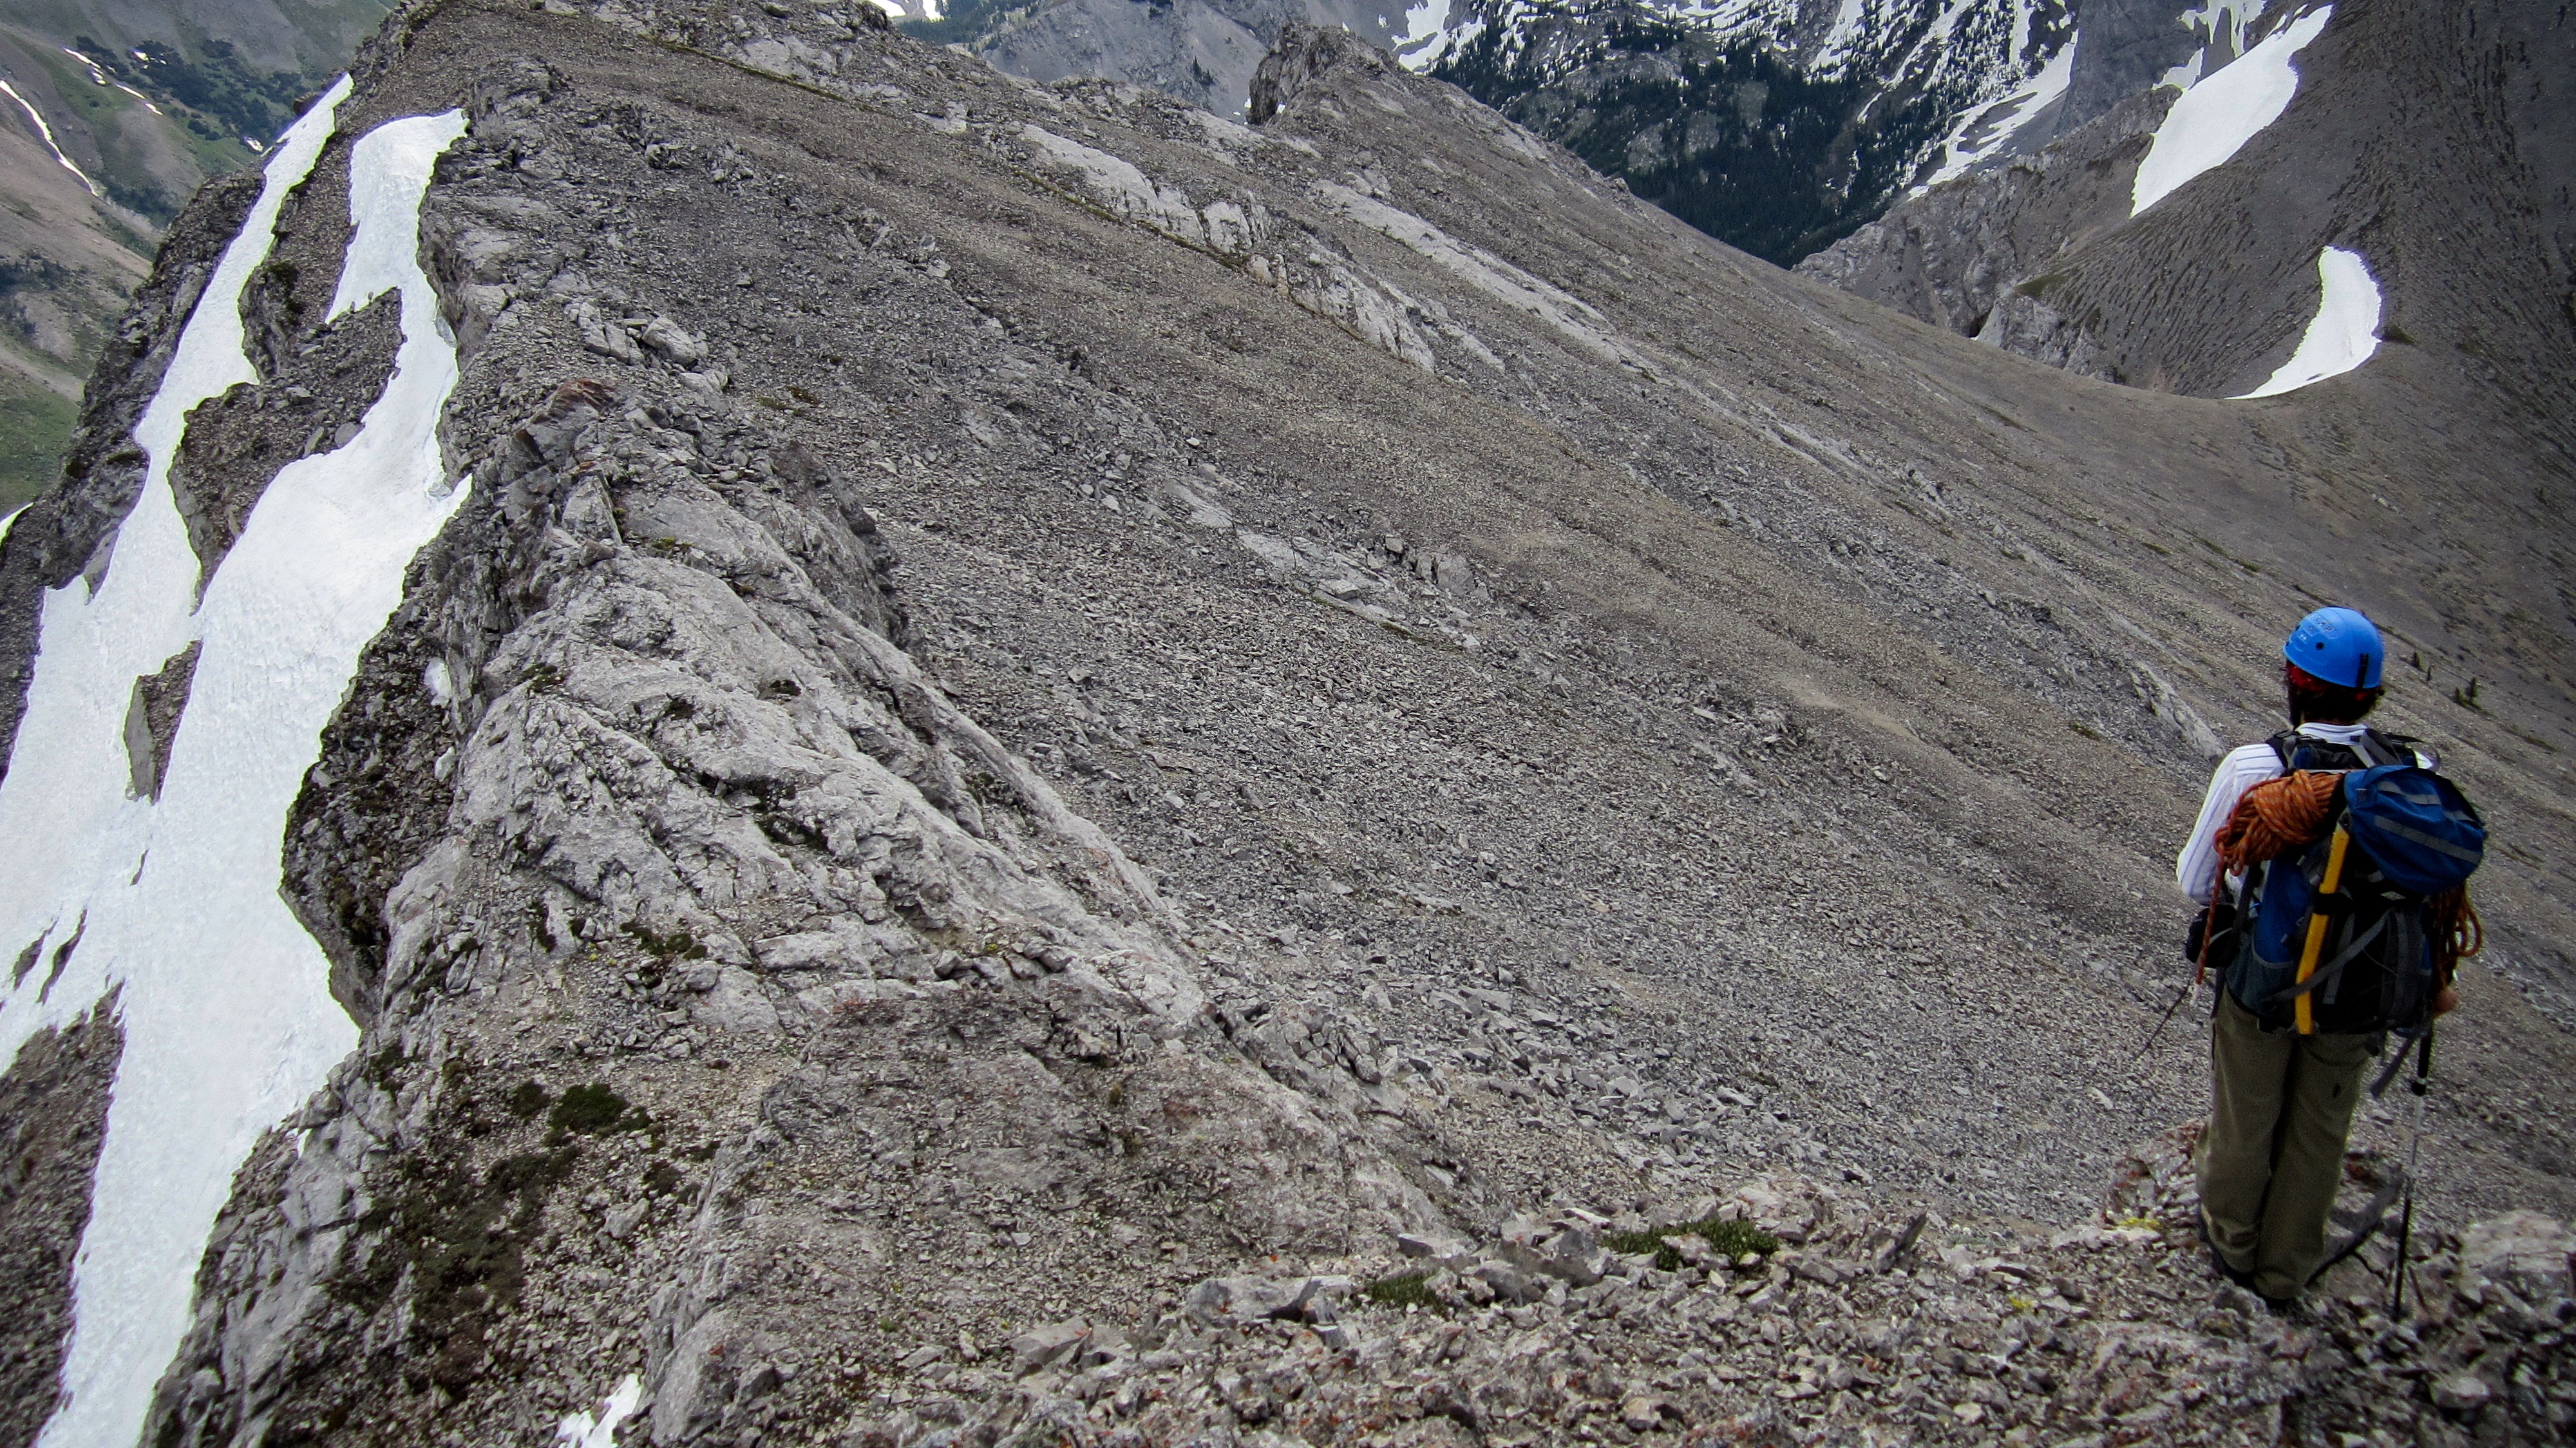
Typical terrain on this section of the ridge. In some places it was possible to drop climber’s right and avoid the crest and in other places, it was easier to take a direct line.

Needless to say, we took our time as the exposure to climber’s left was somewhat extreme.
Brad’s all smiles as we make our way towards Peak 2 (Anubis Peak).

The views from the ridge were simply spectacular!
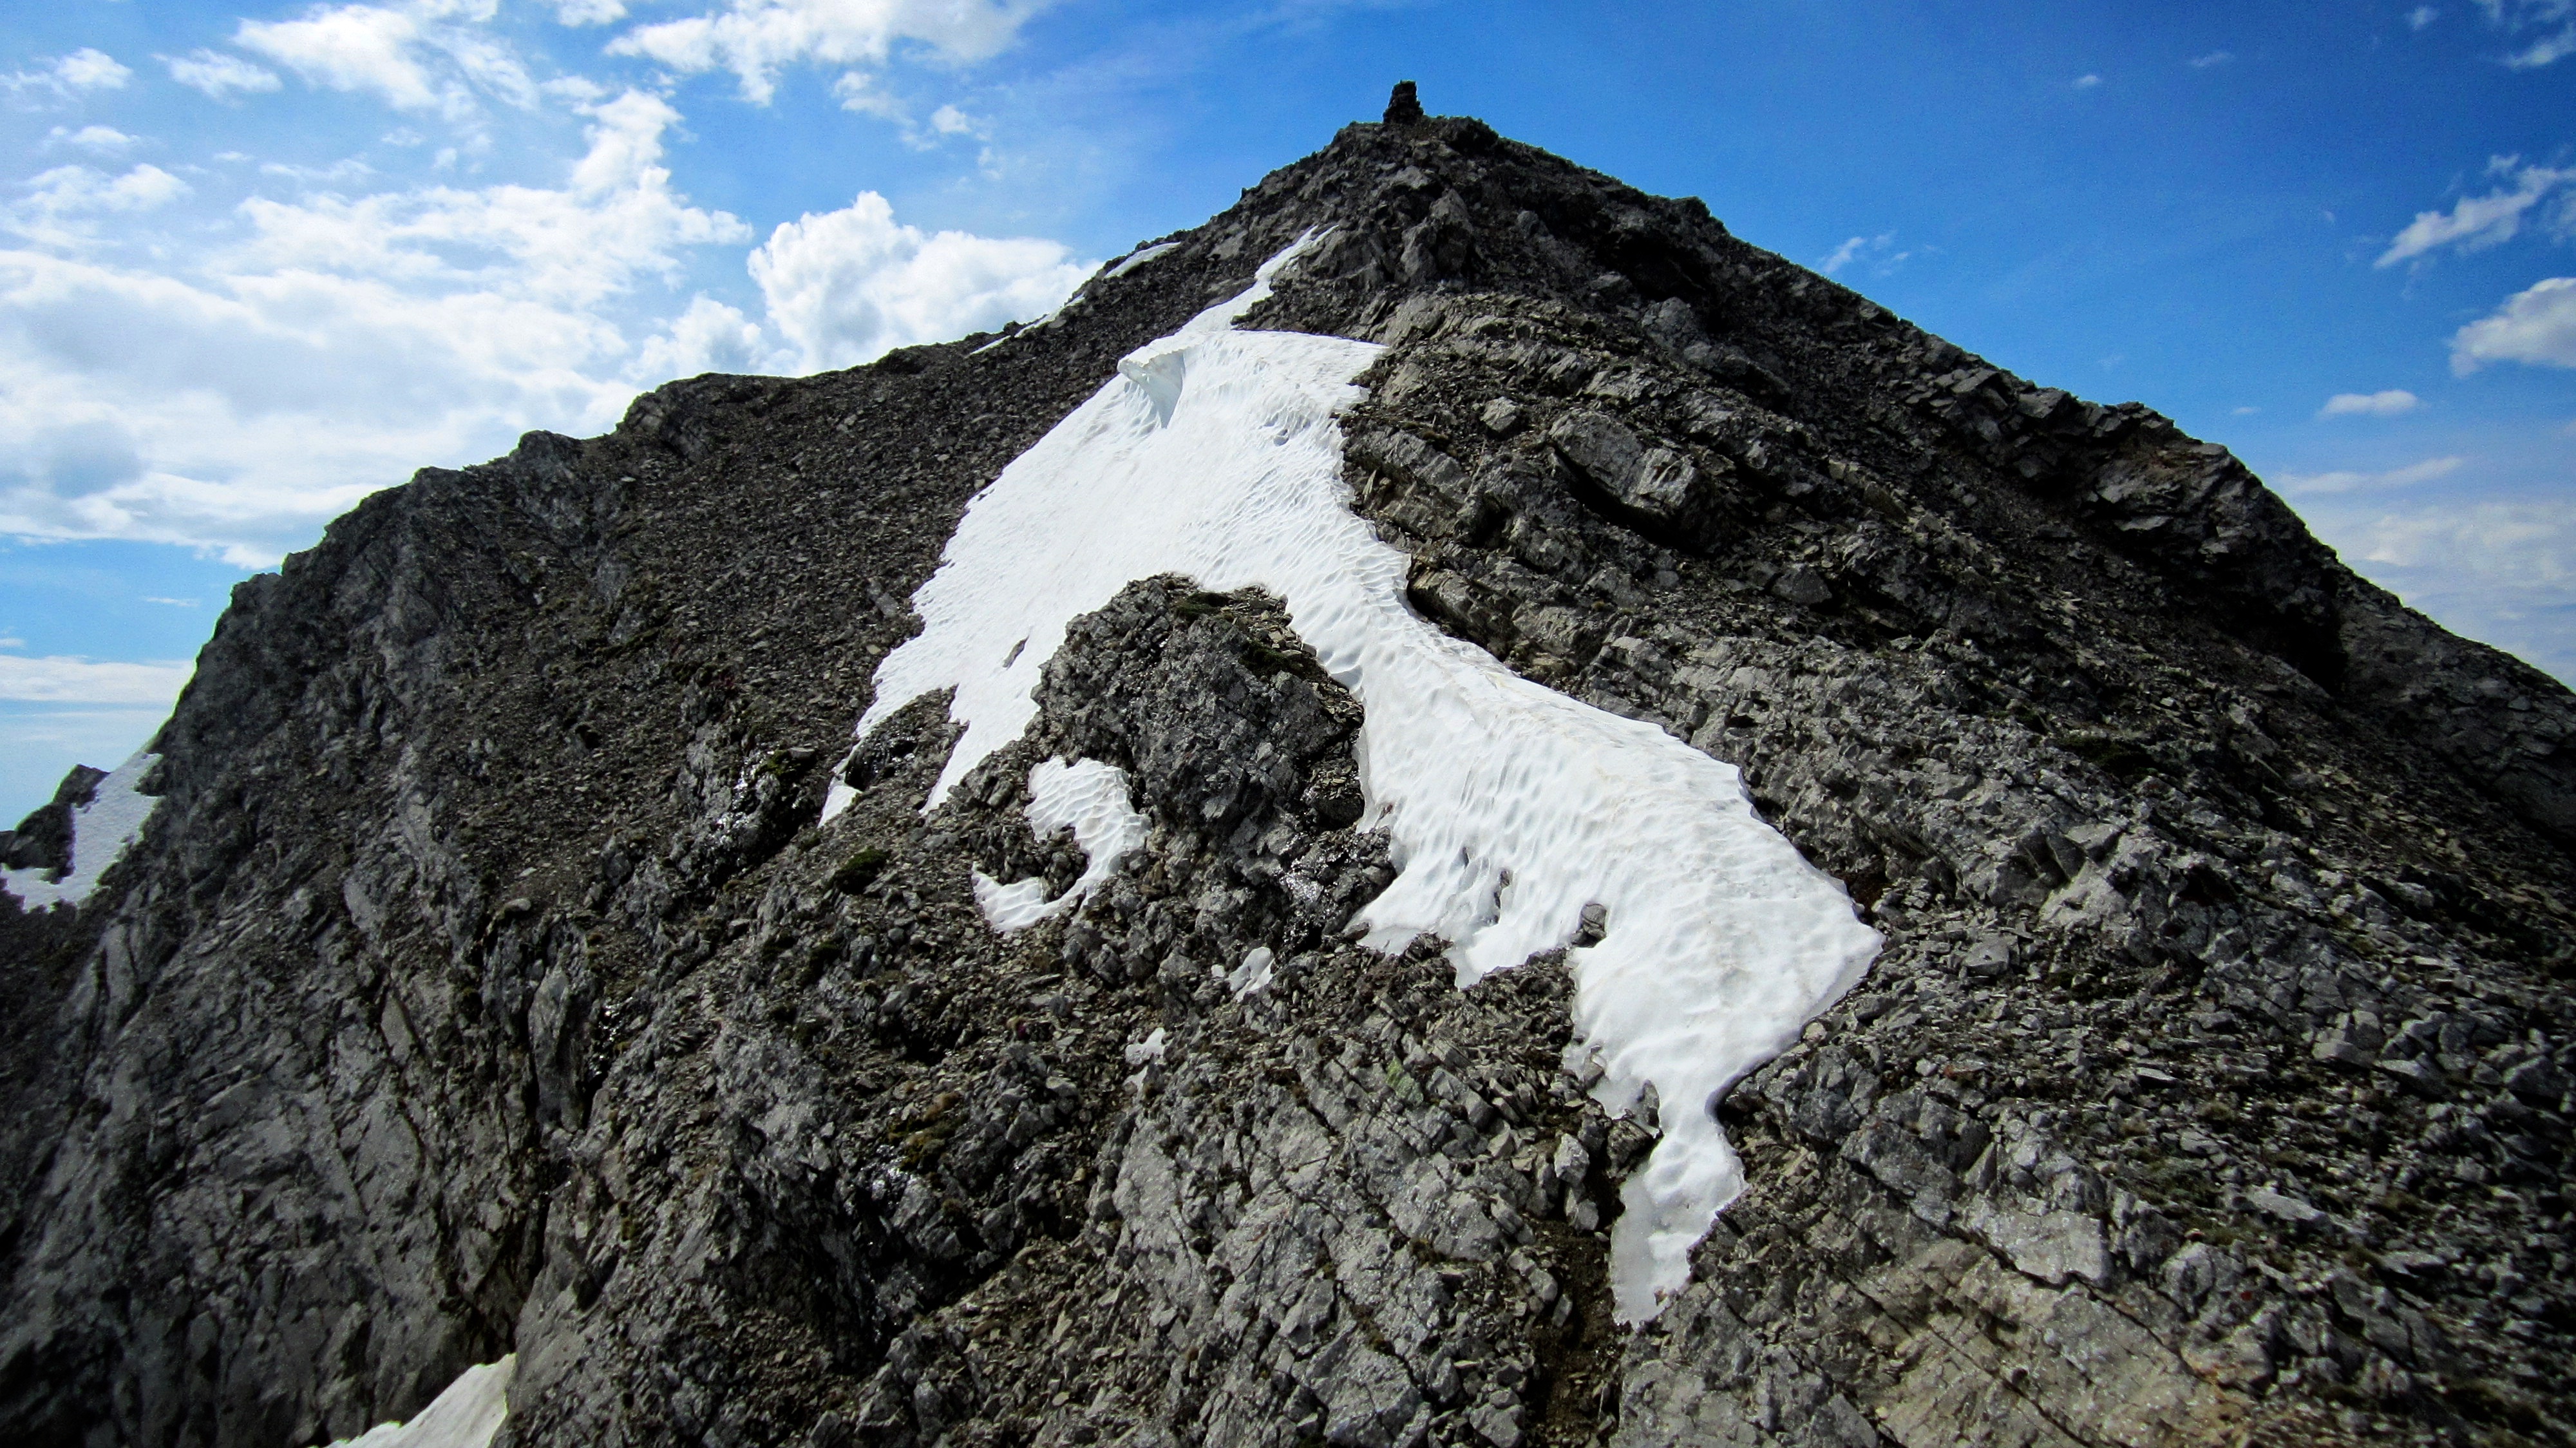
Looking up at the cairn from the ridge beneath Peak 2. We would ascend climber’s right of the snow.

Somewhere out there, an extreme skier from Sherpas Cinema is thinking, ‘Wow! That looks like a fun line!’

Brad scrambles toward the summit.

The summit of Peak 2 or “Anubis Peak” (2513m my GPS). We’re not sure why there was such a massive cairn and nothing on the other two. I’m 6’1″ and this thing was taller than me. One theory we devised, was that a single party had summited this peak via the west and did not venture any further. Maybe this peak has an actual name? More likely though, it was probably built by the Boundary Commission.

A pano looking SE from the summit of Peak 2. From left to right: Chinook Peak, Mount Parrish, Andy Good Peak, Mount Coulthard, Peak 3 (Pharaoh’s Peak), and Mount Ptolemy.
Chinook Peak and Mount Parrish sit across the valley to the east.

Andy Good Peak. Last year, I made it halfway up that gully in the centre before running out of time and turning back. Lord willing, I will return for another attempt sometime soon. Edit: I returned on 23 August 2020 and completed it.
Tent Mountain sits directly to the west and behind it is Mount Taylor. Both were snowshoe destinations for me earlier in the year.
A pano to the NE. What a view and we’re not even on the highest peak yet!

Brad offers up a traditional Northside pose.
Being a Southsider… I’ve got nothing. (Photo by Brad Wolcott)

Looking back at our route over from Peak 1. Sentry Mountain is on the right.
Our attention now turned to Peak 3 (Pharaoh’s Peak) which from this angle, looked somewhat intimidating.
Leaving the summit of Peak 2 (Anubis Peak).
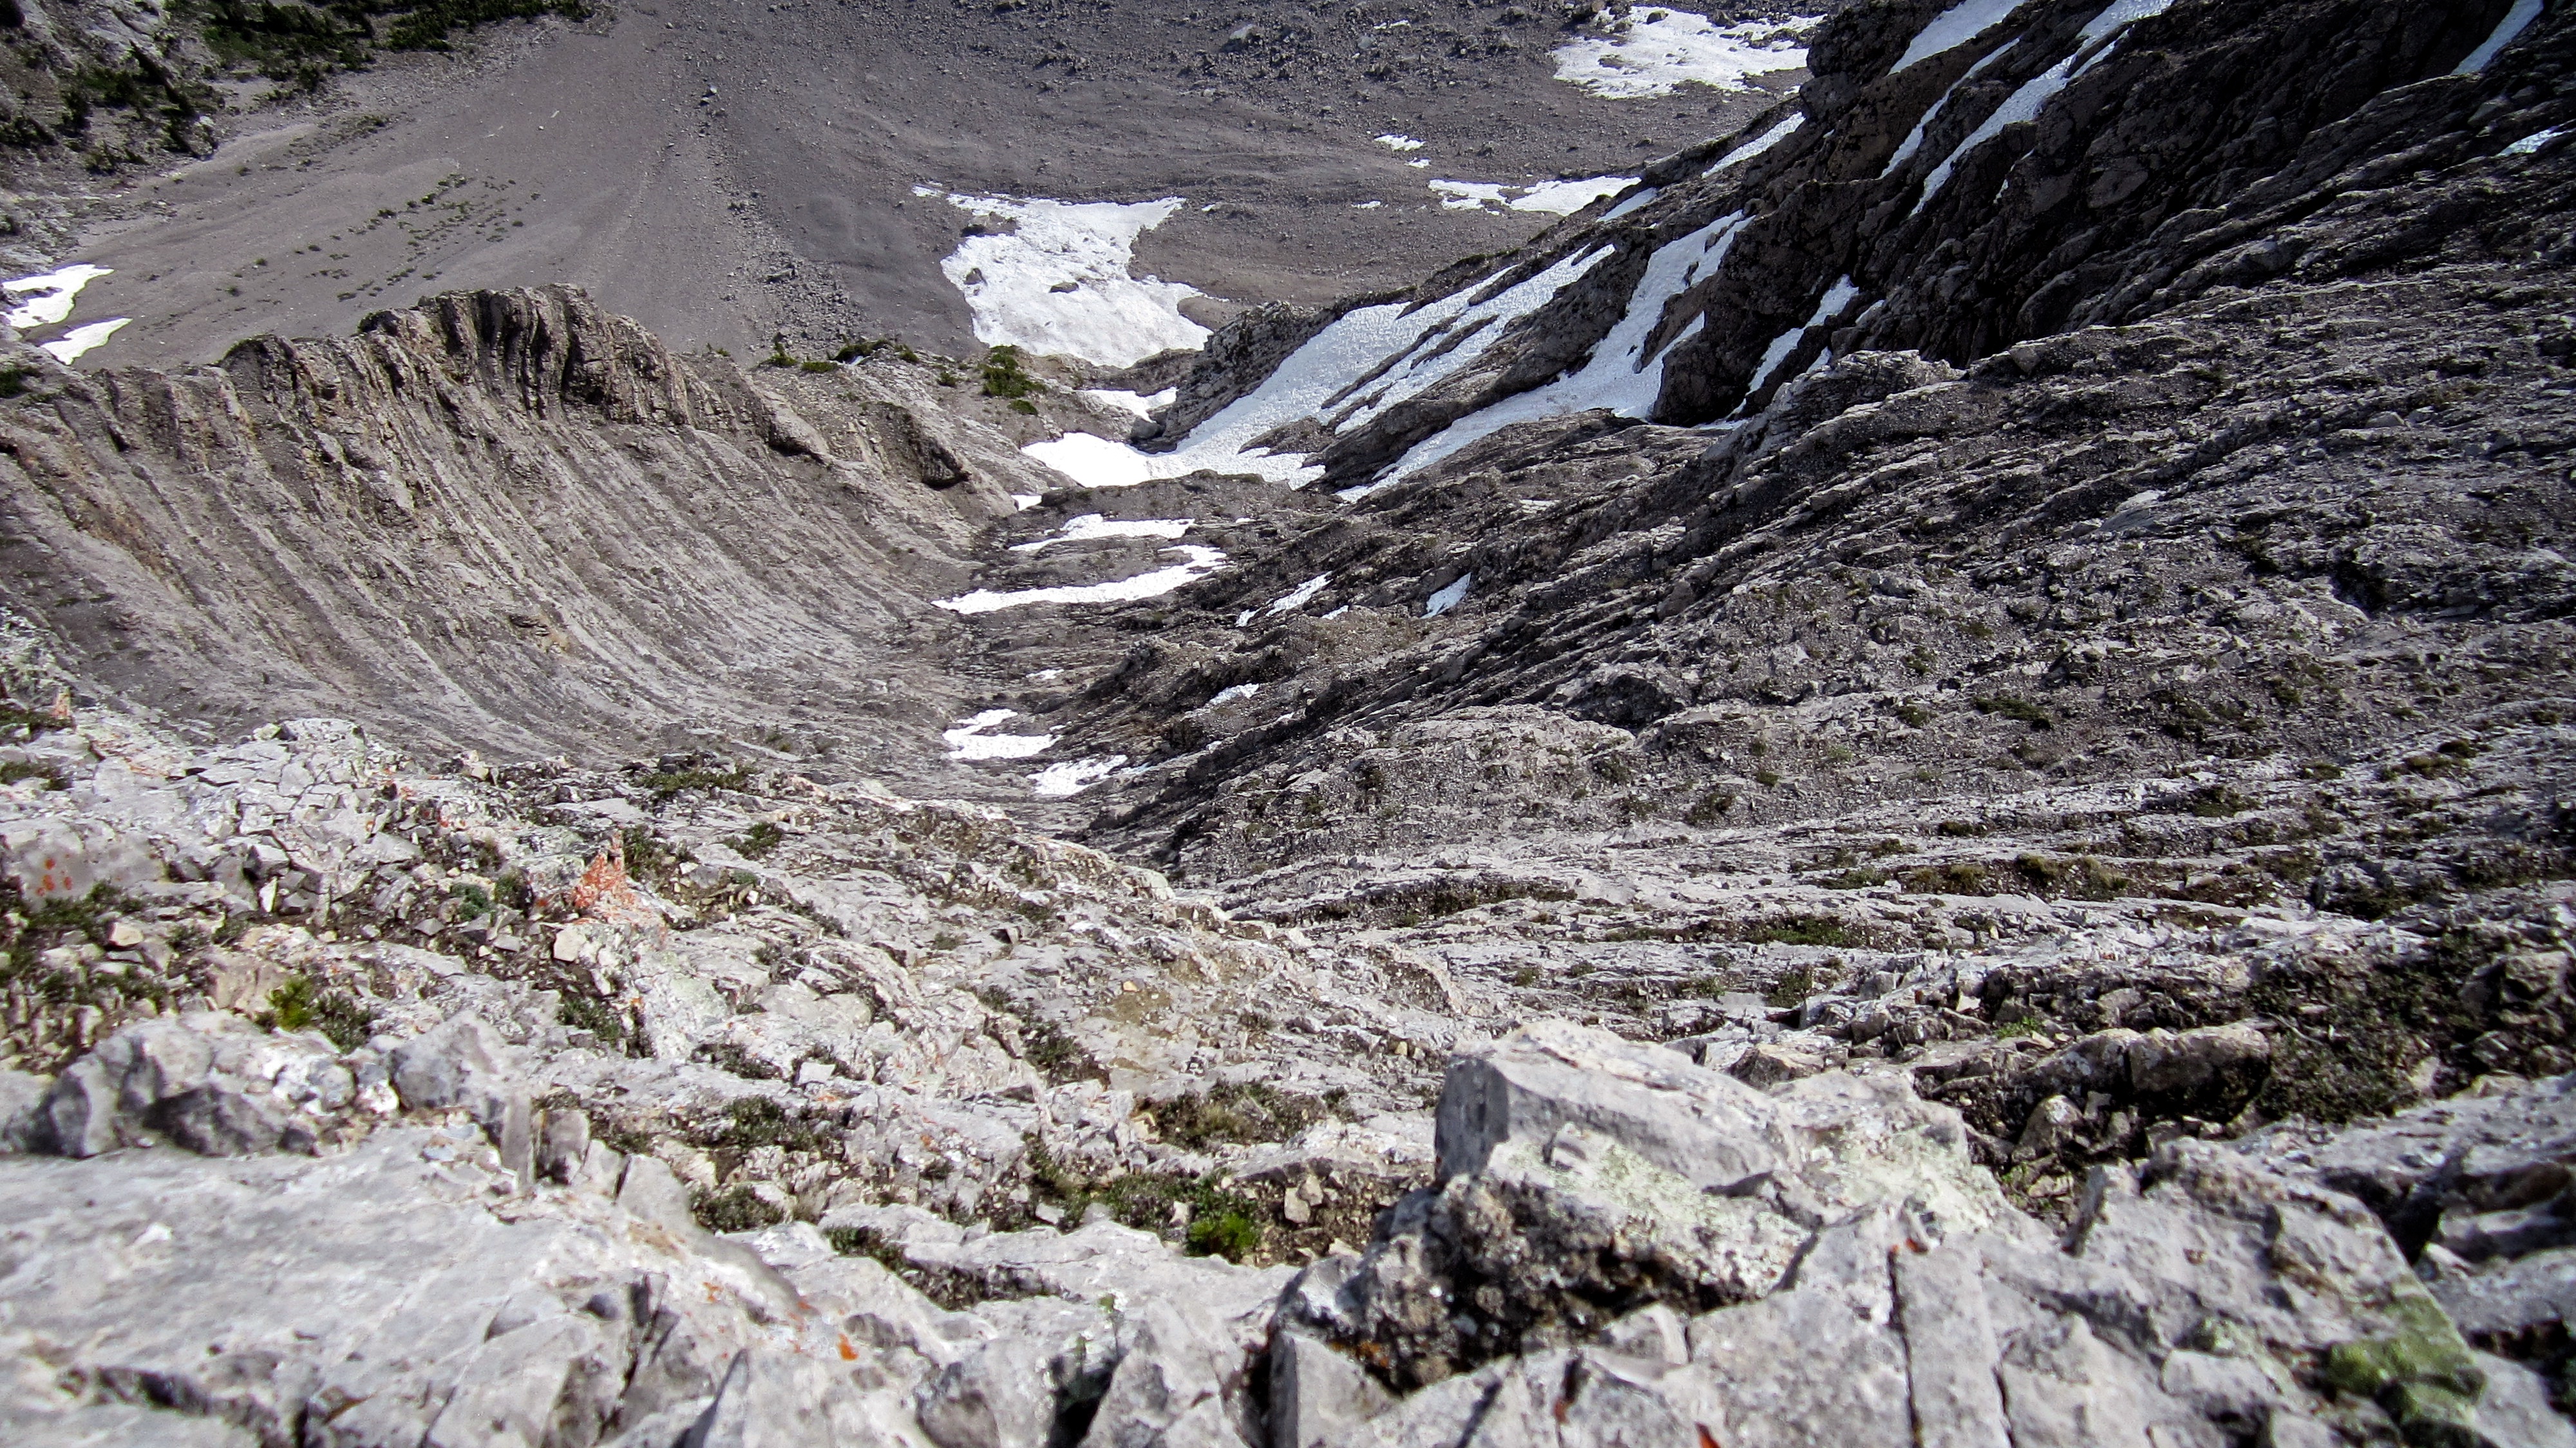
Brad contemplates our next move after our progress along the ridge was halted by an overhanging cliff that was too big to downclimb.

We thought it would be quicker to descend further to the west and cut back to the col than set up the rope. In hindsight, given the scree covered slabs, it might have been quicker to use the rope.
After descending for ~65m we began to sideslope over to the col. (Photo by Brad Wolcott)
Masquerading as a scrambler.
Almost at the col. We lost approximately 157m in elevation between Peak 2 (Anubis Peak) and the col which we then had to regain plus add on another 109 m to reach the summit of Peak 3.
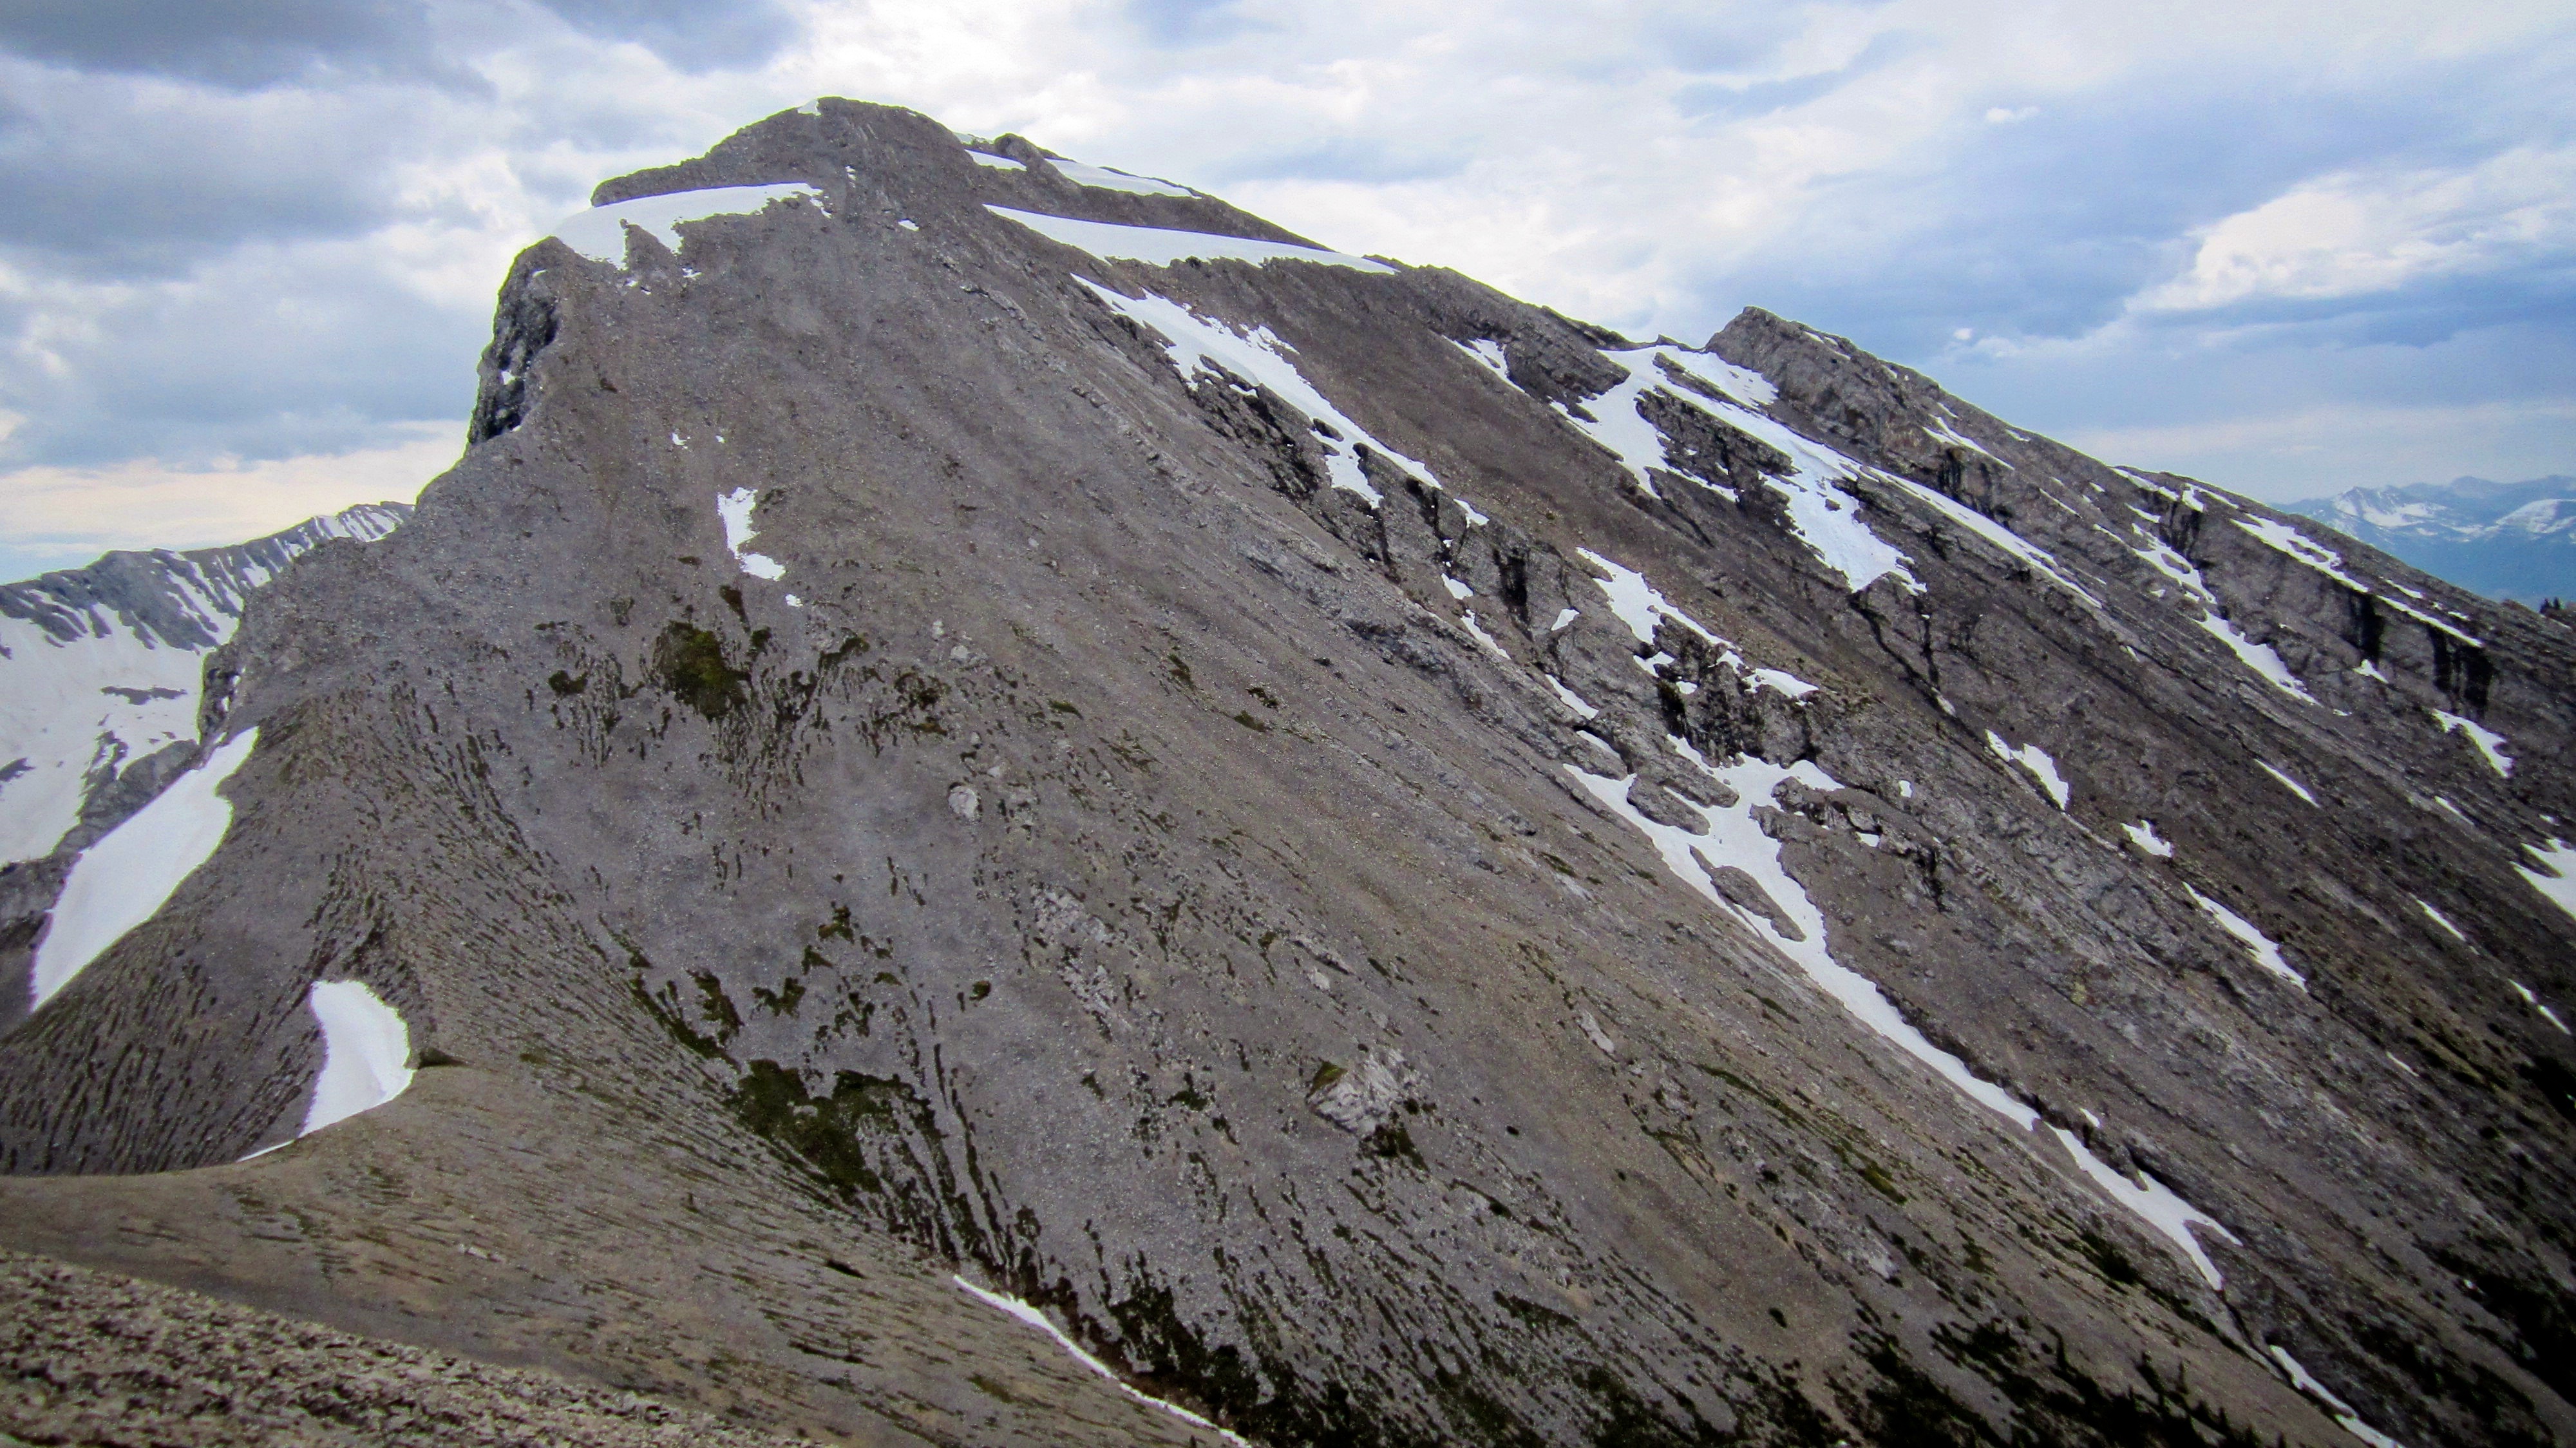
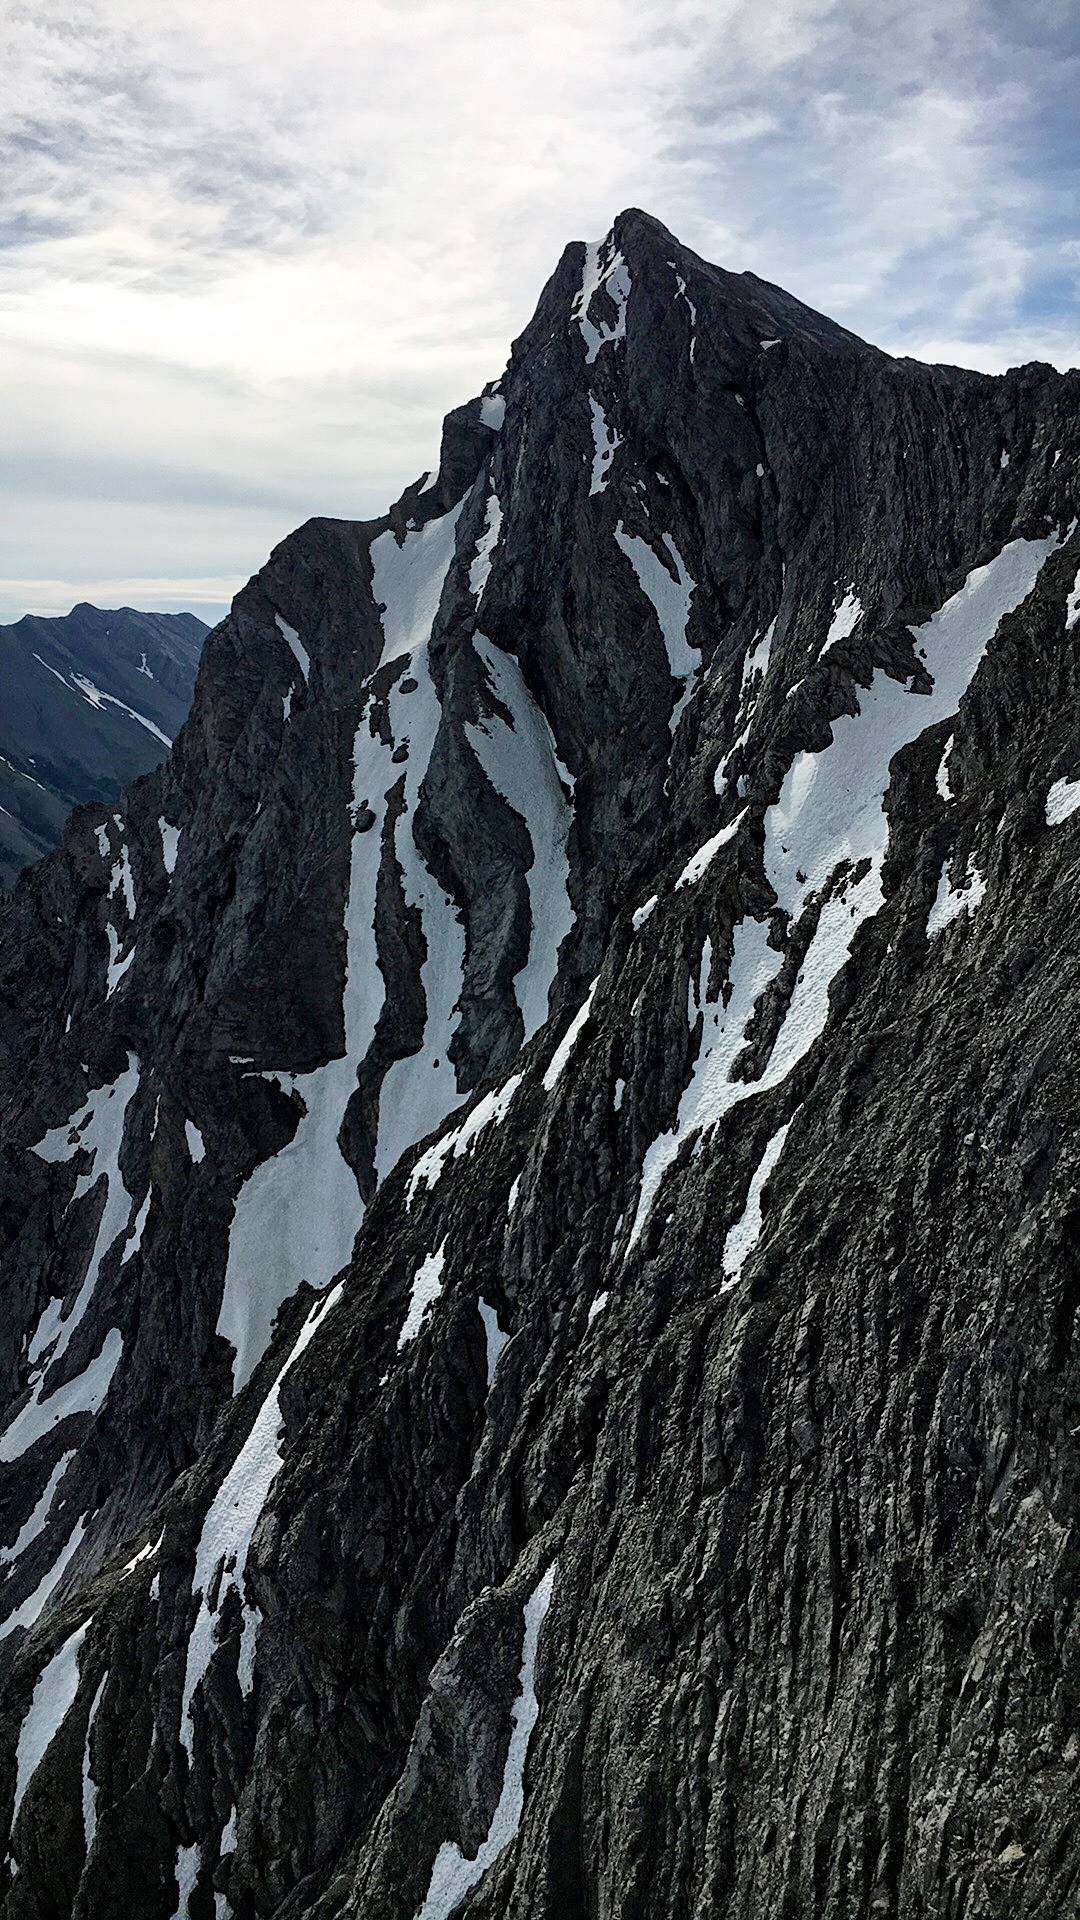
A closer look at Peak 3 (Pharaoh’s Peak). Even at this point, we weren’t sure what route we should take. We ended up following the ridge above the col for most of the way.
At the col and looking west at our descent route down the drainage. We would leave our packs here while we ascended Peak 3.
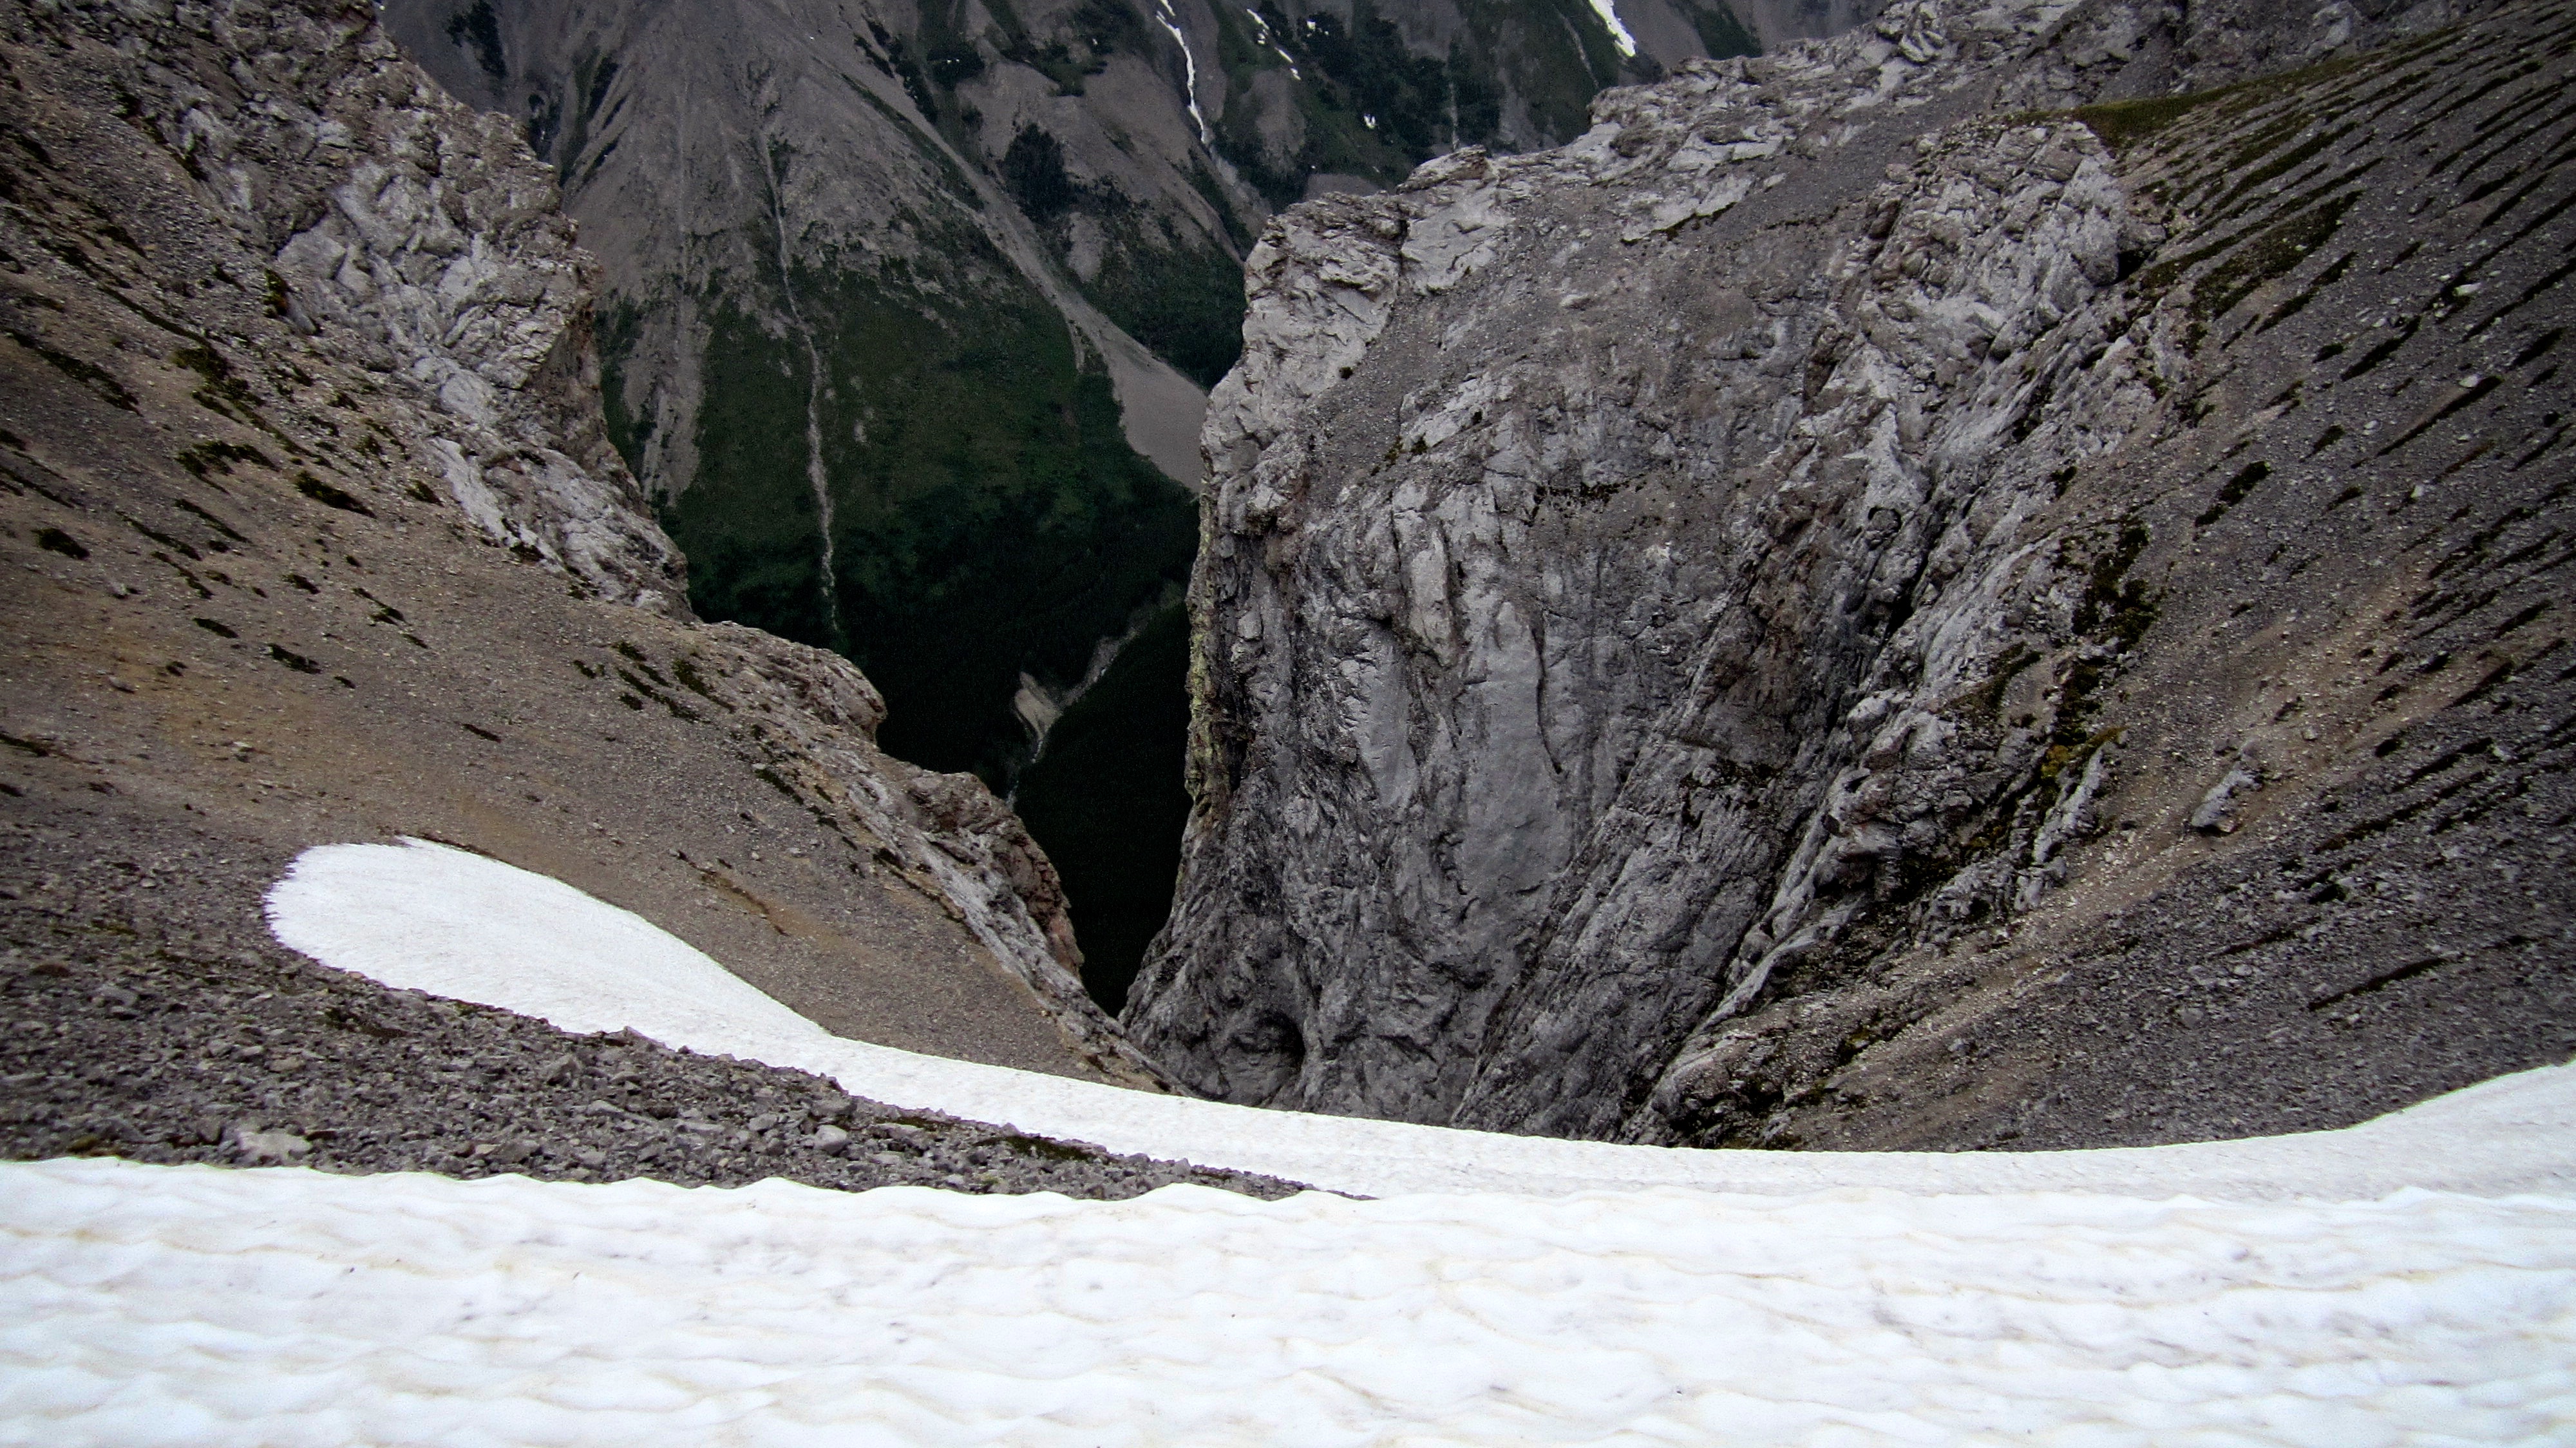
The east side of the col (climber’s left) sports an impressive drop off.
From the col we could see that Peak 3 would mostly be a slog over rubble.

Looking back at the col and Peaks 1 and 2 from partway up the slope.

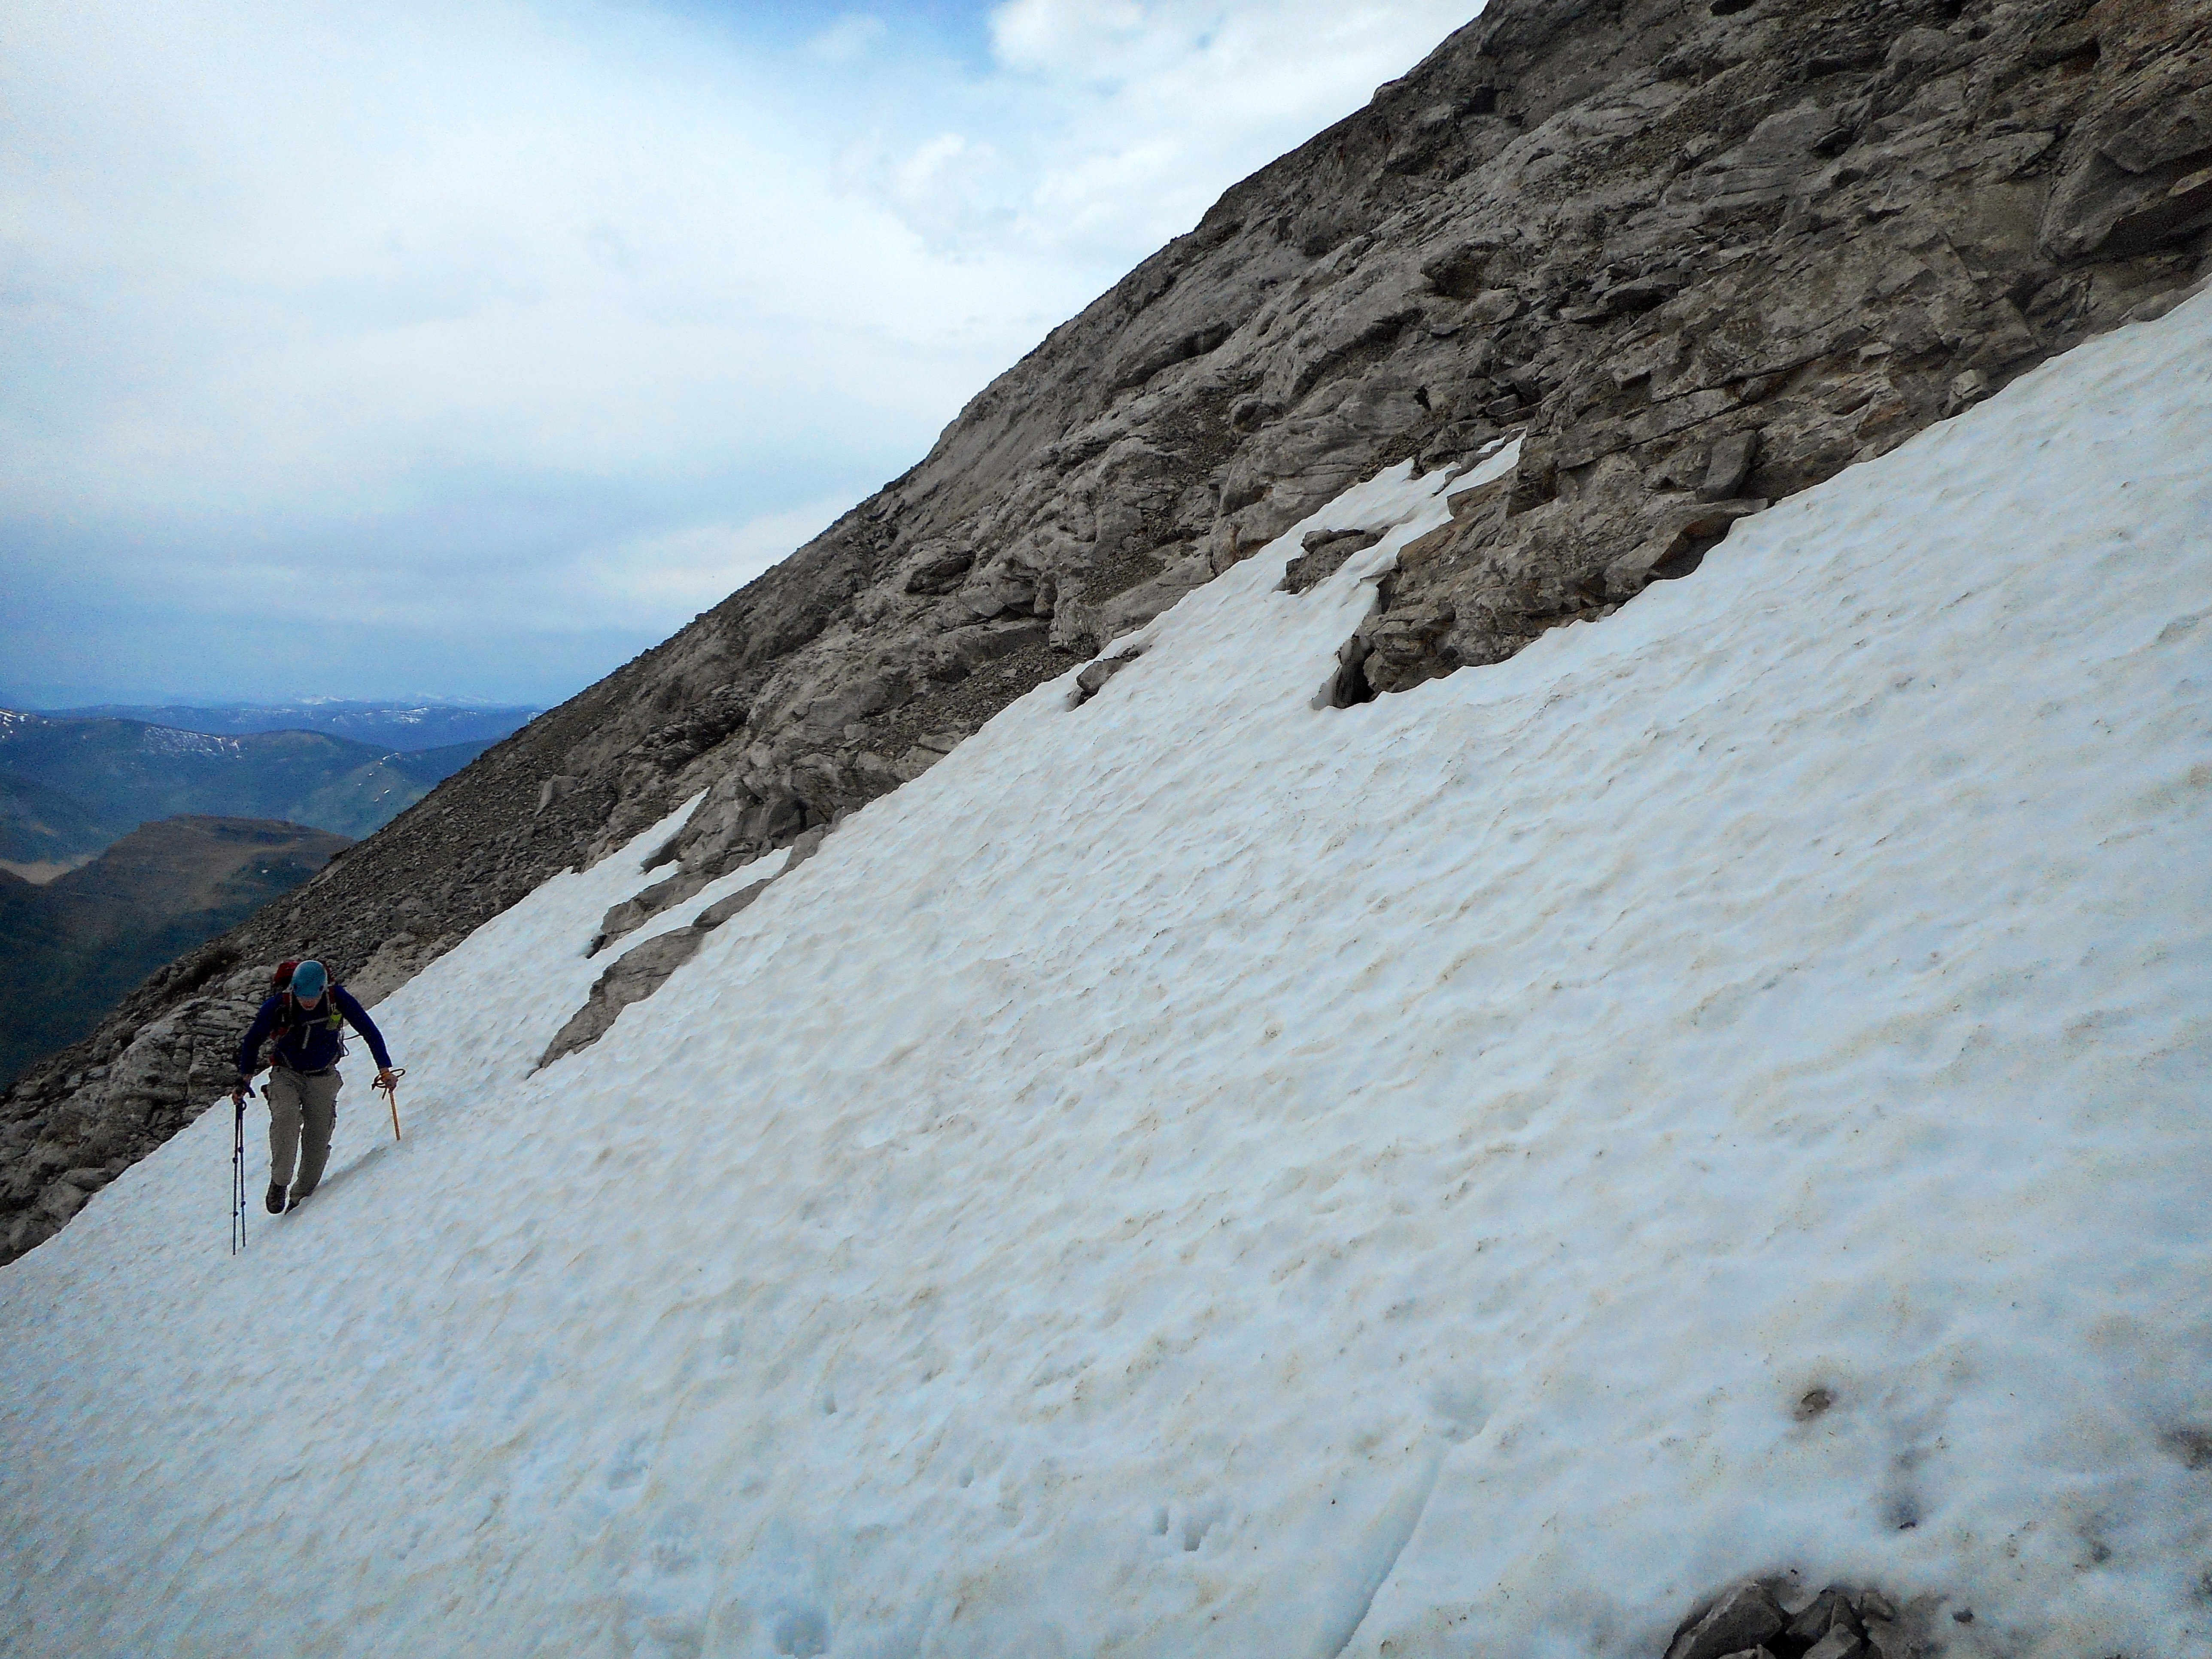
Brad fights the wind as he gets ready to ascend a patch of snow. At this point, a rainstorm was rapidly approaching from the west. We wanted to avoid being trapped on the mountain when it hit, so we booked it as fast as we could – and without our packs, were able to cover the 266m elevation gain in just 30 minutes.
The summit of Peak 3 or “Pharaoh’s Peak” (2622 my GPS). When looking at it from the west, Mount Ptolemy resembles the head of a recumbent Pharaoh while this peak resembles his folded arms. I guess that would make Peak 1 (Mummy Mountain) his feet and Peak 2 (Anubis Peak), his um, loins… 😉

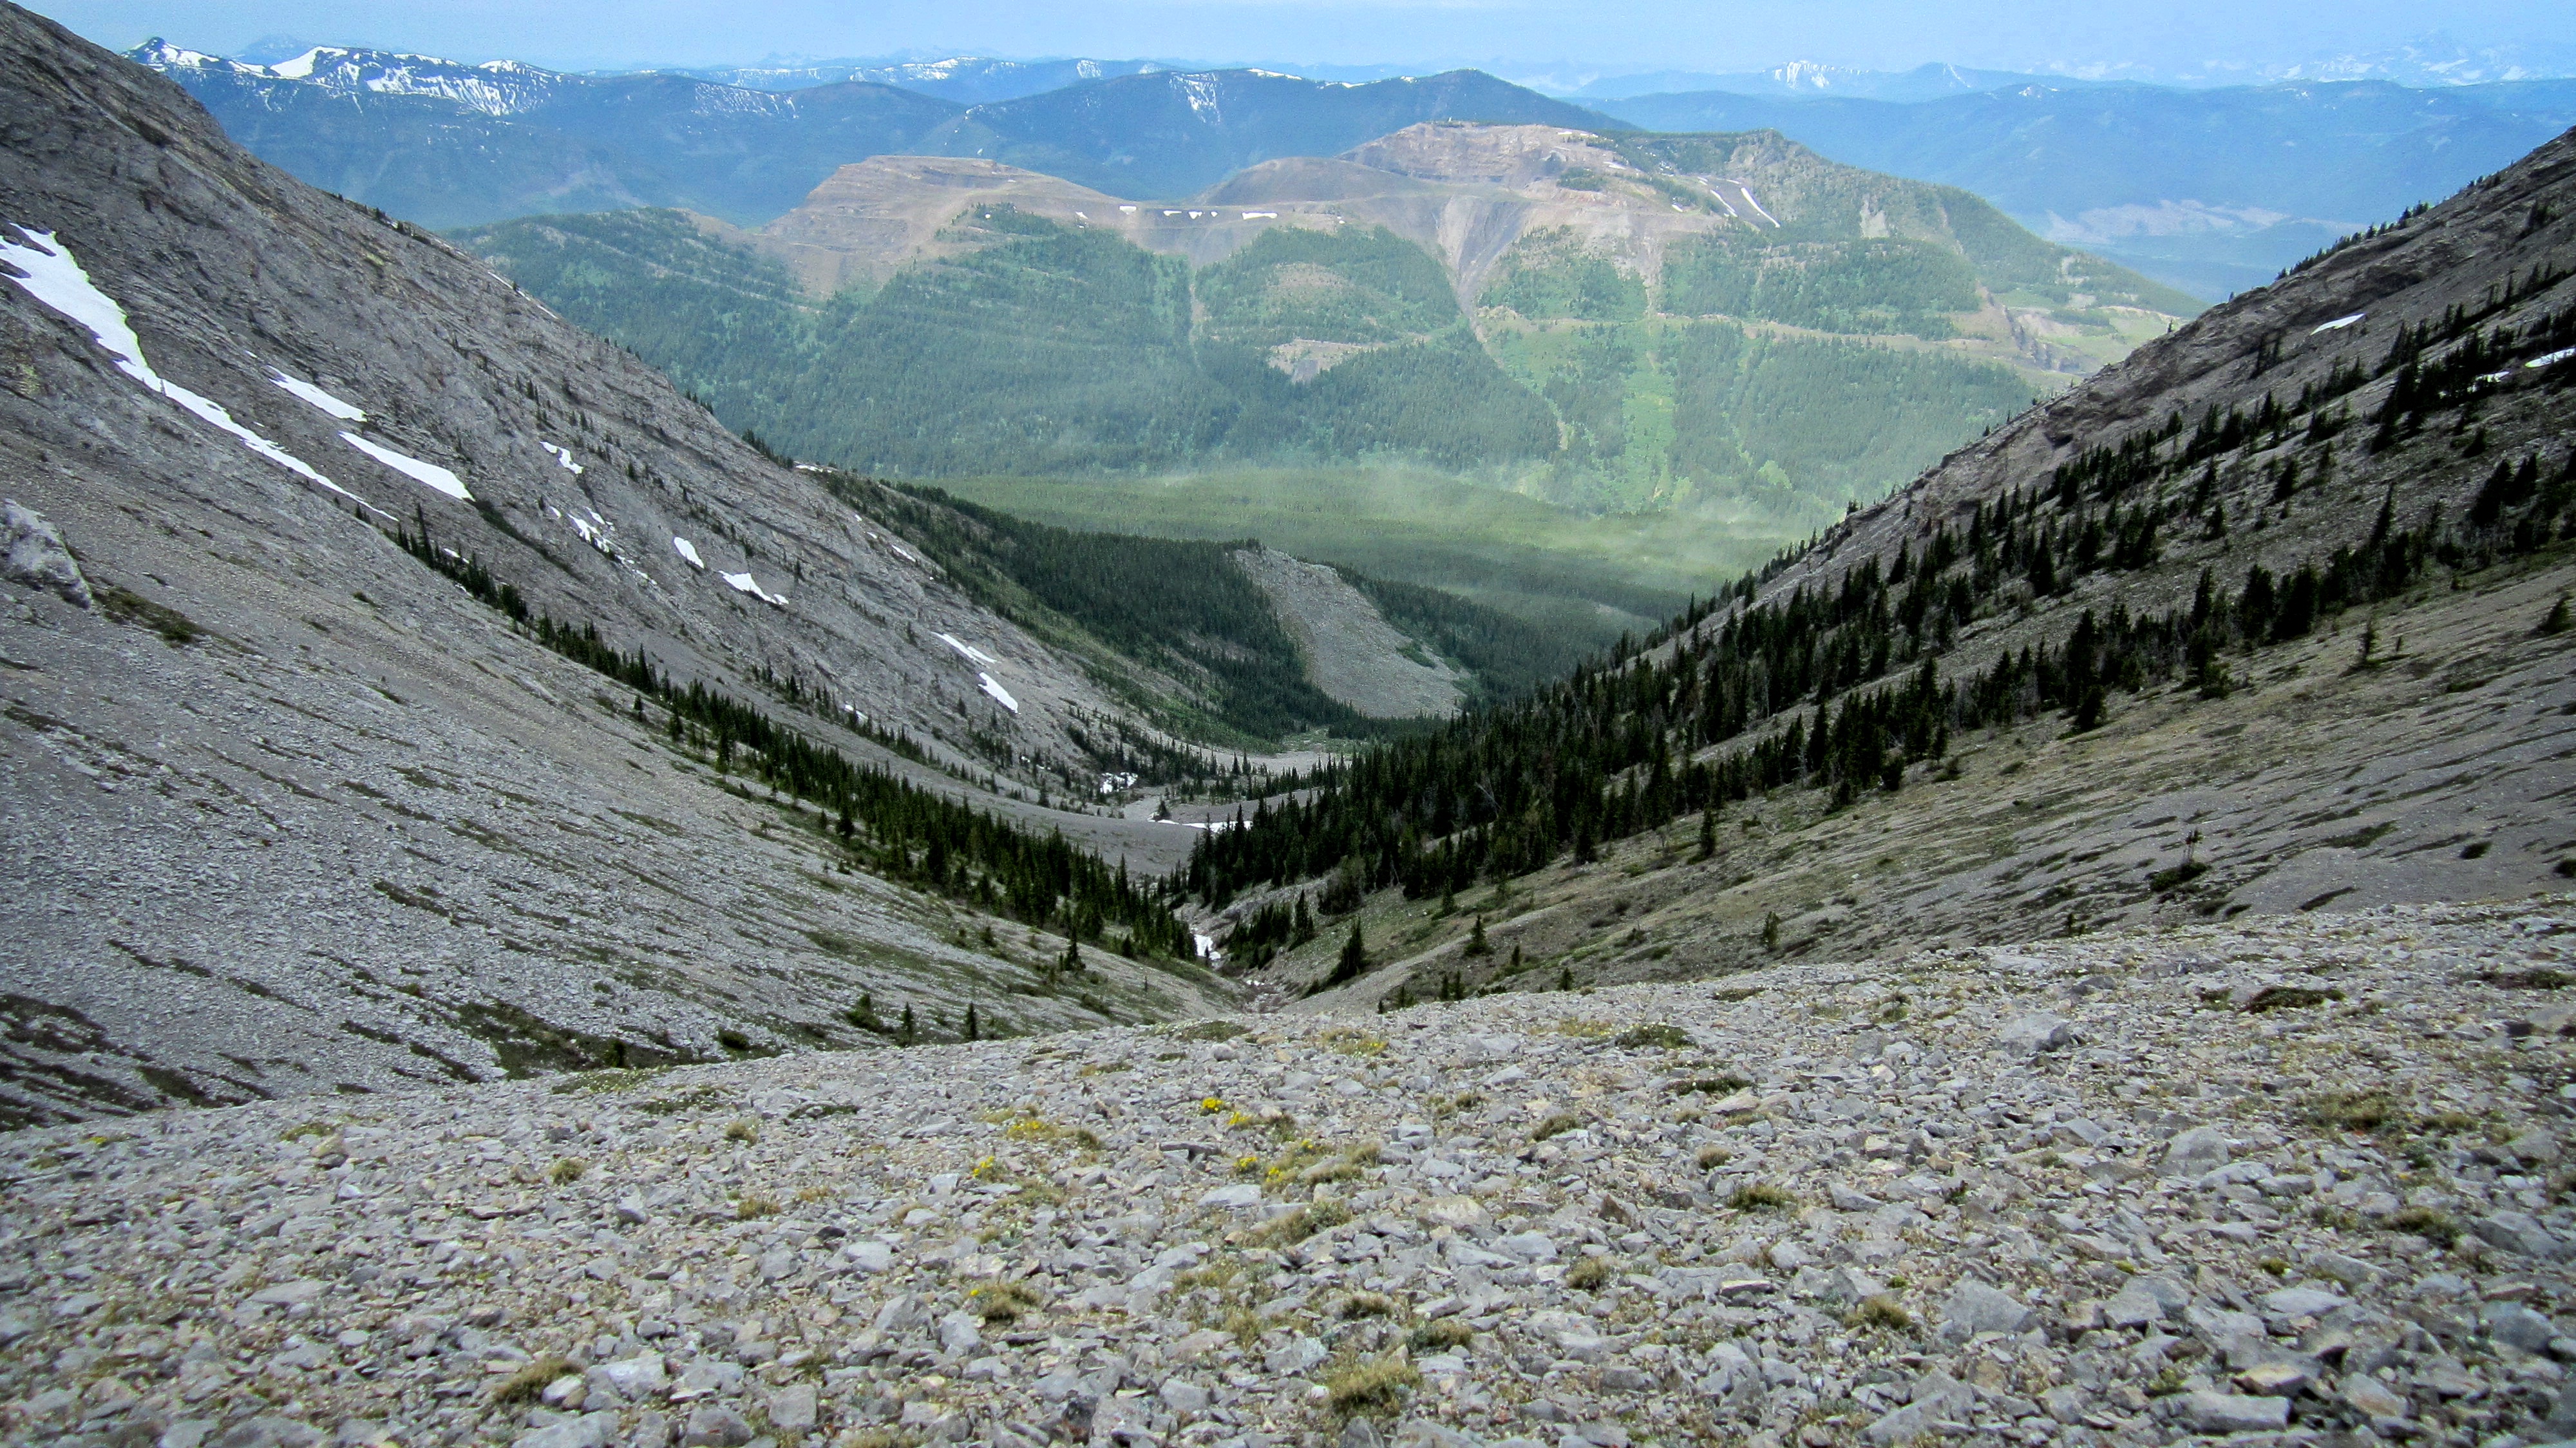
The terminus of the ridge is Mount Ptolemy (2812m) which lies directly to the south. We tried to scope out a route to a fourth peak that can be seen foreground left, but the intervening ridge contained several steep cliffs which quickly took it beyond the level of a scramble – and were such that we didn’t want to be on them when it started raining.

The summit provided some great views of Mount Parrish, Andy Good Peak, and Mount Coulthard.
A pano looking north from the summit. In the distance from left to right: Loop Ridge, Mount Erickson, “Alexander Creek Mountain”, Phillipps Peak, Mount Tecumseh, Sentry Mountain, the Seven Sisters, and Crowsnest Mountain. Peaks 1 and 2 are in the foreground. The entire ridge walk ended up being a little over 4km in length.

A pano looking west at Tent Mountain, Mount Taylor, Michel Head, and Leach Ridge.
Looking east across the valley at Chinook Peak. Peak 3 and Chinook Peak are roughly equivalent in height. The last topo lines on my map stopped at 2560m for both peaks, however, my GPS recorded the height of Peak 3 as 2622m while Bivouac lists the height of Chinook at 2606m.
Edit 31 August 2016: After looking at my GPS readings near the summit of Chinook and comparing them with this peak, I can make a reasonable argument that ‘Pharaoh’s Peak’ is indeed higher than Chinook Peak.

The Ptolemy Plateau.

Sentry Mountain seems rather small from the summit of Peak 3.
A nice shot of Brad on the summit.

And just because film is cheap, another pano shot to the SE. Why this peak isn’t named is a mystery to me.

Brad intently watches the approaching storm.

With the rain starting to fall, we bid adieu to this fine summit…

..but not before we built a small cairn. I named it Roger.

Heading down from the summit as the last rays of sunshine illuminate Phillipps Peak and Mount Tecumseh.

Almost at the col where we left our packs. The rain let loose as soon as we reached the drainage.
It’s hard to tell from this photo, but at this point it was raining quite hard. Fortunately, we could use the snow in the upper sections of the drainage to hasten our descent.

When the snow disappeared, it was still quicker to use the creek bed than hike along the banks.
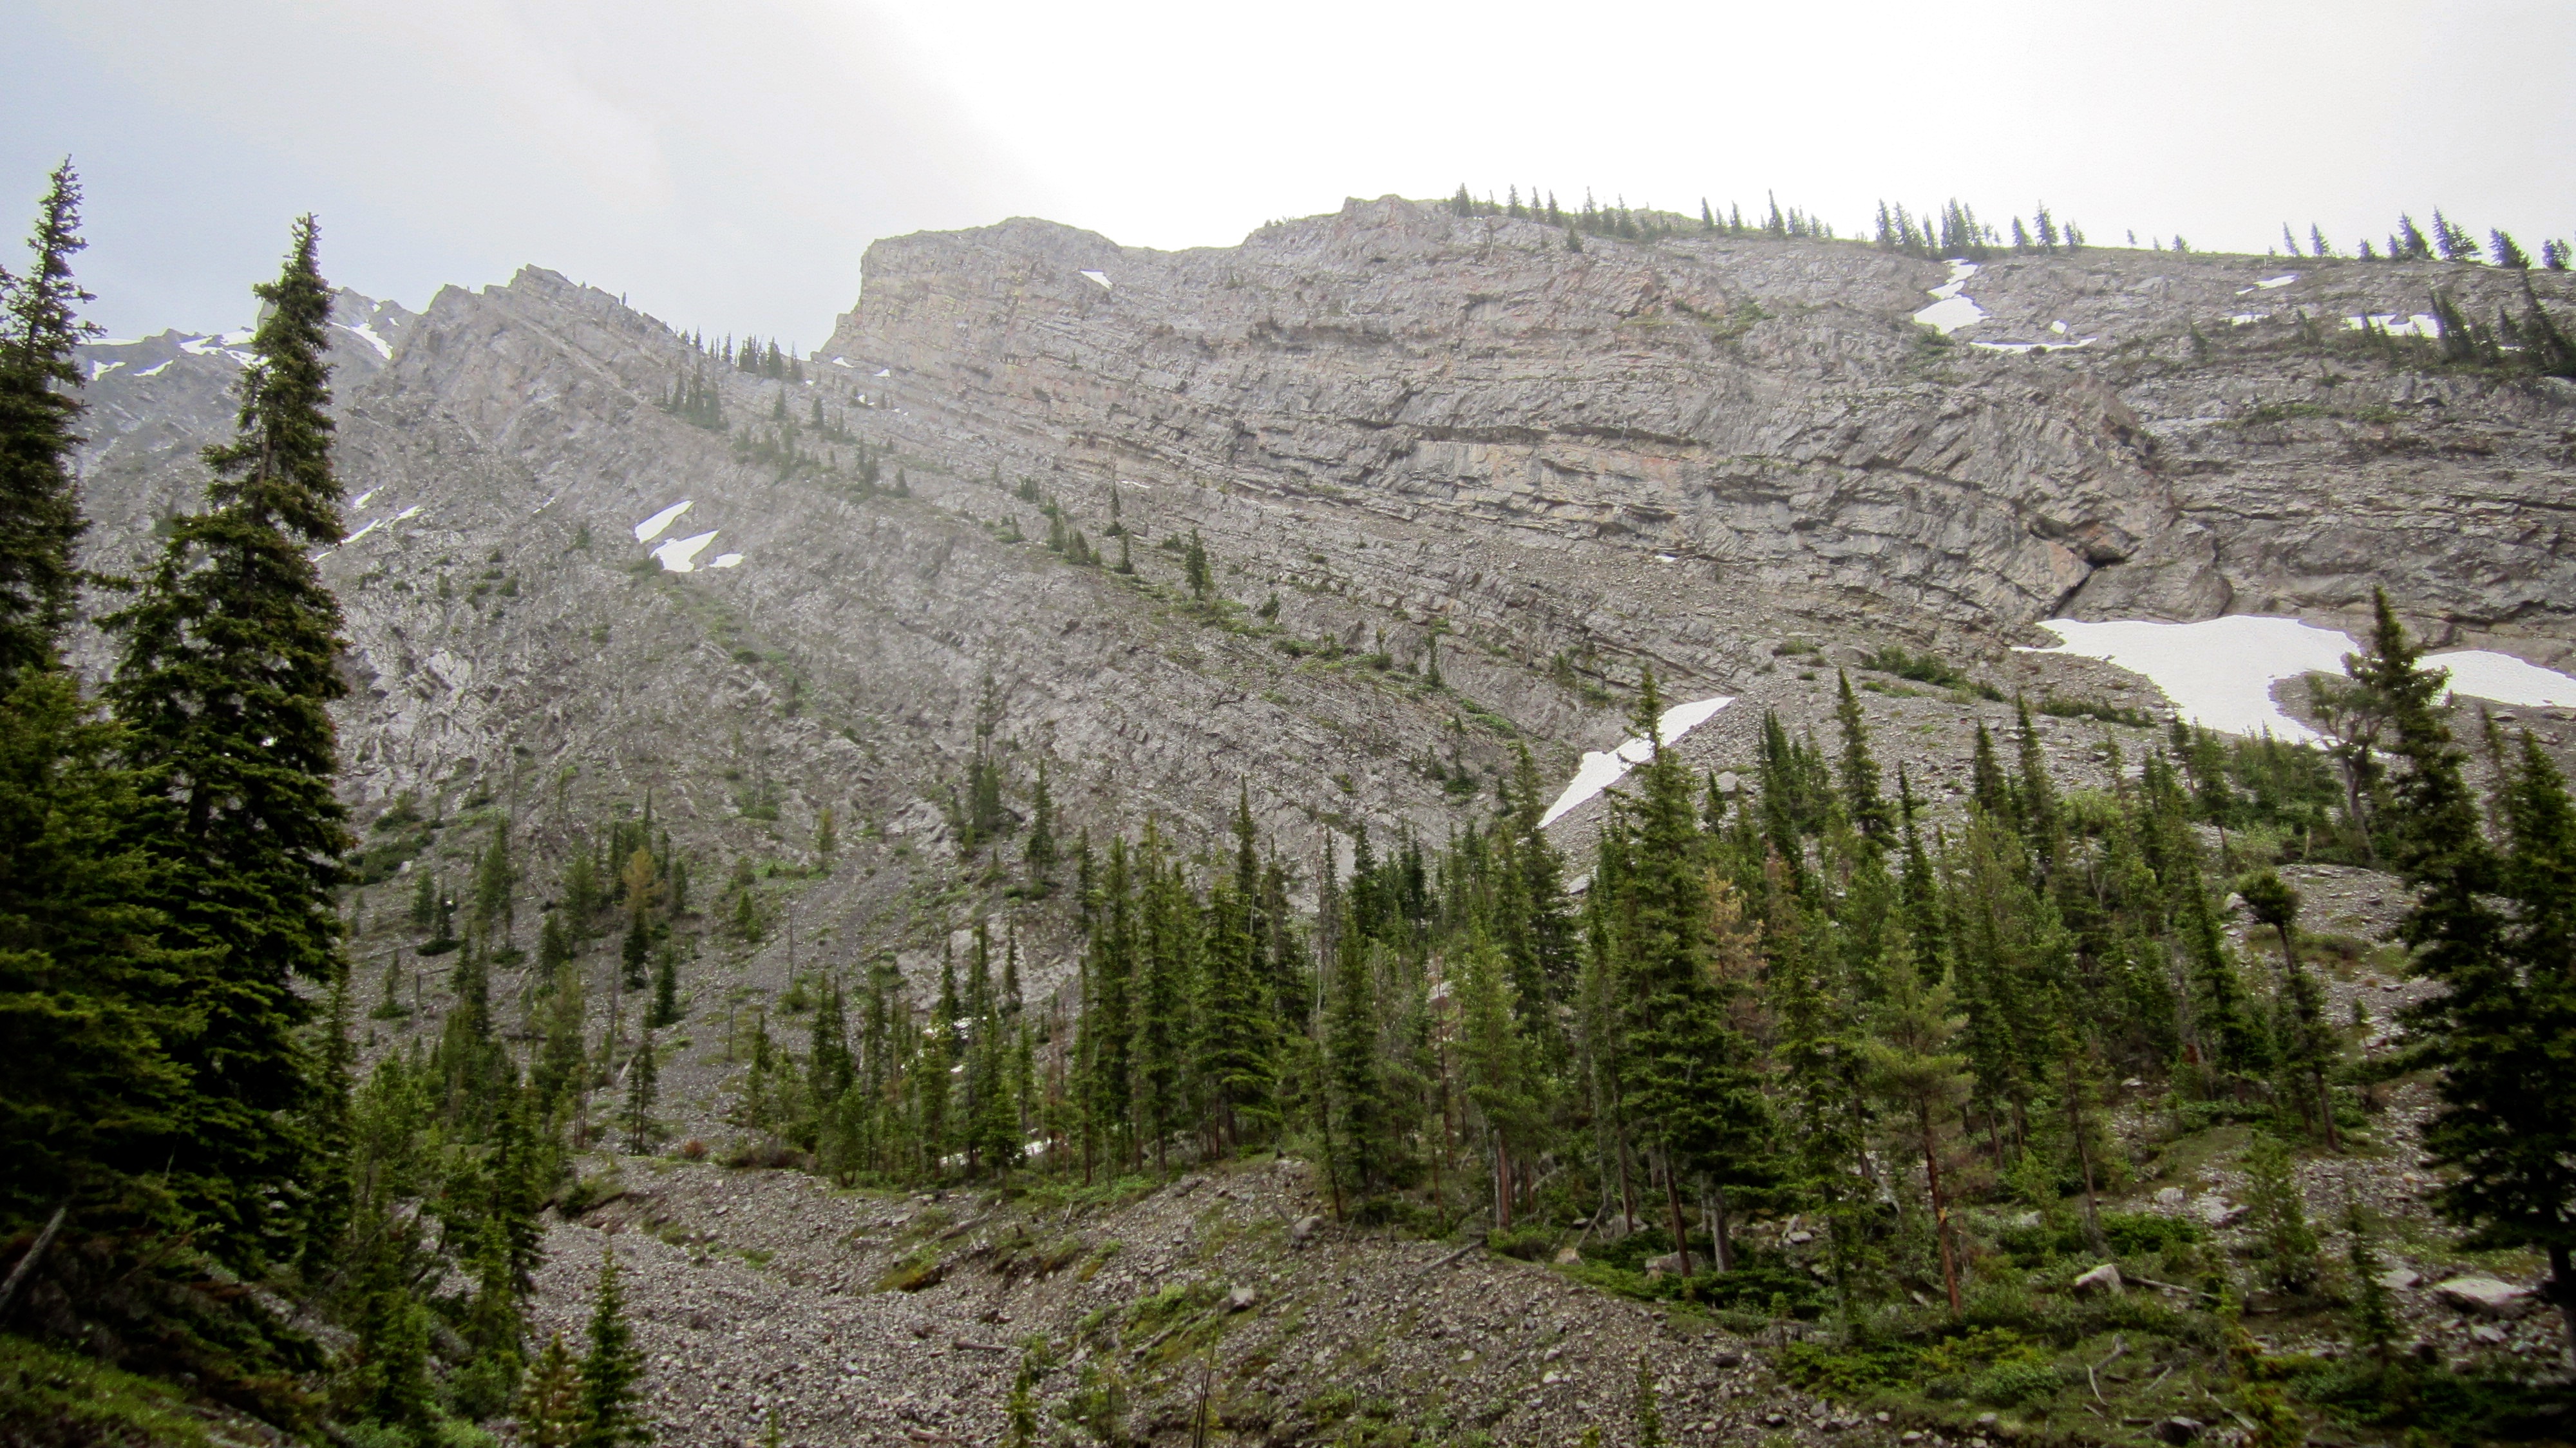
Looking back at some impressive cliffs on the south side of the drainage.

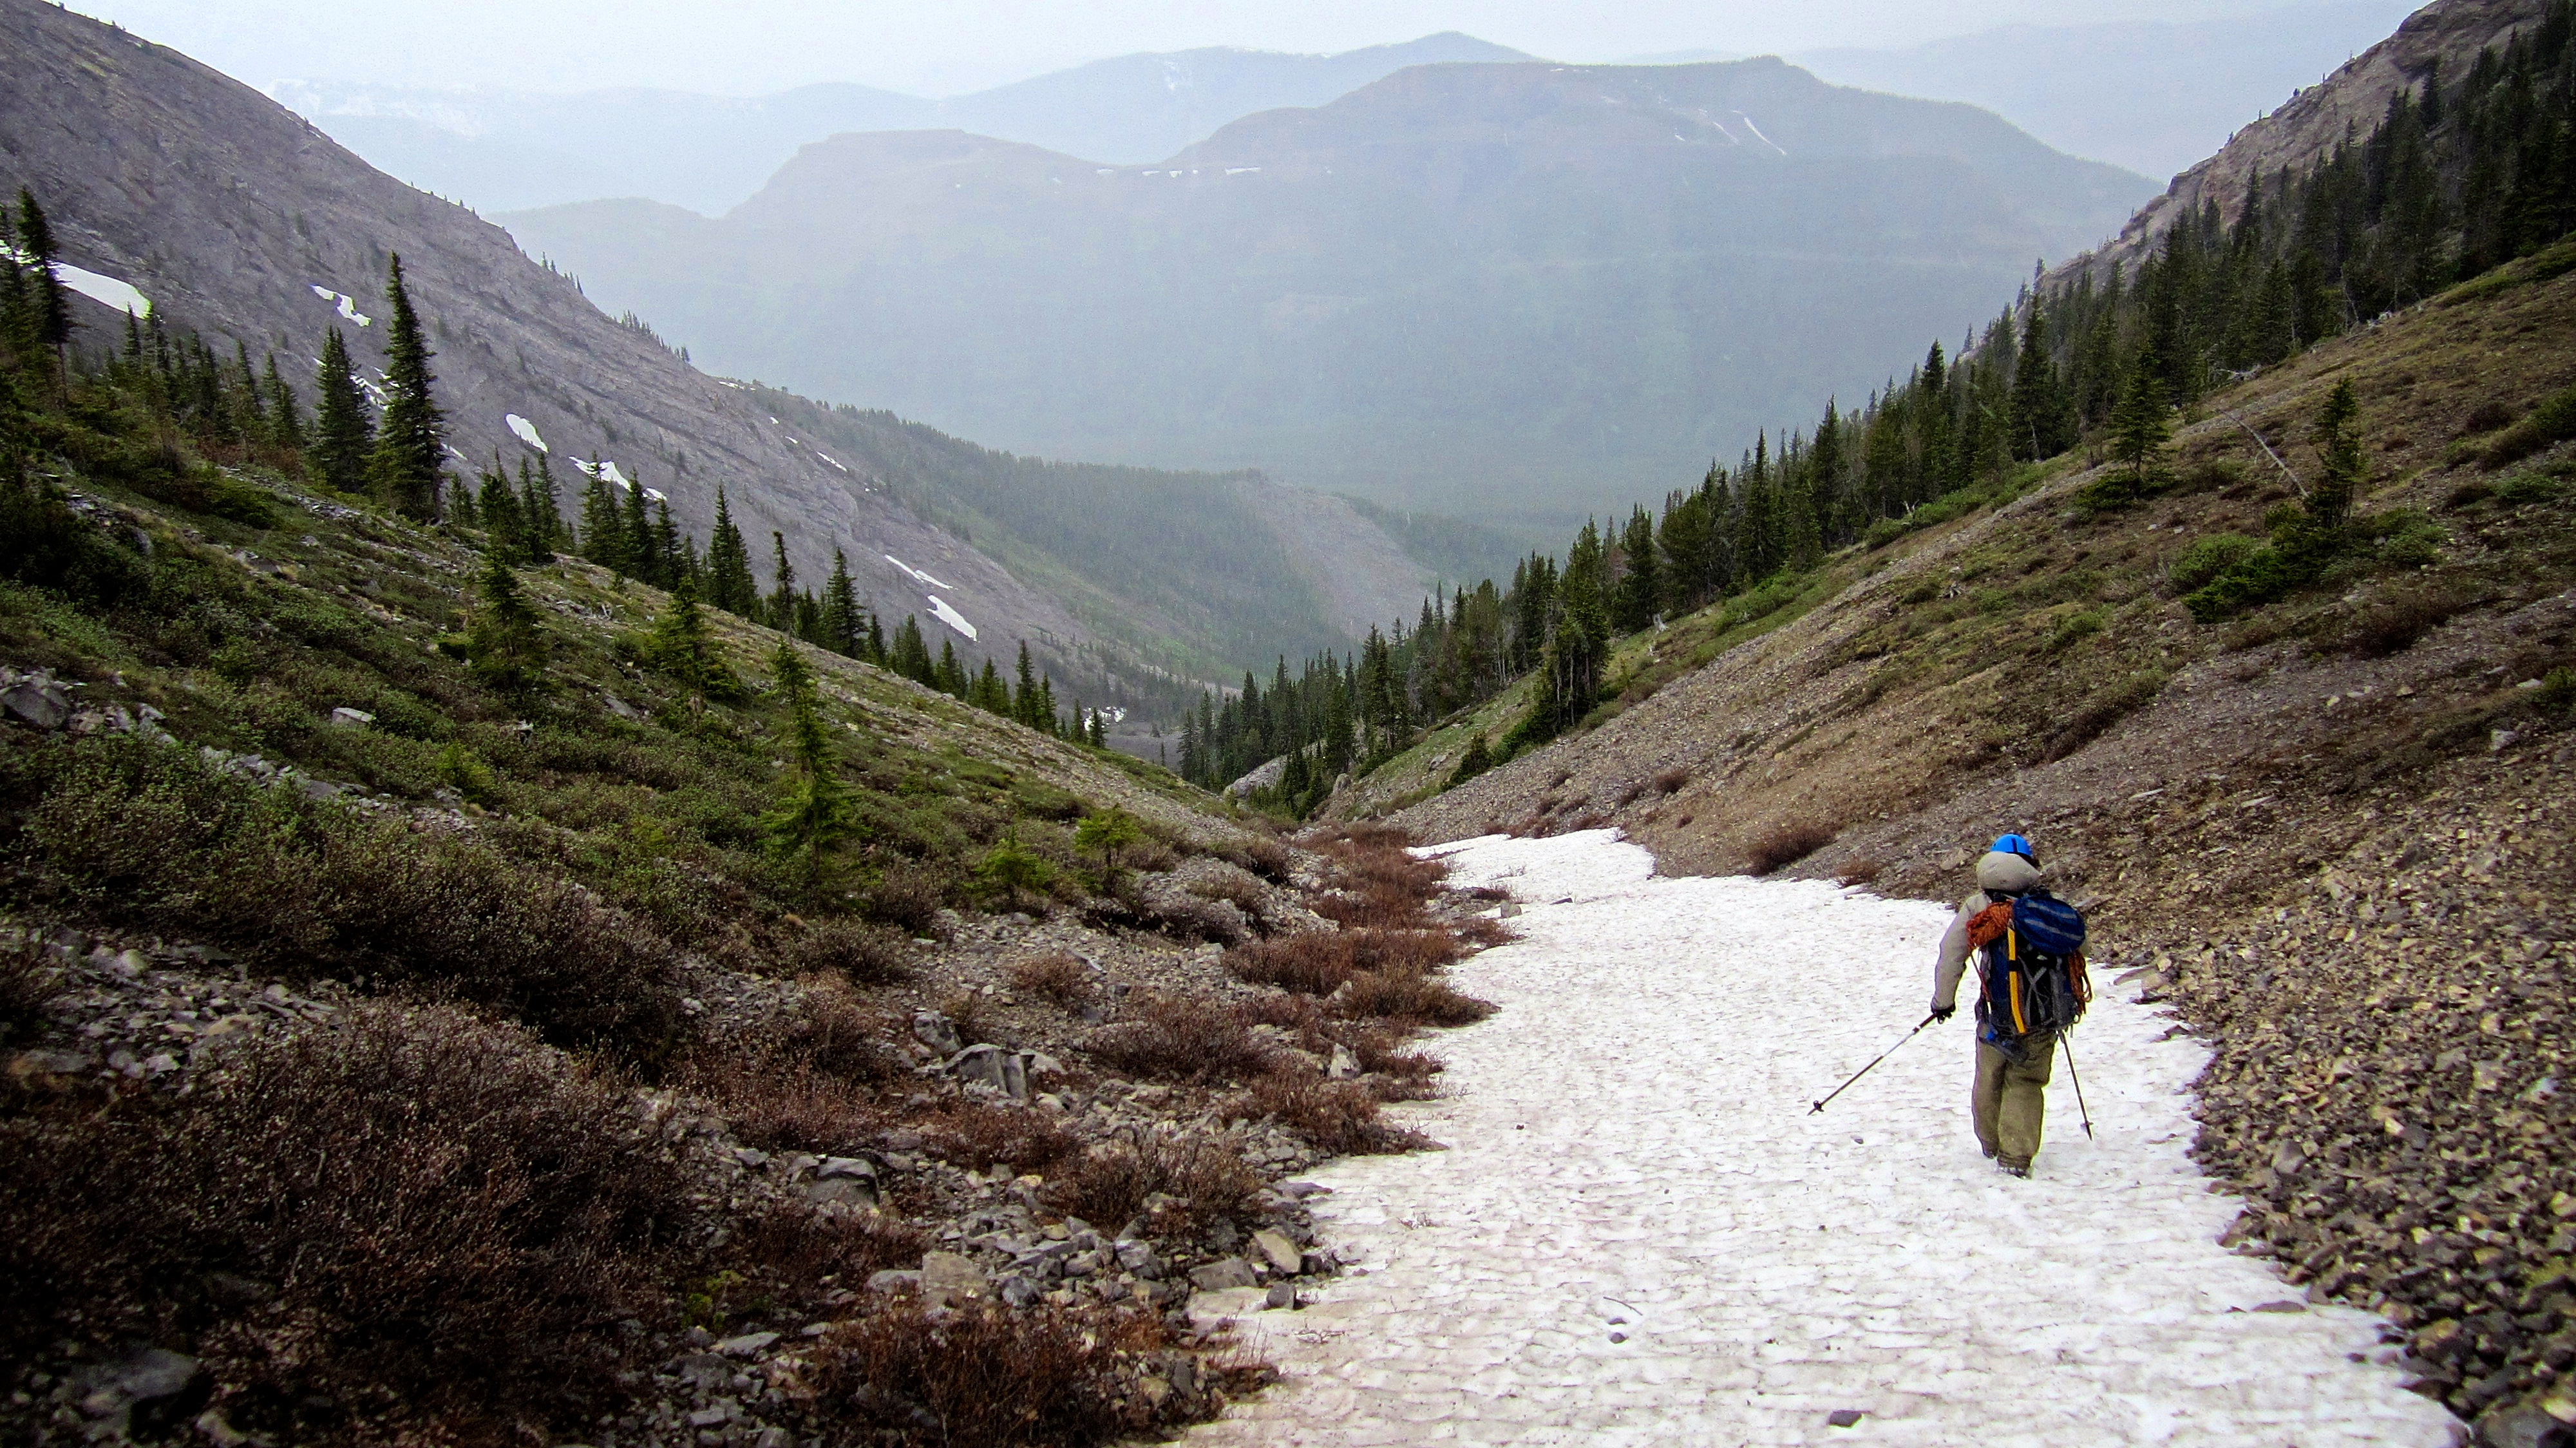
Our plan was to follow the drainage until we reached one of the many ATV or logging roads that criss cross the valley and then use it to connect with the trail for Ptolemy Pass. To avoid bushwhacking in the middle section of the drainage, we decided to leave it and hike through the forest along the northern slope before eventually descending back into it near the base of the ridge. This seemed to work well and after rejoining the creek, we made steady progress until we reached the lower section of the creek. Here, our momentum was slowed by steep banks coupled with heinous bushwhacking. I decided that it was better to bushwhack through a forest than along a creek bed and so ~350m after the creek had made a turn to the north, we hacked our way up a steep embankment and stumbled onto an old logging road. Great success!

This old road would take us all the way to the Ptolemy Pass trail. If I were to do things again, I would leave the creek shortly after it curves to the north and head west through the trees for ~150m until I came to this road. Doing this would have saved us 45 minutes. Coinciding with the discovery of the logging road was the cessation of the rain and the reappearance of the sun.
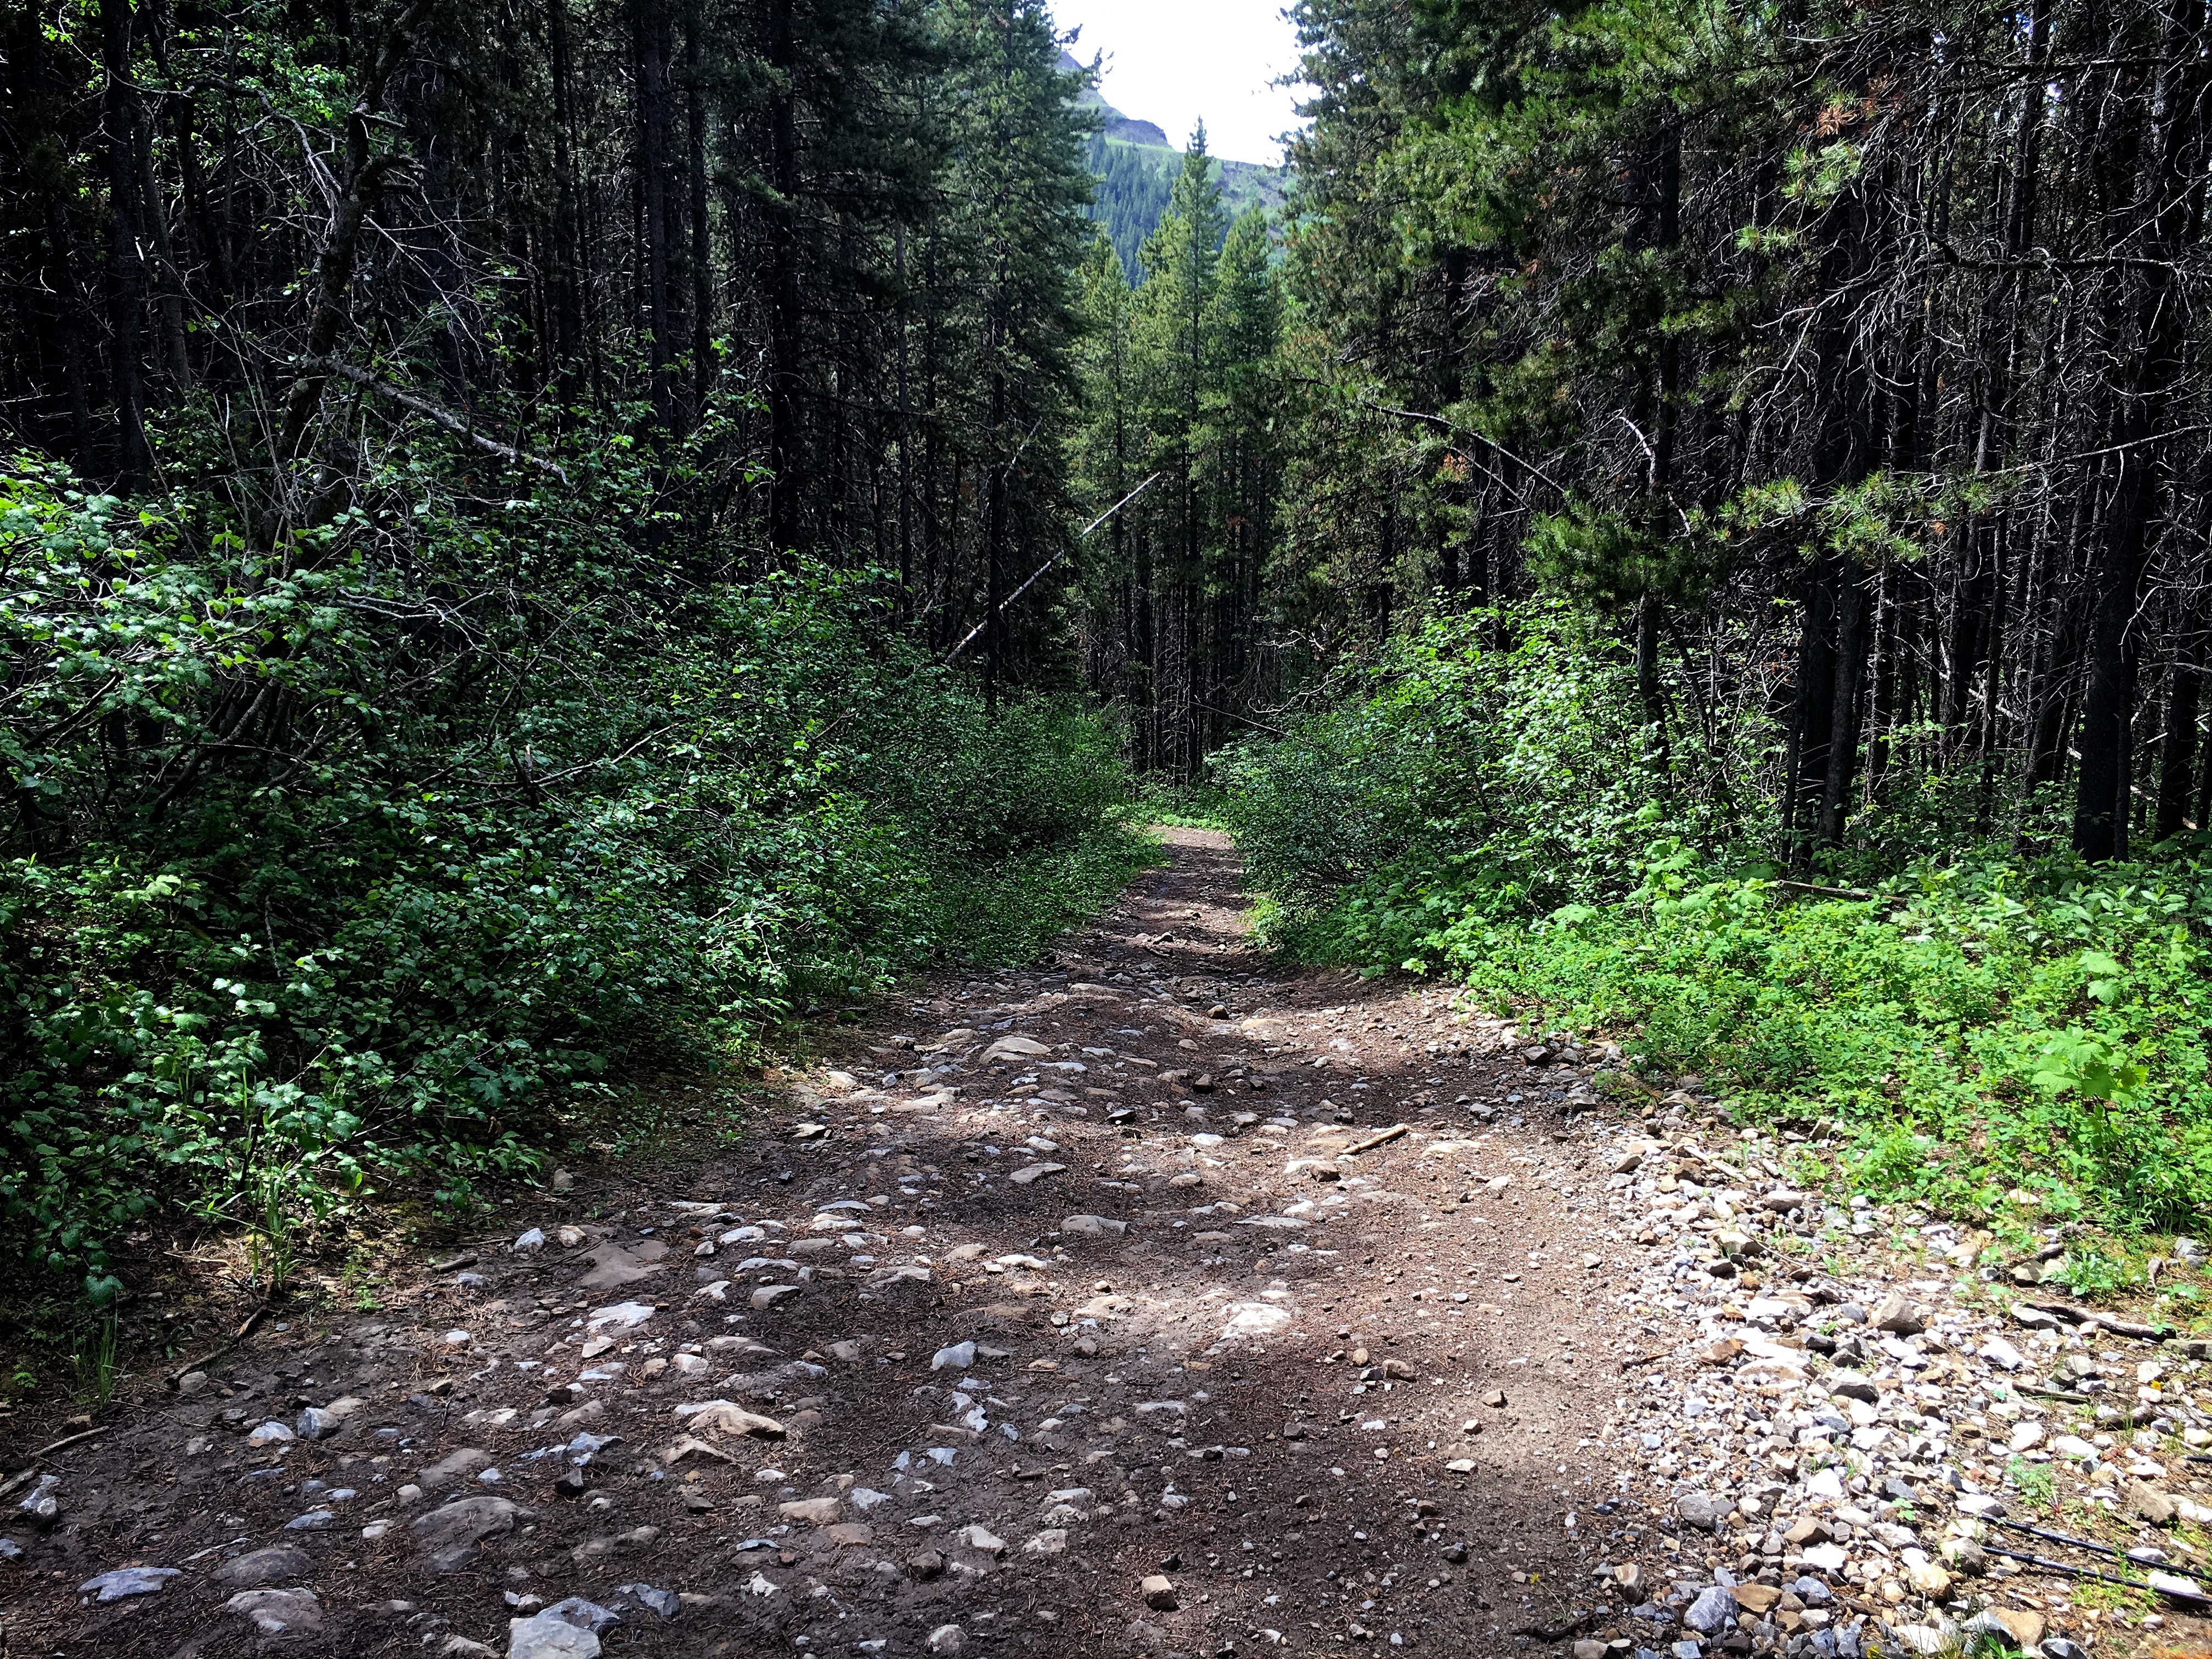
We followed the old logging road for ~450m until we came to the Ptolemy Pass trail which we would then follow north for 5.1km to Coal Road.
The entrance to the old logging road from the Ptolemy Pass trail is partially hidden on the right. We took time at the junction to dry ourselves out and eat a snack.
After following the trail for ~2km through the forest, we were finally treated to some fine views of the valley. In the distance is Mount Erickson.
Brad crosses East Crowsnest Creek using a bridge constructed of pallets and pine bows.

After 5.1 km we arrived at Coal Road. We still had to walk another ~1.2 km down Coal Road to reach our vehicle.

We passed by some beaver ponds on Crowsenest Creek. Island Ridge is an awesome little snowshoe trip!
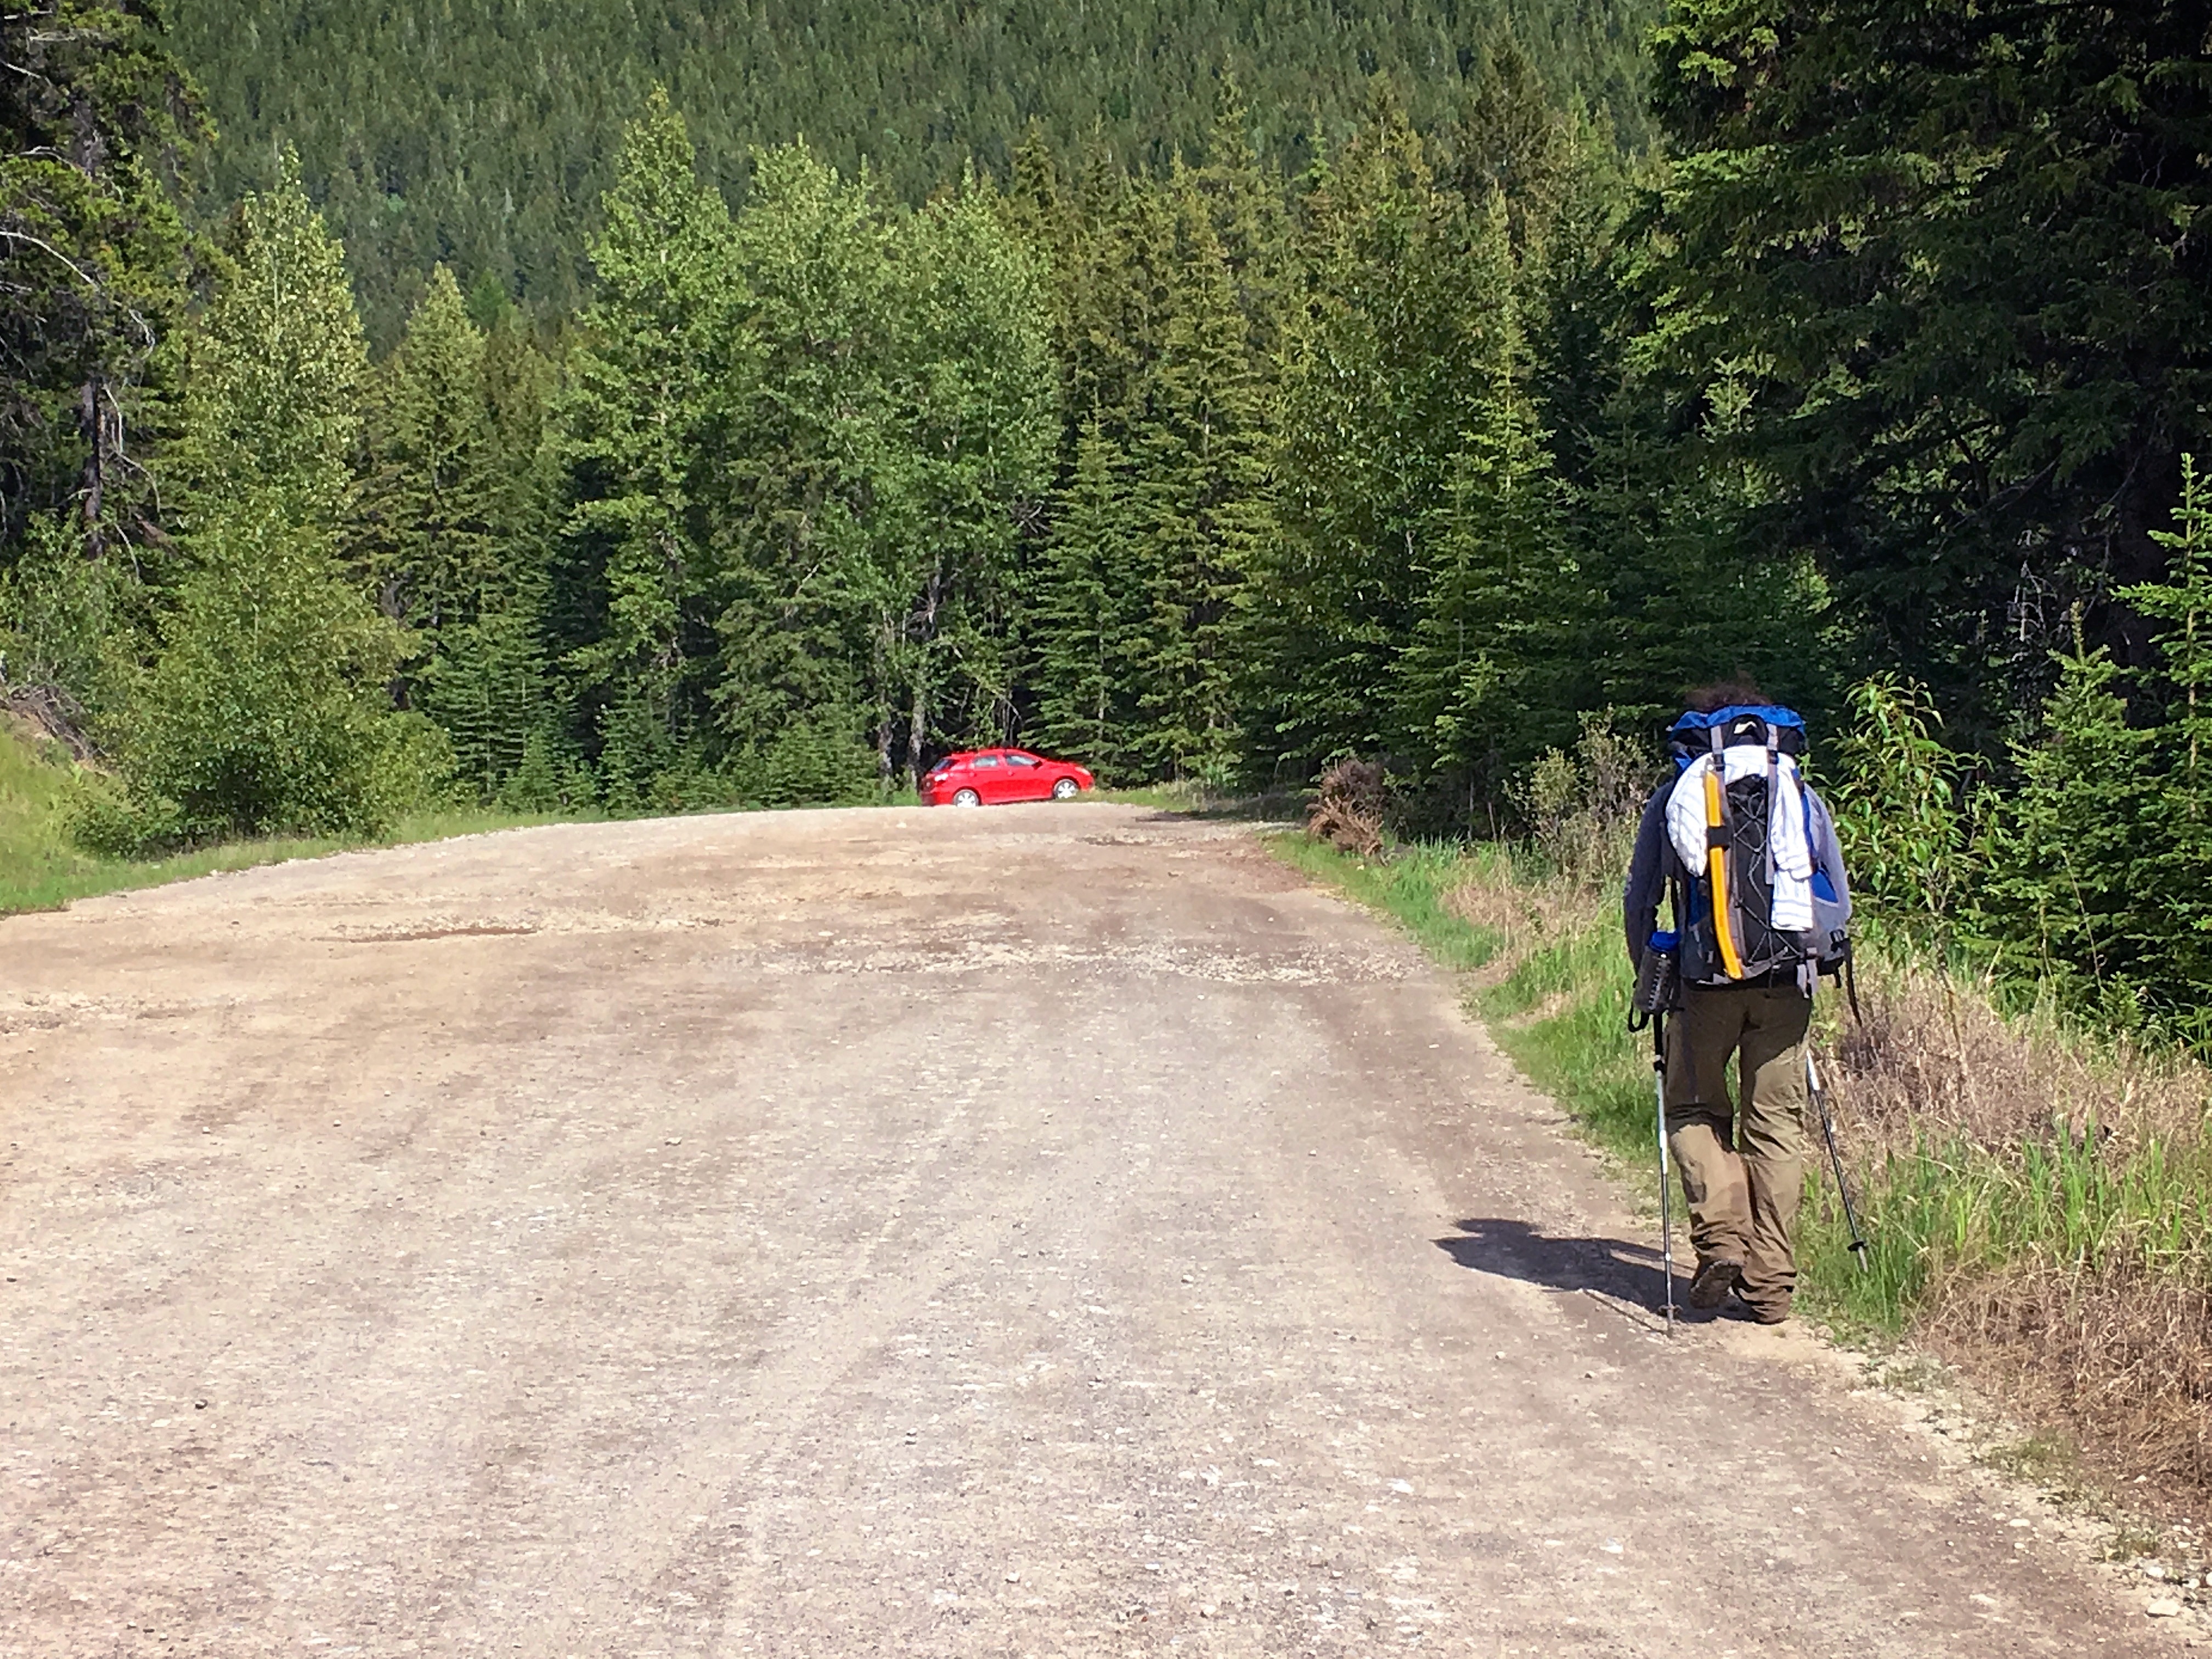
Arriving back at the vehicle after hiking for 10 hours and 31 minutes and covering 18.1 km.
Looking back at Peak 1 (Mummy Mountain) from the road near Brad’s car. I have to say that NROP was an awesome trip. Not only was I in great company, but the 4km ridge walk that covered 3 peaks was enjoyable from start to finish. Hopefully one day I will be able to ascend Mount Ptolemy to cap off this experience! EDIT: Done! 😁
I’ve always wanted to do Ptolemy! Looks like a great scramble!
After getting a taste of the peaks on the north ridge, I’m looking forward to a trip up Ptolemy myself. You should join us Kevan!
Would love that. Let me know when you are planning to go.
Definitely!