
⚠️ Hiking and scrambling are inherently dangerous activities. Please read my Disclaimer. ⚠️
Weddings are one of many things COVID-19 has disrupted. Not being able to gather with family and friends to celebrate a couple starting their journey together, is a major blow to the normalcy of life. Such has been the experience for my daughter, Janelle, and her husband, Jacob, who were married last month in a small, but beautiful ceremony on the shores of Upper Kananaskis Lake. It was not the wedding they had planned for, nor dreamed about, but like their great-grandparents who also wed during a pandemic, they made do with what was safely allowed – and it ended up being an absolutely fantastic day!
We are thrilled to welcome Jacob into our family (remember that he passed the test on Prairie Bluff 😂) and I know Jacob’s family is equally excited to welcome Janelle into theirs. The hope is that they can have the full wedding they were originally planning for in mid-August – so keep getting vaccinated people!
Janelle’s marriage means that Melanie and I are now officially empty-nesters, which is a cool stage of life to enter and we are looking forward to new adventures together – and hopefully a cleaner home with no lights left on and far fewer piles of laundry. 😂 Seriously though – and without being cliché – time does go by quickly, and it seems like only yesterday that we were ferrying our kids to an endless number of lacrosse and hockey games or packing up the trailer and heading out on family camping trips. Life is beautiful, but it’s also quick – so make the most of your relationships and memories.
Anyways, about today and my first ‘empty-nester’ mountain. As it’s been a little over a month since my last trip, I was excited to get out and continue my exploration of Waterton. Mount Dungarvan was on my ‘must visit’ list for 2021 and thankfully, Andrew was game for his third ascent of what he says, “could very well be the best scramble in Waterton National Park.” (More Scrambles in the Canadian Rockies 3rd Edition, p. 39)
However, a worrisome twist on the day, was the presence of a ‘heat dome’ or omega block, that has enveloped western Canada with record breaking temperatures. Indeed, the forecasted high in Lethbridge for today was 38 C with 31 C called for in Waterton. It was already 23 C when we started out along Lost Horse Creek at 6:30 am, and it had reached 31 C by the time we reached the summit at 11:15 am. Thankfully, we had already reached the creek on descent when the temperature soared to 36 C – an alarmingly high temperature for the mountains.
Despite the heat, Dungarvan was a great scramble with plenty of hands-on action and two distinct points of difficulty: the first being the negotiation of the limestone cliffs that guard the entrance onto the summit block; and the second being the chockstone gully that leads onto the summit. Both required some carefully thought-out moves, in particular the chockstone gully as it also had to be down-climbed, whereas, we could avoid repeating the limestone route. Definitely, a fall on the chockstone gully would not be a fun experience; however, the rock is solid and it was not as bad as I had been expecting. We tackled the other scrambling along the ridge largely head-on, and with it, some definite exposure, but there was nothing that wigged me out. That being said, I would not recommend this mountain to anyone who is not confident in their scrambling abilities. It is, as Andrew notes, “a climber’s scramble”. (p. 39)
Finally, I agree with Alison Sekera that the easy descent route described in More Scrambles may not be the best way off of the mountain, as it is tediously long. However, it does contain some beautiful rock and when the temperature is in the 30s, it provides a great place to refill your water and cool off. Indeed, Vern Dewit heeded Alison’s advice and returned using the south ridge; finding it to be a much quicker egress – so keep this in mind if you plan on tackling Dungarvan. I will also note that the trip along Lost Horse Creek is a stunning walk through some gorgeous argillite canyons, but you won’t appreciate it until the end of the day when the sun finally shines on its bright red walls. On a morning approach, you can see its potential, but you need the afternoon sun to experience it. Oh, and wading through it on the way back in 36 C heat is a definite godsend!

Our ascent and descent routes are clearly outlined in Andrew’s More Scrambles in the Canadian Rockies. To get to Mount Dungarvan, we turned onto the Red Rock Parkway and drove ~11.8 km until we came to the Lost Creek parking lot on our right. This extremely small area is the starting point.
From the parking lot, we followed alongside and inside Lost Creek for ~3 km until we come to the very obvious start of Dungarvan’s south ridge – immediately after crossing a second tributary into Lost Creek. Depending on the time of year, the water in Lost Creek may make travel difficult, and if that was the case, we would’ve had to spend the majority of our time, high up on the left bank. Regardless, I’m glad that I brought a set of approach shoes that could handle both the water and the slippery rocks.
The first ~1.5 km up the south ridge was steep, but felt more gradual once we were above treeline. Here is where a series of steps (approximately half a dozen) lead all the way to a limestone cliff band beneath the summit. We tackled most of the steps head-on or close to head-on and encountered some exposure, but I think most could be avoided by keeping to climber’s left.
The limestone band is an imposing barrier and where I consider the first major difficulty to lie, depending on the route used. From the ridge, the further to climber’s left you go, the more weaknesses you encounter, but conversely, the further you go, the more backtracking to the ridge you will have to do. Therefore, we ascended one of the first gullies we came to, where the difficulty for me was climbing over some chockstones at the top – which was good preparation for the actual crux of the trip – while for Andrew, the difficulty was in crawling under the chockstones after he found that he couldn’t climb over them.
Once past limestone, we followed the ridge for a short distance until we were beneath the summit block. Here we trended climber’s right as we made our way along the base . A small cairn marked the entrance to an initial gully on the southeast face that leads to the chockstone gully which is the crux. The gully is hardly more than a narrow crevice that is blocked at the top by three firmly wedged boulders. If they weren’t there, it would be an easy stroll onto the summit! However, they are not moving anytime soon, and it required some careful moves on our part to both climb (and down-climb) these obstacles. A fall here would really hurt.
From the summit we returned the way we came, except we trended to skier’s right beneath the summit block where we descended the limestone cliffs through an easy scree weakness in the middle of the mountain. From here, we followed a drainage down to a tributary that eventually led us back to Lost Horse Creek and our starting point up the south ridge. From here we returned the way we came.

Our total distance travelled was 15.6 km with total elevation gains of 1146 m. Our total round trip time was 9 hours and 4 minutes. For reference, it took us 4 hours and 45 minutes to reach the summit from the Lost Horse Creek parking lot.

Before I jump into today’s adventure, I thought I share some photos from Janelle and Jacob’s wedding. 😊 This is our smart and stylish daughter who has lived in Thailand, Cambodia, and Mongolia. She’s our youngest and we’re super proud of her – and of her choice in husbands! (Photo by Havilah Heger)

Melanie and I watch as Jacob and Janelle exchange vows. (Photo by Havilah Heger)

Upper Kananaskis Lake was the perfect backdrop. A huge shoutout to my niece Erin who made the flower arrangements for the arch and to Melanie who made the macrame. (Photo by Havilah Heger)

The happy couple! (Photo by Havilah Heger)

Enjoying some Pop Shoppe after signing the registry. 😊 (Photo by Havilah Heger)

We are looking forward to having the full wedding and reception in August if the pandemic continues to ease – which will hopefully happen as more people get vaccinated. (Photo by Havilah Heger)

Another great shot of the happy couple. We’re thrilled to have Jacob join our family! (Photo by Havilah Heger)

Our family keeps growing! 😊 (Photo by Gloria Mattatall)

Now back to today and our starting point from the Lost Horse Creek parking lot. 😊 It’s 6:30 am and it’s already 23 C.

Heading up Lost Horse Creek.

Make sure to bring approach shoes that can handle both water and slippery rocks, as you will be inside and beside the creek for ~1.5 to 2 hours.

The creek is incredibly scenic, but its full beauty can only be appreciated on the way back – when the afternoon sun highlights the colours.

We will soon hop from one side to the other. Depending on the time of year, there may be more – or less water in the creek.

Even without the sun, it’s possible to see the intense colour of the underlying argillite.

More colour.

Approaching a small canyon.

Andrew avoids a deep pool by scrambling up the left bank. On the way back, I waded up to my waist through this pool – and in the 36 C heat, it was a welcome relief! 😊

While Andrew took the better route to avoid the pool, I found myself high up on the opposite bank.

This is such a cool place!

Heading up the creek without a paddle. 😂

Morning sunlight on Mount Blakiston.

Avoiding another deep pool.

What I found most surprising, was the lack of deadfall inside the creek. Trips like this usually involve stepping over or crawling under tangled nests of fallen timber, but this was one of the few sections of creek where we encountered debris. I would imagine that as the trees burned in the 2017 Kenow wildfire begin to rot and fall, this relatively clear route will eventually become choked with deadfall. (Photo by Andrew Nugara)

More great scenery that again, can’t really be appreciated until later in the day. (Photo by Andrew Nugara)

Emerging from inside the creek approximately 1.5 km from the parking lot, with the south ridge of Dungarvan at skyline.

Enjoying easy travel alongside Lost Horse Creek with Dungarvan’s south ridge on the left, “Rogan Peak” in the centre, and “Galwey North” on the right.

Fleabane always seems to project a ‘happy’ vibe – and no, Brad, I didn’t smoke it. 😂

Looking back along the upper section of Lost Horse Creek.

“Dundy Peak” is also on my list – and we thought briefly about extending our trip from the summit of Dungarvan – but with the extreme heat, it was quickly put aside for another day. Edit: Done!

The south ridge starts immediately on the other side of the second tributary (foreground) into Lost Horse Creek. We would later use this tributary as our route off of the mountain. Again, if you are planning to tackle Dungarvan, you may want to consider returning along the south ridge instead of using this tributary.

The initial section of the south ridge is steep, but easy. (Photo by Andrew Nugara)

Glancing back after gaining some elevation.

Even though it was just past 8 am, the sun was already intense and with no wind, it was getting hot.

Whew! A welcome bit of shade.

Alberta beardtongue and a Wood’s rose.

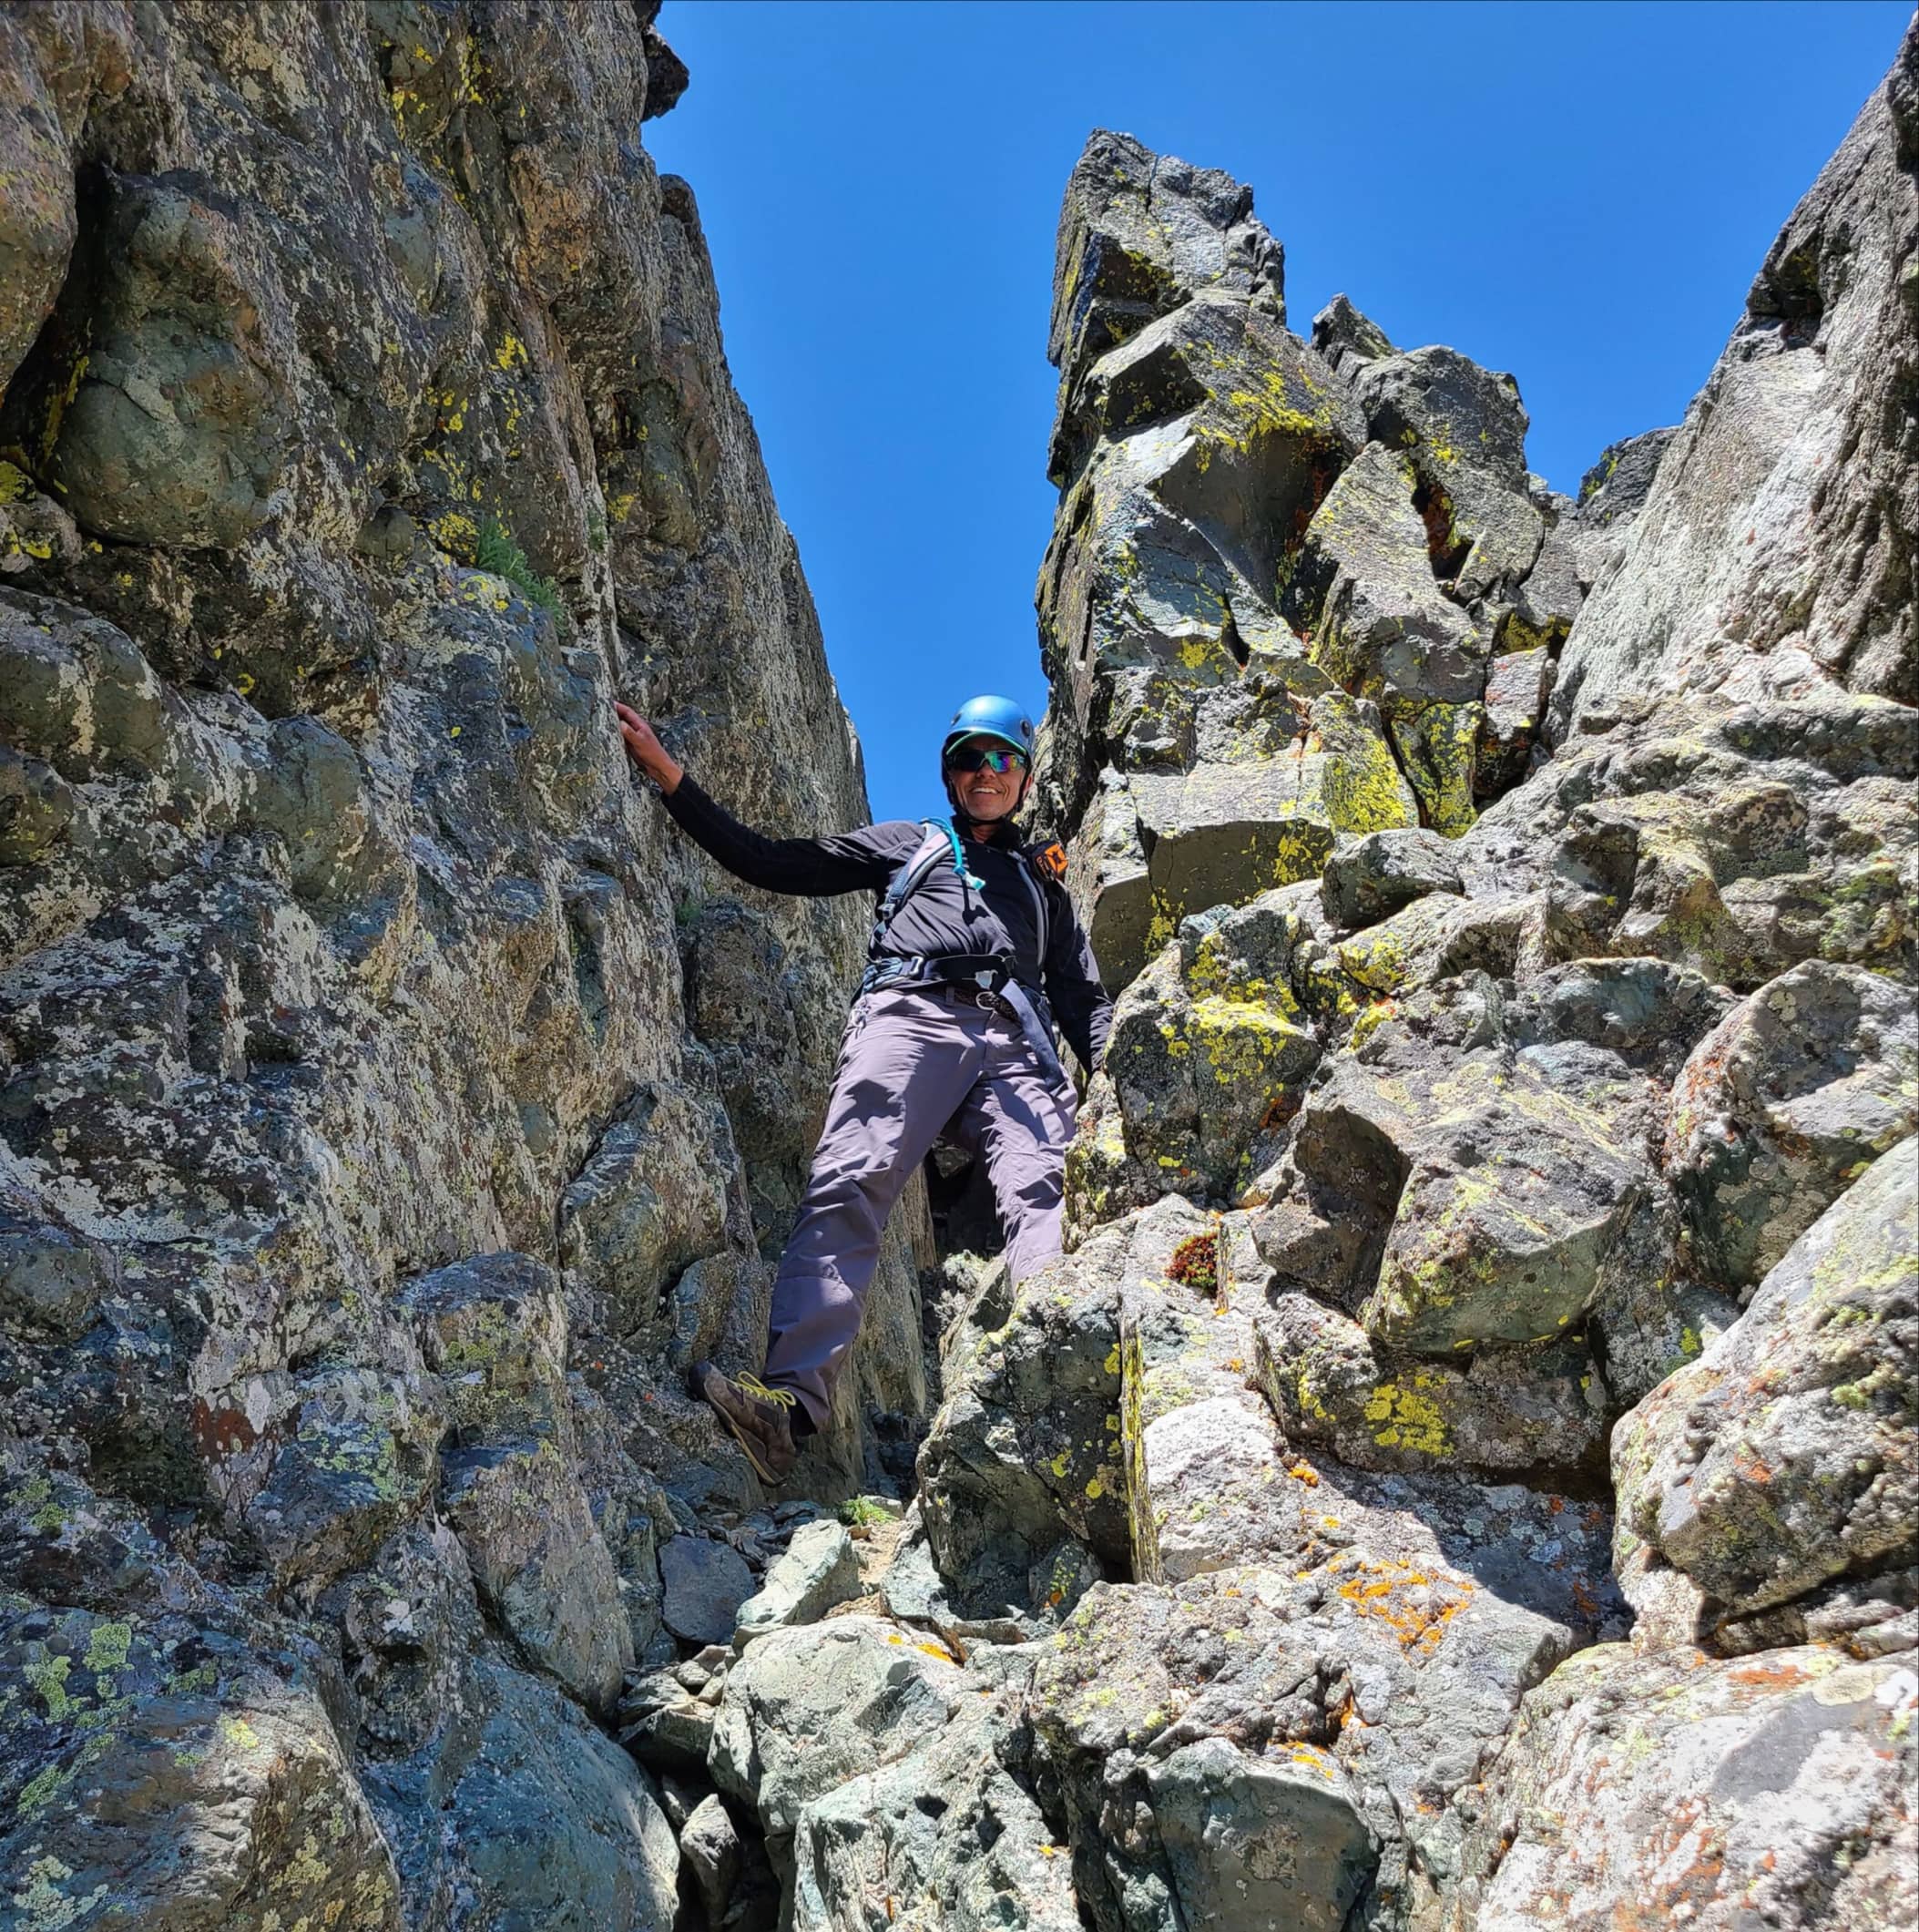
Finally arriving at the fun stuff. 😊

More Wood’s rose. Quick! Cue the 80s Poison soundtrack!

Enjoying a bit of minor scrambling to kick things off.

Now we’re getting into the good stuff! I went straight up the couloir in the centre while Andrew ascended further to climber’s right. As with most obstacles on the ridge, the entire step can be bypassed by keeping to climber’s left if you want.

More Alberta beardtongue…

And more Wood’s rose. Wildflowers provided small, but significant splashes of colour to our day.

Nearing the bottom of the couloir (upper right). (Photo by Andrew Nugara)

Gazing down the couloir from the top.

Onto the next step! The south ridge reminded me of the scrambling found on “Bakery Peak”.

We would tackle this one to climber’s left and in the shade.

Andrew leads the way up…

And onto the top.

A bit of minor ledge walking.

The next step is a big one.

Andrew sizes up the options.

This gives some perspective as to the size of the step. We instinctively headed towards the gully on the far left.

This definitely looked doable, but Andrew remembered a different route…

That went up a neighbouring gully.

We ended up taking parallel routes in the lower section.

Andrew makes it over a short, but surprisingly tricky section.

Back in the main gully and climbing over the last obstacle. (Photo by Andrew Nugara)

The view back as Andrew follows close behind.

Getting our first view of the summit (left of centre) as we make our way onto the crest.

The obligatory Castle / Waterton lichen shot. 😊

The next step was the first of two, almost identical turret-like obstacles. (Photo by Andrew Nugara)

Pulling myself from one ledge onto another… (Photo by Andrew Nugara)

And then onto the top. (Photo by Andrew Nugara)

My view down to Andrew (centre). There was definitely some exposure, but the rock was good.

Andrew climbs up and across the most exposed section.

Finally, our first clear view of the summit (centre), though it’s still a ways off from here. On the left is “Dundy Peak” and on the right, is “Rogan Peak”.

Gazing across Lost Horse Creek to “Rogan Peak” (left) and Galwey North.

The view towards Piinaquiium / Ahkoinimahstakoo (Mount Blakiston) (centre) and Anderson Peak (right). (Photo by Andrew Nugara)

Heading towards the next step.

Again, like most of the other steps, much of the hands-on work can be avoided by keeping to climber’s left. (Photo by Andrew Nugara)

But why avoid such fun and interesting terrain? 😊 (Photo by Andrew Nugara)

We welcomed any shade we could find.

Approaching the second turret-like step. As with the first one, we would tackle it head-on since it was almost identical in structure. (Photo by Andrew Nugara)

Standing beneath the turret, (Photo by Andrew Nugara)

Following a small ledge onto the front. (Photo by Andrew Nugara)

Using a similar route to the first one… (Photo by Andrew Nugara)

Except for the upper section, where some precise maneuvering was required to get on top. (Photo by Andrew Nugara)

Andrew checks his holds as he tackles the most difficult part.

Heading to the final step before the limestone band.

This step was much quicker to overcome.

Andrew leads the way…

Followed by me. (Photo by Andrew Nugara)

The temperature continued to rise, but thankfully, we were closing in on the summit.

Approaching the formidable limestone band that guards the summit. Personally, I prefer to face limestone bands as opposed to Finnish death metal bands. 😉

Andrew inspects the impressive barrier.

Fortunately, there are weaknesses in the rock that can be found by heading to climber’s left. In fact, the further left you go, the easier it is to get past the limestone; however, you will also have to backtrack considerably to regain the ridge. Knowing this, we looked for some of the first available options, though we would descend using the easy scree path on the far left.

The first option that we came to, looked quite useable; however, we decided to see if there was a better route.

We ended up using the next gully that we came to. (Photo by Andrew Nugara)

Gazing back along the gully.

As if to prepare us for the crux on the summit block, we found our way barred by chockstone. After considerable effort, I was able to climb over it, but Andrew elected to crawl under it…

If it was a tight squeeze for Andrew, there was no way it would’ve worked for me. I’d still be wedged in there – like an old, bloated Stampede hot dog in a sweltering midway garbage can. 😳

Andrew re-enacts the rhino birth scene from Ace Ventura 2. 😂

Looking up at the summit block from above the limestone band.

Slogging our way back to the ridge crest.

The summit (centre) is the tallest in a series of pinnacles.

Scrambling a short section as we make our way closer to the summit block. (Photo by Andrew Nugara)

Andrew follows close behind.

Since this was Andrew’s third time on Dungarvan, I happily invited him to lead us onto the summit. 😊

We would trend climber’s left before eventually heading climber’s right and emerging beneath the summit on the righthand side of the photo.

Coming to an interesting formation of red argillite and the point where we began to head climber’s right and towards the gap on the far right.

Andrew leads us through the gap…

And onto the southeast side of the summit block. Note the small cairn sitting on the rock shelf to his right. This marks the entrance to a small gully that leads to the crux.

Andrew stands at the entrance to the gully.

His view back to me. (Photo by Andrew Nugara)

Looking up the small gully from its base. Andrew (upper right) has already left it and is headed to the narrow chockstone gully immediately above him.

One more view back and along the summit block from the entrance to the gully.

Bright yellow cinquefoil and moss campion provide a welcome splash of colour.

The chockstone gully is the narrow ‘V’ in the centre.

Scrambling up…

And up.

I believe this is Jacob’s Ladder, and if so, it’s kind of a fitting spot for it. 🤔

The gully becomes a tight squeeze.

Andrew begins to climb up…

And over! If those three chockstones weren’t there, it’d be a simple route. However they are seriously wedged in place.

My turn to tackle the crux. (Photo by Andrew Nugara)

While the chockstones were secure, finding the right sequence of footholds was the real trick. (Photo by Andrew Nugara)

Looking back from the top. A fall here would not be fun – just ask my pack, which I dropped over the edge on the way back to make down-climbing easier. Not only did I smash my Nalgene, it rag-dolled for quite a distance. I’d recommend bringing a small rope to lower your pack – or even better, just leave your pack at the base of the gully. 😊

Once past the crux, it’s an easy climb to the summit.

The summit of Mount Dungarvan (2614 m).

It was interesting to find three different survey pins on the summit. Usually, there is only one.

A pano to the southeast.

A pano (and Andrew) to the southwest.

Another pano, this time to the west and northwest.

And finally a pano to the north.

A closer look at Piinaquiium / Ahkoinimahstakoo (Mount Blakiston) – also on my list for 2021. EDIT: Done!

A telephoto of Long Knife Peak (left), King Edward Peak (centre) and Starvation Peak (right).

Anderson Peak with “Dundy Peak”in the foreground. It was WAY too hot to continue on to “Dundy”, but I will be back… EDIT: Done!

“Cloudowan Peak” (far left), Mount Glendowan (left) and Cloudy Ridge (centre) are all on my ‘To Do’ list. EDIT: Done, done, and done! In the distance on the right is Loaf Mountain.

Looking across to “Cloudy Junior” with Loaf Mountain (left) and Victoria Peak ( far right) behind it.

A telephoto along the front range of the Castle shows some of the colour it’s famous for. Victoria Peak is in the centre with the Centre Peak of Pincher Ridge in front of it. On the right are Pincher Ridge and Drywood Mountain.

Zooming in on Spread Eagle Mountain and in front of it, Mount Yarrow. The always fun, Prairie Bluff is behind them on the right.

Diminutive “Kesler Lake Peak” sits to the north.

“Rogan Peak” was a fun trip! 😊

A hazy telephoto of Ninastako and in front of it, Sofa Mountain. Closer in, the summit of Bellevue Hill is poking up from behind “Rogan Peak” (foreground).

In the foreground are Mount Galwey and Galwey North. Behind it and to the right is Mount Crandell, with Vimy Peak on the left. Mount Cleveland is large peak on the distant right.

To the south sits Bertha Peak (left), Mount Alderson (right of centre), Buchanan Ridge (right), and Mount Carthew (far right).

A similar view to the previous, except the focus is on Ruby Ridge (centre).

Looking back along the south ridge and our approach via Lost Horse Creek. We would use the drainage and tributary on the right for descent.
Why not? One more pano to the the southeast.

Yet another awkward summit photo. 😂 I have so much 60 spf sunscreen on, that I look like the Joker – or Pennywise. (Photo by Andrew Nugara)

Andrew is much more photogenic.

Andrew explores the summit further to the west.

Time to head back.

Looking over at the other pinnacles near the summit.

Down-climbing the crux. (Photo by Andrew Nugara)

Andrew’s turn…

From front…

To back…

To directly above. As I mentioned before, the key is to locate the footholds and then do them in the proper sequence. The chockstones are super stable and provide a great grip for your hands.

Well, that was fun! 😊

Leaving the chockstone gully.

Looking down the initial gully.

While I descended the way we came, Andrew crossed the initial gully to explore some new terrain.

Another look along the base of the summit block to the gap where we came from.

Enjoying some shade as I pass through the gap.

Andrew is somewhere over there…

The thought of heading to “Dundy Peak” (foreground) was still tempting, but as it was only getting hotter, we quickly put that idea to rest.

Alpine flowers, blue sky, and red argillite: a perfect combination!

There’s Andrew!

We trended skier’s right to avoid the limestone band.

Nearing the start of the drainage. We would cross it and keep to skier’s right to get to the easy scree weakness.

The scree weakness through the band is on the left.

Looking at the limestone band as it stretches over to the south ridge.

Descending the drainage.

Glancing back to the summit.

Be warned, this route is not a quick way off the mountain – but it does offer the chance to refill your water and cool off…

And it’s also quite scenic.

Andrew passes over some colourful rock.

Down-climbing a small section of drainage. (Photo by Andrew Nugara)

Andrew surveys the route ahead.

Another look back from our colourful surroundings.

Transitioning from the drainage to tributary.

One final look back to the summit.

Travel was slow, in part because we made frequent stops to cool off.

Sometimes it was quicker to cut through the underbrush…

But we mostly meandered our way along the creek. (Photo by Andrew Nugara)

Arriving back at Lost Horse Creek to find a Sasquatch cooling off in the cool, clear water, 😉 He must’ve run out of Kokanee! 😂

Travel was much easier alongside Lost Horse Creek.

Glancing back at “Rogan Peak”.

With the temperature reaching 36 C, it was time to cool down. If there were any fish in this creek, they probably all died after I stuck my head underwater. 😂 (Photo by Andrew Nugara)

An ideal route for long, hot day!

Now that the sun was shining, we could start to see some colour. (Photo by Andrew Nugara)

Andrew cools off underneath a small waterfall.

Passing beneath an argillite cliff.

Entering that pretty canyon we passed through on the way in.

This time, the sun is shining and we can see the awesome colours!

This is such a cool place!

Inside the canyon.

I decide to explore the pool that we had avoided earlier… (Photo by Andrew Nugara)

And it was waist-deep! (Photo by Andrew Nugara)

More colour…

And more colour…

And more colour.

We stayed inside the creek as much as possible. (Photo by Andrew Nugara)

Arriving at the Red Rock Parkway bridge…

And then our vehicles after 15.6 km and 9 hours and 4 minutes. It was great to knock Dungarvan off my 2021 list and I’m looking forward to continuing my long overdue exploration of Waterton – though I’m sure I’ll be visiting the Flatheads in the near future to pick up from where we left off last year. 😊 Moreover, hiking with Andrew always makes for a fantastic day and I’m grateful that he’s always game for repeat trips. Finally, and as much as I love the sunny weather, I do hope that this omega block or “heat dome” doesn’t last too long as it will not be good for the wildfire situation or the water reserves in southern Alberta. Unfortunately though, I think it is a harbinger of things to come with climate change.


Leave a Reply